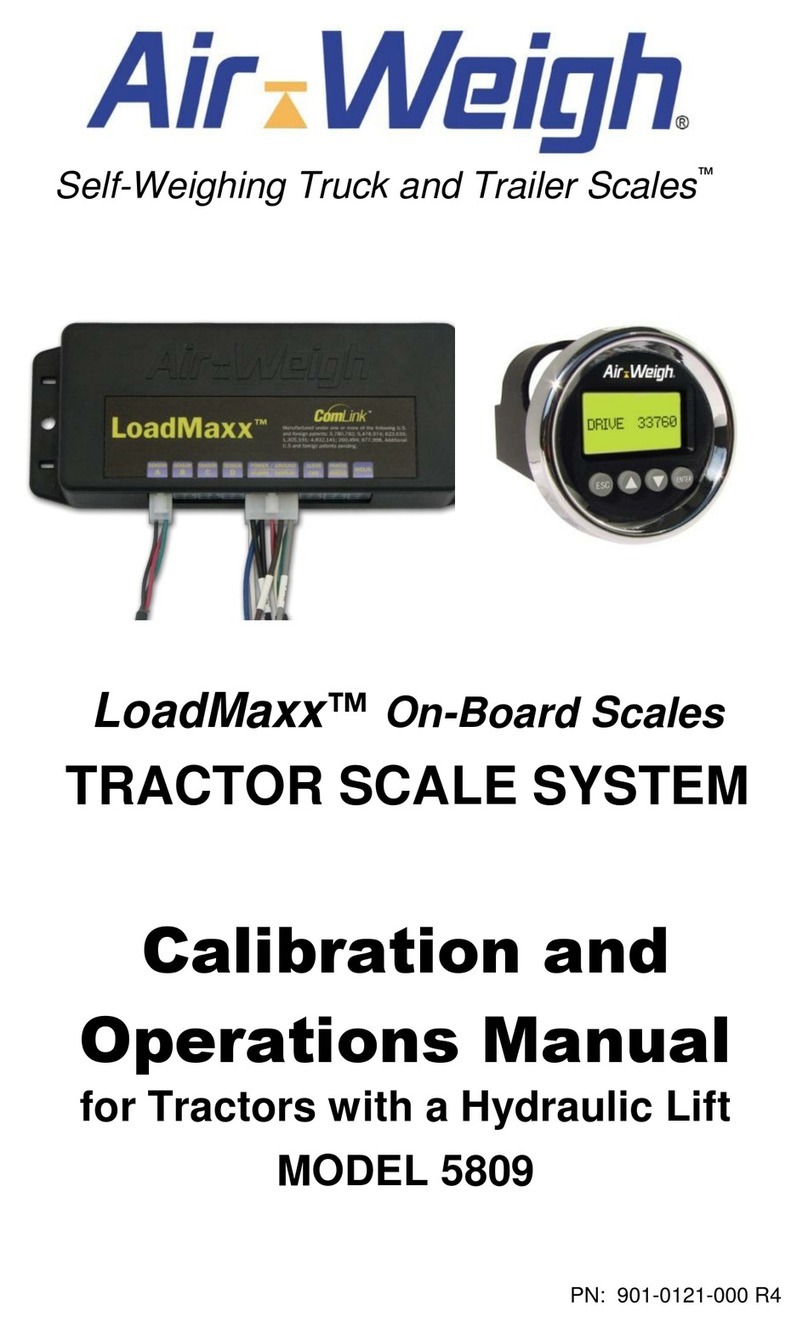
Air Weigh LOADMAXX User manual

LOADMAXX
ON-BOARD SCALES
QUICK REFERENCE
GUIDE

LOADMAXX
ON-BOARD SCALES
TRACTOR CONTROL KEY
ESCAPE
DOWN
ARROW
UP
ARROW
ENTER
LOADMAXX
ON-BOARD SCALES
TRAILER CONTROL KEY
POWER
MENU
ESCAPE
ENTER DOWN
ARROW
UP
ARROW
2

How On-Board Scales Operate
Air-Weigh On-Board Scales measure the air pressure in your air-ride
suspension system; they calibrate, and convert that information into
on the ground weight. Then, that information is displayed in the cab
of your truck.
While using your on-board scales it is best to read the display on level
ground, with the brakes released and the air ride suspension free from
any binding.
Calibration
Calibration is a scientic term that simply means that you are going to
carefully enter empty weight and heavy weight information into the
on-board scale. Your on-board scale needs to know exactly how much
air pressure is in your suspension when your truck is empty and how
much pressure exists when you have a heavy load. Calibration is a 2
stage process. You need to enter the corresponding weights to complete
the calibration process. Calibration is important, and it can be adjusted.
Don’t get two weight tickets and enter the heavy/empty information into
the scale at once. Calibration would fail because the scale needs you to
enter the weight information when the status of the load matches the
empty or heavy status of the truck.
PIN Protection
A PIN number is entered to protect the calibration information and
ensure that no one can tamper with your scale. If you lose the PIN
number, call Air-Weigh Customer Support. They can help you unlock
the scale, provide a temporary PIN number, and help you reset the PIN
protection. Tip: Always PIN protect your scale.
LOADMAXX
ON-BOARD SCALES
3

Alarms
LoadMaxx on-board scale system features
two individually programmable alarm
outputs, Alarm 1 and Alarm 2. The alarms
can be turned off by using the Alarm
menu TURN ON/OFF function. Alarms
appear as a bell icon shown on the
tractor display.
The Alarm1 and Alarm2 are available for
each axle group: Steer, Drive and Trailer
(or for each one of multiple trailers), as well as for Net Payload and GVW.
External lights or audible alarms can be added to alert the driver and the
loaders when the load is approaching the legal limit. Each alarm can be
programmed in two modes: Warning mode, which slowly pulses and Alarm
mode, which is on constant. The same alarm can be programmed to pulse
and provide steady illumination at different weights. Example: Pulsing at
31,000 lbs. and Steady at 33,000 lbs.
GVW
Gross Vehicle Weight (GVW). This is the total
weight of the loaded vehicle which includes the
vehicle itself and the cargo that is loaded on
the vehicle.
Net Payload
By zeroing out the Net Payload prior to loading or unloading, the cargo
weight of separate loads can be determined. It’s an excellent tool for
solving weight discrepancies with shippers right at the loading site, or
calculating the amount of product that has been on/off loaded.
4

Calibration is a 2 Stage process.
You may enter the weight information in any order, but it is important that
you enter the axle weight information into the scale twice. Don’t get two
weight tickets and enter the information from both tickets at once. The
weight ticket information must be entered into the scale when the weight
of the truck matches the weight on the ticket.
2 Separate trips to the certied scale are required.
-1 trip with a Heavy load and 1 trip Empty.
• Get the rst weight ticket
• Enter the axle weight shown on the weight ticket immediately as
instructed on the following pages into your LoadMaxx scale.
Heavy Weight Empty Weight
• When the status of your load changes, return to a certied scale.
• Get another weight ticket, and immediately enter the weights shown
on the ticket into your scale.
• Use this guide to assist you.
Accurately calibrated LoadMaxx on-board scales will perform within an
accuracy rate of 300 lbs per axle group.
Tip: The weight ticket information must be entered into the scale when
the load on the truck matches the status on the scale.
Heavy weight entered when
the truck is loaded.
Empty weights entered when
the truck is empty.
5

LoadMaxx Tractor can automatically
calibrate the trailer scale from inside
the cab.
LoadMaxx Trailer
Scales must be PIN
protected at the
trailer display.
PIN Protect your Trailer Scale
Air-Weigh recommends that you PIN protect all your scales once they
are calibrated. To completely ensure the protection of your calibration
information, PIN protect the trailer scale directly on the trailer display.
Follow the directions listed on the trailer PIN protection section of this
guide. Call Air-Weigh Customer Support with questions 888-459-3247.
Calibration of LoadMaxx trailer scale can be completed at the tractor
display. If your tractor is attached via the 7-way cord to a trailer which is
equipped with LoadMaxx on-board scales, the calibration information
is automatically sent to the trailer. The trailer retains the calibration
information and can be used with other LoadMaxx equipped tractors
without any recalibration requirements.
Calibrate LoadMaxx Tractor & Trailer Scales
6

LOADMAXX
CALIBRATION GUIDE
Calibrating LoadMaxx Tractor Scales
Calibration is a scientic term that simply means that you
need to carefully enter an empty weight, and a heavy weight for
each axle group into the on-board scale.
Your on-board scale already knows exactly how much air pressure is
in your suspension when your truck is empty and how much pressure
exists when you have a heavy load. You need to enter the corresponding
weights shown on the weight ticket to complete the calibration process.
Avoid the #1 User Error
• Enter EMPTY weight information into your Air-Weigh
scale only when the vehicle is EMPTY.
• Enter HEAVY weight information into your Air-Weigh
scale only when the vehicle is HEAVY.
The order that you enter the “Heavy” weight information, or
“Empty” weight information, is not important.
Calibration is Important - Follow Directions Carefully.
Prior to Calibrating the Scale, Follow these 3 Steps.
Step 1 - Drive to a reliable certied scale with your vehicle empty/heavy
and get a scale ticket showing individual weights for your
steer, drive, & trailer axles.
Step 2 - Identify a smooth, level area to park you vehicle and roll to a
stop, transmission in neutral, brakes released.
Step 3 - Dump the air in the suspensions for 5-10 seconds,
then re-inate the suspension to ride height.
Calibration instructions continued on the next page
7

Fig. 1
Fig. 3
Fig. 4 Fig. 5
Fig. 6 Fig. 7 Fig. 8
Air-Weigh Scales provide the Weight of all Axle Groups
Calibration is required for each axle group. Display indicators blink
on-screen. If you choose to enter the Heavy weight information
from the certied scale ticket rst, follow the “Heavy” calibration
instructions. Complete the process with the “Empty” calibration
entry instructions.
Note: Bold type on the Figures represents blinking on-screen.
Fig. 2
Fig. 9 “Warning Screen”
In this example we will enter the
“EMPTY” weights rst:
1. Press the ESC button.
A menu will appear with VIEW
WEIGHTS blinking.
2. Press the DOWN arrow 2
times until PRINT SETUP is blinking.
3. Press ENTER.
4. Press the DOWN arrow once,
SYSTEM SETUP is blinking.
5. Press ENTER.
6. CALIBRATION is now blinking.
Press ENTER.
(Enter a PIN#, if required)
7. Press the DOWN arrow once,
MANUL CALIB is blinking.
8. Press ENTER.
EMPTY WEIGHT is blinking.
9. Press ENTER.
(When Calibrating HEAVY Weight
information press the DOWN arrow once,
then press ENTER)
(When repeating these intructions to enter the Heavy Weights this
warning will read, “Enter Heavy Weights When Heavy”.)
8

Fig. 11 Fig. 12
Fig. 10
Fig. 14 Fig. 15
Fig. 13
Fig. 18
Fig. 21
Fig. 22
Fig. 16
Fig. 17
Fig. 19 Fig. 20
Fig. 23
Steer, Drive and Trailer axle groups will
appear as STR, DRV, TRL.
10. Press ENTER while STR is blinking.
(Without a trailer scale you will not see
the TRL option.)
11. Use the UP and DOWN arrows to
select the proper steer axle weight
indicated on your certied weight
ticket.
12. Press ENTER.
The screen will display ACCEPTED for
2 seconds then it will return to the
previous screen.
13. Press ESC.
The screen that displays all three axle
groups (STR, DRV, TRL) will appear.
14. Push the DOWN arrow once until
DRV is blinking and
15. Press ENTER.
16. Use the UP and DOWN arrows to
enter the Drive axle weight and
17. Press ENTER.
18. After ACCEPTED appears on
screen press ESC.
The screen displaying the three axle
groups wil appear.
19. Push the DOWN arrow twice until
TRL is blinking and
20. Press ENTER.
21. Use the UP and DOWN arrows to
enter the Trailer axle weight and
22. Press ENTER.
After ACCEPTED appears,
23. Press “ESC” 7 times
All “Empty” axle weights will show.
Now you can enter the “Heavy” weight information into the scale. Follow
the “HEAVY” weight calibration instructions on the next page. 9

“Heavy” Weight Calibration Process
Get a fully loaded trailer, repeat the Pre-Calibration Steps listed on the front
cover and proceed to illustration 9.
• When the “Empty Weights” is blinking press the Down arrow once,
“HEAVY Weights” is blinking. Press ENTER.
Follow all instructions from illustration 10 through 23. Remember that you
are now entering the “Heavy” axle weight information. Each instruction will
show “Heavy” instead of “Empty” on the screen.
After you nish entering all of the “Empty” and the “Heavy” weight
information, your LoadMaxx on-board scale will be fully calibrated and
ready for use.
If you have questions, call Air-Weigh Customer Support at 888-459-3444.
PIN Protection - Protect Your Calibration Information
PIN Protection is required to prevent loss of accurate calibration
information. Pin protection is recommended to prevent accidental or
intentional changes in calibration.
1. Press the
ESC button.
2. Press DOWN
arrow twice.
3. Press ENTER.
4. Press DOWN
arrow once.
5. Press ENTER.
6. Press DOWN
arrow twice.
7. Press ENTER.
Choose a 2-3 digit
PIN number.
8. Use the UP &
DOWN arrows to
input a PIN.
9. Press ENTER.
The message SET
PIN ACCEPTED
will appear.
PIN number must also be entered directly into the trailer scale display.
10. Turn off engine and restart.
PIN# has been entered.
10

Calibrating LoadMaxx Trailer Scales
Calibration is a scientic term that simply means that you
need to carefully enter an empty weight, and a heavy weight for
each axle group into the on-board scale.
Your on-board scale already knows exactly how much air pressure
is in your suspension when your trailer is empty and how much
pressure exists when you have a heavy load. You need to enter the
corresponding weights shown on the weight ticket to complete the
calibration process.
Avoid the #1 User Error
• Enter EMPTY weight information into your Air-Weigh
scale only when the vehicle is EMPTY.
• Enter HEAVY weight information into your Air-Weigh
scale only when the vehicle is HEAVY.
The order that you enter the “Heavy” weight information, or
“Empty” weight information, is not important.
Calibration is Important - Follow Directions Carefully.
Prior to Calibrating the Scale, Follow these 3 Steps.
Step 1 - Drive to a reliable certied scale with your vehicle empty/
heavy and get a scale ticket showning individual weights for
your Steer, Drive, & Trailer axles.
Step 2 - Identify a smooth, level area to park you vehicle and roll to a
stop, transmission in neutral, brakes released.
Step 3 - Dump the air in the suspensions for 5-10 seconds,
then re-inate the suspension to ride height.
Calibration instructions continued on the next page
LOADMAXX
CALIBRATION GUIDE
11

Calibrating LoadMaxx Trailer Scale
Calibrate the trailer scale “Manually” or use “Built-In” calibrations.
• Manual Calibration is recommended. Use a certied scale weight ticket.
• “Built-In” Calibration requires suspension’s Brand, Model &
number of axles.
Depending upon the status of your trailer Empty/Heavy, enter the corresponding
weight information shown on the certied scale ticket when instructed.
Example #1 - Manual Calibration
Manual Calibration provides the most
accurate weight information. Air-Weigh
recommends this process. To begin-
1. Press the MENU button.
2. Use the DOWN arrow until the screen
shows PROGRAM.
3. Then press ENTER.
4. If you have programmed a PIN number,
enter it using the UP & DOWN arrows.
Press ENTER.
If you have not programmed a PIN number
the screen will automatically change to
CALIBRATE.
5. Press ENTER.
6. Press the DOWN arrow, select
EMPTY or HEAVY (match load condition)
7. Press ENTER.
The screen will show a Warning - “Enter
Empty weight when Empty.” or “Enter Heavy
weight when Heavy”.
Fig. 1
Fig. 2
Fig. 3
Fig. 4
Fig. 5
Fig. 6
Fig. 7
12

8. Using the UP and DOWN arrows enter
the weight of the trailer axle shown on the
certied scale ticket.
9. Press ENTER.
The screen will show ACCEPTED.
Next, get a Heavy/Empty load, repeat
pre-calibration steps and enter the remaining
weight information. After entering both “Empty”
and “Heavy” axle group weight information, the
scale will be fully calibrated and ready to use.
Fig. 8
Fig. 9
1. Press the MENU button.
2. Press the DOWN arrow twice, the screen
shows PROGRAM.
3. Then press ENTER.
4. If you have programmed a PIN number, enter
it using the UP & DOWN arrows.
If you have not programmed a PIN number, the
screen will automatically change to
CALIBRATE.
Fig. 1
Fig. 2
Fig. 3
Fig. 4
Calibration instructions continued on the next page
Example #2 - ”Built In” Calibration
13

A list of abbreviated “Built-In” suspension brands
will appear on screen.
7. Use the UP and DOWN arrows to nd your
specic suspension brand.
8. Press ENTER.
9. An abbreviated list of models will appear on
screen. Use the UP and DOWN arrows to nd your
specic suspension model (2X or 4X indicates
number of axles).
10. Then press ENTER.
11. The screen will now show ACCEPTED.
Your scale is calibrated and ready
to use.
Note - Check the weight against the weigh ticket. If the weight shown on the screen
varies from the certied scale ticket, Call Customer Support at 888-459-3247.
Fig. 7Fig. 8
Fig. 9
Fig. 10
Fig. 11
The screen will change to SUSPNSNS.
This abbreviation indicates suspension.
6. Press ENTER.
Fig. 6
With CALIBRATE shown on screen
5. Press ENTER.
Fig.5
14

LOADMAXX
PIN PROTECTION
Trailer Scale PIN Protection
Protect calibration information and ensure drivers trust
the accuracy of their LoadMaxx On-Board Trailer Scale.
Select an easy-to-remember, low 2-3 digit,
Personal Identication Number (PIN).
If you lose the PIN#, Air-Weigh can unlock
the scale, call 888-459-3247.
1. Press the MENU button.
2. Use the DOWN arrow twice until the
screen shows PROGRAM.
3. Then press ENTER.
4. Use the DOWN arrow until the screen
shows SET UP.
5. Press ENTER.
6. Press the DOWN arrow, select
NEW PIN.
7. Press ENTER.
8. Using the UP and DOWN arrows enter
a Personal Identication Number or PIN.
Maintain this number and keep it under
management control.
9. Press ENTER.
The screen will ash ACCEPTED.
10. Press the “ESC” button. Turn the
power to the scale off. When the
engine is restarted, your PIN number will
be locked within the scale.
Fig. 1
Fig. 2
Fig. 3
Fig. 4
Fig. 5
Fig. 6
Fig. 7
Fig. 8
Fig. 9
15

Using LoadMaxx On-Board Scales
Daily use of your on-board scales requires that you make a few
adjustments to your routine.
To read your scale you need to nd a place to stop.
1. Identify a level, smooth area…lightly tap your breaks to slow,
with the transmission in neutral...safely glide to a full stop.
2. Do not engage your brakes during the scale reading. Dump air and
reinate to ride height.
3. Wait until a steady weight reading appears on the display.
Read and report your axle weight information.
Live-Loading
If you are live-loading, lightly tap your breaks until you can engage the clutch
and safely glide to a full stop at the loading area. The loading area must be
level and smooth.
There are ways for you to keep the truck from rolling during loading and still
get accurate weights:
• You can release the clutch pedal with the engine off and the truck
in gear, or
• You can set either the tractor or trailer parking brake. Do not set both
brakes. The idea is to allow the truck to bounce and sag while loading,
without binding up the suspensions. Stop loading when the scale
indicates you’re approaching the maximum load.
Before leaving the load site, it’s a good idea to check your scale again.
Release the brakes and briey dump the suspension air, then allow it to
inate back to ride height.
Check the weights shown on the screen...add more to your load if necessary.
By using this process you can maximize every load without waiting in line to
add product or waste time off-loading excess product.
16

Setting the Tractor Alarm Function
1. Press ESC twice until VIEW
WEIGHTS is blinking.
2. Press the DOWN arrow once,
ALARMS is blinking.
3. Press ENTER.
SET ALARMS is blinking.
4. Press ENTER.
5. ALARM 1 is blinking. Press ENTER.
Fig. 1
Fig. 5
Fig. 8
Fig. 6
Fig. 2 Fig. 3
Choose which axle group you want to
alarm. Press the DOWN arrow until it
is blinking.
For this example we will use GVW.
GVW NET ALM1 is blinking,
6. Press ENTER.
GVW ALARM is blinking.
7. Press ENTER.
WARN WT 1 is blinking,
8. Press ENTER.
9. Using the UP and DOWN arrows
enter the desired warning weight.
10. Press ENTER.
The screen will then
ash ACCEPTED.
Fig. 7
Fig. 9 Fig. 10
Programming Tractor Alarm Continued
Fig. 4
LOADMAXX
ALARMS
If your scale is PIN Protected you will not be able to shut off
or turn on the alarms, unless you have the PIN Number.
17

15. Press ENTER.
The screen will then ash ACCEPTED.
Press ESC several times to return to the
main screen.
Turning ON/OFF the Alarms Feature
1. Press ESC once, VIEW WEIGHTS
is blinking.
2. Press the DOWN arrow once, ALARMS
is blinking.
3. Press ENTER.
Fig. 1 Fig. 2
4. Press the DOWN arrow once until TURN
ON/OFF is blinking.
The next line gives the state of the alarm
feature, (NOW ON) or (NOW OFF).
5. Press ENTER to change this state.
If you do not want to adjust the status,
press ESC.
Fig. 4
Fig. 3
Fig. 5
Fig. 11 Fig. 12
13. Press ENTER.
14. Using the UP and DOWN arrows enter
the desired alarm weight.
Fig. 13
Fig. 14
Fig. 15
11. Press ESC once.
12. Press the DOWN arrow once
ALARM WT 1.
18

Setting Trailer Alarm Functions
1. Press the MENU button.
Fig. 1
2. Use the UP arrow once, the screen will
display PROGRAM.
3. Press ENTER.
Fig. 3
4. Press UP twice, screen will display ALARMS.
5. Press ENTER.
Fig. 2
EXIST means that the alarms have been activated
and can be used.
Tip: At EXIST, press ENTER.
If EXIST is YES, then press ESC and proceed to
Step 6.
If EXIST is NO, the alarm feature has not been
activated in the scale.
To activate the scale, see Step 14.
Once the scale is activated, it will then revert to
showing EXIST. Proceed on to Step 6 to nish
putting in your alarm setting weights.
LOADMAXX
ALARMS
If the scale is not PIN protected it will ash NO
PIN, then proceed to Step 4.
If the scale is PIN protected, the screen will ask
you to enter a PIN # which you would enter using
the UP and DOWN arrows.
Press ENTER
When PIN# is accepted, screen displays PIN OK.
Fig. 4
Fig. 5
19

Fig. 7
Fig. 6
6. Press the UP arrow four times, the screen
displays ALARM WT.
7. Press ENTER.
8. Use UP and DOWN arrows to change the
zero in the display to a preferred weight that
will activate to the alarm weight.
Fig. 13 Fig. 12
Fig. 11
Fig. 10
Fig. 9
Fig. 8
Tip: If warning weights are not desired, skip to
Step 14.
10. Press the DOWN arrow once to display
the WARN WT.
11. Press ENTER.
9. Press ENTER to store the weight into the
scale memory.
The screen will momentarily display
ACCEPTED as the weight is stored and then
reverts to displaying ALARM WT.
Tip: The Alarm weight is the heaviest weight,
the Warning weight is the lighter weight.
12. Use the UP and DOWN arrows to change the
zero in the display to a weight that will activate
the WARN WT.
13. Press ENTER to store the weight into the
scale memory.
The screen will momentarily display ACCEPTED
as the weight is stored and then reverts to
display WARN WT.
20
Other manuals for LOADMAXX
4
Table of contents
Other Air Weigh Scale manuals

Air Weigh
Air Weigh LoadMaxx Plus User manual

Air Weigh
Air Weigh LOADMAXX Operating and maintenance instructions

Air Weigh
Air Weigh LoadMaxx 5809 User manual

Air Weigh
Air Weigh BinMaxx User manual

Air Weigh
Air Weigh BinMaxx User manual

Air Weigh
Air Weigh LOADMAXX User manual

Air Weigh
Air Weigh LoadMax User manual

Air Weigh
Air Weigh QuickLoad User manual

Air Weigh
Air Weigh BinMaxx User manual