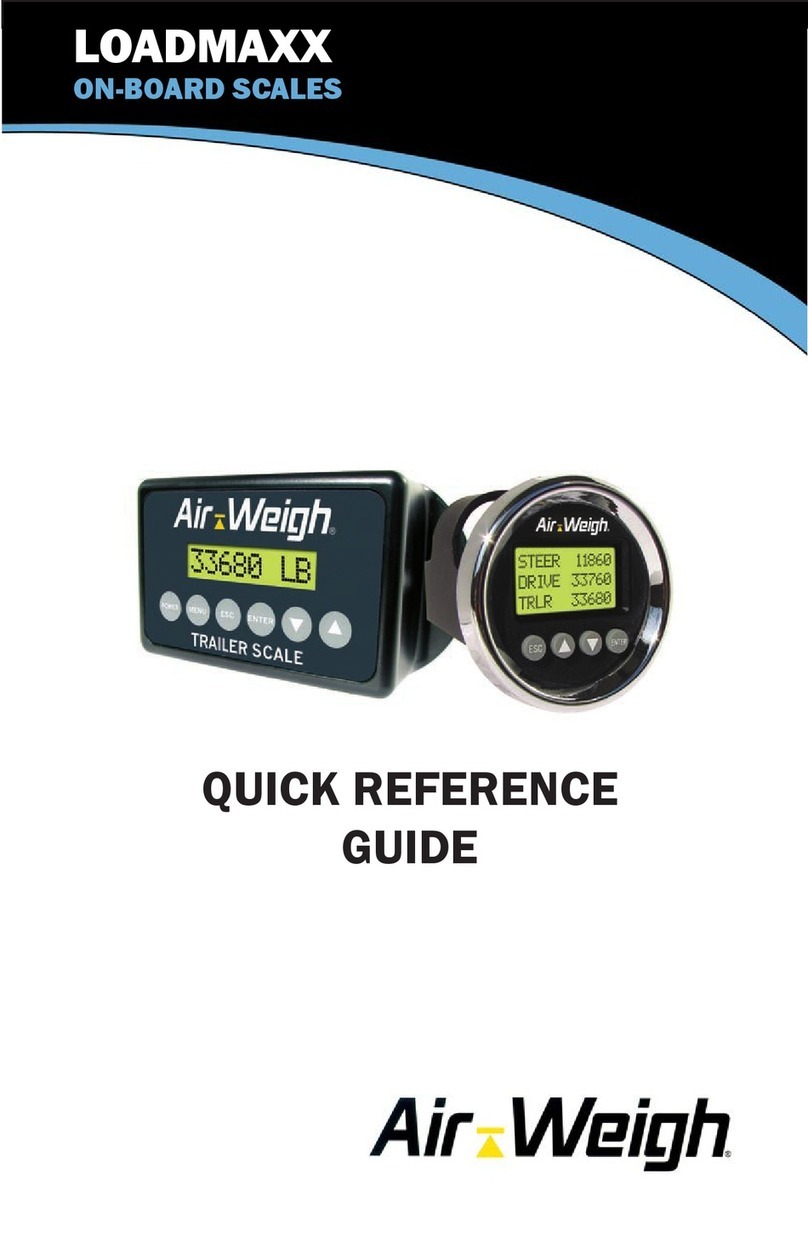
Air Weigh BinMaxx User manual

Calibration and
Operations Manual
PN: 901-0147-000 Rev. 001
BinMaxx™Scale
The Leader in Onboard Weighing Technology TM

2
Table of Contents
I. BinMaxx FRONT-END LOADER SCALE SYSTEM
OVERVIEW.................................................................................... 3
Scale Display Overview............................................................. 3
Scale Buttons.............................................................................3
II. CALIBRATION........................................................................... 4
Preliminary Considerations........................................................5
Calibration Overview.................................................................. 5
Calibration Procedure................................................................5
III. FUNCTIONAL OPERATION .................................................... 8
User / System Operation ........................................................... 8
Screen Displays and Functions .................................................8
LIFT # / NET or TOTAL Screen...............................................10
Erase / Print.............................................................................11
ERASE LIFTS, Screen 1 .....................................................11
PRINT, ERASE Screen 2....................................................12
Setup........................................................................................13
Calibration............................................................................13
Display Setup.......................................................................14
Power-Up Mode...................................................................14
Truck Number......................................................................15
Set Pin.................................................................................15
Printer Port...........................................................................15
CAL WT Setup.....................................................................15
Date and Time.....................................................................16
Diagnostics ..............................................................................16
Display.................................................................................17
ECU.....................................................................................17
IV. ERROR MESSAGES ............................................................. 18
V. APPENDIX............................................................................... 19
Limited Warranty........................................................................22
3
I. BinMaxx FRONT-END LOADER SCALE
SYSTEM OVERVIEW
The BinMaxx Scale accurately measures and displays the net content weight
of any bin size and is designed to work on any front loading refuse vehicle
using the existing forks. The scale records each individual bin lift and net
weight in addition to calculating the accumulated net weight added to the
vehicle.
With the optional Air-Weigh Date/Time Printer, Part Number 1250, attached,
the date and time for each lift is also recorded. Individual lifts can be printed
immediately, or all lifts can be printed at a later time.
Once the scale has been calibrated correctly, the scale will display accurate
net weights for any load or bin size.
Use of the Air-Weigh BinMaxx Calibration Tank (Part Number 1280) is highly
recommended for the most accurate calibration of the scale system.
Scale Display Overview
Prior to using your BinMaxx Scale, it must be
calibrated. Before starting the calibration process,
it’s a good idea to become familiar with the
BinMaxx Scale Display.
Scale Buttons
1. Pushing any button one time will illuminate the display.
2. With the display illuminated, pressing the ESC key reverts the scale to the
main menu; PRINT/ERASE will be displayed at the top. The ESC key also
enables the user to return to a previous screen and to erase any numeric
values before they are entered into the scale.
3. Cursor location is indicated by a blinking line item.
4. To change the cursor location, or to set a numeric value, depress the up or
down arrow keys ▲ or ▼.
5. The OK key is used to select a blinking item or confirm a numeric value to
be saved.

4
II. CALIBRATION
Air-Weigh highly recommends the use of the Bin Maxx calibration tank (Part
Number 1280) to perform the system calibration. A bin may be used in place of
the recommended calibration tank; however, both the heavy and empty weight
of the bin must be known prior to beginning the calibration.
In the event that the Air-Weigh calibration tank is not used for calibrating the
scale, please reference an alternative calibration procedure as defined in the
Appendix of this document.
During the calibration process, the calibration tank will be lifted multiple times;
first when it is filled with water, then again when it is empty. Follow the
instructions provided on the display and in this manual to complete the system
calibration. After five (5) successful lifts and drops of the filled calibration weight,
and five lifts and drops of the empty calibration weight, the calibration process
will be complete.
NOTE
It is important that the calibration be completed as quickly as
possible so that the arm temperature does not vary much during the
calibration process.
Figure 1: BinMaxx Calibration Tank

5
Preliminary Considerations
The accuracy of the BinMaxx Scale depends on the accuracy of the calibration
weight used. Air-Weigh’s Calibration tank (Part Number 1280) has been
previously weighed and the empty and heavy weights are located on a sticker
attached to the outside of the calibration weight.
Before starting the calibration, please ensure that the deflection sensor seating
process has been performed as found in the BinMaxx Installation Guide.
NOTE
Please reference the Appendix if using a bin as a calibration weight.
Calibration Overview
Before beginning the calibration, verify that the Heavy and Empty weight values
identified on the calibration tank (or Heavy and Empty bin weights) are entered
into the scale BEFORE the calibration is started. If using the calibration tank, it
must be full of water and sitting on the lowered forks before starting the heavy
calibration process. Following the heavy calibration, the calibration tank must
be empty and sitting on the lowered forks before starting the empty calibration
process. Inaccurate scale weights will result from either calibrating the BinMaxx
scale for a heavy weight when the calibration weight is not full or when
calibrating the empty weight when the calibration weight it is not empty.
NOTE
Calibration must be performed in HEAVY first, then EMPTY order.
The scale will not permit an empty calibration until the heavy
calibration is complete.
Calibration Procedure
The following pages provide a step-by-step procedure for performing the
HEAVY and EMPTY calibrations, respectively. If using the Air-Weigh calibration
tank, enter 2580 lbs for the HEAVY weight and 480 lbs for the EMPTY weight.
See the Appendix if you are NOT using the calibration tank.
Entering Heavy / Empty Weight Information
1. From the main page use the display controls to select the following options:
SETUP > OK > CAL WT SETUP > OK > EMPTY WEIGHT > OK.
Use ▲or ▼to enter the empty weight and push OK. Push ESC one
time to return to the CAL WT SETUP menu.

6
2. Select HEAVY WEIGHT > OK. Use the ▲or▼to enter the heavy weight
and push OK. Push ESC until the main menu is reached.
Heavy Calibration
1. If using the BinMaxx Calibration tank, remove the lid and fill the tank with
water until it is overflowing. Securely replace the lid.
2. Turn the vehicle on and wait for the scale to power-up.
3. Place the filled calibration tank on the forks (if not already on).
4. Make sure the vehicle is in “travel mode”so that the forks will not exceed
the height of the windshield. This will make the calibration process easier
and faster.
5. From the main page use the display controls to select the following options:
SETUP > OK > CALIBRATION > OK > HEAVY WEIGHT > OK.
6. Wait a few seconds after the USE FILLED AIR-WEIGH CAL WEIGHT
screen appears. The display will then show RAISE WEIGHT UNTIL
DISPLAY FLASHES. Begin the lift.
NOTE
On the first lift, the Low proximity switch will not flash on the display.
7. Lift the calibration tank using a smooth motion. Lift the filled calibration tank
until the display flashes (reaching the high proximity switch). During the lift,
the display will show LIFT #1.
8. If you wait long enough, the display will stop flashing and change to
LOWER WEIGHT UNTIL DISPLAY FLASHES. Lower the calibration tank
again in one smooth motion. While you lower the tank, the display will show
DROP #1. When you reach the Low proximity switch location, the display
will flash. Immediately stop lowering the tank, being careful not to touch the
ground.
9. If you stop or pause at anytime while raising or lowering the calibration
tank, before the display flashes, you may receive a LIFT ERROR. The error
message will instruct you to restart the calibration process.
10. Repeat lifting and lowering the calibration tank until the calibration is
complete. The scale will repeat the instructions and will show the count of
lifts and drops remaining.

7
After five lifts and drops, the heavy calibration will be complete, and the scale
will show HEAVY WEIGHT CALIBRATION DONE... After a few seconds, the
display will change to show EMPTY CALIB REQUIRED BEFORE USE.
Empty Calibration
1. Lower the filled calibration tank, remove the fill cap, and remove one of the
Empty plugs along the bottom of the calibration tank. Empty as much water
as possible from the weight for the most accurate calibration.
2. Replace the fill cap and drain plug and proceed with the EMPTY calibration
by selecting the following options from the main page: SETUP > OK >
CALIBRATION > OK > EMPTY WEIGHT > OK.
3. Wait a few seconds after the USE EMPTY AIR-WEIGH CAL WEIGHT
screen appears. The display will then show RAISE WEIGHT UNTIL
DISPLAY FLASHES.
4. Follow the same sequence of lifting and lowering of the empty weight as
was performed with the heavy weight. As previously seen, the display will
show the LIFT and DROP numbers. As before, the display will flash when it
is time to reverse the arm direction from lift to lower, and lower to lift.
Calibration will be finished when five lifts and drops have been completed
without an error. The scale will show EMPTY WEIGHT CALIBRATION DONE
on the display. After a few seconds, the display will change to show the Lift
Number / Bin Net Weight display.
NOTE
The empty calibration weight value entered earlier in the calibration
process can be changed after the empty calibration is completed, if it has
been determined that the empty weight that was entered earlier was
incorrect. The new empty calibration weight value entered will
automatically recalculate the Empty Ratio and Offset.
Once calibrated, your Air-Weigh BinMaxx Scale will display weight in 20lb
(10kg) increments, and is ready for use.

8
III. FUNCTIONAL OPERATION
User / System Operation
The BinMaxx scale has been designed to acquire measurements while the bin
is in motion. The heavy weight is measured when lifting and the empty weight is
measured while lowering. From those two measurements, the Net weight is
calculated and then displayed. This measurement area is called the
measurement zone.
The measurement zone is determined based on a fork height, Low proximity
switch setting of 48” –52”, and a high proximity switch setting of approximately
98 –102”from the ground. The distance between these two locations provides
a measurement zone window of approximately 50”.
In order to get the most accuracy out of the system with the least amount of Lift
Errors, follow these recommended procedures:
Do:
Provide as smooth and consistent a lift and drop as possible while
going through the measurement zone
Don’t:
Do not pause during a lift or drop in the measurement zone.
Do not try to arrange or shift the bin load while in the
measurement zone.
Do not exceed 60 seconds above the high proximity switch when
emptying a bin, before returning to the measurement zone.
BinMaxx will update the Lift # and Net weight soon after the bin has dropped
below the Low proximity switch measurement area.
Screen Displays and Functions
At power-up the Air-Weigh logo will be momentarily displayed, followed by the
BinMaxx name and model number. The next screen depends upon calibration
status and system settings.
If the system has not been calibrated, “CALIBRATON REQUIRED BEFORE
USE” will be displayed. If only the Heavy calibration has been completed,
“EMPTY CALIB REQUIRED BEFORE USE” will be displayed.

9
Once the scale has been fully calibrated it will display RESET LIFT # or LIFT # /
NET, depending on user settings.
RESET LIFT #
YES
NO
At this screen, the driver has the ability to reset both the Lift # and the Total
(accumulated net bin weight) value. For example, at the beginning of a shift, the
driver may want to zero the Lift # and Net Total value before beginning the route.
During the course of the day, if the vehicle is turned off for any reason, when
restarted and after the system power-up, the driver will be asked if they want to
reset the lift # and/or the net total value. The driver can choose to reset either,
both or neither to zero at this time.
RESET LIFT: The user will be asked to RESET LIFT #, with a YES or NO. Use
the UP or DOWN arrow to select YES or NO, press OK.
If YES is selected, the display will show RESET LIFTS (ACCEPTED) and the
LIFT # will be set to zero (0). The RESET WEIGHT screen will automatically be
displayed when the Lift screen has been updated.
If NO is selected, the LIFT # will NOT be reset and will remain at its last recorded
lift number. The RESET WEIGHT screen will automatically be displayed when
completed.
RESET WEIGHT: The user will be asked to RESET WEIGHT, with a YES or NO.
Use the UP or DOWN arrow to select YES or NO, press OK.
If YES is selected, the display will show RESET WEIGHT (ACCEPTED) and the
NET and TOTAL value will be set to zero (0). The LIFT # / NET screen will
automatically be displayed when completed.
If NO is selected, the NET and TOTAL weight will NOT be reset and will remain
at its last recorded weight. The LIFT # / NET screen will automatically be
displayed when completed.
Once the Default Reset process is completed, the display will show one of
two (2) screens:
Screen 1A: OR Screen 2A:
LIFT# 9999
NET 0
LIFT# 9999
NET 0
“OK” PRINTS

10
Screen 1B: OR Screen 2B:
If Screen 1A or B appears, this signifies that the Printer is not connected and/or
powered on. All data will be recorded in the BinMaxx ComLink, to be printed or
transferred at a later time based upon user command input.
NOTE 1:
The Printer must be connected and powered in order to record the
current Date and Time. If a printer is not detected, only an elapsed
time based on “Key On / Key Off” will be recorded.
NOTE 2:
BinMaxx has the ability to store up to 1000 lift transactions and
associated data. The recorded lift data can be printed or transferred
(to an OBC) at any time the user requests it. Once 1000 lift
transactions have been reached, the oldest will be deleted as new
transactions occur.
If Screen 2A or B appears, this signifies that the optional printer has been
installed and is powered on in the vehicle. The printer MUST be turned on
manually. Once it is attached and operating, the Date/Time will be recorded on
all transactions and the operator can print any current single lift by pressing the
OK button. All lift data will be recorded and stored in the BinMaxx ComLink and
can be printed or transferred (to an OBC) at a later time. Please reference
Application Note, 903-0142-000, BinMaxx, Output Data Stream on RS232 Port
for more information. The recorded lift data can be printed individually or all
transactions can be printed, based on user command input.
LIFT # / NET or TOTAL Screen
The LIFT # / NET or TOTAL screen are the two main screens that will be
displayed during operation.
NOTE
If the user wants to change the print status, go to SETUP, described
later in the document or power-off the printer.
TOTAL
1234560
TOTAL
1234560
“OK” PRINTS
TOTAL
1234560
LIFT# 9999
NET 0

11
LIFT #: This number will be incremented every time a complete lift (lift, empty,
lower) of a bin has taken place. The number will continue to be incremented
until reset.
NET: This is the bin net (content) weight. Once a lift is completed, the bin NET
weight will be displayed, typically before the bin is placed back upon the ground.
This value will remain until another lift is completed.
TOTAL: This number is the accumulated Net total weight. This value will
continue to increment as the Net weight of each bin emptied is accumulated and
displayed. The Net total weight number will continue to increment until it is reset
or reaches 99,999 lbs.
Erase / Print
From the LIFT # / NET screen, press the UP or Down arrow button to display the
TOTAL screen. Pressing ESC again will display one of the following screens,
dependent upon whether Screen 1 (No Printer) or Screen 2 (Printer) has been
selected from the system SETUP menu.
Screen 1: Screen 2:
NOTE
Screen 2 will only be displayed if a printer is connected to the
BinMaxx scale and it is operational.
Use the UP or DOWN arrow buttons on the display to migrate to the desired
action and it will begin to flash. Press the OK button to select the desired action.
Pressing ESC will return you to the previous menu.
ERASE LIFTS, Screen 1
Select ERASE LIFTS by pressing the OK button when flashing. The Erase Lifts
screen will allow the operator to either
1) Reset the Lift # and Net Weight Total OR
2) Erase all recorded data.
RESET LIFTS or ERASE ALL will be displayed. Use the UP or DOWN arrow to
select the action desired.
ERASE LIFTS
SETUP
DIAGNOSTICS
PRINT,ERASE
SETUP
DIAGNOSTICS

12
Select RESET LIFTS by pressing the OK button when flashing. The display will
return you to the default Reset Lift # and Weight process as seen during power-
up. Follow the display instructions to Reset the Lift or Weight data as discussed
above.
NOTE
Reset Lifts does NOT delete lift data stored in the ComLink, it only
resets the Lift or Weight on the display.
If ERASE ALL is desired, Press OK. This process will delete all Lift and Weight
information stored in the BinMaxx Comlink. A caution will be displayed. “USE
CAUTION! PUSH “OK” TO ERASE ALL”. Pressing OK will delete all Lift and
Weight data stored in the BinMaxx Comlink.
PRINT, ERASE Screen 2
If a printer is detected, Screen 2 will be displayed, select PRINT, ERASE by
pressing OK.
Use the UP or DOWN arrows to select the desired action. This screen will allow
the operator to either:
1) Reset the Lift # and Weight Total,
2) Print all recorded Lift’s and Weight data
3) Erase all recorded data.
Select RESET LIFTS by pressing OK. The display will return you to the default
Reset Lift # and Weight process. Follow the display instructions to reset the Lift
or Weight data as discussed above.
Select PRINT LIFTS by pressing OK.If no printer is detected, an error message
“NO PRINTER” will be displayed. If a printer is detected, “PRINTING ALL
LIFTS….ESC CANCELS” will be displayed. Press OK to print ALL recorded lifts.
Pressing the ESC button at any time during the printing process will cancel any
remaining printing.
ERASE LIFTS
SETUP
DIAGNOSTICS
RESET LIFTS
ERASE ALL
USE CAUTION
PUSH “OK”TO
ERASE ALL
PRINT,ERASE
SETUP
DIAGNOSTICS
RESET LIFTS
PRINT LIFTS
ERASE ALL
USE CAUTION
PUSH “OK” TO
ERASE ALL

13
NOTE
Print Lifts does NOT delete lift data stored in the ComLink. The only
method to delete data stored in the ComLink is by using the ERASE
ALL command.
Select ERASE ALL by pressing OK. This process will permanently delete all Lift
and Weight information from the BinMaxx Comlink. When selecting ERASE ALL
a caution will be displayed. “USE CAUTION! PUSH “OK” TO ERASE ALL”.
Pressing OK will permanently delete all Lift and Weight data stored in the
BinMaxx ComLink.
Setup
Selecting SETUP allows the user to perform the following functions, Use the UP
or DOWN arrows to scroll between the listed menu items and to select the
desired action.
CALIBRATION –Perform a system calibration
DISPLAY SETUP –LBS/KG, Brightness, Light timeout
PWR UP MODE –Reset Lift # / Weight Prompt
TRUCK NUMBER –Enter / Edit a truck ID Number
SET PIN # –Set a PIN number
PRINTER PORT –Set Output for Printer or Data Stream
CAL WT SETUP –Enter Calibration Weight (Empty / Heavy). NOTE: Must be
done before the calibration process is started.
DATE / TIME –Enter Date & Time, requires Printer ON
Calibration
Select CALIBRATION, Press OK. Follow the Calibration process in Section II,
and/or follow the instructions provided on the scale display.
IMPORTANT!
CAL WT SETUP must be completed before the calibration procedure is
started!
PRINT,ERASE
SETUP
DIAGNOSTICS
CALIBRATION
DISPLY SETUP
PWR UP MODE

14
Display Setup
Select DISPLY SETUP, Press OK.
The display will show:
LBS / KGS –Sets display as pounds or kilograms
BRIGHTNESS –will change the display brightness
LITE TIMEOUT –sets the display timeout time
Select LBS / KGS, Press OK. The display will show POUNDS and KILOGRAMS.
Use the UP or DOWN arrow to select the desired action, Press OK. If POUNDS
is selected, the screen will display POUNDS, (Now Lbs); If KILOGRAMS is
selected, the screen will display KILOGRAMS, (Now Kgs).
Select BRIGHTNESS, Press OK. The display will show BRIGHT and DIM. Use
the UP or DOWN arrow to select the desired action, Press OK. If BRIGHT is
selected, the screen will display BRIGHT, (Now Bright); If DIM is selected, the
screen will display DIM, (Now DIM).
Select LITE TIMEOUT, Press OK. The display will show BACKLIGHT TIMEOUT
and a flashing location with MINS. Use the UP or DOWN arrow to select the
amount of time you want the backlight to stay on and Press OK.
NOTE
Once the backlight times-out, touching any button will turn the
backlight on.
Power-Up Mode
Select PWR UP MODE, Press OK.
This function allows the user to modify the default Power Up, RESET LIFT or
WEIGHT screen. The default display will show PROMPT RESET, DON’T
PROMPT (Now Prompt). Use the UP or DOWN arrows to select a desired
action.
CALIBRATION
DISPLY SETUP
PWR UP MODE
CALIBRATION
DISPLY SETUP
PWR UP MODE

15
When (Now Prompt) is displayed, any time the truck is powered up, it will
prompt the driver to Reset the Lift # and/or the Weight to zero.
If the driver does not want to reset the Lift # or Weight at power up, select DON’T
PROMPT, Press OK. The display will show (Now Don’t),as accepted.
NOTE
In DON’T PROMPT mode the Lift number and Total weight will
continue to accumulate until it reaches 99,999 OR until the ERASE
LIFTS / PRINT LIFTS screen is displayed and then RESET LIFTS is
selected. At that point the RESET LIFT # / RESET WEIGHT process
will be initiated.
Truck Number
Select TRUCK NUMBER by pressing the down arrow from the top screen
(CALIBRATION). Press OK. The screen will display TRUCK NUMBER with a
flashing line. Use the UP or DOWN arrows to select the truck number desired.
Hold the UP or DOWN arrow button to accelerate the number selection. Once
the number desired is reached, press OK.
Set Pin
Select SET PIN #, Press OK. The screen will display PERSONAL ID# with a
flashing line. Use the UP or DOWN arrows to select the PIN number desired.
Hold the UP or DOWN arrow button to accelerate the number selection. Once
the number desired is reached, press OK.
Printer Port
Select PRINTER PORT, Press OK. The display will show LIFTS REPORT or
DATA STREAM.
If LIFTS REPORT is set, the display will show (Now Report). In this mode the
system is expecting a Printer to be attached for printing ALL Lift and Weight data.
If DATA STREAM is set, the display will show (Now Stream). In this mode the
system is expecting an OBC to be attached to download Lift and Weight data.
CAL WT Setup
Select CAL WT SETUP, Press OK. The display will show:
TEST WEIGHT
EMPTY WEIGHT
HEAVY WEIGHT

16
In this mode the BinMaxx system is looking for the Empty and Heavy Calibration
weights to be input into the system. If the Air-Weigh calibration weight is used,
the Heavy weight is 2580 lbs and the Empty weight is 480 lbs. If another weight
is being used to calibrate (Empty / Heavy bin as an example), enter the
Empty / Heavy bin weights as measured on a scale. Enter the weights into the
system as follows:
Select EMPTY WEIGHT, Press OK. The display will show ENTER EMPTY
TEST WEIGHT with a flashing line. Press the UP or DOWN arrow to select the
correct empty weight identified on the Calibration weight, Press OK
If HEAVY WEIGHT is desired, Press OK. The display will show ENTER HEAVY
TEST WEIGHT with a flashing line. Press the UP or DOWN arrow to select the
correct heavy weight identified on the Calibration weight, Press OK
Date and Time
Select DATE / TIME, Press OK.In order to set the Date / Time, a printer must be
installed and powered on. If no printer is sensed, the following message will be
displayed:
If a printer is connected and powered on, the display will show:
Use the UP and DOWN and RIGHT and LEFT arrows to select the correct field.
Once the field is selected, use the UP and DOWN arrows to select the proper
date or time.
Diagnostics
The diagnostics screens are very helpful in identifying what may be causing a
scale problem. Select DIAGNOSTICS, Press OK. Use the UP and DOWN
arrows to select the desired action. The screen will display:
DISPLAY –Information about the display and S/W version
ECU –Electronic Control Unit status, sensor data and ID
DATE / TIME
REQUIRES
PRINTER ON
SELECT FIELD
10:23
07/23/12

17
Display
Select DISPLAY, Press OK. The display will show the display model # (5800C),
Current Weight display (Lbs or Kgs), Display software version # (S/W V001) and
a display serial number.
ECU
Select ECU, Press OK. Use the UP and DOWN arrows to select the desired
action. The screen will display:
Select SENSOR DATA, Press OK. The screen will display information about the
Right and Left deflection sensor. Use the UP and DOWN arrow to get to the next
screen and return to the previous screen.
Select CALIB DATA, Press OK. The screens will display Lift and Drop
calibration data. Use the UP and DOWN arrows to page between screens.
Select ECU ID, Press OK. The screen will display the BinMaxx Version number,
Model number and unit Serial number.
SENSOR DATA
CALIB DATA
ECU ID

18
IV. ERROR MESSAGES
The following error messages may be displayed during BinMaxx operation.
ERROR
MESSAGE
DESCRIPTION
POSSIBLE CAUSE
SCALE
SYSTEM
ERROR
The scale did not deduce a Net
weight change after the lift;
deflection sensor value at 0
Bad or damaged
deflection sensor;
Brocken or
disconnected deflection
sensor cable
MEMORY
FULL, NO
RECORDING!
PUSH “ESC”
The BinMaxx Comlink data buffer
is full; old lift information will be
overwritten by new lift data
Erase all lift data
CALIBRATION
REQUIRED
BEFORE USE
The BinMaxx scale must be
calibrated
Calibrate the scale
EMPTY CALIB
REQUIRED
BEFORE USE
The HEAVY calibration has been
completed, but not the EMPTY
Perform the EMPTY
calibration
BAD CALIB
RUN!
PUSH “ESC”
During the calibration lift or drop
(Empty or Heavy) this error occurs
Either too much time
was taken during the
lift/drop; the lift did not
pass the low/high prox
switch; too much time
was taken before
lift/drop started after the
display flashed
BAD LIFT!
PUSH “ESC”!
The scale did not determine an
accurate weight from the lift.
“ESC” will return you to the last
Lift #.
One of more of the
following conditions
happened:
Lift did not go past
HIGH prox switch; Lift
did not go by LOW prox
switch; Lift delayed in
between Low/High prox
switch; net weight within
100 lb accuracy zone
NO PRINTER
Print Lift command issued, no
Printer detected
Under DISPLY SETUP,
Printer Port selected
(Now Report); Printer
installed –turn power
ON or check cable
connection

19
V. APPENDIX
CALIBRATING A BINMAXX SCALE WHEN NOT USING THE
RECOMMENDED AIR-WEIGH CALIBRATION TANK
A refuse front-end-loader vehicle with a BinMaxx scale installed must be
calibrated before it can be placed in service. In order to calibrate a BinMaxx
scale, Air-Weigh recommends that our calibration tank (P/N 1280) be used to
perform the calibration. In the event that the Air-Weigh calibration tank is not
available, we suggest calibrating the scale using 4 cu. yd. bins as a calibration
tank replacement.
Equipment Needed:
Access to an accurate ground scale
Quantity (2) of 4 cu. yd. refuse bins with similar dimensions and weight
Approximately 2500 lbs. of material, such as gravel, to load into one of the 4
cu. yd. bins
NOTE: Select a material that will not shift much during the calibration
process.
Empty & Heavy Weight Set-up:
1.Select one of the 4 Yd bins to be used as your Empty calibration weight
2.Weigh the bin on the scale, record your Empty weight for input into the
BinMaxx scale, under SETUP / CAL WT SETUP / EMPTY WEIGHT. See
the BinMaxx Calibration and Operation Manual (P/N 901-0147-000).
NOTE: An Empty 4 Yd bin should fall in the range 400 –600 lbs.
3.Remove the Empty bin from the scale
4.Place the loaded Heavy bin onto the scale and record the Heavy weight for
input into the BinMaxx scale, under SETUP / CAL WT SETUP / HEAVY
WEIGHT. See the BinMaxx Calibration and Operation Manual for details.
NOTE: A heavy 4 Yd bin and contents should fall in the range 2800 –3200
lb.
5.Remove the heavy bin from the scale
6.Place the empty and heavy bins near the vehicle to be calibrated
7.Follow the Calibration process outlined in this manual

20
NOTES
Other manuals for BinMaxx
3
Table of contents
Other Air Weigh Scale manuals

Air Weigh
Air Weigh LOADMAXX User manual

Air Weigh
Air Weigh BinMaxx User manual

Air Weigh
Air Weigh LoadMax User manual

Air Weigh
Air Weigh LoadMaxx 5809 User manual

Air Weigh
Air Weigh LoadMaxx Plus User manual

Air Weigh
Air Weigh QuickLoad User manual

Air Weigh
Air Weigh LOADMAXX User manual

Air Weigh
Air Weigh LOADMAXX Operating and maintenance instructions

Air Weigh
Air Weigh BinMaxx User manual