manuals.online logo
Brands
  1. Home
  2. •
  3. Brands
  4. •
  5. AJAX
  6. •
  7. Security Sensor
  8. •
  9. AJAX DoorProtect Plus User manual

AJAX DoorProtect Plus User manual

Guida rapida | Ita
Ajax DoorProtect Plus
Sensore magnetico wireless con sensore di
vibrazione ed inclinazione.
Guía rápida | Es
Ajax DoorProtect Plus
Contacto magnético inalámbrico con sensor de
vibración e inclinación
Quick Start Guide | En
Magnetic opening detector
Model Name: Ajax DoorProtect Plus
Wireless magnetic door detector with shock
and tilt sensor
DoorProtect Plus è un sensore magnetico di
apertura porta o finestra con sensore di
vibrazione ed inclinazione. Dispone di un
ingresso per collegare un rilevatore esterno.
DoorProtect Plus è connesso al sistema di
sicurezza Ajax tramite il protocollo Jeweller,
con un raggio di comunicazione fino 1200 metri
senza ostacoli. È progettato per uso interno. La
batteria ha una durata utile fino a 7 anni.
IMPORTANTE : Questa guida rapida contiene
informazioni generali sul DoorProtect Plus.
Prima di usare il dispositivo si raccomanda di
consultare il manuale al sito:
ajax.systems/support/devices/doorprotect-plus
1. DoorProtect Plus
2. Magnete grande
3. Magnete piccolo
4. Indicatore luminoso
5. Pannello di montaggio SmartBracket
(la parte forata è necessaria per
azionare il tamper in caso di tentativo
di rimozione del dispositivo dalla
superficie).
6. Entrata per rilevatore esterno
7. Codice QR
8. Interruttore On/Off
9. Tamper anti-sabotaggio.
Connessione e configurazione rilevatore
La connessione e la configurazione del
dispositivo avviene tramite l’applicazione
DoorProtect Plus es un detector magnético
inalámbrico de apertura de puerta y ventana
con sensor de vibración e inclinación.Tiene una
entrada para conectar un detector externo.
DoorProtect Plus está conectado al sistema de
seguridad Ajax a través del protocolo Jeweller,
cuya comunicación tiene un rango de alcance
de hasta 1.200 metros sin obstáculos. Está
diseñado para uso interior. Su batería tiene una
duración de hasta 7 años.
IMPORTANTE: Esta guía rápida del usuario
contiene información general sobre el
DoorProtect Plus. Antes de utilizar el
dispositivo, le recomendamos que consulte la
guía completa del dispositivo en el sitio web de
Ajax:
ajax.systems/support/devices/doorprotect-plus
1. DoorProtect Plus.
2. Imán grande.
3. Imán pequeño
4. Indicador luminoso
5. Panel de fijación SmartBracket (la
pieza troquelada es necesaria para
accionar el tamper en caso de
cualquier intento de arrancar el
detector de la superficie).
6. Entrada de conexión para detector
externo.
7. Código QR
8. Interruptor On/Off
9. Tamper anti-sabotaje.
Conexión y configuración del detector
La conexión y configuración del detector se
realiza a través de la aplicación móvil Ajax
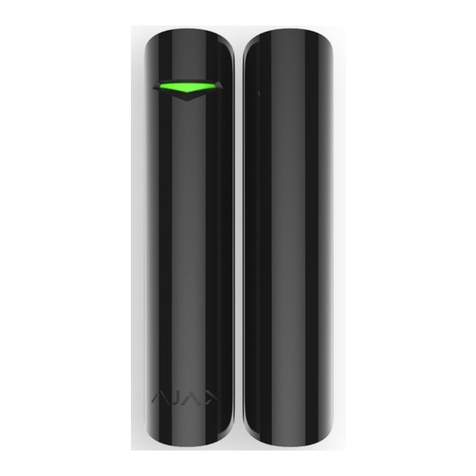
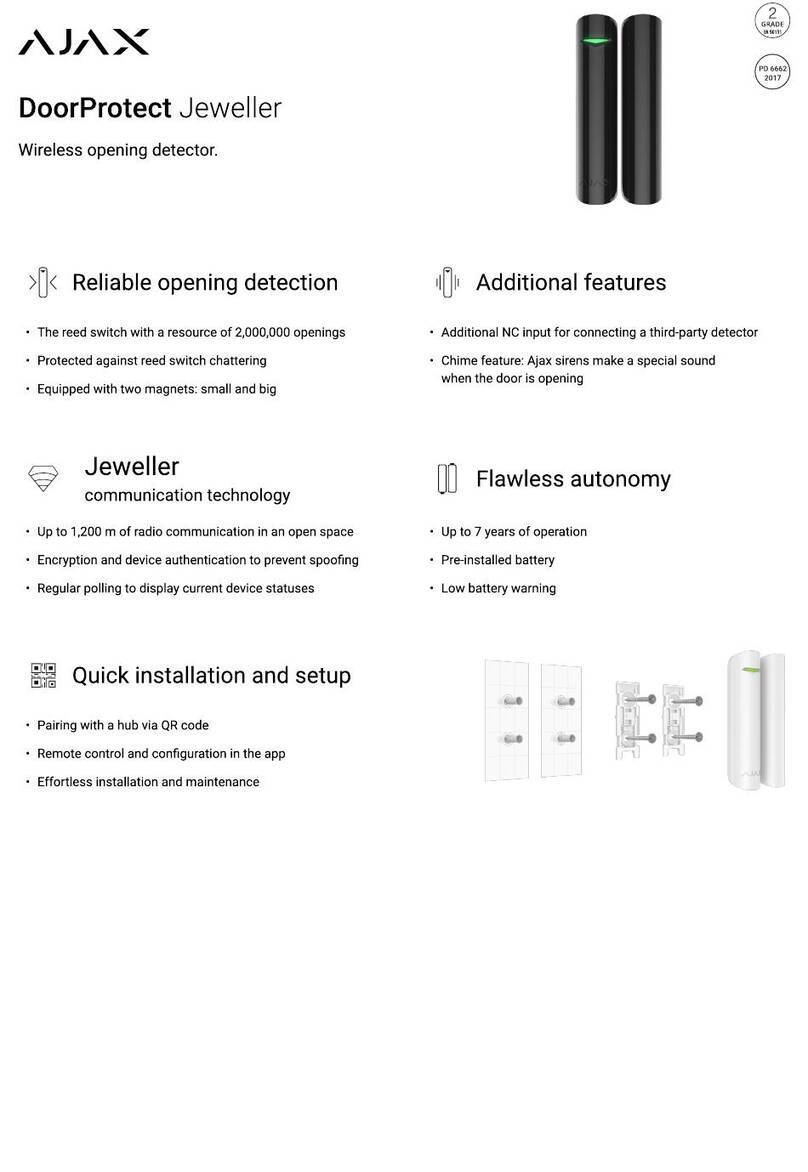
DoorProtect Plus is a wireless security device
which detects opening, shocks, and tilting. It
has a socket for connecting an external
detector. DoorProtect Plus is connected to the
Ajax security system via the protected Jeweller
protocol, with an effective communication range
of up to 1,200 meters without obstacles. It can
operate up to 7 years from a bundled battery
and is designed for use indoors.
IMPORTANT: This Quick Start Guide contains
general information about the DoorProtect Plus.
Before using the device, we recommend to
reviewing the User Manual on the website:
ajax.systems/support/devices/doorprotect-plus
1. DoorProtect Plus.
2. Big magnet.
3. Small magnet.
4. Light indicator.
5. SmartBracket attachment panel
(perforated part is required for
actuating the tamper in case of any
attempt to tear off the detector from
the surface).
6. External detector connection socket.
7. QR code.
8. Device switch.
9. Tamper button.
Detector Connection and Setting Up
The DoorProtect Plus works only with the Ajax
security system. Connection to another system
mobile Ajax Security System.
Per stabilire la connessione tra il rilevatore e
l’Hub, avvicinare i dispositivi ed eseguire la
procedura di aggiunta del dispositivo.
Non è possibile la connessione ad altri sistemi
d’aIlarme tramite Ajax uartBridge o Ajax
ocBridge Plus.
È possibile collegare un rilevatore cablato NC
al Door Protect Plus usando un connettore
esterno. Per poter far uscire il cavo
lateralmente dal DoorProtect Plus, bisogna
prima rompere la parte preforata sul retro.
Prima di utilizzare il connettore esterno
collegandolo al DoorProtect Plus, è necessario
attivarlo nella configuraziona del dispositivo.
Se il rilevatore si trova in un luogo dove è
richiesto un controllo 24 ore, attivare l’opzione
"Sempre attivo". DoorProtect Plus si attiverà in
caso di apertura, anche se il sistema non è
inserito.
Scelta dell’ubicazione del dispositivo
Per scegliere l’ubicazione del dispositivo si
deve considerare qualsiasi ostacolo che possa
impedire una trasmissione del segnale radio.
Non installare il rilevatore:
● All’area aperta.
● Vicino ad oggetti metallici e specchi che
attenuino il segnale radio.
● All’interno di un’impianto con temperatura o
umidità aldilà dei limiti consentiti.
Prima di fissare il rilevatore alla superficie,
effettuare la prova del livello di intensità del
segnale sull’applicazione Ajax Security System
per almeno un minuto. Questo servirà per
verificare la qualità della comunicazione tra il
rilevatore e l’Hub e assicurerà una scelta
adeguata della posizione del dispositivo.
3 barre
Livello del segnale eccellente
Illuminazione con interruzione ogni 1,5 secondi
2 barre
Livello del segnale buono
Lampeggio 5 volte al secondo
Security System.
Para establecer la conexión entre el detector y
el Hub, deben situarse uno del otro a una
distancia cercana y seguir el procedimiento de
añadido del dispositivo.
No es posible conectarlo a otro sistema de
alarma a través de Ajax uartBridge o Ajax
ocBridge Plus.
Se puede conectar un detector cableado NC al
DoorProtect Plus a través del conector
mediante un cable. Para sacar el cable del
DoorProtect Plus, extraer dicho conector.
Antes de utilizar el detector externo conectado
al DoorProtect Plus, es necesario activarlo en
los ajustes del dispositivo.
Si el detector se encuentra en una estancia que
requiere control de 24 horas, activar el modo
"Siempre activo" - DoorProtect Plus se activará
en caso de apertura, incluso si el sistema no
está armado.
Selección de la ubicación del dispositivo
Al seleccionar la ubicación de instalación para
DoorProtect Plus, se debe considerar cualquier
obstáculo que impida la transmisión de la señal
vía radio.
No instalar el detector:
●Al aire libre.
●Cerca de objetos metálicos y espejos
que causen la atenuación de la señal
radio.
●Dentro de cualquier instalación con
una temperatura y humedad más allá
de los límites permitidos.
Antes de fijar el detector a la superficie, realizar
la prueba de nivel de intensidad de la señal en
la aplicación móvil Ajax Security System
durante al menos un minuto. Esto servirá para
comprobar la calidad de comunicación entre el
detector y el Hub y asegurará una selección
adecuada del lugar de instalación del
dispositivo.
3 barras
Excelente nivel de señal
Iluminación con un parpadeo cada 1,5
segundos
via Ajax uartBridge or Ajax ocBridge Plus is not
available.
The detector is connected to the hub and set up
via the Ajax Security system mobile application.
To establish connection please locate the
detector and the hub within the communication
range and follow the device adding procedure.
A wire detector with a NC type contact may be
connected to DoorProtect Plus using an
outside-mounted terminal clamp. To lead out
the wire from the DoorProtect Plus body, break
out piece of plastic on the backside.
Before using the external detector connected to
the terminal clamp, activate it in the
DoorProtect Plus settings.
If the detector is located in a room requiring 24-
hour control, switch on the "Always active"
mode - DoorProtect Plus will be actuated in
case of opening, even if the system is not in the
armed mode.
Detector Location Selection
When selecting an installation location for
DoorProtect Plus, take into account any
obstacles impairing the radio signal
transmission.
Do not install the detector:
●Outside the premises (outdoors).
●Nearby any metal objects and mirrors
causing radio signal attenuation or
screening it.
●Within any premises with the
temperature and humidity beyond the
range of permissible limits.
Prior to the attachment of the detector to a
surface with screws, please perform signal level
test in the Ajax Security System application for
at least a minute. This will demonstrate
communication quality between the detector
and the hub and ensures proper installation
place selection.
3 bars
Excellent signal level
Lights with interruptions once every 1.5
seconds
1 barra
Livello del segnale basso
Lampeggio 2 volte al secondo
Senza segnale
Lampeggio ogni 1,5 secondi
Il rilevatore include due magneti, uno piccolo ed
uno grande, con un rango di funzionamento
rispettivamente di 1cm e 2 cm. Il magnete si
monta alla destra del rilevatore :
Se necessario, il rilevatore può essere montato
orizzontalmente.
Nel caso non si necessiti della rilevazione di
apertura, si raccomanda di usare solo l’unità
elettronica (senza magnete) e disabilitare il
sensore magnetico nella configurazione.
Il sensore di inclinazione rileva uno
spostamento verticale del dispositivo rispetto
alla posizione iniziale superiore ai 5º.
DoorProtect Plus può essere installato anche
su finestre, inclusi gli abbaini, ed essere armato
durante la ventilazione (il contatto magnetico
deve essere previamente disabilitato nella
configurazione).
1. Rilevatore
2. Magnete
Installazione del dispositivo
1. Fissare il pannello SmartBracket del
rilevatore e del magnete utilizzando le viti
incluse nella confezione o altri strumenti di
fissaggio altrettanto affidabili.
2. Mettere il rilevatore nel pannello di fissaggio
SmartBracket – l’indicatore luminoso
lampeggierà una volta sola per confermare che
2 barras
Buen nivel de señal
Parpadea 5 veces por segundo
1 barra
Bajo nivel de señal
Parpadea 2 veces por segundo
Sin señal
Se enciende brevemente cada 1,5 segundos
El detector incluye dos imanes: imán pequeño
y otro grande, con un rango de funcionamiento
de 1 cm y 2 cm respectivamente. Este imán se
fija a la derecha del detector.
Si es necesario, el detector puede colocarse
horizontalmente.
En caso de no necesitar la detección de
apertura, se recomienda usar sólo la parte fija
sin el imán y deshabilitar el sensor magnético
en la configuración del dispositivo.
El sensor de inclinación detecta un movimiento
vertical del dispositivo respecto a la posición
inicial de más de 5º. DoorProtect Plus se puede
instalar tanto en ventanas abatibles como
inclinables y el sistema puede armarse durante
la ventilación (se debe deshabilitar previamente
el contacto magnético en la configuración del
dispositivo)
1. Detector
2. Imán
Instalación del dispositivo
1. Fijar el panel SmartBracket del detector y del
imán utilizando los tornillos incluidos en la caja
del dispositivo u otros elementos de fijación
igual de fiables.
2. Poner el detector en el panel de fijación
SmartBracket - el indicador luminoso
parpadeará una única vez confirmando que el
2 bars
Good signal level
Blinks 5 times per second
1 bar
Bad signal level
Blinks 2 times per second
No signal
Lights up for a short time once every 1.5
seconds
The detector is equipped with two magnets -
small and big, with the magnet operation
ranges of 1 cm and 2 cm accordingly. The
magnet should be located to the right of the
detector at the mark level:
The detector may be positioned horizontally.
If there is no need to detect opening with the
sealed contact reed relay, please use only an
electronics unit (without magnets) and disable
the magnetic sensor in the settings.
Tilt detector detects the vertical deviation of the
device relative to the initial position of more
than 5°. DoorProtect Plus can be installed on
windows including dormer windows, and the
system can be armed, when they are in the
airing mode (you should рreviously disable the
magnetic sensor in the settings).
1. Detector.
2. Magnet.
Mounting the device
1. Fix the SmartBracket attachment panels of
the detector and magnet with bundled screws
or other no less reliable attachment hardware.
2. Put the detector on the panel - single blink of
the light indicator will confirm that the tamper
has been actuated.
il tamper è stato attivato.
Specifiche tecniche
Raggio d’azione massimo del rilevatore:
1 cm (magnete piccolo)
2 cm (magnete grande)
Inclinazione:
5º o superiore (regolabile)
Sensibilità d’impatto:
3 livelli
Possibilità di ignorare il primo impatto:
Sì
Tamper anti-sabotaggio:
Si
Rango di frequenze :
868,0-868,6 MHz
Potenza apparente irradiata (PRA):
7,91 dBm / 6,19 mW (fino 20 mW)
Modulazione:
GFSK
Raggio del segnale radio:
Fino 1200m (senza ostacoli)
Entrata per collegare rilevatore cablato:
Si, NC
Alimentatore:
1 batteria CR123A, 3 V
Durata della batteria:
Fino 5 anni
Temperatura di funzionamento:
Da 0 ° C a + 50 ° C
Umidità massima:
Fino all’80%
Dimensioni:
Ø20х90 mm
Peso:
29 g
Informazioni importanti
Questo prodotto si può utilizzare in tutti i paesi
dell’Unione Europea.
Questo dispositivo rispetta i requisiti e le
relative disposizioni della Direttiva 2014/53 /
UE. Sono stati realizzati tutti i test di segnale
radio pertinenti.
ATTENZIONE: RISCHIO DI ESPLOSIONE
DELLA BATTERIA SE RIMPIAZZATA CON UN
MODELLO SBAGLIATO. DISFARSI DELLE
BATTERIE USATE SEGUENDO LE
ISTRUZIONI.
Garanzia
La garanzia dei dispositivi Ajax Systems Inc. È
valida per 2 anni dopo l’acquisto e non si
applica alla batteria fornita. Se il dispositivo non
funzionasse correttamente, mettersi in contatto
con il servizio tecnico. I problemi tecnici
possono essere risolti da remoto nella maggior
parte dei casi.
Il testo completo della garanzia è disponibile al
sito web:
ajax.systems/warranty
Condizioni generali d’utilizzo :
ajax.systems/end-user-agreement
Supporto Tecnico :
[email protected]ystems
Contenuto
tamper ha sido accionado.
Especificaciones Técnicas
Distancia máxima de actuación del detector:
1 cm (imán pequeño)
2 cm (imán grande)
Inclinación:
5º o superior (ajustable)
Sensibilidad de impacto:
3 niveles
Opción de ignorar el primer impacto:
Sí
Tamper anti-sabotaje:
Sí
Rango de Frecuencia:
868.0-868.6 MHz
Potencia radiada aparente (PRA):
7.91 dBm / 6.19 mW (hasta 20 mW)
Modulación:
GFSK
Alcance de la señal radio:
Hasta 1.200 m (sin obstáculos)
Entrada para conectar detectores cableados:
Sí, NC
Alimentación:
1 batería CR123A, 3 V
Duración de la batería:
Hasta 5 años
Temperatura de funcionamiento:
De 0 ° C a + 50 ° C
Humedad máxima:
Hasta el 80%
Dimensiones:
Ø20х90 mm
Peso:
29 g
Información importante
Este producto se puede usar en todos los
países miembros de la Unión Europea.
Este dispositivo cumple con los requisitos
esenciales y otras disposiciones relevantes de
la Directiva 2014/53 / UE. Se han llevado a
cabo todas las pruebas de señal vía radio
pertinentes.
ATENCIÓN: RIESGO DE EXPLOSIÓN SI LA
BATERÍA SE REEMPLAZA POR OTRA DE UN
MODELO ERRÓNEO. DESHACERSE DE LAS
BATERÍAS USADAS SEGÚN LAS
INSTRUCCIONES
Garantía
La garantía de los dispositivos Ajax Systems
Inc. es válida por 2 años después de la compra
y no se aplica a la batería suministrada. Si el
dispositivo no funciona correctamente, primero
debe ponerse en contacto con el servicio de
asistencia técnica. Los problemas técnicos se
pueden resolver de forma remota en gran parte
de los casos.
El texto completo de la garantía está disponible
en el sitio web:
ajax.systems/warranty
Acuerdo de usuario:
ajax.systems/end-user-agreement
Soporte técnico:
[email protected]ystems
Tech Specs
Detector actuation threshold:
1 cm (small magnet)
2 cm (big magnet)
Tilt sensor activation threshold:
5° or more (customizable)
Shock sensitivity:
3 levels
Ignore first shock option:
Yes
Anti-tamper switch:
Yes
Frequency band:
868.0-868.6 mHz
Effective radiated power — 7.91 dBm / 6,19
mW (limit 20mW)
Modulation:
GFSK
Radio signal:
up to 1,200 m (any obstacles absent)
Socket for connecting wire detectors:
Yes, NC
Power supply:
1 battery CR123A, 3 V
Battery life:
up to 5 years
Operating temperature range:
from 0°С to +50°С
Operating humidity:
up to 80%
Dimensions:
Ø20х90 mm
Weight:
29 g
This product can be used across all EU
member states.
This device in compliance with the essential
requirements and other relevant provisions of
Directive 2014/53/EU. All essential radio test
suites have been carried out.
CAUTION: RISK OF EXPLOSION IF BATTERY
IS REPLACED BY AN INCORRECT TYPE.
DISPOSE OF
USED BATTERIES ACCORDING TO THE
INSTRUCTIONS
Warranty
Warranty for the Ajax Systems Inc. devices is
valid for 2 years after the purchase and does
not apply to the supplied battery. If the device
does not work correctly, you should first contact
the support service—in half of the cases,
technical issues can be solved remotely!
The full text of the warranty is available on the
website:
ajax.systems/warranty
User Agreement:
ajax.systems/end-user-agreement
Technical support:
[email protected]ystems
1. DoorProtect Plus
2. Batteria CR123A.
3. Magnete grande.
4. Magnete piccolo.
5. Cavo per connessione cablata.
6. Kit d'installazione.
7. Guida rapida
Produttore: Research and Production
Enterprise “Ajax” LLC
Address: Sklyarenko 5, Kyiv, 04073, Ukraine
By request of Ajax Systems Inc.
www.ajax.systems
Contenido
8. DoorProtect Plus
9. Batería CR123A.
10. Imán grande.
11. Imán pequeño.
12. Conector para detector cableado.
13. Kit de instalación.
14. Guía rápida
Manufacturer: Research and Production
Enterprise “Ajax” LLC
Address: Sklyarenko 5, Kyiv, 04073, Ukraine
By request of Ajax Systems Inc.
www.ajax.systems
Complete Set
1. DoorProtect Plus.
2. Battery CR123A (pre-installed).
3. Big magnet.
4. Small magnet.
5. Outside-mounted terminal clamp.
6. Installation kit.
7. Quick Start Guide.
Manufacturer: Research and Production
Enterprise “Ajax” LLC
Address: Sklyarenko 5, Kyiv, 04073, Ukraine
By request of Ajax Systems Inc.
www.ajax.systems

Other manuals for DoorProtect Plus

4

Other AJAX Security Sensor manuals

AJAX FireProtect 2 Heat/CO Jeweller User manual

AJAX

AJAX FireProtect 2 Heat/CO Jeweller User manual

AJAX FireProtect User manual

AJAX

AJAX FireProtect User manual

AJAX CombiProtect User manual

AJAX

AJAX CombiProtect User manual

AJAX MotionProtect Curtain User manual

AJAX

AJAX MotionProtect Curtain User manual

AJAX LeaksProtect User manual

AJAX

AJAX LeaksProtect User manual

AJAX FireProtect 2 Jeweller User manual

AJAX

AJAX FireProtect 2 Jeweller User manual

AJAX FireProtect 2 (Heat) Jeweller User manual

AJAX

AJAX FireProtect 2 (Heat) Jeweller User manual

AJAX DoorProtect Plus User manual

AJAX

AJAX DoorProtect Plus User manual

AJAX FireProtect 2 (Heat) Jeweller User manual

AJAX

AJAX FireProtect 2 (Heat) Jeweller User manual

AJAX FireProtect User manual

AJAX

AJAX FireProtect User manual

AJAX GlassProtect Fibra User manual

AJAX

AJAX GlassProtect Fibra User manual

AJAX CombiProtect User manual

AJAX

AJAX CombiProtect User manual

AJAX FireProtect User manual

AJAX

AJAX FireProtect User manual

AJAX MotionProtect User manual

AJAX

AJAX MotionProtect User manual

AJAX GlassProtect User manual

AJAX

AJAX GlassProtect User manual

AJAX LeaksProtect User manual

AJAX

AJAX LeaksProtect User manual

AJAX MotionProtect User manual

AJAX

AJAX MotionProtect User manual

AJAX MotionProtect User manual

AJAX

AJAX MotionProtect User manual

AJAX HomeSiren User manual

AJAX

AJAX HomeSiren User manual

AJAX LeaksProtect User manual

AJAX

AJAX LeaksProtect User manual

AJAX DoorProtect User manual

AJAX

AJAX DoorProtect User manual

AJAX FireProtect 2 User manual

AJAX

AJAX FireProtect 2 User manual

AJAX MotionProtect User manual

AJAX

AJAX MotionProtect User manual

AJAX MotionProtect Plus Fibra User manual

AJAX

AJAX MotionProtect Plus Fibra User manual

Popular Security Sensor manuals by other brands

Zumtobel ED-SxED manual

Zumtobel

Zumtobel ED-SxED manual

Profort luxSpot manual

Profort

Profort luxSpot manual

Gira 2399 02 operating instructions

Gira

Gira 2399 02 operating instructions

U-Prox WDC user manual

U-Prox

U-Prox WDC user manual

ADWEL WTD-501 operating manual

ADWEL

ADWEL WTD-501 operating manual

PCB Piezotronics 482C16 Installation and operating manual

PCB Piezotronics

PCB Piezotronics 482C16 Installation and operating manual

Bushnell Speed RadaR Gun user manual

Bushnell

Bushnell Speed RadaR Gun user manual

ADEMCO 1875EX installation instructions

ADEMCO

ADEMCO 1875EX installation instructions

Bosch DS840LSN installation instructions

Bosch

Bosch DS840LSN installation instructions

ProMinent DULCOLEVEL Original operating instructions

ProMinent

ProMinent DULCOLEVEL Original operating instructions

GasTech G-SHIELD-FIRE instructions

GasTech

GasTech G-SHIELD-FIRE instructions

Fisher Research Labs XLT-100 operating manual

Fisher Research Labs

Fisher Research Labs XLT-100 operating manual

Samsung ADT SmartThings F-ADT-WTR-1 Setup guide

Samsung

Samsung ADT SmartThings F-ADT-WTR-1 Setup guide

Elko Inels RFSF-18 manual

Elko

Elko Inels RFSF-18 manual

Simon XTi quick guide

Simon

Simon XTi quick guide

WATERS CORPORATION TQ Operator's guide

WATERS CORPORATION

WATERS CORPORATION TQ Operator's guide

Emos P56300 manual

Emos

Emos P56300 manual

schmersal SFB-PN-IRT-8M12-IOP operating instructions

schmersal

schmersal SFB-PN-IRT-8M12-IOP operating instructions

manuals.online logo
manuals.online logoBrands
  • About & Mission
  • Contact us
  • Privacy Policy
  • Terms and Conditions

Copyright 2025 Manuals.Online. All Rights Reserved.