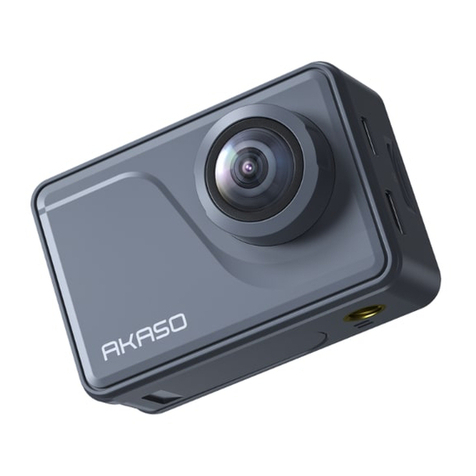
Akaso V50 Pro SE User manual

USER
MANUAL
V50 Pro SE Action Camera

English
CONTENTS
Your V50 Pro SE
Getting Started
Overview of Modes
Customizing Your V50 Pro SE
Connecting To The iSmart Pro+ App
Playing Back Your Content
Deleting Videos and Photos On Your V50 Pro SE
Offloading Your Content
Reformatting Your Micro SD Card
Maintenance Your Camera
Maximizing Battery Life
Battery Storage and Handling
Remote
Mounting Your Camera
Contact US
2
4
5
7
14
15
15
17
17
18
18
18
19
19
21
01

YOUR V50 PRO SE
02 03
1
10
2
6
11
5
7
8
9
12
1413
4
3
1. Power / Mode Button
2. Shutter / Select Button
3. MIC
4. Wi-Fi Indicator
5. Micro HDMI Port
6. Micro SD Slot
7. Mini USB Port
8. Lens
9. Operating Indicator
10. Touch Screen
11. Speaker
12. Tripod Hole
13. Battery Door
Note: Camera does not record sound when it is in the waterproof case.

GETTING STARTED
Welcome to your AKASO V50 Pro SE. To capture video and photos, you need a micro SD
card (sold separately).
MICRO SD CARDS
Use brand name memory cards that meet these requirements:
• micro SD, micro SDHC, or micro SDXC
• Class 10 or UHS-III rating
• Capacity up to 64GB (FAT32)
Note:
1. Please format the micro SD card first in this camera before using. To keep your micro SD
card in good condition, reformat it on a regular basis. Reformatting erases all of your
content, so be sure to offload your photos and videos first.
2. FAT32 format Micro SD card stops recording when the storage of each file is over 4 GB
and starts to record again on a new file.
POWERING ON + OFF
To Power On:
Press and hold the Mode button for three seconds. The camera beeps while the camera
status light is on. When information appears on the display or the camera status screen,
your camera is on.
To Power Off:
Press and hold the Mode button for three seconds. The camera beeps while the camera
status light is off.
SWITCHING MODE
To Switch Mode:
Turn on the camera, tap Mode Shift icon or press Mode button to switch mode.
To Exit Mode:
Press Mode button to exit mode.
TURNING ON / OFF Wi-Fi
To turn on Wi-Fi
Turn on camera, swipe down from the top of the screen with your finger or tap shortcut
key to access to menu. Then tap Wi-Fi icon to turn on Wi-Fi. You can also enter General
Setting to turn on Wi-Fi.
To turn off Wi-Fi
Press and hold Shutter button for 5 seconds to turn off Wi-Fi.
There are 4 modes: Video, Photo, Playback and Setting.
OVERVIEW OF MODES
VIDEO MODE
Video Mode is the default mode when you turn on the camera.
In Video Mode, press Shutter button, the camera starts recording video. Press Shutter
button to stop recording video.
04 05
M
4K/30fps
Video Mode
Video Resolution
Menu
Mode Shift
Image Stabilization
Shotcut Key
Battery Capacity
M
Beep Mic Speaker RF Wi-Fi

PHOTO MODE
Press Mode button once to switch to Photo Mode after you turn on camera.
In Photo Mode, press Shutter button, the camera takes a photo.
PLAYBACK MODE
Press Mode button twice to switch to Playback Mode.
SETTING MODE
Press Mode button three times to switch to Setting Mode.
VIDEO SETTING
1. Video Resolution: 4K 60FPS, 4K 30FPS, 2.7K 30FPS, 1080P 120FPS, 1080P 60FPS,
1080P 30FPS, 720P 240FPS, 720P 120FPS, 720P 60FPS, 720P 30FPS
Default setting is 4K / 30fps.
Note: You cannot select 4K/60FPS, 1080P/120FPS, 720P/240FPS or 720P/120FPS when
Image Stabilization is ON. When capturing video at high resolutions or high frame rates in
warm ambient temperatures, the camera may become warm and use more power.
2. Codec: H.264 / H.265
Default setting is H.264.
A video codec is an electronic circuit or software that compresses or decompresses digital
video. It converts uncompressed video to a compressed format or vice versa.
According to multiple studies, HEVC, High Efficiency Video Coding (H.265) should deliver
up to 50% better compression than H.264 in video on demand (VOD) applications, which
means better quality at half the bit rate. In live encoding, which obviously has to be
performed in real time, the initial expectations are a 35% bandwidth reduction at similar
CUSTOMIZING YOUR V50 PRO SE
06 07
Setup
Video Photo
Effect General
Exit / Back
Shotcut Key
Setting
M
14m
Mode Shift
Shotcut Key
Playback
M
14m
Mode Shift
Video file
Photo file
Video file 0/0
Delete
Exit / Back
Shotcut Key
M
14m
Battery Capacity
Photo Resolution
Mode Shift
Photo Mode

quality levels. Alternatively, HEVC can also enable larger resolution movies, whether 2K or 4K.
In addition, encoding existing SD and HD content with HEVC rather than H.264 will add to
cost savings and/or the ability to stream higher quality video to lower bit rate connections.
Note: You cannot set Codec when camera is at 4K 60FPS video resolution.
3. Image Stabilization: ON / OFF
Default setting is off.
This setting adjusts the footage to offset for motion during capture. The result is smoother
footage, especially in activities with relatively small but fast motion including cycling,
motorcycling, and handheld uses.
4. Video File Length: Unlimited / 1 Min / 3 Min / 5 Min
Default setting is Unlimited.
Set up Video File Length (Loop Recording), you can continuously record video, but save
only the moments that you want. For example, if you select a 5-minute video file length,
only the previous 5 minutes are saved when you press the Shutter button to stop
recording. If you record for 5 minutes and do not press the Shutter button to stop
recording and save, the camera records a new 5-minute interval by recording over your
previous 5 minutes of footage. When the micro SD card is full, the new files will cover the
old one if loop recording is on.
Note: You cannot set Video File Length when camera is at 4K 60FPS video resolution.
5. Time Lapse Interval: OFF / 0.5 Sec / 1 Sec / 3 Sec / 5 Sec / 10 Sec / 30 Sec / 1 Min
Default setting is off.
Time Lapse Video creates video from frames captured at specific intervals. This option lets
you capture a time lapse event and immediately view or share it as a video. Time Lapse
Video is captured without audio.
Select 3 seconds means recording 3 seconds to get one frame per second.
For example: If you select 4K/30FPS and 3 seconds, you need to record 90 seconds, then
you can get 1 second video for 4K/30FPS.
6. Time Lapse Duration: Unlimited / 5 Min / 10 Min / 15 Min / 20 Min / 30 Min / 60 Min
Default setting is Unlimited.
Note: If you want to set Time Lapse Duration, please turn on Time Lapse Interval first.
7. Slow Motion Movie: ON / OFF
Default setting is off.
Slow motion is an effect in film-making whereby time appears to be slowed down.
Note: If you want to select Slow Motion Movie, please turn off Image Stabilization first,
then choose 1080P 120FPS, 720P 240FPS or 720P 120FPS Video Resolution.
8. Fast Motion Movie: OFF / 2x / 4x / 6x / 10x / 15x
Default setting is off.
Action that appears to move faster than normal on the screen, accomplished by filming
the action at less than normal speed in the camera and then projecting it at normal speed.
9. Wind Noise Reduction: ON / OFF
Default setting is off.
Turn on Wind Noise Reduction, it can lower the noise to an acceptable level.
10. Scene Mode: Manual / Water / Riding / Winter / Diving / Night
Default setting is Manual.
11. Date Stamp: OFF / Date / Date&Time
Default setting is Date&Time.
If you select Date&Time, this camera adds date stamp to the videos you take.
PHOTO SETTING
1. Resolution: 20MP / 16MP / 14MP / 10MP / 8MP / 5MP / 2MP
Default setting is 20MP.
2. Time Lapse Interval: OFF / 0.5 Sec / 1 Sec / 3 Sec / 5 Sec / 10 Sec / 30 Sec / 1 Min
Default setting is off.
Time Lapse Photo captures a series of photos at specified intervals. Use this mode to
capture photos of any activity, then choose the best ones later.
08 09
3. Time Lapse Duration: Unlimited / 5 Min / 10 Min / 15 Min / 20 Min / 30 Min / 60 Min
Default setting is Unlimited.
Note: If you want to set Time Lapse Duration, please turn on Time Lapse Interval first.
4. Burst Photo: OFF, 3 shots / 1s, 7 shots / 2s, 15 shots / 4s, 30 shots / 8s
Default setting is off.
Burst captures up to 30 photos in 8 seconds, so it is perfect for capturing fast-moving
activities.
5. Delay Timer: OFF / 3 Sec / 5 Sec / 10 Sec
Default setting is off.
A Delay timer gives a delay between pressing the shutter release and the shutter's firing. It
is most commonly used to let photographers to take a photo of themselves (often with
family).
6. Date Stamp: OFF/ Date/ Date&Time
Default setting is Date&Time.
If you select Date&Time, this camera adds date stamp to the photos you take.
7. Scene Mode: Manual / Outdoor / Indoor / Portrait / Landscape / Night
Default setting is Manual.
8. Picture Quality: S-Fine / Fine / Normal
Default setting is S-Fine.
EFFECT SETTING
1. AE Meter: Center / Average / Spot
Default setting is Center.
In photography, the metering mode refers to the way in which a camera determines
exposure. Cameras generally allow the user to select between center, average or spot
metering modes. The different metering modes allow the user to select the most
appropriate one for use in a variety of lighting conditions.
2. FILTER: None / Black & White / Sepia / Vivid / Natural / Negative / Warm / Coo l/ Red /
Green / Blue
Default setting is None.
3. White Balance: Auto / Daylight / Shade / Tungsten Light / White Fluorescent
Default setting is Auto.
White Balance lets you adjust the color temperature of videos and photos to optimize for
cool or warm lighting conditions. When you change this setting, the display immediately
shows you the effect on your image.
4. EV: -2.0 / -1.0 / +0.0 / +1.0 / +2.0 (Exposure Value)
Default setting is +0.0.
By default, your camera uses the entire image to determine the appropriate exposure level.
However, Exposure lets you select an area that you want the camera to prioritize when
determining exposure. This setting is particularly useful in shots where an important region
might otherwise be over- or underexposed.
When you change this setting, the display immediately shows you the effect on your
image. If you change modes, the camera returns to using the entire scene to determine
the correct level of exposure.
5. ISO: Auto / 50 / 100 / 200 / 400 / 800 / 1600
Default setting is Auto.
ISO determines the camera’s sensitivity to light, and creates a trade-off between brightness
and resulting image noise. Image noise refers to the degree of graininess in the image.
In low light, higher ISO values result in brighter images, but with greater image noise.
Lower values result in lower image noise, but darker images. When you change this setting,
the display immediately shows you the effect on your image.
10 11

GENERAL SETTING
1. Control: Mic / Speaker / Brightness
You can adjust the mic, speaker and brightness of your V50 Pro SE.
2. Sounds: Shutter: ON / OFF
Boot-up: ON / OFF
Beep: ON / OFF
Default setting is on.
You can turn on or off the shutter, boot-up, beep sounds.
3. Distortion Calibration: ON / OFF
Default setting is off.
Turn on Distortion Calibration, it can correct the image distortion.
Note: You cannot select Distortion Calibration when Image Stabilization is on.
4. Angle: Super Wide / Wide / Medium / Narrow
Default setting is Super Wide.
The angle refers to how much of the scene (measured in degrees) can be captured
through the camera lens. Super Wide angle captures the largest amount of the scene,
while Narrow angle captures the least.
5. WIFI: ON / OFF
Default setting is off.
6. RF: ON / OFF (Remote)
Default setting is off.
7. Diving Mode: ON / OFF
Default setting is off.
Turn on Diving Mode, it can compensate for the lack of red light in underwater scenes.
Diving Mode is designed to be used in tropical and blue water, optimized for use between
10 and 80 feet.
8. Date & Time: MM / DD / YY HH / MM / AM or PM
Default setting is MM / DD / YY HH / MM / AM or PM.
9. Screen Saver: OFF / 1Min / 3Min / 5Min
Default setting is 1Min.
Turns off the display after a period of inactivity to save battery life. To turn on the display
again, press any button on the camera.
10. Auto Power Off: OFF / 1Min / 3Min / 5Min
Default setting is 3Min.
Powers off your V50 Pro SE after a period of inactivity to save battery life.
11. Quick Record: ON / OFF
Default setting is off.
If you turn on Quick Record, the camera records video automatically after you turn on
V50 Pro SE.
If you turn on Quick Record and use it as a dash cam, the camera will turn on
automatically if you start your car and will turn off if you stop your car.
12. USB: Storage / PC Camera
If you connect this camera to computer, please select ‘Storage’.
If you want to use this camera as a PC camera, please select ‘PC Camera’.
13. Reset WiFi Setting: Yes / No
Default setting is Yes.
This option can erase the WiFi data of V50 Pro SE.
14. Language: English / Deutsch / Français / Italiano / Español / 日本語/
Simplified Chinese / Traditional Chinese
Default setting is English.
15. Format Card: Yes / No
To keep your micro SD card in good condition, reformat it on a regular basis. Reformatting
erases all of your content, so be sure to offload your photos and videos first.
To reformat your card, please enter General Setting, then scroll through the options to
locate and tap ‘Format Card’, then tap ‘Yes’.
12 13

16. System: FactoryReset: Yes / No
System Info: V50 Pro-TJT08029018_V5
Card Info: Capacity/ Free Space
FactoryReset option resets all settings to their default values.
System Info option let you check the model, version and updated time of your V50 Pro SE.
Card Info option let you check the capacity and free space of your micro SD card.
Some functions cannot be used at the same time. Please refer to the information below.
The iSmart Pro+ app lets you control your camera remotely using a smartphone or tablet.
Features include full camera control, live preview, playback, download, sharing of content
and setting camera.
1. Download iSmart Pro+ from Google Play or Apple Store.
2. Turn on the camera, tap Shotcut Key to turn on Wi-Fi.
3. Turn on Wi-Fi of your mobile phone, connect to the Wi-Fi SSID: ‘AKASO_V50Pro_XXXXX’.
4. Enter the password: 1234567890.
5. Open the app iSmart Pro+.
Note: Please download iSmart DV app if the iSmart Pro+ app does not work.
CONNECTING TO THE ISMART PRO+ APP
1. Enter playback mode. If your micro SD card contains a lot of content, it might take a
minute for it to load.
2. Tap the video or photo file icon.
3. Tap the video or photo file you want to delete.
4. Tap . The selected file will be deleted.
You can also try the following steps to delete video and photo on your V50 Pro SE.
1. Enter playback mode.
2. Tap the video or photo file icon.
3. Tap .
4. Tap the file you want to delete.
5. Tap again. The screen shows ‘Delete This File? Yes / No’.
6. Tap ‘Yes’. The selected file will be deleted.
DELETING VIDEOS AND PHOTOS ON YOUR V50 PRO SE
You can play back your content on the camera’s display, your computer, TV, or smartphone
/ tablet.
You can also play back content by inserting the micro SD card directly into a device, such
as a computer or compatible TV. With this method, playback resolution depends on the
resolution of the device and its ability to play back that resolution.
VIEWING VIDEOS AND PHOTOS ON YOUR V50 PRO SE
1. Enter Playback mode. If your micro SD card contains a lot of content, it might take a
minute for it to load.
2. Tap video or photo file icon.
3. Tap any video or photo file.
4. Tap Forward or Backward icon to playback video or photo files.
PLAYING BACK YOUR CONTENT
14 15
Image Stabilization
Image Stabilization
Image Stabilization
Video File Length
Codec
4K 60FPS,1080P 120FPS,720P 240FPS,720P 120FPS
Slow Motion Movie
Distortion Calibration
4K 60FPS
4K 60FPS

Action Camera
My AlbumCamera
Distcont and exit
Ver 1.0.10
03:00:32
FHD60
99% 25%
PHOTO VIDEO
20180907_161357.JPG
20180907_161352.JPG
20180907_161347.JPG
20180907_161241.JPG
4320 x 3240
09 / 07 / 2018
4320 x 3240
09 / 07 / 2018
4320 x 3240
09 / 07 / 2018
4320 x 3240
09 / 07 / 2018 1 files 4.16MB
1 files 4.56MB
1 files 4.51MB
1 files 4.32MB
2 Files 8.72MB
PHOTO VIDEO
20180907_161357.JPG
20180907_161352.JPG
20180907_161347.JPG
20180907_161241.JPG
4320 x 3240
09 / 07 / 2018
4320 x 3240
09 / 07 / 2018
4320 x 3240
09 / 07 / 2018
4320 x 3240
09 / 07 / 2018 1 files 4.16MB
1 files 4.56MB
1 files 4.51MB
1 files 4.32MB
2 Files 8.72MB
Do you want to download the files?
8.72MB
2 files
CANCEL OK
4
Contents
PHOTO VIDEO
20180907_161357.JPG
20180907_161352.JPG
20180907_161347.JPG
20180907_161241.JPG
4320 x 3240
09 / 07 / 2018
4320 x 3240
09 / 07 / 2018
4320 x 3240
09 / 07 / 2018
4320 x 3240
09 / 07 / 2018 1 files 4.16MB
1 files 4.56MB
1 files 4.51MB
1 files 4.32MB
OFFLOADING YOUR CONTENT TO A COMPUTER
To play back your video and photos on a computer, you must first transfer these files to a
computer. Transferring also frees up space on your micro SD card for new content.
To offload files to a computer using a card reader (sold separately) and your computer’s
file explorer, connect the card reader to the computer, then insert the micro SD card. You
can then transfer files to your computer or delete selected files on your card. Note that
you must use a card reader to offload photos or audio files.
OFFLOADING YOUR CONTENT TO SMARTPHONE OR TABLET
1. Open the ‘iSmart Pro+’ app.
2. Tap ‘Folders icon’ at the left corner of the bottom screen.
3. Tap ‘ ’ at the top screen.
4. Tap the files you want to download.
5. Tap ‘ ‘ at the top screen. The screen shows ‘Do you want to download the files?
CANCEL / OK’.
6. Tap ‘OK’ icon.
Note:
1. If you cannot offload videos or photos to iPhone or iPad, please enter Setting -> Privacy
-> Photos , find "iSmart Pro+" and select "Read and Write".
2. You cannot download 4K or 2.7K video to iPhone and iPad via Wi-Fi app. Please offload
4K or 2.7K videos via card reader.
OFFLOADING YOUR CONTENT
To keep your micro SD card in good condition, reformat it on a regular basis. Reformatting
erases all of your content, so be sure to offload your photos and videos first.
1. Press and hold Mode button for 3 seconds to turn on V50 Pro SE.
2. Enter General Setting.
3. Scroll through the screen to find ‘Format Card’ option.
4. Tap ‘Format Card’, the screen shows ‘Yes/ No.’
5. Tap ‘Yes’, the screen shows ‘Please wait’. Then you format your micro SD card successfully.
REFORMATTING YOUR MICROSD CARD
16 17

Follow these guidelines to get the best performance from your camera:
1. For best audio performance, shake the camera or blow on the mic to remove debris
from the microphone holes.
2. To clean the lens, wipe it with a soft, lint-free cloth. Do not insert foreign objects around
the lens.
3. Don’t touch the lens with fingers.
4. Keep the camera away from drops and bumps, which may cause damage to the parts
inside.
5. Keep the camera away from high temperature and strong sunshine to avoid being
damaged.
MAINTENANCE YOUR CAMERA
The camera contains sensitive components, including the battery. Avoid exposing your
camera to very cold or very hot temperatures. Low or high temperature conditions may
temporarily shorten the battery life or cause the camera to temporarily stop working
properly. Avoid dramatic changes in temperature or humidity when using the camera, as
condensation may form on or within the camera.
Do not dry the camera or battery with an external heat source such as a microwave oven
or hair dryer. Damage to the camera or battery caused by contact with liquid inside the
camera is not covered under the warranty.
Do not store your battery with metal objects, such as coins, keys or necklaces. If the
battery terminals come in contact with metal objects, this may cause a fire.
Do not make any unauthorized alterations to the camera. Doing so may compromise
safety, regulatory compliance, performance, and may void the warranty.
BATTERY STORAGE AND HANDLING Power Button
Press the Power Button for 3s to turn on / off the remote.
How to Connect the Remote to Camera?
1. Press Power / Mode Button to turn on the camera.
2. Enter Setup→General, turn on the RF.
3. Turn on the remote.
Power Button
Video Button
Photo Button
Splashproof only, not waterproof
REMOTE
Attach your camera to helmets, gear and equipment.
MOUNTING YOUR CAMERA
18 19
If the battery reaches 0% while recording, the camera saves the file and powers off.
To maximize battery life, follow these guidelines when possible:
• Turn off Wireless Connections.
• Capture video at lower frame rates and resolutions.
• Use Screen Saver setting.
MAXIMIZING BATTERY LIFE
WARNING: Do not drop, disassemble, open, crush, bend, deform, puncture, shred,
microwave, incinerate or paint the camera or battery. Do not insert foreign objects into the
battery opening on the camera. Do not use the camera or the battery if it has been
damaged—for example, if cracked, punctured or harmed by water. Disassembling or
puncturing the battery can cause an explosion or fire.

For any inquiries, issues or comments concerining our products, please send E-mail to the
address below or call us. We will respond as soon as possible.
E-mail: [email protected]
CONTACT US
20 21
English

INHALTSVERZEICHNIS
Ihre V50 Pro SE
Erste Schritte
Übersicht über die Modi
Anpassen Ihrer V50 Pro SE
Verbindung mit der iSmart Pro+ App
Wiedergabe der Inhalte
Löschung Videos und Fotos auf V50 Pro SE
Abladung der Inhalte
Reformatting Your Microsd Card
Wartung der Kamera
Maximieren der Batterielebensdauer
Batterien Lagerung und Behandlung
Fernbedienung
Anbringen der Kamera
Kontakt
23
25
26
28
35
36
36
38
38
39
39
39
40
41
42
22
Deutsch

IHRE V50 PRO SE
23 24
1
10
2
6
11
5
7
8
9
12
1413
4
3
1. Einschalt / Modus Taste
2. Auslöser / Auswahl Taste
3. Mikrofon
4. WiFi Anzeige
5. Micro HDMI Anschluss
6. Micro SD Kartenschlitz
7. Mini USB Port
8. Linse
9. Betriebsanzeige
10. Touchscreen
11. Lautsprecher
12. Stativgewinde
13. Akkufach
Hinweis: Kamera zeichnet keinen Ton auf, wenn es in dem wasserdichten
Gehäuse ist.

ERSTE SCHRITTE
Willkommen bei Ihrer AKASO V50 Pro SE. Zur Erfassung von Videos und Fotos, benötigen
Sie eine Micro SD Karte (separat erhältlich).
Micro SD Karten
Verwenden Sie Markennamen Speicherkarten, die diese Anforderungen erfüllen:
• Micro SD, micro SDHC oder micro SDXC
• Klasse 10 oder UHS-III Bewertung
• Kapazität bis zu 64GB (FAT32)
Hinweis:
1. Formatieren Sie die Micro SD-Karte zuerst in dieser Kamera, bevor sie zu verwenden.
Um Ihre Micro SD-Karte in gutem Zustand zu halten, formatieren Sie es auf einer
regelmäßigen Basis. Neuformatierung löscht alle Ihre Inhalte, so sein sicher, zuerst Ihre
Fotos und Videos abzuladen.
2. Micro SD-Karte mit FAT32-Format stoppt die Aufnahme, wenn die Speicherung der
Dateien über 4 GB und beginnt wieder aufzunehmen auf eine neue Datei.
EIN UND AUSSCHALTEN
Zum Einschalten
Drücken und halten Sie die Modus-Taste für drei Sekunden. Die Kamera piept, während
die Kamera Status-LED leuchtet. Wenn Informationen auf dem Display oder den
Kamerastatusbildschirm angezeigt wird, ist Ihre Kamera ein.
Zum Ausschalten
Drücken und halten Sie die Modus-Taste für drei Sekunden. Die Kamera piept, während
das Kamera-Statuslicht ausgeschaltet ist.
UMSCHALTMODUS
Zum Umschaltmodus
Schalten Sie die Kamera ein, tippen auf Modusumschalt Symbol oder drücken die Modus
Taste um den Modus zu wechseln.
Modus zu beenden
Drücken Sie die Modus-Taste, um Modus zu beenden.
EIN- / AUSSCHALTEN Wi-Fi
Wi-Fi Einschalten
Schalten Sie die Kamera ein, wischen mit dem Finger vom oberen Rand des Bildschirms
nach unten oder tippen auf Schnelltaste das Tastenkürzel zum Menü. Tippen Sie dann auf
WiFi Symbol um Wi Fi einzuschalten. Sie können auch in Allgemeine Einstellungen Wi Fi
einschalten.
Wi-Fi Ausschalten
Drücken und halten Sie die Auslöser-Taste für 5 Sekunden um Wi-Fi auszuschalten.
Es gibt 4 Modi: Video, Foto, Wiedergabe und Einstellung.
ÜBERBLICK ÜBER DIE MODI
VIDEOMODUS
Video-Modus ist der Standardmodus, wenn Sie die Kamera einschalten.
Im Video-Modus, drücken Sie die Auslöser-Taste, und die Kamera beginnt mit der
Videoaufnahme. Drücken Sie die Auslöser-Taste um die Videoaufnahme zu stoppen.
25 26
Videomodus
Videoauflösung
Menü
Modusumschalt
Bildstabilisierung
Schnelltaste
Batteriekapazität
Wi-Fi
M
4K/30fps
M
Beep Mic Speaker RF Wi-Fi
M
4K/30fps

FOTOMODUS
Drücken Sie die Modus-Taste einmal, um zum Foto-Modus zu wechseln nachdem
Einschalten der Kamera.
Im Foto-Modus, drücken Sie die Auslöser-Taste und die Kamera nimmt ein Foto auf.
WIEDERGABEMODUS
Drücken Sie die Modus-Taste zweimal, um zu Wiedergabemodus zu wechseln.
Einstellungsmodus
Drücken Sie die Modus-Taste drei Mal, um zu Einstellungsmodus zu wechseln.
VIDEOEINSTELLUNG
1. Videoauflösung: 4K 60FPS, 4K 30FPS, 2.7K 30FPS, 1080P 120FPS, 1080P 60FPS,
1080P 30FPS, 720P 240FPS, 720P 120FPS, 720P 60FPS, 720P 30FPS
Die Standardeinstellung ist 4K / 30fps.
Hinweis: Sie können 4K / 60FPS, 1080P / 120FPS, 720P / 240fps oder 720P / 120FPS nicht
wählen, wenn die Bildstabilisierung ist eingeschaltet. Wenn Video bei hohen Auflösungen
oder hohen Bildraten in warmen Umgebungstemperaturen erfasst wird, kann die Kamera
warm werden und mehr Energie verbrauchen.
2. Videokodierer: H.264 / H.265
Die Standardeinstellung ist H.264.
Ein Videokodierer ist eine elektronische Schaltung oder Software, die digitale Videos
komprimiert oder dekomprimiert. Er konvertiert unkomprimierte Videos in ein
komprimiertes Format oder umgekehrt.
Laut mehrerer Studien sollte HEVC, High Efficiency Video Coding (H.265) 50% bessere
Komprimierung in „video on demand“ Diensten (VOD) ausgeben, als H.264, was bessere
ANPASSEN DER V50 PRO SE
27 28
1/1
M
14m
M
14m
Schnelltaste
Batterieleistung
Fotoauflösung
Modusumschalt
Fotomodus
Schnelltaste
Wiedergabe Modusumschalt
Fotodatei
Videodatei
Löschen
Beenden / Zurück
M
14m
Setup
Video Photo
Effect General
Beenden / Zurück
Schnelltaste
Modusumschalt
Einstellung

höherer Auflösung ermöglichen, sei es in 2K oder 4K. Außerdem kann die Kodierung von
bestehenden SD oder HD Inhalten mit HEVC anstatt mit H.264 zur Kosteneinsparung und /
oder Fähigkeit beitragen, Videos mit hoher Auflösung bei niedrigerer Bitrateverbindung zu
streamen, beitragen.
Hinweis: Sie können Codec nicht einstellen, wenn die Kamera bei 4K 60FPS Video
Auflösung ist.
3. Bildstabilisierung: AN / AUS
Die Standardeinstellung ist Aus.
Diese Einstellung gleicht Bewegungen während der Aufnahme aus. Das Ergebnis ist eine
geschmeidigere Aufnahme, besonders bei Aktivitäten mit relativ kleinen, aber schnellen
Bewegungen, einschließlich Radfahren, Motorradfahren und bei freihändiger Nutzung.
4. Videodatei Länge: Unbegrenzt / 1 Min / 3 Min / 5 Min
Die Standardeinstellung ist Unbegrenzt.
Richten Sie Videodatei Länge (Loop-Aufnahme), Sie können Video kontinuierlich
aufzeichnen, aber nur die Momente Sie wollen speichern. Zum Beispiel, wenn Sie eine 5
minütigen Videodatei wählen, werden nur die vorherigen 5 Minuten gespeichert, nachdem
Sie die Auslöser-Taste für Stoppen der Aufnahme gedrückt haben. Wenn Sie für 5 Minuten
aufzeichnen und die Auslöser-Taste für Stoppen und Speichern der Aufnahme nicht
drücken, nimmt die Kamera ein neues 5-Minuten-Intervall und das letzten 5 Minuten
Filmmaterial wird ersetzt. Wenn die Micro-SD-Karte voll ist, werden die neuen Dateien die
alten decken, wenn die Loop-Aufnahme eingeschaltet ist.
Hinweis: Sie können Videodatei-Länge nicht eingestellen, wenn die Kamera bei 4K 60FPS
Video-Auflösung ist.
5. Zeitraffer-Intervall: OFF / 0.5 Sec / 1 Sec / 3 Sec / 5 Sec / 10 Sec / 30 Sec / 1 Min
Standardeinstellung ist AUS.
Zeitraffer-Video erstellt Video von Frames die in bestimmten Abständen erfasst werden.
Mit dieser Option können Sie eine Zeitraffer-Ereignis erfassen und es sofort ansehen oder
als ein Video teilen. Zeitraffer-Video ist ohne Ton eingefangen.
Zum Beispiel: Wenn Sie 4K / 30 FPS und 3 Sekunden wählen, müssen Sie 90 Sekunden
aufzeichnen und bekommen dann 1 Sekunde Video für 4K / 30FPS.
6. Zeitraffer-Dauer: Unbegrenzt / 5 Min / 10 Min / 15 Min / 20 Min / 30 Min / 60 Min Die
Standardeinstellung ist Unbegrenzt.
Hinweis: Wenn Sie Zeitraffer-Dauer einstellen möchten, schalten Sie bitte Zeitraffer-
Intervall zuerst.
7. Zeitlupe-Film: AN / AUS
Standardeinstellung ist aus.
Zeitlupe ist ein Filmemachereffekt, wobei die Zeit verlangsamt zu sein scheint.
Hinweis: Wenn Sie Zeitlupe-Film auswählen möchten, schalten Sie bitte Bildstabilisierung
zuerst aus, wählen dann 1080P 120FPS, 720P 240fps oder 720P 120FPS Videoauflösung.
8. Zeitraffer-Film: AUS / 2x / 4x / 6x / 10x / 15x
Die Standardeinstellung ist OFF (AUS).
Aktion, die schneller als normal auf dem Bildschirm zu bewegen scheint, erreicht durch die
Wirkung bei weniger als normaler Geschwindigkeit in der Kamera zu filmen und dann mit
normaler Geschwindigkeit zu projizieren.
9. Windgeräuschreduktion: AN / AUS
Die Standardeinstellung ist aus.
Schalten Sie die Windgeräuschreduktion ein, es kann das Geräusch auf ein akzeptables
Niveau senken.
10. Szenenmodus: Manuell / Wasser / Reiten / Winter / Tauchen / Nacht
Die Standardeinstellung ist Manuell.
11. Datumsstempel: AUS / Datum / Datum & Uhrzeit
Die Standardeinstellung ist Datum & Uhrzeit.
Wenn Sie Datum & Uhrzeit auswählen, fügt diese Kamera Datumsstempel auf die Videos,
die Sie aufnehmen.
FOTO EINSTELLUNG
1. Auflösung: 20MP / 16MP / 14MP / 10MP / 8MP / 5MP / 2MP
Die Standardeinstellung ist 20MP.
29 30

2. Zeitraffer-Intervall: AUS / 0.5Sec / 1Sec / 3Sec / 5Sec / 10Sec / 30Sec / 1Min
Standardeinstellung ist AUS.
Zeitraffer-Foto fängt eine Reihe von Fotos in bestimmten Intervallen. In diesem Modus
erfassen Fotos von einer Aktivität und dann die besten auswählen.
3. Zeitrafferdauer: Unbegrenzt / 5 Min / 10 Min / 15 Min / 20 Min / 30 Min / 60 Min
Die Standardeinstellung ist Unbegrenzt.
Hinweis: Wenn Sie Zeitraffer-Dauer einstellen möchten, schalten Sie bitte Zeitraffer-
Intervall zuerst ein.
4. Serienfoto: AUS, 3 Schüsse / 1s, 7 Schüsse / 2s, 15 Schüsse / 4s, 30 Schüsse / 8s
Die Standardeinstellung ist OFF (AUS).
Burst fängt bis zu 30 Fotos in 8 Sekunden auf, so ist es ideal für die Aufnahme sich schnell
bewegender Aktivitäten.
5. Zeitschalter: AUS / 3 S / 5 S / 10 S
Die Standardeinstellung ist ausgeschaltet.
Der Zeitschalter ermöglicht eine Verzögerung zwischen Betätigen des Auslösers und der
tatsächlichen Aufnahme. Es wird am häufigsten verwendet, ein Foto von sich selber
aufnehmen zu lassen (oft mit Familie).
6. Datumsstempel: AUS / Datum / Datum & Uhrzeit
Die Standardeinstellung ist Datum & Uhrzeit.
Wenn Sie Datum & Uhrzeit auswählen, fügt diese Kamera Datumsstempel auf die Fotos zu,
die Sie aufnehmen.
7. Szenenmodus: Manuell / Outdoor / Indoor / Porträt / Landschaft / Nacht
Die Standardeinstellung ist Manuell.
8. Bildqualität: S-Fein / Fein / Normal
Die Standardeinstellung ist S-Fein.
EFFEKT EINSTELLUNG
1. AE Meter: Zentrum/ Durchschnitt / Spot
Die Standardeinstellung ist Zentrum.
In der Fotografie, bezieht sich der Messmodus auf die Art und Weise, in der eine
Kamerabelichtung bestimmt. Die Benutzer können im allgemeinen zwischen den Zentrum,
Durchschnitt, oder Spot-Messmodi auszuwählen. Die verschiedenen Messmodi
ermöglichen es dem Benutzer, die am besten geeigneten für die Verwendung von
unterschiedlichen Lichtverhältnissen zu wählen.
2. FILTER: Kein / Schwarzweiß / Sepia / Vivid / Natural / Negativ / Warm / Kühl / Rot /
Grün / Blau Die Standardeinstellung ist Kein.
3. Weißabgleich: Auto / Tageslicht / Schatten / Glühlampenlicht / Weiß Fluoreszierend
Die Standardeinstellung ist Auto.
Weißabgleich macht die Farbtemperatur von Videos und Fotos einstellbar und optimierbar
für kühle oder warme Lichtbedingungen. Wenn Sie diese Einstellung ändern, zeigt es Ihnen
sofort auf dem Display die Auswirkungen des Bildes.
4. EV (Belichtung): -2.0 / -1.0 / +0.0 / +1.0 / +2.0 (Belichtungswert)
Die Standardeinstellung ist +0,0.
Standardmäßig wird Ihre Kamera das gesamte Bild verwendet, um das entsprechende
Expositionsniveau zu bestimmen. Allerdings können Sie durch Belichtung(Exposure) einen
Bereich auswählen, die Sie die Kamera priorisieren wollen, beim Bestimmen der Belichtung.
Diese Einstellung ist besonders nützlich in Situationen, wo eine wichtige Stelle eher über-
oder unterbelichtet sein könnte.
Wenn Sie diese Einstellung ändern, zeigt es Ihnen sofort auf dem Display die Auswirkungen
des Bildes. Wenn Sie den Modus wechseln, kommt die Kamera zur gesamten Szene zurück,
um einen richtigen Belichtungsgrad zu bestimmen.
5. ISO: Auto / 50 / 100 / 200 / 400 / 800 / 1600
Die Standardeinstellung ist Auto.
ISO bestimmt die Empfindlichkeit der Kamera auf Licht und erzeugt einen Kompromiss
zwischen Helligkeit und die daraus resultierende Bildrauschen. Das Bildrauschen bezieht
sich auf den Grad der Körnigkeit des Bildes.
Bei schlechten Lichtverhältnissen ergeben höhere ISO-Werte hellere Bilder, aber mit
größerem Bildrauschen. Niedrigere Werte führen zu geringeren Bildrauschen, aber dunkler
Bilder. Wenn Sie diese Einstellung ändern, zeigt es Ihnen sofort auf dem Display die
Auswirkungen des Bildes.
31 32

ALLGEMEINE EINSTELLUNG
1. Kontrolle: Mic / Lautsprecher / Helligkeit
Sie können das Mikrofon, den Lautsprecher und die Helligkeit des V50 Pro SE anpassen.
2. Klänge: Auslöser: AN /AUS Hochfahren: EIN / AUS Piepston: EIN / AUS
Die Standardeinstellung ist AN.
Sie können den Auslöser, Hochfahren, Piepston aktivieren oder deaktivieren.
3. Verzerrungskalibrierung: AN / AUS
Die Standardeinstellung ist aus.
Schalten Sie die Verzerrungskalibrierung an, somit die Bildverzerrung korrigiert werden
kann.
Hinweis: Sie können keine Verzerrungskalibrierung wählen, wenn Bildstabilisierung
eingeschaltet ist.
4. Winkel: Super Breit / Breit / Medium / Schmal
Die Standardeinstellung ist Super Breit.
Der Winkel bezieht sich darauf, wie viel von der Szene (in Grad gemessen) durch das
Objektiv der Kamera eingefangen werden. Superbreitwinkel fängt die größte Menge der
Szene ein, während schmaler Winkel die am wenigsten.
5. WIFI: AN / AUS
Die Standardeinstellung ist AUS.
6. RF: EIN / AUS (Remote)
Die Standardeinstellung ist AUS.
7. Tauch-Modus: AN / AUS
Die Standardeinstellung ist AUS.
Schalten Sie den Tauch-Modus an, somit es für den Mangel an roten Licht in
Unterwasserszenen kompensieren kann. Der Tauch-Modus ist so konzipiert, in tropischen
und blaues Wasser zu verwenden, optimiert für den Einsatz zwischen 10 und 80 Fuß.
8. Datum & Zeit: MM / TT / JJ HH / MM / AM oder PM
Die Standardeinstellung ist MM / TT / JJ HH / MM / AM oder PM.
9. Bildschirmschoner: AUS / 1min / 3min / 5min
Die Standardeinstellung ist 1Min.
Schaltet die Anzeige nach einer gewissen Zeit der Inaktivität aus, um Batterie zu sparen.
Um die Anzeige wieder anzuschalten, drücken Sie irgendeine beliebige Taste der Kamera.
10. Autom. Ausschalten: AUS / 1 Min. / 1 Min. / 3 Min. / 5 Min.
Die Standardeinstellung ist 3Min.
Schaltet Ihre V50Pro SE nach einer gewissen Zeit der Inaktivität um die Batterie zu schonen.
11. Schnellaufnahme: AN / AUS
Die Standardeinstellung ist AUS.
Wenn die Schnellaufnahme eingeschaltet ist, nimmt die Kamera Videos automatisch nach
dem Einschalten V50 Pro SE auf.
Wenn die Kamera als eine Dashcam verwendet und die Schnellaufnahme eingeschaltet ist,
wird die Kamera automatisch eingeschaltet, wenn Sie Ihr Auto starten, und ausgeschaltet,
wenn Sie Ihr Auto stoppen.
12. USB: Speicher / PC Kamera
Wenn Sie diese Kamera an den Computer anschließen, wählen Sie bitte ‚Speicher‘.
Wenn Sie diese Kamera als PC Kamera verwenden möchten, wählen Sie bitte ‚PC Kamera‘.
13. WiFi-Einstellung: Ja / Nein
Die Standardeinstellung ist Ja.
Diese Option kann die WiFi-Daten von V50 Pro SE löschen.
14. Sprache: English / Deutsch / Français / Italiano / Español / 日本語/ 简体中文
Die Standardeinstellung ist Englisch.
15. Karte Formatieren: Ja / Nein
Um die Micro SD-Karte in gutem Zustand zu halten, formatieren Sie es bitte auf einer
regelmäßigen Basis. Neuformatierung löscht alle Ihre Inhalte, so sein sicher, zuerst Ihre
Fotos und Videos abzuladen.
Um die Karte zu formatieren, gehen Sie zu “Allgemeine Einstellungen“, blättern dann durch
die Optionen zu „Lokal“ und tippen auf „Karte Formatieren“ und dann auf ‚Ja‘.
33 34
Other manuals for V50 Pro SE
9
Table of contents
Languages:
Other Akaso Action Camera manuals

Akaso
Akaso Brave 6 Plus User manual

Akaso
Akaso Brave 7 User manual

Akaso
Akaso V50 Pro SE User manual

Akaso
Akaso V50 Elite User manual

Akaso
Akaso EK7000 Pro User manual

Akaso
Akaso EK7000 User manual

Akaso
Akaso V50 Elite User manual

Akaso
Akaso EK7000 User manual

Akaso
Akaso Keychain User manual

Akaso
Akaso V50 Pro SE User manual

Akaso
Akaso Brave 7 LE User manual

Akaso
Akaso Brave 4 Elite User manual

Akaso
Akaso BRAVE 4 PRO User manual

Akaso
Akaso Brave 7 LE User manual

Akaso
Akaso EK7000 User manual

Akaso
Akaso V50X User manual

Akaso
Akaso Brave 7 User manual

Akaso
Akaso V50 Pro SE User manual

Akaso
Akaso V50 Pro SE User manual

Akaso
Akaso Brave 5 User manual