OOppttiioonnaalleess ZZuubbeehhöörr
• Optionales Zubehör finden Sie im aktuellen
AKG-Katalog/Folder oder auf www.akg.com.
hr Händler berät Sie gerne.
BBeessoonnddeerree MMeerrkkmmaallee
• Professionelles Miniatur-Ansteckmikrofon
• Kondensatorwandler mit nierenförmiger Richt-
charakteristik für natürlichen Klang.
• Frequenzgang auf Sprachübertragung abge-
stimmt.
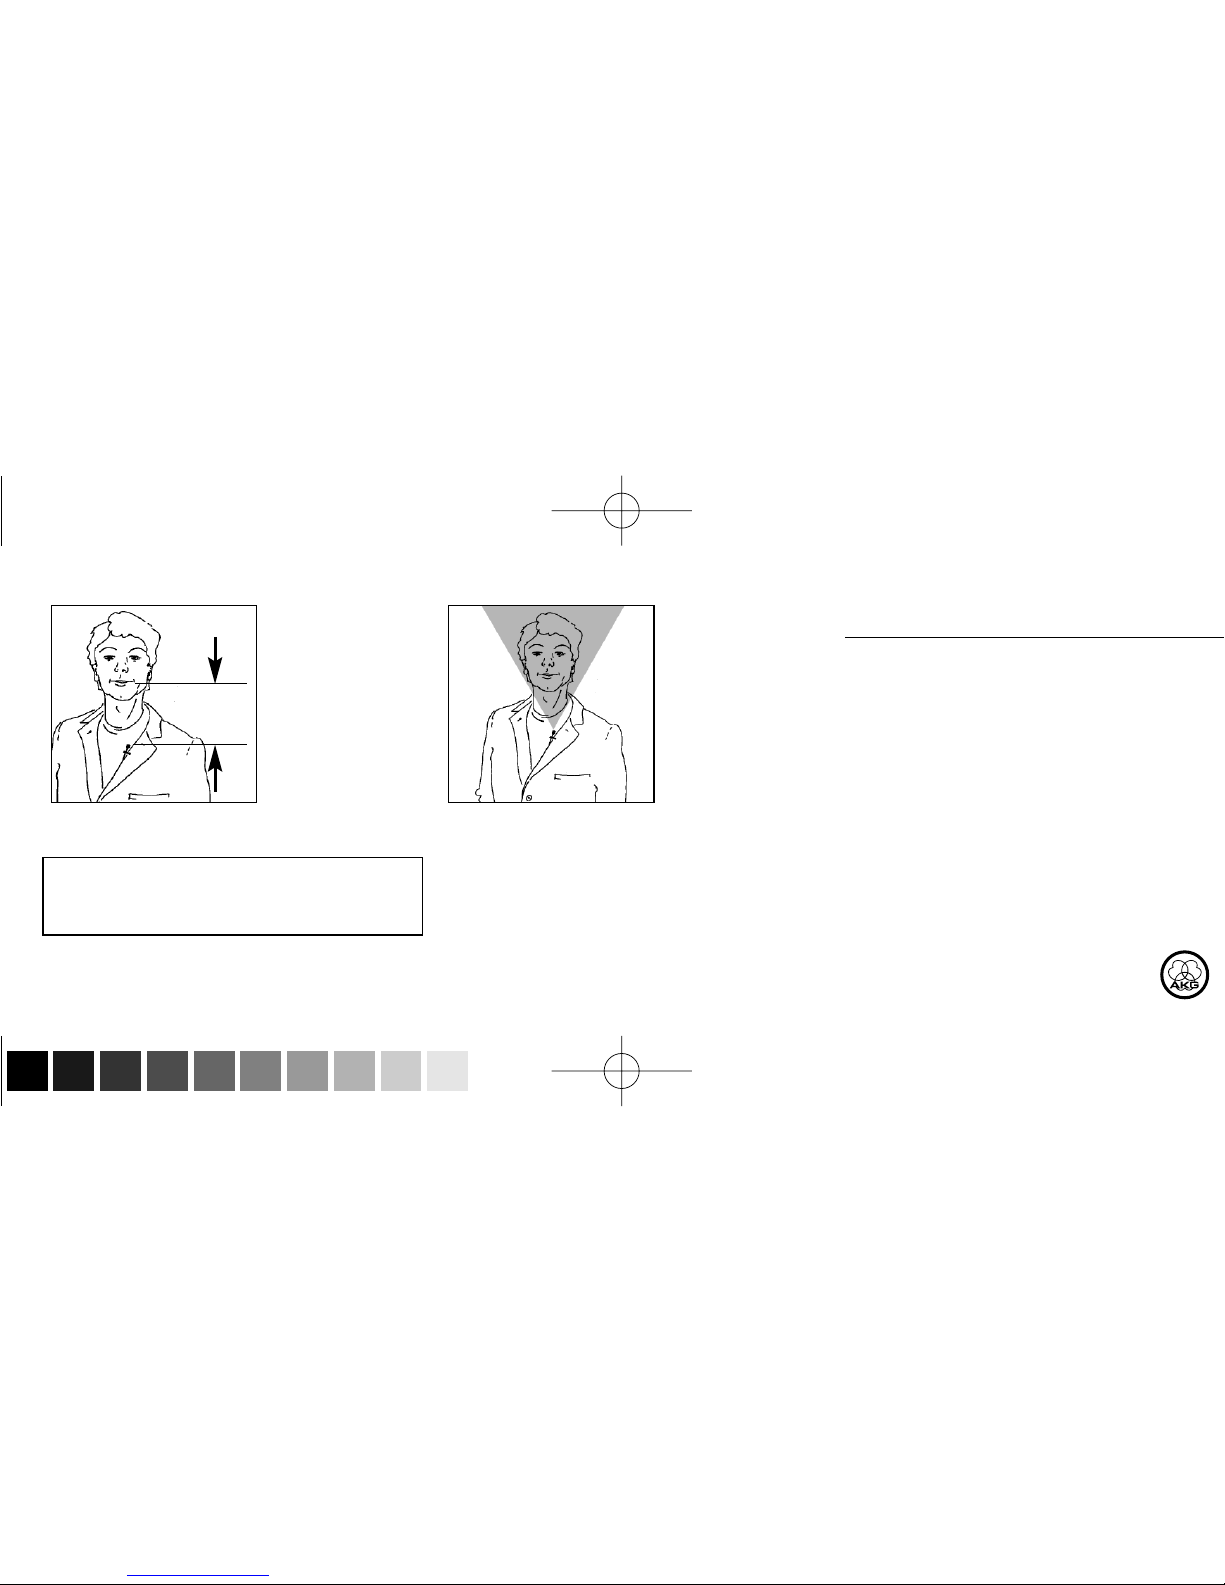
• Geeignet zur Befestigung an der Kleidung.
KKuurrzzbbeesscchhrreeiibbuunngg
Das CK 99 L ist ein professionelles Miniatur-Kon-
densator-Ansteckmikrofon mit nierenförmiger
Richtcharakteristik. Auf Grund der kleinen Abmes-
sungen eignet sich das Mikrofon ideal für alle
Anwendungen, wo unauffällige Mikrofontechnik
und große Bewegungsfreiheit der Anwenderin/des
Anwenders gefordert werden.
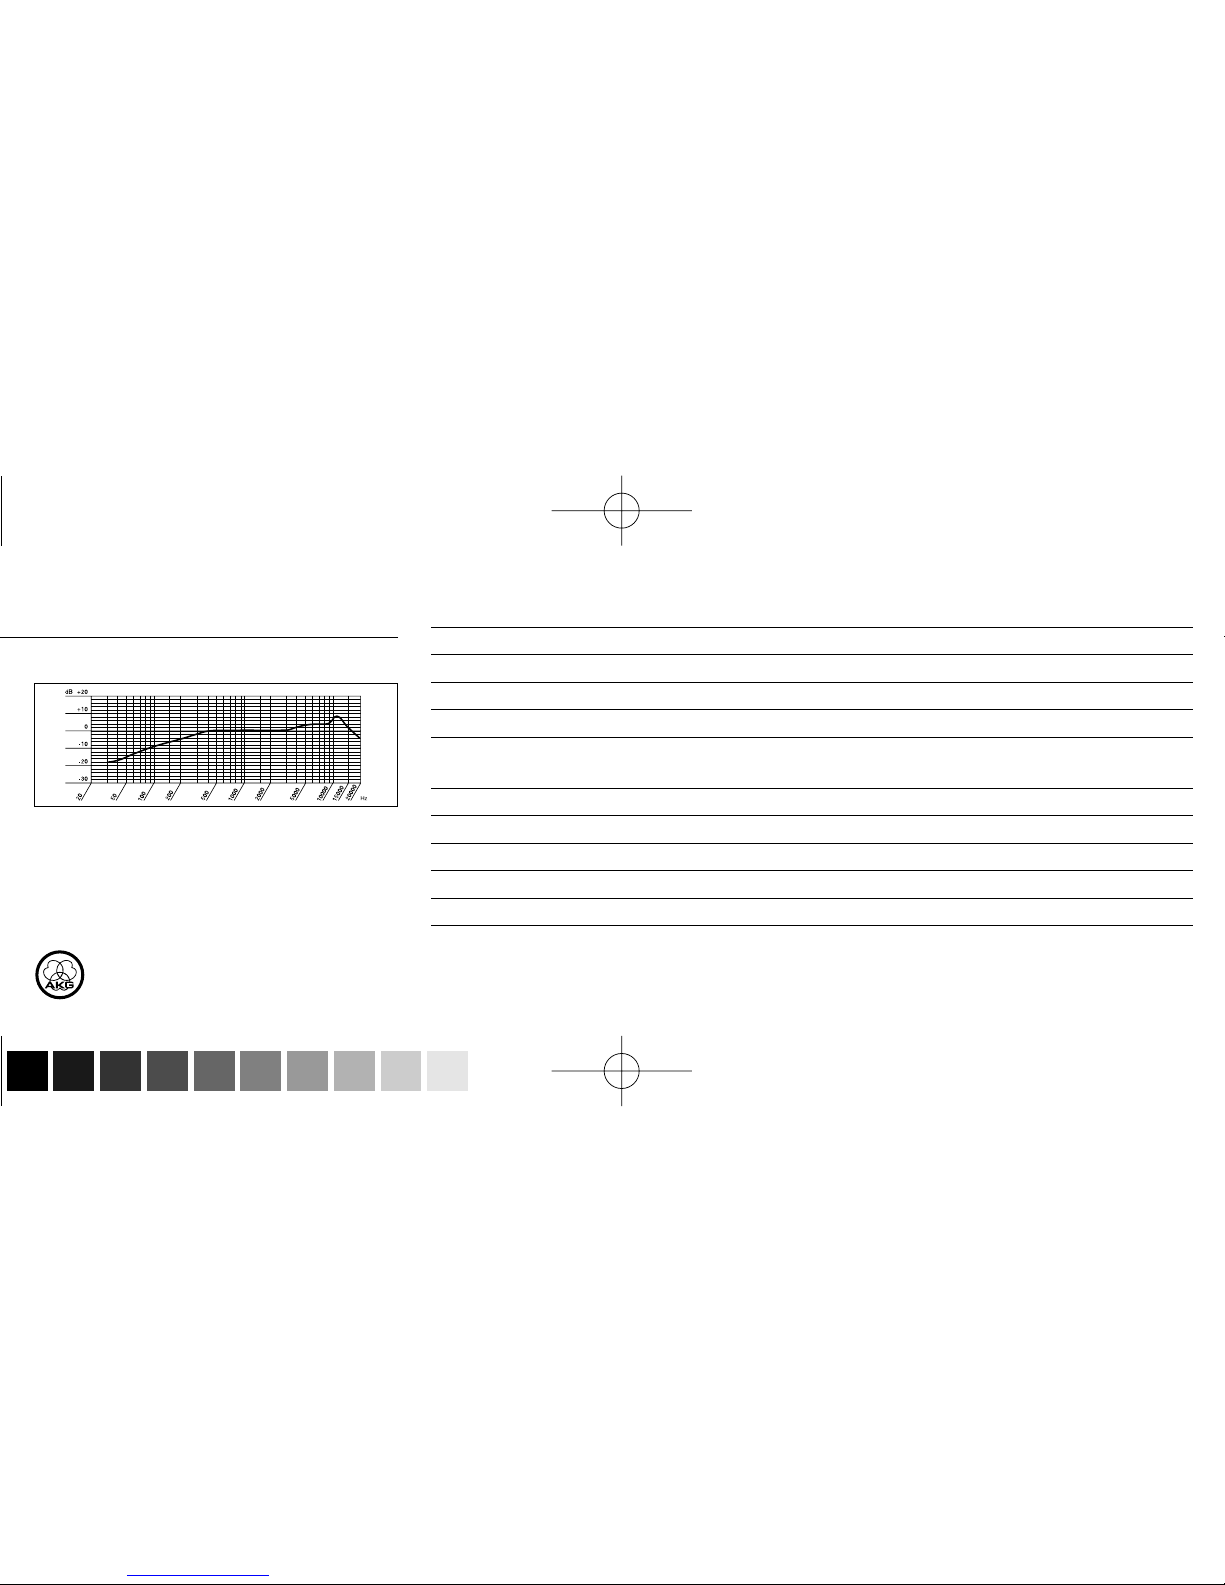
Der Frequenzgang des Mikrofons ist speziell auf
Sprachübertragung ausgelegt.
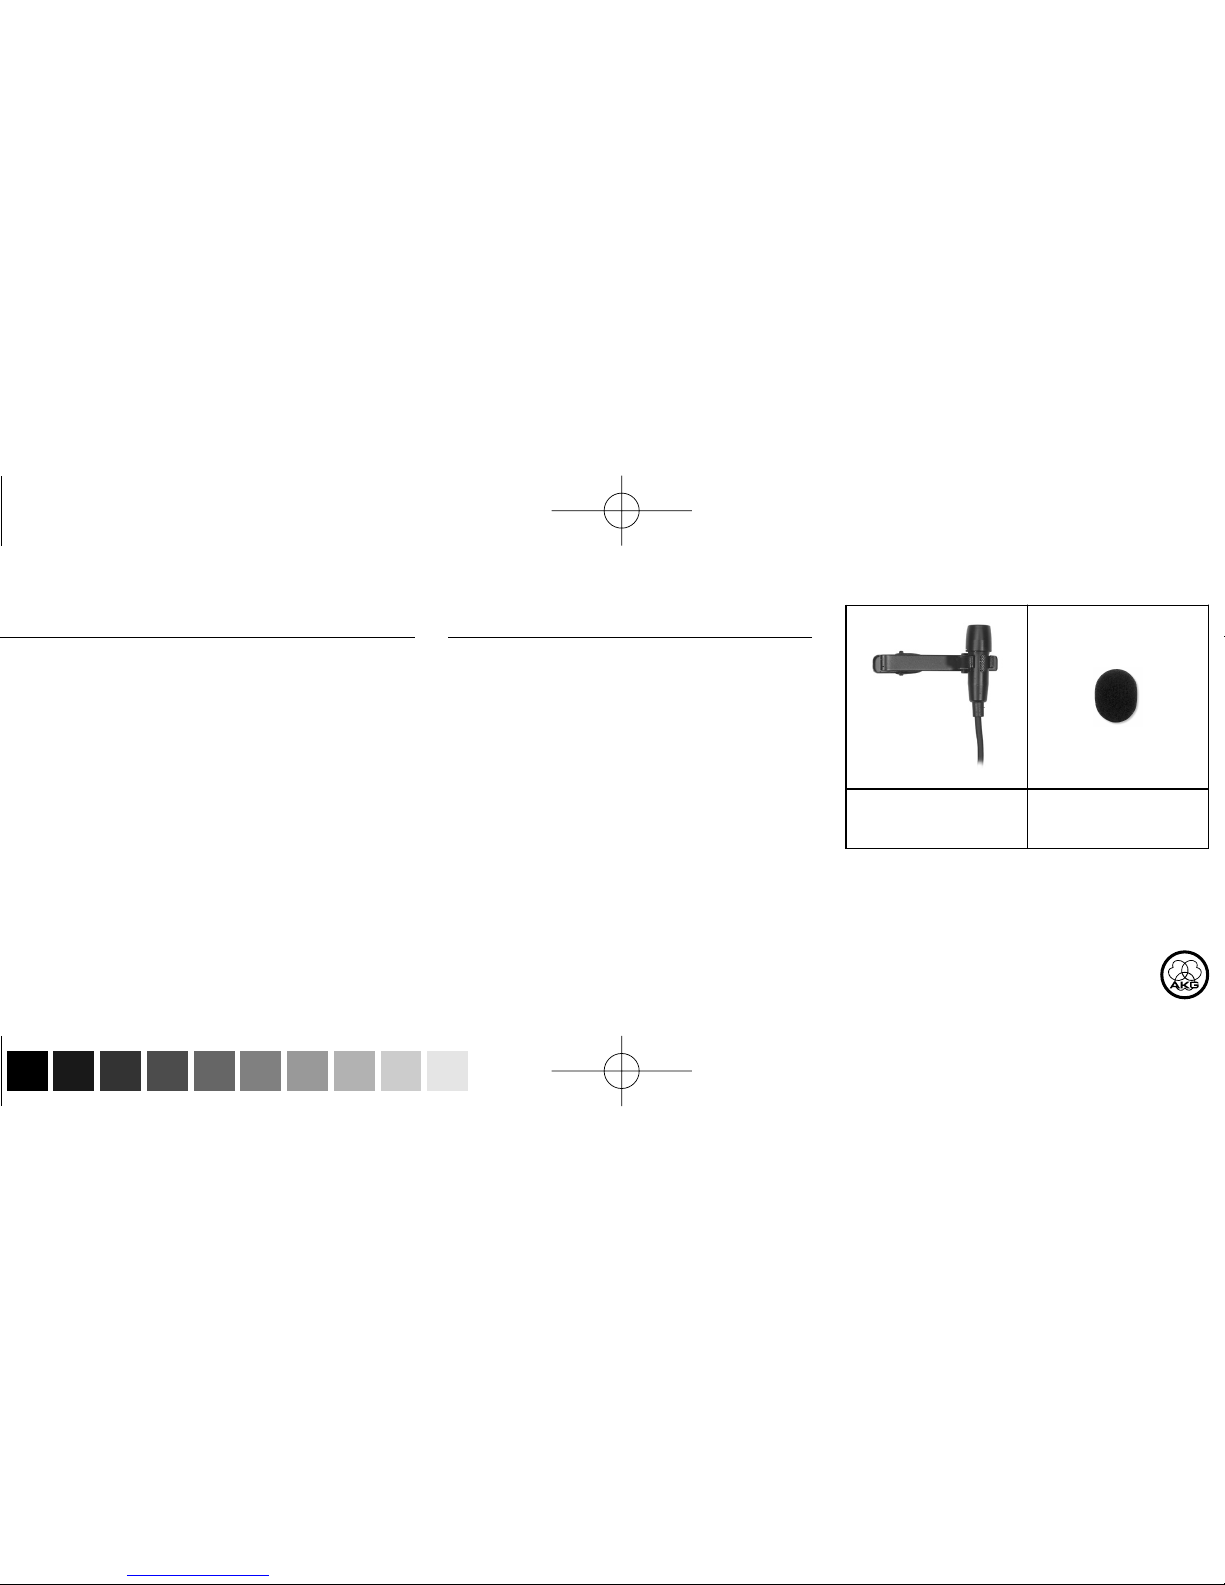
Ein externer Windschutz für die Dämpfung von
Windgeräuschen beim Einsatz im Freien ist im
Lieferumfang enthalten.
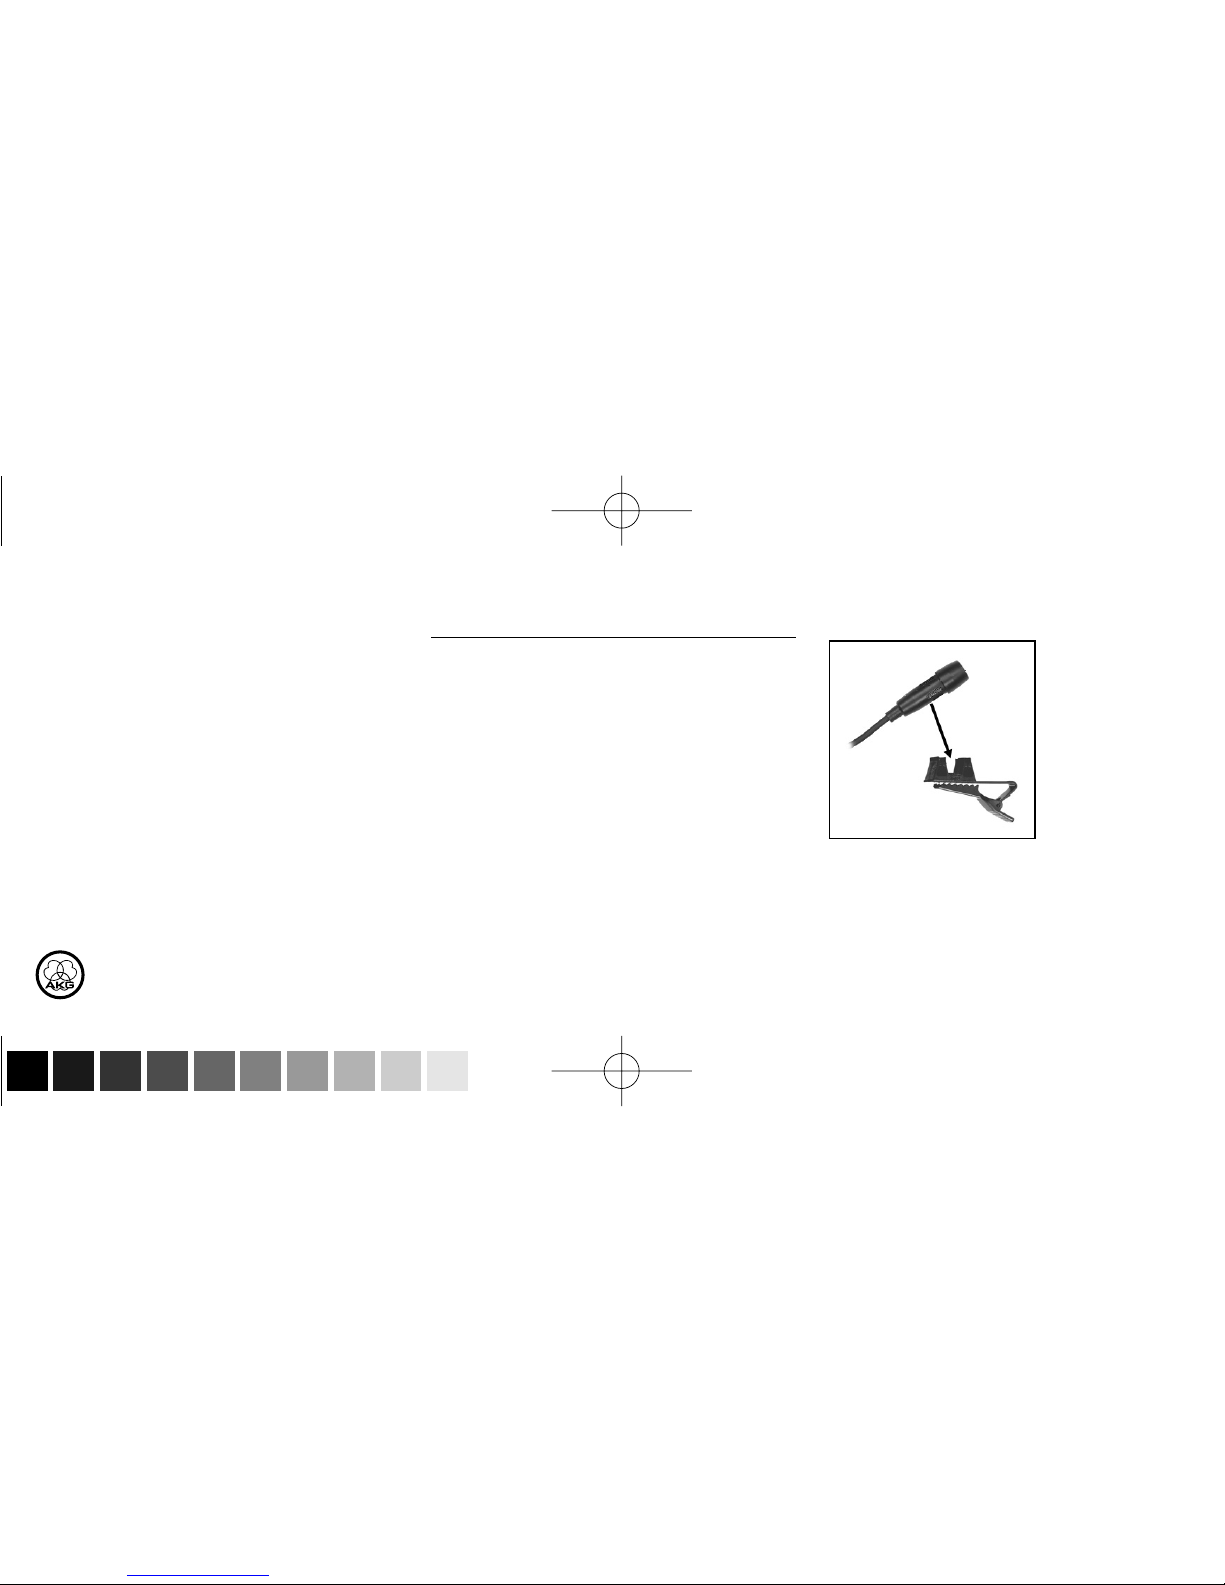
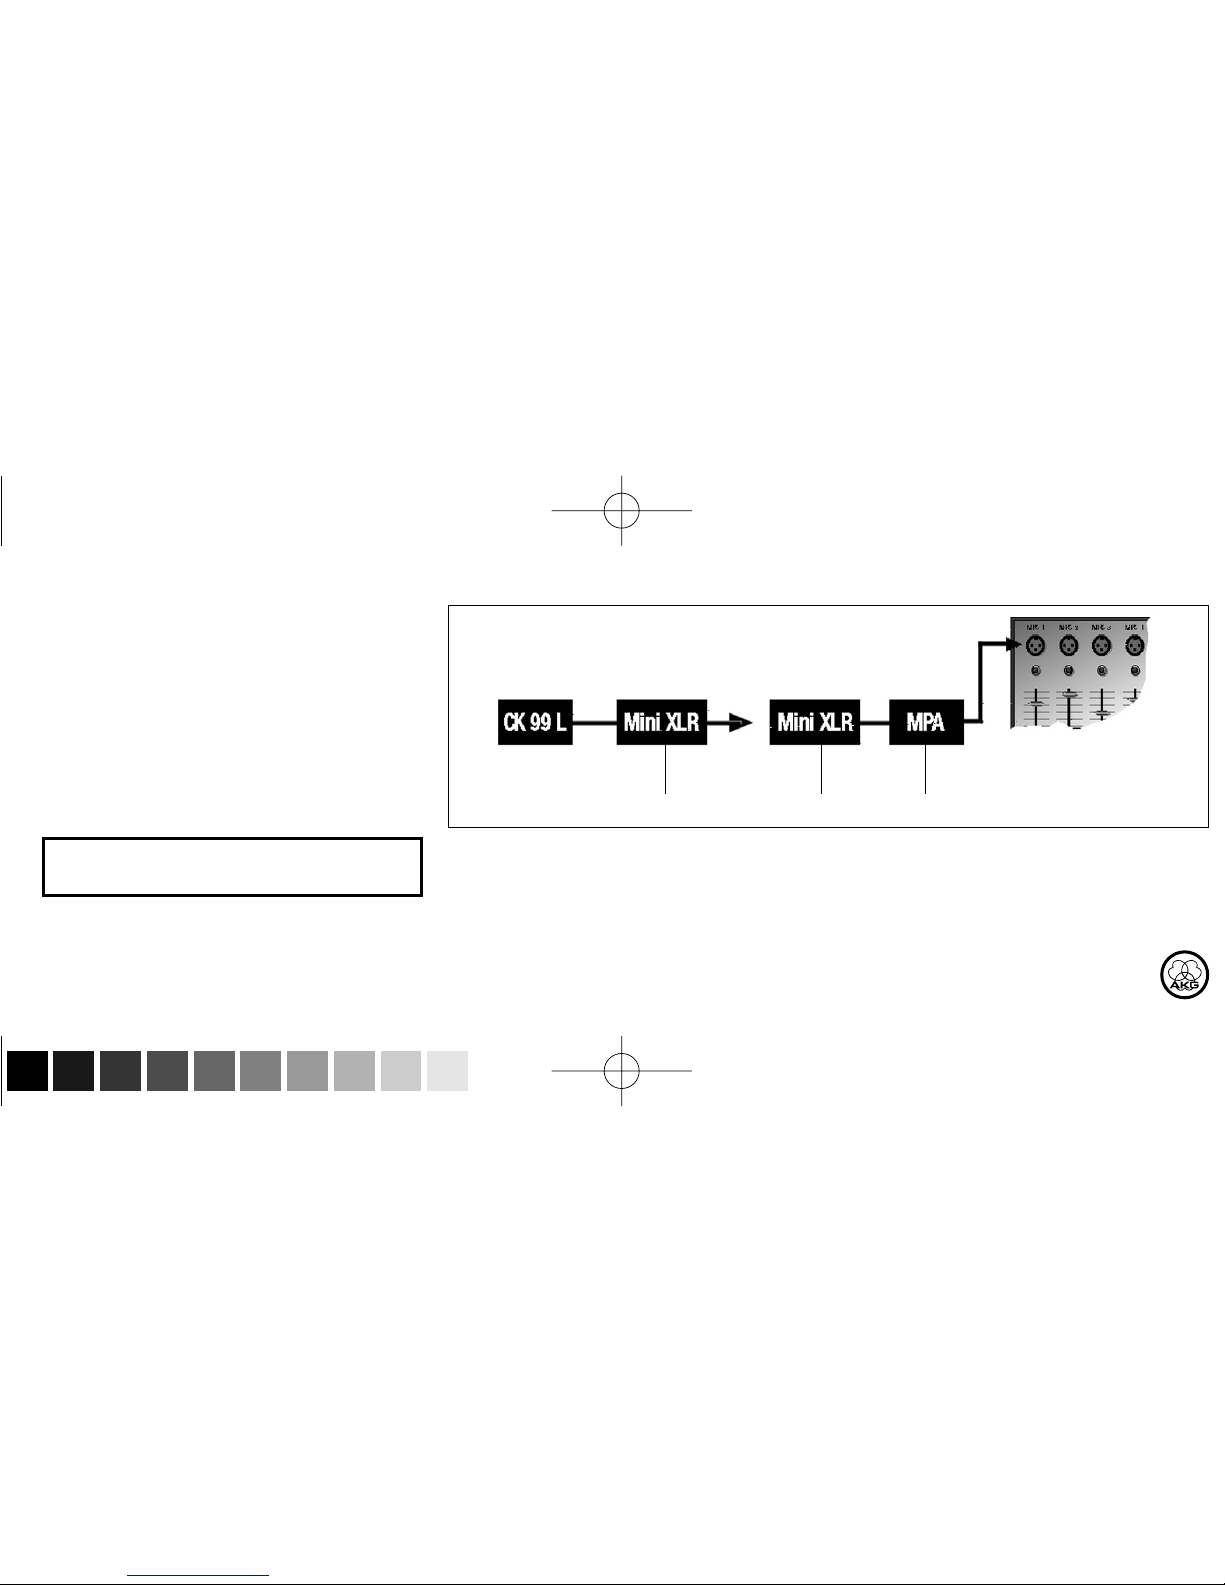
Das Mikrofon ist mit einem 1,6 m langen Kabel mit
verriegelbarem Mini-XLR-Stecker zum Anschluss
an den Phantomspeiseadapter MPA V L oder AKG-
Taschensender ausgestattet.
2 Anschluss
EEiinnlleeiittuunngg
Das CK 99 L ist ein Kondensatormikrofon und be-
nötigt daher eine Stromversorgung.
3
CK 99 L
Inhalt
1 Beschreibung/Sicherheit . . . . . . . . . . . . . . . . 2
2 Anschluss. . . . . . . . . . . . . . . . . . . . . . . . . . . 3
3 Anwendung . . . . . . . . . . . . . . . . . . . . . . . . . 5
4 Reinigung . . . . . . . . . . . . . . . . . . . . . . . . . . . 6
5 Technische Daten . . . . . . . . . . . . . . . . . . . . . 7
1 Beschreibung/Sicherheit
icherheitshinweis
•Überprüfen ie bitte, ob das Gerät, an das
ie das Mikrofon anschließen möchten,
den gültigen icherheitsbestimmungen
entspricht und mit einer icherheits-
erdung versehen ist.
Lieferumfang
• Kontrollieren Sie bitte, ob die Verpackung alle
unten abgebildeten Teile enthält.
• Falls etwas fehlt, wenden Sie sich bitte an
hren AKG-Händler.
1 x Windschutz W 55