AKG D 112 User manual

Live Sound & Studio
Recording
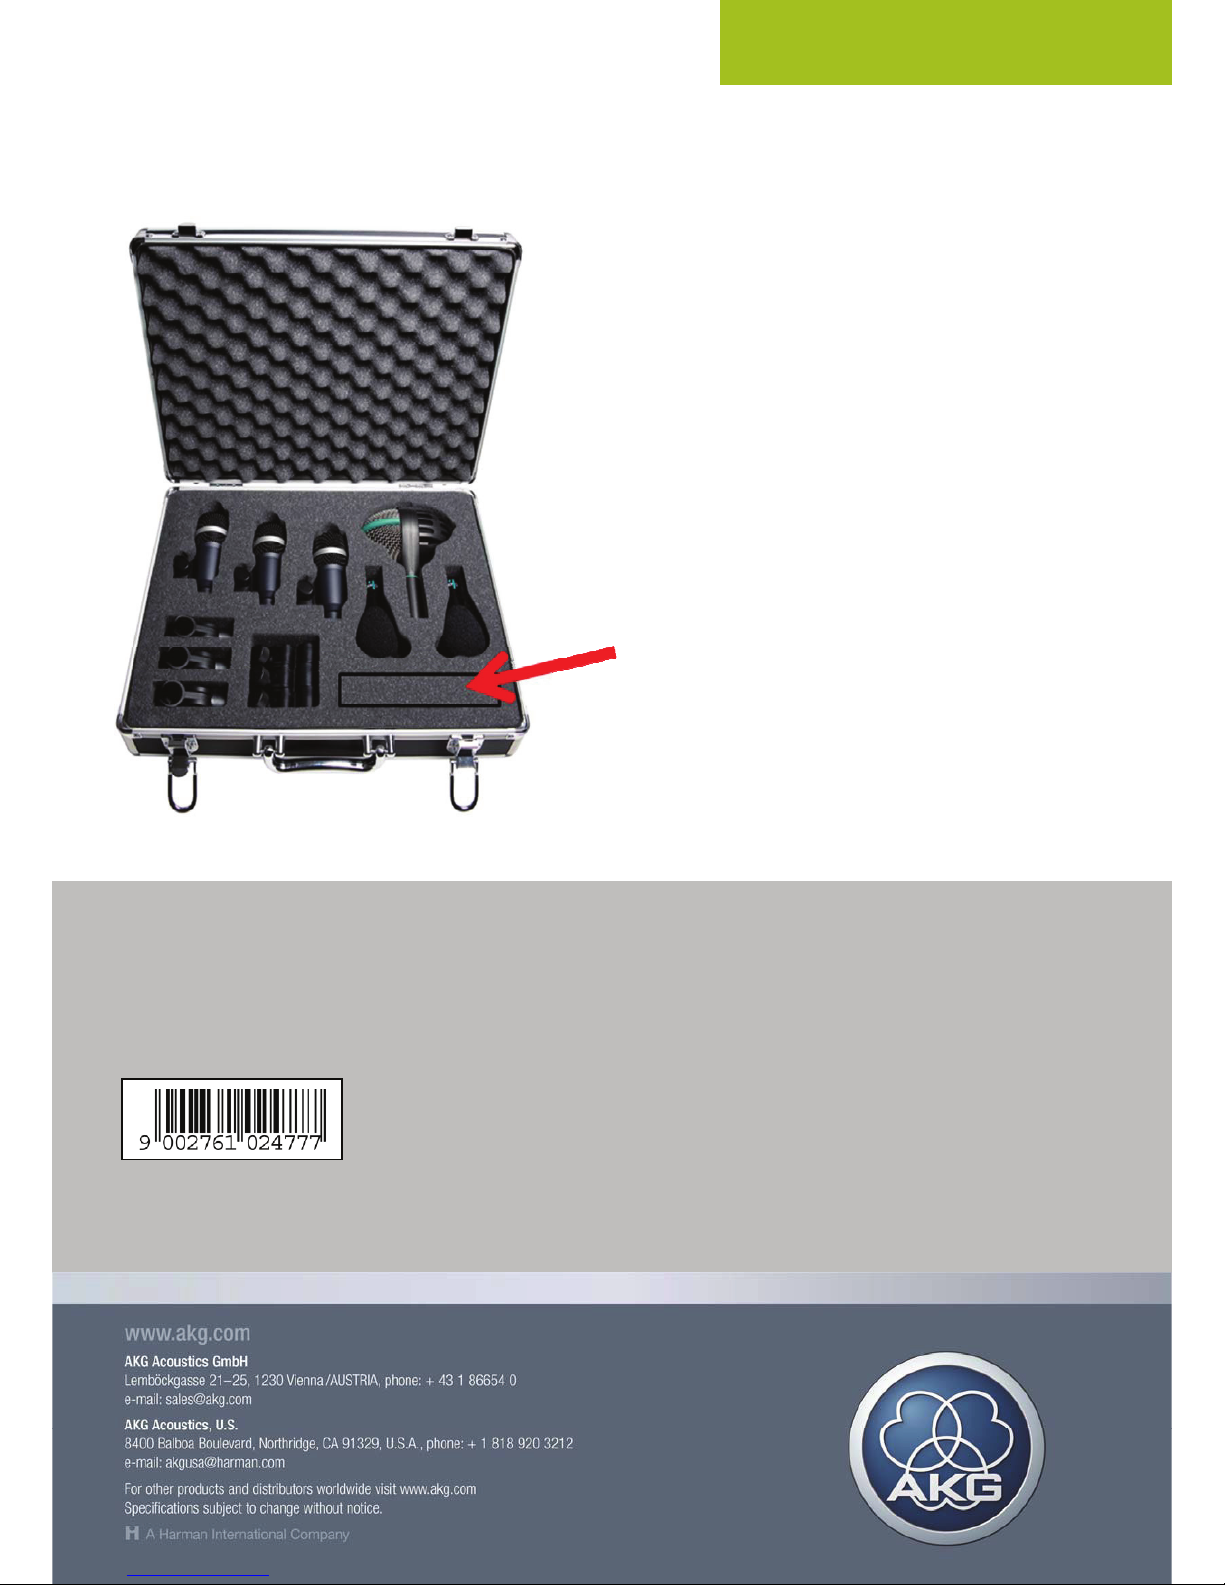
PROFESSIONAL LIVE & STUDIO DRUM SET
D 112
•Large-diaphragm dynamic microphone for bass instruments
•Extremely high SPL capability
•Classic microphone for stage and studio applications
D 40
•Dynamic microphone designed for drums and percussions, wind
instruments, and guitar amps
•Patented AKG Varimotion diaphragm technology
•Custom built capsule mounting
•Integrated stand adapter H440
•Spring steel wire-mesh cap
•Rugged all-metal body withstands typical tough handling on stage
C 430
•Miniature condenser microphone for cymbal and overhead miking
•Phantom or battery powering options
•Mounts securely on all commercial microphone stands
Rhythm Pack
Instrument Microphones

Package Content:
•2 x C 430, 2 x SA 60, 2 x W 32
•3 x D 40; 3 x H 440
•1 x D 112; 1 x SA 60
Item Number:
Rh
y
thm Pack 2581Z00130
Additional spare space inside !
Instrument Microphones

BEDIENUNGSANLEITUNG .......... S. 2
Bitte vor Inbetriebnahme des Gerätes lesen!
USER INSTRUCTIONS............... p. 14
Please read the manual before using the equipment!
MODE D’EMPLOI..................... p. 26
Veuillez lire cette notice avant d’utiliser le système!
ISTRUZIONI PER L’USO ............ p. 38
Prima di utilizzare l’apparecchio, leggere il manuale!
MODO DE EMPLEO .................. p. 49
¡Sirvase leer el manual antes de utilizar el equipo!
INSTRUÇÕES DE USO............... p. 60
Favor leia este manual antes de usar o equipamento!
D112

Description:
General
'
The
0 112
is
a dynamic cardioid microphone
designed for miking
up
bass instruments. Its
frequency response extends down to 20
Hz
and it
is
completely overload-proof.
The
sound entry side
is
identified by a green bumper band. Sounds arriving
from the sides and rear are suppressed.
Construction
The
0 112 has a die-cast aluminum case and a
stainless steel wire mesh grille. With its dual
windscreen to keep out wind noise, the 0 112
is
perfectly suited for wind instruments and vocalists,
too.
14
Application:
Finding the optimum microphone placement
is
basically a process of trial and error. Here are a few
hints:

Bass Drum
Most engineers agree that it
is
beneficiat to remove
the front head when miking up the bass drum. A full
drum sound
is
obtained
by
placing the microphone
just outside the drum.
The
further inside, the drier and
1ess
boomy the
sound and the better the acoustic separation of the
bass drum from the rest of the
kit.
Pointing the
microphone right toward the beater produces a
harder sound culminating
in
a
"click"
when the
microphone
is
as
close
as
1 or 1.5 inches to where
the beater strikes the head. Directing the micro-
phone away from this point, toward the rim of the
head,
will mellow the sound.
Fig. 1
15

Bass Guitar
Place the D
112
up close to the bass speaker and
aim
it
toward the center of the diaphragm to capture
the high frequencies which are radiated over a very
narrow angle only.
Electric Guitar
To mike
up
a guitar amp, place the D 112 close to
the speaker
as
shown. If your guitar sounds weak
and thin through the
PA,
the D
112
will restore the
lacking punch and bass (e.g., of certain open-back
combo amps with poor bass response).
16
Fig. 2

Double Bass
The
sound of a double bass amplified
via
a pickup
can
be
improved
by
adding a microphone.
The
two
signals are eq'd separately and then mixed. Place
the D 112 about 4 to 8 inches away from the bridge
for increased warmth and fullness of sound.
Fig. 3
17

Wind Instruments
The D 112
is
an
excellent microphone for wind
instruments, mainly for the trombone, tenor horn.
and tuba,
as
well
as
for the trumpet, fluegelhorn,
Fig. 4
18
etc. When miking
up
close
(2
to
12
in.)
be
sure to
play to the side of the microphone because loud
passages may cause excessive wind noise or
distortion
(fuzz).
Fig. 5

If
you
want to learn more about microphones and
how to use them, get a copy of "The Microphone
Technology and Techniques" by Norbert Pawera.
The
book
is
available at
yowr
local music shop. It
describes, in a straightforward and easy-to- read
manner, basic microphone designs, acoustics
(reverberation, room radius, the
"acoustics"
of
halls,
...
) acoustic properties of musical instruments
(compass, formants,
...
),
how to choose the right
microphone for a given instrument, and how to
place microphones for best results. Both studio and
onstage uses are discussed
in
detail.
19

Wiring:
XLR
vs.
Jack
The
XLR
sockets
on
a mixer or other equipment are
practically always balanced microphone inputs.
When
connecting your microphone to such
an
input,
you
may
use
a cable up to 600 m (2,000 ft.) long
Pin 3
Fig. 6
20
without problems. When making your own cables
be
sure to solder the two inner (audio) wires to the
same pins
on
both connectors (pins 2 and
3)
.
Pin
1
always takes the shield (ground) (see fig.
6).

Jack sockets (mono) are unbalanced inputs.
In
this
case, long cables are susceptible to interference
from magnetic fields (power lines, light dimmers).
Fig. 7
When fitting a cable with a jack plug bridge pins 1
and 3
in
the
XLR
connector (see fig.
7)
.
21

The
following problems are often due to incorrect
widng or a poor soldering joint: ·
• Hum (shield soldered poorly or to wrong
pin)
• Microphone signal too low (incorrect wiring,
missing bridge for unbalanced operation)
•
"Dead"
microphone (short circuit
in
connector
due to poor soldering; cable break)
•
Phase
problems: Hold two microphones very
close to each other and talk into them. If there
is
no
bass, the connections to pins 2 and 3
in
one
of the
XLR
connectors have been reversed.
Impedance
The
D 112
is
a low- impedance microphone
(200 ohms) and may be conncected to practically all
mixers, multitrack recorders, etc. without any
problems. High impedance inputs of older
equipment require a
t:
10
step-
up
transformer at
the equipment end of the cable.
22
Safety Ground:
Make sure the mixer or other equipment
you
connect your microphone to
is
adequately grounded.
The
D 112 case will be automatically connected to
this safety ground.
Microphone Care:
In
order to protect your microphones from dirt
and
damage, store and transport them
in
their original
packages
·or
in
aspecialized carrying case.
To
clean the enameled case, use a cloth moistened
with water or diluted alcohol if the case
is
badly
soiled.

1,8 mV/Pa (-75 dBV re 1V/Pa)

SA 15 stand adapter
This product conforms to the standards listed in the Declaration of Conformity. To order a free copy of the
Declaration of Conformity, visit http://www.akg.com or contact [email protected].

Frequency Response:
dB
•20
·10
Dimensional
Drawing:
115
Polar Diagram:
12SHI-
250HI
-·••
500HI-
·-
IOOOHl-
o•
90'
2000
HI
.tOOOHI
.-
·-
8000Hz
.........
I&OOOHI
25

Technische Änderungen vorbehalten. Specifications subject to change without notice. Ces caractéristiques sont susceptibles de modifications.
Ci riserviamo il diritto di effettuare modifiche tecniche. Nos reservamos el derecho de introducir modificaciones técnicas. Especificações sujeitas a mudanças sem aviso prévio.
Printed in China (P.R.C.) 08/10/9100 U 08050
Mikrofone · Kopfhörer · Drahtlosmikrofone · Drahtloskopfhörer · Kopfsprechgarnituren · Akustische Komponenten
Microphones · Headphones · Wireless Microphones · Wireless Headphones · Headsets · Electroacoustical Components
Microphones · Casques HiFi · Microphones sans fil · Casques sans fil · Micros-casques · Composants acoustiques
Microfoni · Cuffie HiFi · Microfoni senza filo · Cuffie senza filo · Cuffie-microfono · Componenti acustici
Micrófonos · Auriculares · Micrófonos inalámbricos · Auriculares inalámbricos · Auriculares con micrófono · Componentes acústicos
Microfones · Fones de ouvido · Microfones s/fios · Fones de ouvido s/fios · Microfones de cabeça · Componentes acústicos
AKG Acoustics GmbH
Lemböckgasse 21–25, A-1230 Vienna/AUSTRIA, phone: (+43-1) 86654-0*
e-mail: [email protected]
For other products and distributors worldwide visit www.akg.com

D40
BEDIENUNGSANLEITUNG ..........S. 2
Bitte vor Inbetriebnahme des Gerätes lesen!
USER INSTRUCTIONS ...............p. 13
Please read the manual before using the equipment!
MODE D’EMPLOI .....................p. 24
Veuillez lire cette notice avant d’utiliser le système!
ISTRUZIONI PER L’USO .............p. 35
Prima di utilizzare l’apparecchio, leggere il manuale!
MODO DE EMPLEO ...................p. 46
¡Sirvase leer el manual antes de utilizar el equipo!
INSTRUÇÕES DE USO ...............p. 57
Favor leia este manual antes de usar o equipamento!

Page
1 Precaution/Description .........................................................................14
Precaution .........................................................................................14
Packing List .......................................................................................14
Optional Accessories...........................................................................14
Features ............................................................................................14
Brief Description .................................................................................15
2 Interfacing ............................................................................................16
3 Using Your Microphone .........................................................................17
Introduction........................................................................................17
Saxophone.........................................................................................17
Trumpet .............................................................................................18
Guitar Amp.........................................................................................19
Tom-toms, Roto-toms, Snare Drum ......................................................19
Bongos, Congas, Timbales...................................................................20
4 Cleaning................................................................................................21
5 Troubleshooting ....................................................................................22
6 Specifications .......................................................................................23
Table of Contents
D40 13

1 Precaution/Description
• Please make sure that the piece of equipment your mi-
crophone will be connected to fulfills the safety regu-
lations in force in your country and is fitted with a
ground lead.
• Check that the packaging contains all of the components
listed above. Should anything be missing, please contact
your AKG dealer.
• For optional accessories, refer to the current AKG catalog or
folder, or visit www.akg.com. Your dealer will be glad to
help.
• Frequency response tailored to instrument miking.
• Integrated swivel stand adapter for easy mounting on a mi-
crophone stand.
• H 440 bracket for direct mounting on a drum shell.
• Built-in windscreen/pop filter for effective suppression of
pop and breath noise.
• Frequency-independent cardioid polar response for high
gain before feedback.
The D 40 is a unidirectional (pressure gradient) dynamic micro-
phone. It has been designed primarily as an instrument micro-
phone for rough stage use. The integrated stand adapter pro-
vides a swivel range of approximately 135 degrees for easy,
precise, and reliable microphone alignment. The supplied
1D40 1 H 440 1 protective bag
14 D40
Precaution
Packing List
Optional Accessories
Features
Brief Description

1 Description
H 440 bracket allows you to clamp the microphone directly on
the top hoop of a tom-tom, snare drum, roto-tom, etc. The fre-
quency independent cardioid pickup pattern of the D 40 en-
sures high gain before feedback. The D 40 is fitted with a shock
absorbing inner grille that protects the transducer against dam-
age. The heavy-duty metal body and wire-mesh outer grille pro-
vide additional protection for the transducer system. The outer
grille and a layer of special fabric beneath it form a very effec-
tive windscreen that will suppress blowing and wind noise on
open-air stages.
D40 15
Other manuals for D 112
4
This manual suits for next models
2
Table of contents
Other AKG Microphone manuals