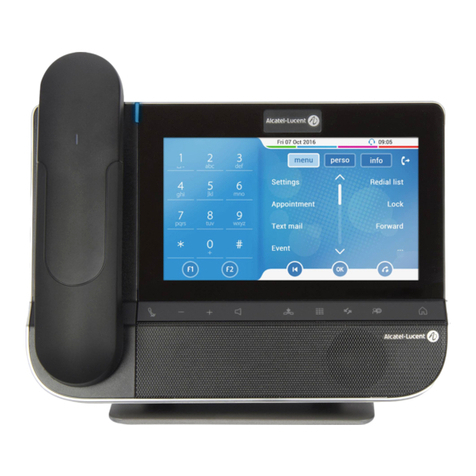
Alcatel-Lucent Enterprise OpenTouch ALE-300 User manual

OpenTouch® Suite for MLE
ALE-300 Enterprise DeskPhone SIP
User manual
8AL91446ENAAed01
w2248

User manual
8AL91446ENAAed01 2 /65
Introduction
Thank you for choosing an Alcatel-Lucent Enterprise desk phone.
This document describes the services offered by the ALE-300 Enterprise DeskPhone in connection with an
OmniPCX Enterprise system in SIP mode (R100.1 MD1 and upper).
The ALE-300 Enterprise DeskPhone is the next generation of business phones with innovative and sleek
industrial design built for every workstyle and workplace with vertical capabilities in the Enterprise
environment.
The desk phone provides advanced telephony features and call management for Alcatel-Lucent
Enterprise OmniPCX Enterprise Purple Communication server R100.0 and above. It can be easily
provisioned and deployed using OmniPCX Enterprise Device Management.
A smart touch control wheel enables legacy and future voice-oriented feature to provide a new evolutive
user experience.
The desk phone is robust, future-proof, durable products based on state-of the art hardware and
software platform with rich connectivity options (Dual Port Gigabit Ethernet, Dual USB-C, NFC).

User manual
8AL91446ENAAed01 3 /65
1 Getting started 6
1.1 How to read this guide 6
1.2 Unboxing 6
1.3 Install Hold, Transfer and Conference keys 7
1.4 Login 7
2 Getting to know your telephone 8
2.1 ALE-300 Enterprise DeskPhone 8
2.1.1 Phone description 8
2.2 Smart Pad 9
2.2.1 Description 9
2.2.2 Smart Pad gesture 10
2.2.3 LED 10
2.3 Permanent features keys 13
2.4 Alphanumeric keyboard 15
2.5 Description of the homepage 16
2.5.1 Define the default homepage 17
2.6 Status icons 17
2.7 User local menu 18
2.8 Information area 19
2.9 Connectors 20
2.9.1 Description of the connectors 20
2.9.2 Powering the desk phone 20
2.9.3 Power boost 20
2.9.4 USB hub 20
2.10 Compatible accessories 21
2.11 Contacts 22
2.11.1 Contact card 22
2.11.2 Create a new contact 23
2.11.3 Add a contact from the call log to your local directory 23
2.11.4 Modify a contact 23
2.11.5 Delete a contact 24
2.12 Call log 25
3 Using your telephone 26
3.1 Search by name feature 26
3.2 Make an audio call 26
3.2.1 Using Dialpad 27
3.2.2 Using Contacts 27
3.2.3 Using Call log 28
3.2.4 Using call by name 28
3.3 Receive an incoming call 29
3.3.1 Incoming call screen 29
3.3.2 Answer incoming call 29
3.3.3 Stop ringing 29
3.3.4 Divert the incoming call to your voicemail 30
3.3.5 Ignore the call 30
3.4 Call Routing 30
3.4.1 Telephony status 30
3.4.2 Open call routing management 30
3.4.3 Forward all incoming calls to your voicemail immediately 31
3.4.4 Forward all incoming calls to another number immediately 31
3.4.5 Forward all incoming calls to your voicemail when you are busy and/or if you don't reply 31
3.4.6 Forward all incoming calls to another number when you are busy and/or if you don't reply 31
3.4.7 Do not disturb 32
3.4.8 Cancelling all forwards 32

User manual
8AL91446ENAAed01 4 /65
3.5 During audio call 33
3.6 Mute, so that your contact cannot hear you 34
3.6.1 From the set 34
3.6.2 From the headset 34
3.7 Switching between audio modes 34
3.8 Activating the loudspeaker during a conversation (handset lifted) - Group listening feature 35
3.9 Release the second call and retrieve the call on hold 35
3.10 Put a call on hold/retrieve a call on hold 35
3.11 Transfer a call 36
3.12 Sending DTMF signals 36
3.13 Make a second call 36
3.14 Receive a second call 37
3.15 Switch between two calls 37
3.16 Conference 38
3.17 Consulting your voice mailbox 38
3.18 Programmable keys 39
3.18.1 Create a programmable key 39
3.18.2 Modify a programmable key 41
3.18.3 Delete programmable key 41
4 Programming your telephone 42
4.1 Initializing your voice mailbox 42
4.2 Adjusting the audio functions 42
4.2.1 Define the ringtone 42
4.2.2 Activate/deactivate silent mode 42
4.2.3 Activate/deactivate meeting mode (progressive ringing) 43
4.2.4 Activate/deactivate discreet ring mode 43
4.2.5 Adjust ringer volume while a call arrives 43
4.3 Prefered device 43
4.4 Adjusting the brightness of the desk phone 44
4.4.1 Auto-adjusting of the brightness 44
4.4.2 Adjust the brightness when the phone is in use 44
4.4.3 Adjust the dimmed brightness when the phone is not in use 45
4.5 Selecting language 45
4.6 Install a USB accessory (Headset, Handsfree, Loudspeaker) 45
4.7 Contacting your administrator (Technical support) 46
4.7.1 Date code / Technical code 46
4.7.2 Software version 46
4.7.3 Hardware model 46
4.7.4 Legal notice 46
4.7.5 Network status 47
4.7.6 Network configuration 47
4.7.7 Send your desk phone or your add-on module to support 47
4.7.8 Auto upgrade the desk phone via USB key 47
4.7.9 Copy logs on USB drive 48
4.7.10 Restore factory settings 48
4.7.11 NOE mode 48
5 Accessories 49
5.1 List of accessories 49
5.1.1 USB accessories 49
5.1.2 Other headsets 49
5.1.3 Other accessories 49
5.2 ALE-150 SWB Corded Handset 50
5.2.1 Description 50
5.2.2 Unboxing 50
5.2.3 Install a comfort wired handset 50

User manual
8AL91446ENAAed01 5 /65
5.3 Magnetic alphabetic keyboard: ALE-100 keyboard (USB) 51
5.3.1 Description 51
5.3.2 Unboxing 51
5.3.3 Installation 51
5.3.4 How to use the keyboard 52
5.4 ALE-140 Customization kit 54
5.4.1 Description 54
5.4.2 Unboxing 54
5.4.3 Remove or install the customization kit 54
5.5 ALE-110 Wall Mounting Kit 57
5.5.1 Prerequisites 57
5.5.2 Wall mount installation 57
5.6 Third parties headset certified in Developer and Solution Partner Program (DSPP) 59
6 Ordering information 60
7 Guarantee and clauses 61
7.1 Safety Instructions 61
7.2 Regulatory Statements 62
Quick guide 64

User manual
8AL91446ENAAed01 6 /65
1Getting started
1.1 How to read this guide
The labels and icons displayed depend on the type and the skin of the set.
The label is not displayed if the corresponding feature is not configured on your telephone system.
All labels are displayed in color and are italicized.
This icon describes a succession of actions or labels you have to do or select.
This icon describes the consequence of an action.
Press the function key to the left of the contact's name/number, or label.
Press the function key to the right of the contact's name/number, or label.
Pick up the handset.
In other cases, the keys on the desk phone or the icons on the display are used to describe the features
in the user manual.
1.2 Unboxing
Your phone is modular. Several options are possible depending on your specific requirements.
•Safety and regulatory instructions.
•Desk phone (base).
•Corded handset.
•Removable keys. Your phone is equipped with three removable keys. F1/F2/abc keys are installed
by default. Hold/Transfer/Conference keys are delivered with your phone.
•Default color: Neptune Blue. The color of the desk phone is 'Neptune Blue' by default. You can
change it by using a customization kit sold separately (ALE-140).
The network cable (RJ45) is not delivered with the phone.

User manual
8AL91446ENAAed01 7 /65
1.3 Install Hold, Transfer and Conference keys
If not already done, you have to install Hold, Transfer and Conference keys provided with your desk
phone instead of the F1, F2 and 'abc' keys.
To install new keys:
The extra keys are provided hanging on a
support so that they do not get lost. The
new key is easily detached.
•On the desk phone, take the key to replace between thumb and
forefinger and pull gently to remove it. Two small notches on
the side of the key allow you to lift it with your fingernail if
necessary.
•Insert the new key into its slot by gently pressing it (as if you
were using this key).
•Keep the old keys if necessary.
1.4 Login
Typically, your administrator will have set up your account and desk phone on the communication
server. In this case, the phone will be ready for use. If this is not the case, you will be asked for a
login/password when you first connect.
Contact your administrator to know your login/password.
: enter your login.
: enter your password.
The communication server is defined by your administrator in the
settings of the desk phone.

User manual
8AL91446ENAAed01 8 /65
2Getting to know your telephone
2.1 ALE-300 Enterprise DeskPhone
This phone is part of the Enterprise and IP phone ranges. With its 3.5 inch color display that comes with
ten dedicated function keys and an intuitive navigation Smart Pad, the ALE-300 Enterprise DeskPhone
(ALE-300) delivers a great user experience. You can change the color of the phone by using an ALE-140
DeskPhone customization kit (Neptune Blue in the following picture).
2.1.1 Phone description
1
Smart Pad.
2
Color display with auto brightness adjustment which enhances user experience and saves power
(ambient light sensor).
3
10 dedicated functions keys.
4
Corded handset (ALE-150).
5
Permanent feature keys: quick access to the phone's main features.
(5a) Hang up key, messaging key, local menu key.
(5b) Hold key, transfer key, conference key.
6
Wideband loudspeaker for optimized sound.
7
Magnetic alphabetic keyboard (optional - ALE-100 Keyboard).
8
An adjustable and stable foot (60° to 0°).
9
Connectors.
10
Busy light logo on back shell.

User manual
8AL91446ENAAed01 9 /65
2.2 Smart Pad
2.2.1 Description
Hands-free/Loudspeaker key
Pressing this key answers an incoming call in hands-free mode (when activated, the key is
lit blue). When a call is in progress, pressing this key switches between the supported
audio mode: hands-free, headset, handset or group listening (loudspeaker).
In idle state, press this key to take the line before dialing a number.
Mute and interphony key
Mute key: during a call, press this key to stop your contact from hearing you. When
activated, the key is lit in blue and the Smart Pad ring in red.
Interphony key: When idle, press this key to switch the phone to interphony mode. When
you receive a call, the phone automatically answers into hands-free mode. This key lights
up blue when activated. Interphony can be disabled by the administrator.
Back/Exit key
Use this key to go back to the previous step (short press). Use this key to go back to the
homepage (long press). Use this key to delete one number or character at a time.
Reserved for future use.
Up-down navigator
Used to scroll through the content of a page.
Left-right navigator
When consulting the call log, use this key to apply a filter (all, missed, unsuccessful,
incoming, outgoing, conference).
In the text edition, use this key to navigate into the text box.
Rotate clockwise
Turn up the volume (ringing or call state).
Up vertical scrolling (idle state).
Rotate counter clockwise
Turn down the volume (ringing or call state).
Down vertical scrolling (idle state).
OK key
Use this key to validate your choices and options while programming or configuring.
Use this key to answer an incoming call with the default audio device (hands-free mode).
Use this key to open contextual menu.

User manual
8AL91446ENAAed01 10 /65
2.2.2 Smart Pad gesture
Short press
Long press
Rotate
The light ring is not touch sensitive. Please place your finger in the hollow of the Smart Pad for any
actions.
2.2.3 LED
The Smart Pad contains a large number of notifications indicated by the color of the leds.
The ring around the Smart Pad and the keys can light up depending on the event. The ring can light up
completely or partially depending on the case.
2.2.3.1 Smart Pad ring
Smart Pad ring is composed of 8 segments which can be lighted up in blue, red or purple:
Blue = Active
Red = Warning
Purple = Other
No light = Inactive
2.2.3.2 Smart Pad keys
4 keys on the Smart Pad are lit in blue when activated. These keys are
dimly lit in blue to show available actions (hands-free, mute, back).

User manual
8AL91446ENAAed01 11 /65
2.2.3.3 LED management
Legend:
Dimly lit in
blue
Strongly lit in blue
Blinking in blue
LED
Smart Pad ring
In idle state, awake,
Interphony activated
Switched off
Incoming call (ringing)
In conversation with
handset or headset
In conversation in hands-
free mode
Muted with handset or
headset
Muted in hands-free
mode
During settings
(Settings)
Switched off
2.2.3.4 Use cases
Incoming calls
The Smart Pad ring is blinking blue.
The hands-free/loudspeaker key is blinking blue to show hands-free
hook-off capacity.
During conversation
You are in conversation with the handset or the headset.
The Smart Pad ring is lit in blue.
Press the hands-free/loudspeaker key to switch in hands-free mode.
The key is lit in blue.
You are in conversation. Press the mute key. The key is lit in blue.
The Smart Pad ring is lit in red. The microphone is muted.

User manual
8AL91446ENAAed01 12 /65
2.2.3.5 Other use cases
Idle state
Boot
During boot phase, the Smart Pad ring rotates clockwise in blue
until the boot is finished.
Update
During software update, the Smart Pad ring rotates clockwise in
purple until the update is finished.

User manual
8AL91446ENAAed01 13 /65
2.3 Permanent features keys
This chapter displays all permanent features keys available on your desk phone. The keys depend on the
model of your desk phone. They are located around the screen and on the Smart Pad.
•Take the call with the headset if connected, or in hands-free mode.
•Hang up key (lit in red) to end a call or to go back to the homepage during
programming.
•Return to the homepage at any time.
Voicemail / Missed calls
•This key is lit in red when there is new voice message. Access your voicemail. Follow
the instructions from the voicemail server (TUI).
•This key is lit in blue when there are missed calls. Open call logs.
•The key remains lit in red as long as there are new voice messages, even if there are
missed calls.
•The key remains lit until all events are acknowledged or deleted.
Call Routing
•Forward your call to your voicemail.
•Forward your call to another number.
•Select forwarding conditions (Immediately, when you are busy or/and when you don't
reply).
•Activate the 'Do not disturb' feature.
Contacts
•Create a new contact.
•Add a contact from the call log to your local directory.
•Modify or delete a contact from your local directory.
Call logs
•Display your entire call history sorted by date.
•Use filters to display all calls, missed calls, unanswered calls, incoming calls, outgoing
calls or conference.
•Call back a contact.
Prog keys
•Create a programmable key.
•Modify or delete a programmable key.
Settings: quick access to user local menu (short press)
•Define the appearance.
•Define the language.
•Define the ringtone.
•Select your preferred accessory.
•Software information (version, run mode).
•Hardware information (MAC, CPU).
•Network configuration (DM, DNS, Ethernet, IP parameters, LDAP).
•Activate logging for support.

User manual
8AL91446ENAAed01 14 /65
•Hold: the call is placed on hold.
•Transfer: transfer the call to another number.
•Conference: establish a three-party conference call.
The following keys are located on the Smart Pad (for more information see section: Smart Pad)
•Hands-free/Loudspeaker key.
•Mute and interphony key.
•Reserved for future use.

User manual
8AL91446ENAAed01 15 /65
2.4 Alphanumeric keyboard
An alphanumeric keyboard is built into your desk phone, using its own keys. It is not necessary to install
a physical keyboard to input text.
The number pad keys have letters that you can display by successive presses. The number is the first
character in the series. To make typing easier, the list of characters associated with a key is displayed
and the character that will be used after pressing several times this key is highlighted.
Some special characters can be displayed by successively pressing the key:
*
%
$
/
~
&
(
)
[
]
=
#
@
1
space
|
-
_
0
+
.
,
;
:
\
/
?
!
<
>
•Use navigation keys to move the cursor into the text (except in dial by name feature).
•or : Use this key to delete the last entered character. The alphabetic mode remains
activated.
Your desk phone can also be equipped with a magnetic alphabetic keyboard: ALE-100 keyboard (sold
separately). In this case, the alphanumeric keyboard is disabled and the numeric keypad allows you to
enter numbers directly.
Use cases:
: '1' is displayed.
: 'space' is displayed.
: '5' is displayed.
(2 successive presses): 'j' is displayed.
(5 successive presses): 'J' is displayed.
(5 successive presses): ' ' is displayed.

User manual
8AL91446ENAAed01 16 /65
2.5 Description of the homepage
The homepage is the default page displayed on your phone. The default homepage displays information
about your desk phone (phone numer, forward, missed calls), but you can choose to display another page
in the settings of the phone (call log, contacts or programmable keys).
The phone status is displayed in a red banner when your desk phone is forwarded to your mailbox
or another contact.
Call Routing
Open call routing to manage the status of your desk phone (forward to a number,
forward to your voicemail, do not disturb, …).
My telephony status (the status is displayed for your information and is only visible
on your desk phone). When your phone is forwarded, this area is highlighted in red.
•Reachable ( ).
•Call forwarded to voicemail ( ). In this case, a red banner is displayed
on the default homepage.
•Call forwarded to number ( ).In this case, a red banner is displayed on
the default homepage.
•Do not disturb ( ).In this case, a red banner is displayed on the
default homepage.
Search by name feature
•A search bar is provided at the top of the window.
User local menu
•Access to the user local menu: Call Routing, Contacts, Call logs, User keys,
Settings, Search, Homepage.
SOS
•Call emergency.

User manual
8AL91446ENAAed01 17 /65
2.5.1 Define the default homepage
Settings
Access the phone local menu.
User
Use left-right navigation keys to display user settings (displayed by default).
Phone Homepage
Select the homepage:
•Default
•Contacts
•Call Log
•Programmable Keys
or
or
Save and go back to the homepage.
2.6 Status icons
Icons with information about some of the specific configurations of the phone are displayed in the top
bar of the screen
Depending on the size of the display, all status icons may not be displayed simultaneously. Which icons
are displayed depend on their priority. The following icons are listed according to their priority, from the
highest to the lowest.
Silent mode.
Headset connected / Handsfree connected.

User manual
8AL91446ENAAed01 18 /65
2.7 User local menu
Open the user local menu.
→
Call Routing
Open call routing to manage the status of your desk phone (forward to a number, forward
to your voicemail, do not disturb, …).
My telephony status (the status is displayed for your information and is only visible on
your application).
•Reachable ( ).
•Call forwarded to voicemail ( ). In this case, a red banner is displayed on
the default homepage.
•Call forwarded to number ( ).In this case, a red banner is displayed on the
default homepage.
•Do not disturb ( ).In this case, a red banner is displayed on the default
homepage.
Contacts
•Display all your local contacts (defined in the local directory).
•Open contact card.
•Select a contact to call.
•Create a new contact.
Call logs
•Display your entire call history sorted by date.
•Use filters to display all calls, missed calls, unanswered calls, incoming calls,
outgoing calls or conference calls.
•Call back a contact.
Prog keys
•List all programmable keys (3 pages/8 by page are available).
•Call a programmed contact.
•Activate advanced services available using prefix.
•Create, modify or delete a programmed key.

User manual
8AL91446ENAAed01 19 /65
Settings
•Define the appearance.
•Define the language.
•Define the ringtone.
•Define the ringtone volume.
•Select your preferred accessory.
•Software information (version, run mode).
•Hardware information (MAC, CPU).
•Network configuration (DM, DNS, Ethernet, IP parameters, LDAP).
Search
•Open the search by name interface.
Homepage
•Open the default homepage.
2.8 Information area
An information area opens at the top of the screen when an error occurs.
The color of the information area changes according to the severity of the error message:
High
Medium
Success
Available actions:
The message is automatically closed after a few seconds, except for a red message which
remains until a solution is provided.
<>
If there is more than one message, you can scroll through them by tapping on the left
or right arrow.
Contact your administrator if necessary.

User manual
8AL91446ENAAed01 20 /65
2.9 Connectors
2.9.1 Description of the connectors
1
Universal Serial Bus (USB-C) connector(1).
2
10/100/1000 Mbps Ethernet connectors to a PC (RJ45). Use this port to connect your PC to your
enterprise network.
3
10/100/1000 Mbps Ethernet connectors to the enterprise network (LAN - RJ45). Use this port to
connect the desk phone to the enterprise network.
4
Wired handset connector (RJ11). Use only Alcatel-Lucent Enterprise compatible handset (ALE-
150 SWB Corded Handset).
5
Universal Serial Bus (USB-C) connector(1).
(1)USB connectors (Universal Serial Bus) –USB type C.
These connectors are agnostic, meaning that you can use either connector to connect USB-C power
adapter, USB keyboard, USB headset, an audio equipment, a USB stick, a Bluetooth® USB dongle
provided with a Bluetooth® headset.This connector can be used to charge a smartphone.
USB-C
USB type C
The USB Type C is reversible and full duplex. It is able to
transmit data or power.
2.9.2 Powering the desk phone
The phone can be powered either via a power adapter (5V/3A - sold separately) or via Power over
Ethernet (PoE). The power adapter can be connected to a USB-C connector (1 or 2).
2.9.3 Power boost
The Power boost feature allows a desk phone to get more power available from Power over Ethernet
(PoE) than requested through a default startup, for several needs such as more USB current for
accessories (smartphone charging). In this case, your administrator has to enable the USB Boost to
deliver more power. After restart, the phone changes its USB current limiter management, to increase
the available power from 240 mA to 1400 mA according to the model of your desk phone and can change
of PoE class.
Contact your administrator if necessary.
2.9.4 USB hub
If both USB-c ports are used (e.g. for power supply and headset), your desk phone supports most
commercially available dual port USB-c hubs. For more information, contact your installer or
administrator.
Table of contents
Other Alcatel-Lucent Enterprise IP Phone manuals

Alcatel-Lucent Enterprise
Alcatel-Lucent Enterprise 8088 Smart DeskPhone User manual

Alcatel-Lucent Enterprise
Alcatel-Lucent Enterprise Premium DeskPhone 8068 BT User manual

Alcatel-Lucent Enterprise
Alcatel-Lucent Enterprise 8088 User manual

Alcatel-Lucent Enterprise
Alcatel-Lucent Enterprise 8018 User manual

Alcatel-Lucent Enterprise
Alcatel-Lucent Enterprise OXO CONNECT ALE-500 Enterprise DeskPhone User manual

Alcatel-Lucent Enterprise
Alcatel-Lucent Enterprise OXO CONNECT ALE-500 Enterprise DeskPhone User manual