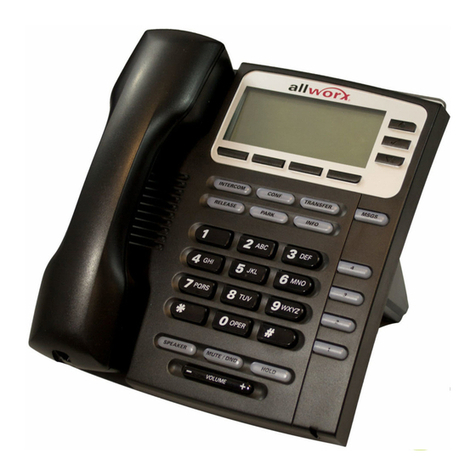
Allworx 9202E User manual

Allworx®
Phone Model 9202E User Guide
Version J Updated February 14, 2019


Allworx® Phone Model 9202E
User Guide

Allworx Phone Model 9202E User Guide
Page ii +1 866 ALLWORX * +1 585 421 3850
www.allworx.com
Version J Updated: February 14, 2019
Copyright
Documentation
©2019 Allworx Corp, a Windstream company. All rights reserved. No part of this publication may be
reproduced, stored in a retrieval system, or transmitted, in any form or by any means, electronic,
mechanical, photocopy, recording, or otherwise without the prior written permission of Allworx Corp.
Software
Software in this product is Copyright 2019 Allworx Corp, a Windstream company, or its vendors. All
rights are reserved. The software is protected by United States of America copyright laws and
international treaty provisions applicable worldwide. Under such laws, the licensee is entitled to use the
copy of the software incorporated with the instrument as intended in the operation of the product in
which it is embedded. The software may not be copied, decompiled, reverse-engineered,
disassembled, or otherwise reduced to human-perceivable form. This is not the sale of the software or
any copy of the software; all right, title, ownership of the software remains with Allworx or its vendors.
Warranty
This warranty shall not apply to any products to the extent the defect or non-conformance is due to (A)
accident, alteration, abuse, misuse, or repair not performed by Allworx, (B) storage other than specified,
(C) failure to comply with applicable environmental requirements for the products.
Environmental Conditions
Allworx servers and phones:
Operating:
Tem p era ture
Relative Humidity
+5° to 40° C / +41° to +104° F
5 to 90% (non-condensing)
Storage:
Low Temperature Point
High Temperature Point
High Relative Humidity Point
-40° C / +40° and any convenient humidity
+66° C / +150° 15% RH
+32° C / +90° 90% RH

Allworx Phone Model 9202E User Guide
+1 866 ALLWORX * +1 585 421 3850 Page iii
www.allworx.com
Version J Updated: February 14, 2019
Trademarks
The following trademarks are owned by Allworx:
Revision History
Allworx® Verge™ IP phone series
Allworx® 92xx™ IP phone series
Allworx® Verge™ 9308
Allworx® Verge™ 9312
Allworx® Verge™ 9318Ex
Allworx® 92xx IP phone series
92xx IP phone series
92xx series
Allworx® Reach™
Allworx® Reach Link™
Allworx® Extend Link™
Allworx® Interact™
Allworx® Interact™ Professional
Allworx® Interact Sync™
Allworx® View™
Allworx® View™ ACD
Allworx® OfficeSafe™
Allworx® Migrate™
Allworx® Connect™ servers
Allworx® Connect™ 731 server
Allworx® Connect™ 536/530 server
Allworx® Connect™ 536 server
Allworx® Connect™ 530 server
Allworx® Connect™ 324/320 server
Allworx® Connect™ 324 server
Allworx® Connect™ 320 server
Allworx® 6x Server
Allworx® 6x 12 Server
Allworx® 24x Server
Allworx® 48x Server
Allworx® Px6/2 Expander
Revision Date Description
A 02-NOV-2011 New Release
B 24-FEB-2012 Updated per feedback.
C 31-MAY-2012 Updated per feedback.
D 04-AUG-2015 Updated per feedback.
E 21-OCT-2016 Updated Overview > Function Buttons > Hold section.
Rename Interact CLID to TSP Driver Caller ID.
My Allworx Manager - added reference to My Allworx Manager User Guide.
Added Audio Message Center navigation tables.

Allworx Phone Model 9202E User Guide
Page iv +1 866 ALLWORX * +1 585 421 3850
www.allworx.com
Version J Updated: February 14, 2019
F 02-MAR-2017 Updated front matter: Copyright, warranty, environmental conditions, and trademarks.
Updated the Introduction chapter to include: Who Should Read This Guide, Guide Purpose, Guide
Organization, Equipment Requirements, Server Features
Updated the following sections for 8.2:
• Overview > clarified soft key definition
• Overview > clarified function button definitions
• Overview > updated programmable function keys (PFKs)
• Operation > added communication options section
• Operation > added appearance PFK section
• Operation > clarified place a call
• Operation > added Park Monitor section
• Operation > updated Transfer section
• Features > added Contacts section
• Features > removed Business Speed Dial section
G5-JAN-2018
• Updated Allworx Message Center > Access Audio Message Center
H 2-OCT-2018 • Added Settings > Phone Preferences > Caller ID Preference
• Updated Settings > Phone Preferences > TSP Driver Caller ID
• Removed legacy Allworx System Software information.
J 14-FEB-2019 • Updated Section 4.11 Park.
Revision Date Description

Allworx Phone Model 9202E User Guide
+1 866 ALLWORX * +1 585 421 3850 Page v
www.allworx.com
Version J Updated: February 14, 2019
Contents
Chapter 1 - Introduction . . . . . . . . . . . . . . . . . . . . . . . . . . . . . . . . . . . . . . . . . . . . . . .1
1.1 - Who Should Read this Guide . . . . . . . . . . . . . . . . . . . . . . . . . . . . . . . . . . . . . . . . . . . . . . . . . . . . 1
1.2 - Guide Organization . . . . . . . . . . . . . . . . . . . . . . . . . . . . . . . . . . . . . . . . . . . . . . . . . . . . . . . . . . . . 1
1.3 - Equipment Requirements . . . . . . . . . . . . . . . . . . . . . . . . . . . . . . . . . . . . . . . . . . . . . . . . . . . . . . . 2
Chapter 2 - Setup . . . . . . . . . . . . . . . . . . . . . . . . . . . . . . . . . . . . . . . . . . . . . . . . . . . . .3
2.1 - Connect the Phone . . . . . . . . . . . . . . . . . . . . . . . . . . . . . . . . . . . . . . . . . . . . . . . . . . . . . . . . . . . . . 3
2.2 - Adjust the Phone Angle . . . . . . . . . . . . . . . . . . . . . . . . . . . . . . . . . . . . . . . . . . . . . . . . . . . . . . . . . 4
2.3 - Volume Adjustment . . . . . . . . . . . . . . . . . . . . . . . . . . . . . . . . . . . . . . . . . . . . . . . . . . . . . . . . . . . . 4
2.4 - Wall Mounting (Optional) . . . . . . . . . . . . . . . . . . . . . . . . . . . . . . . . . . . . . . . . . . . . . . . . . . . . . . . 5
2.4.1 - Wall Mounting Plate . . . . . . . . . . . . . . . . . . . . . . . . . . . . . . . . . . . . . . . . . . . . . . . . . . . . . . . 5
2.4.2 - Handset Retainer Clip . . . . . . . . . . . . . . . . . . . . . . . . . . . . . . . . . . . . . . . . . . . . . . . . . . . . . . 5
Chapter 3 - Overview . . . . . . . . . . . . . . . . . . . . . . . . . . . . . . . . . . . . . . . . . . . . . . . . . .7
3.1 - Buttons . . . . . . . . . . . . . . . . . . . . . . . . . . . . . . . . . . . . . . . . . . . . . . . . . . . . . . . . . . . . . . . . . . . . . . . 8
3.2 - Screen Icons . . . . . . . . . . . . . . . . . . . . . . . . . . . . . . . . . . . . . . . . . . . . . . . . . . . . . . . . . . . . . . . . . . . 8
3.3 - Function Buttons . . . . . . . . . . . . . . . . . . . . . . . . . . . . . . . . . . . . . . . . . . . . . . . . . . . . . . . . . . . . . . . 8
3.4 - My Allworx Manager . . . . . . . . . . . . . . . . . . . . . . . . . . . . . . . . . . . . . . . . . . . . . . . . . . . . . . . . . . . 9
Chapter 4 - Operation . . . . . . . . . . . . . . . . . . . . . . . . . . . . . . . . . . . . . . . . . . . . . . . 11
4.1 - Audio Path Options . . . . . . . . . . . . . . . . . . . . . . . . . . . . . . . . . . . . . . . . . . . . . . . . . . . . . . . . . . . 11
4.2 - Place a Call . . . . . . . . . . . . . . . . . . . . . . . . . . . . . . . . . . . . . . . . . . . . . . . . . . . . . . . . . . . . . . . . . . . 11
4.3 - Receive a Call . . . . . . . . . . . . . . . . . . . . . . . . . . . . . . . . . . . . . . . . . . . . . . . . . . . . . . . . . . . . . . . . . 11
4.4 - End a Call . . . . . . . . . . . . . . . . . . . . . . . . . . . . . . . . . . . . . . . . . . . . . . . . . . . . . . . . . . . . . . . . . . . 12
4.5 - Headset . . . . . . . . . . . . . . . . . . . . . . . . . . . . . . . . . . . . . . . . . . . . . . . . . . . . . . . . . . . . . . . . . . . . . 12
4.6 - Directory Dialing . . . . . . . . . . . . . . . . . . . . . . . . . . . . . . . . . . . . . . . . . . . . . . . . . . . . . . . . . . . . . .12
4.7 - Redial a Number . . . . . . . . . . . . . . . . . . . . . . . . . . . . . . . . . . . . . . . . . . . . . . . . . . . . . . . . . . . . . . 12
4.8 - Mute/DND . . . . . . . . . . . . . . . . . . . . . . . . . . . . . . . . . . . . . . . . . . . . . . . . . . . . . . . . . . . . . . . . . . . 12
4.8.1 - Mute a Call . . . . . . . . . . . . . . . . . . . . . . . . . . . . . . . . . . . . . . . . . . . . . . . . . . . . . . . . . . . . . 12
4.8.2 - Do Not Disturb (DND) . . . . . . . . . . . . . . . . . . . . . . . . . . . . . . . . . . . . . . . . . . . . . . . . . . . . 13


Allworx Phone Model 9202E User Guide
Page vi +1 866 ALLWORX * +1 585 421 3850
www.allworx.com
Version J Updated: February 14, 2019
4.9 - Intercom . . . . . . . . . . . . . . . . . . . . . . . . . . . . . . . . . . . . . . . . . . . . . . . . . . . . . . . . . . . . . . . . . . . . 13

4.10 - Hold . . . . . . . . . . . . . . . . . . . . . . . . . . . . . . . . . . . . . . . . . . . . . . . . . . . . . . . . . . . . . . . . . . . . . . . 13

4.11 - Park . . . . . . . . . . . . . . . . . . . . . . . . . . . . . . . . . . . . . . . . . . . . . . . . . . . . . . . . . . . . . . . . . . . . . . . 14
4.11.1 - Viewing Parked Calls . . . . . . . . . . . . . . . . . . . . . . . . . . . . . . . . . . . . . . . . . . . . . . . . . . . . 14
4.11.2 - Retrieving Parked Calls . . . . . . . . . . . . . . . . . . . . . . . . . . . . . . . . . . . . . . . . . . . . . . . . . . 14
4.11.3 - Reminder Period . . . . . . . . . . . . . . . . . . . . . . . . . . . . . . . . . . . . . . . . . . . . . . . . . . . . . . . 15
4.11.4 - Call Route Settings . . . . . . . . . . . . . . . . . . . . . . . . . . . . . . . . . . . . . . . . . . . . . . . . . . . . . 15
4.12 - Transfer . . . . . . . . . . . . . . . . . . . . . . . . . . . . . . . . . . . . . . . . . . . . . . . . . . . . . . . . . . . . . . . . . . . . 15
4.13 - Conference . . . . . . . . . . . . . . . . . . . . . . . . . . . . . . . . . . . . . . . . . . . . . . . . . . . . . . . . . . . . . . . . . 16
4.14 - Missed Calls . . . . . . . . . . . . . . . . . . . . . . . . . . . . . . . . . . . . . . . . . . . . . . . . . . . . . . . . . . . . . . . . 17
4.15 - Presence . . . . . . . . . . . . . . . . . . . . . . . . . . . . . . . . . . . . . . . . . . . . . . . . . . . . . . . . . . . . . . . . . . . 17
Chapter 5 - Features . . . . . . . . . . . . . . . . . . . . . . . . . . . . . . . . . . . . . . . . . . . . . . . . . 19
5.1 - Contacts . . . . . . . . . . . . . . . . . . . . . . . . . . . . . . . . . . . . . . . . . . . . . . . . . . . . . . . . . . . . . . . . . . . . 19
5.2 - System Extensions . . . . . . . . . . . . . . . . . . . . . . . . . . . . . . . . . . . . . . . . . . . . . . . . . . . . . . . . . . . . 19
5.3 - User / Resource Extensions . . . . . . . . . . . . . . . . . . . . . . . . . . . . . . . . . . . . . . . . . . . . . . . . . . . . 20
5.4 - Allworx Message Center . . . . . . . . . . . . . . . . . . . . . . . . . . . . . . . . . . . . . . . . . . . . . . . . . . . . . . . 20
Chapter 6 - Phone Configuration . . . . . . . . . . . . . . . . . . . . . . . . . . . . . . . . . . . . . . 27
6.1 - Personal Speed Dial . . . . . . . . . . . . . . . . . . . . . . . . . . . . . . . . . . . . . . . . . . . . . . . . . . . . . . . . . . 27
6.2 - Preferences . . . . . . . . . . . . . . . . . . . . . . . . . . . . . . . . . . . . . . . . . . . . . . . . . . . . . . . . . . . . . . . . . . 28
6.3 - Reboot the Phone . . . . . . . . . . . . . . . . . . . . . . . . . . . . . . . . . . . . . . . . . . . . . . . . . . . . . . . . . . . 30
6.4 - Hot Desk Login . . . . . . . . . . . . . . . . . . . . . . . . . . . . . . . . . . . . . . . . . . . . . . . . . . . . . . . . . . . . . . 30
6.5 - Clear Call History . . . . . . . . . . . . . . . . . . . . . . . . . . . . . . . . . . . . . . . . . . . . . . . . . . . . . . . . . . . . . 30
6.6 - Refresh Directory . . . . . . . . . . . . . . . . . . . . . . . . . . . . . . . . . . . . . . . . . . . . . . . . . . . . . . . . . . . . . 31
6.7 - Network Profiles . . . . . . . . . . . . . . . . . . . . . . . . . . . . . . . . . . . . . . . . . . . . . . . . . . . . . . . . . . . . . 31
Chapter 7 - Regulatory Notices . . . . . . . . . . . . . . . . . . . . . . . . . . . . . . . . . . . . . . . . 33
Appendix A - Abbreviations . . . . . . . . . . . . . . . . . . . . . . . . . . . . . . . . . . . . . . . . . . 35

Allworx Phone Model 9202E User Guide
+1 866 ALLWORX * +1 585 421 3850 Page 1
www.allworx.com
Version J Updated: February 14, 2019
Chapter 1 Introduction
The Allworx 9202E IP phone consists of a graphic LCD screen, three soft keys, five function buttons,
and two call appearance keys for users to manage phone calls.
Unpack the Allworx phone and applicable accessories, identify each item in the checklist and inspect
for missing items.
•Allworx phone and base: attach the base to the back of the phone. See “Adjust the Phone
Angle” on page 4 for more information.
•Handset with cord: attach the cord to the jack on the back of the Allworx phone.
•Phone Functions Reference Card: slide the quick operating guide between the base and back
of phone.
Additional equipment needed not included in the box:
•Ethernet Cable: connects the phone to the network
•Power Supply: provides power to the Allworx phone - rated 24VDC, 400 mA (or a network
connection with Power over Ethernet).
1.1 Who Should Read this Guide
This guide is for users of the Allworx 9224 IP phone.
1.2 Guide Organization
This User Guide describes the operation, features, and configuration options.
Chapter 1 - information about this guide.
Chapter 2 - set up of the IP phone.
Chapter 3 - managing calls.
Chapter 4 - IP phone features.
Chapter 5 - IP phone advanced options.
Chapter 6 - regulatory notices.
Chapter 7 - abbreviations used in this guide.

Allworx Phone Model 9202E User Guide
Page 2 +1 866 ALLWORX * +1 585 421 3850
www.allworx.com
Version J Updated: February 14, 2019
1.3 Equipment Requirements
The table below is a complete list of equipment, requirements, and additional documentation
necessary to perform all operations identified in this User Guide.
Equipment Requirements
Allworx server Allworx System Software Version 8.2 or higher.
Supported Web
Browsers
• Microsoft Edge (latest release)
• Microsoft Internet Explorer 11 (latest release with auto upgrade enabled).
• Google Chrome (latest release).
• Mozilla Firefox (latest release).
My Allworx Manager
User Guide
The guide is specific to My Allworx Manager and describes the features within the application.
This guide is available at: www.allworx.com.
Allworx Interact and
Interact Professional
User Guide
The guide is specific to the Allworx Interact and Interact Professional application and describes
the features within the application. This guide is available at: www.allworx.com.
Allworx Reach for
iOS User Guide
The guide is specific to the Allworx Reach for iOS smart phone app and describes the features
within the application. This guide is available at: www.allworx.com.
Allworx Reach for
Android User Guide
The guide is specific to the Allworx Reach for Android smart phone app and describes the fea-
tures within the application. This guide is available at: www.allworx.com.
My Allworx Manager
User Guide
The guide is specific to the Allworx My Allworx Manager PC application and describes the fea-
tures within the application. This guide is available at: www.allworx.com.
Allworx IP Phone
Series Function Card
The guide is specific quick reference to the 92xx IP phone functions. This guide is available at:
www.allworx.com.
Allworx IP Phone
Series Quick Start
Guide
The guide is specific to installation and mounting of the 92xx IP phones. This guide is available
at: www.allworx.com.

Allworx Phone Model 9202E User Guide
+1 866 ALLWORX * +1 585 421 3850 Page 3
www.allworx.com
Version J Updated: February 14, 2019
Chapter 2 Setup
2.1 Connect the Phone
To connect the phone:
1. Connect the cables to the jacks on the back of the phone.
2. Thread cables through the strain relief guide on the phone base.
Caution:
Do not connect the phone to an analog phone line. This may cause damage to the Allworx
phone, which voids the warranty.
Cable Connections
Optional: Headset cord Headset jack ( )
Handset cord Handset jack ( )
Ethernet cable Network jack ( ) and Wall Ethernet jack
Power over Ethernet (PoE): provides power to the phone after connecting the
Ethernet cable.
Optional: Ethernet cable Computer jack ( ) and the computer.
Optional: Power Supply Phone DC jack ( ). Allworx recommends using a surge protector.
Only required if the Ethernet cable does not provide PoE
Back of Phone

Allworx Phone Model 9202E User Guide
Page 4 +1 866 ALLWORX * +1 585 421 3850
www.allworx.com
Version J Updated: February 14, 2019
3. View the initialization progress on the phone screen. A normal sequence includes:
•Allworx Logo
• Profile: <profile name> (depending upon the phone configuration)
• Configuring Network
• Starting network
• Loading configuration files
• Station Init complete
After successful startup, the phone displays a combination of the date, time, user presence, user
name, and extension or the phone display may suggest assigning the handset to a user. If this
occurs, follow the on screen directions. If the phone does not follow this sequence or displays
an error, contact the Allworx Server Administrator.
2.2 Adjust the Phone Angle
The phone base angle adjusts for easier phone screen reading.
To adjust the phone base angle:
1. Unplug the phone from the PoE or the power supply. Remove the handset from the hook and
lay the phone face down on a soft surface.
2. Hold the base with the fixed tabs facing the bottom of the phone. Select one of the three
available positions to connect the base to the phone. The set of holes at the bottom of the
phone provides the steepest angle.
3. Place the fixed tabs in the preferred holes on the back of the phone. Rotate the phone base
upwards until the flexible tabs click into place.
To remove the base:
1. Remove the handset from the hook and lay the phone face down on a soft surface.
2. Press down on the flexible tabs and rotate the base towards the phone bottom until the fixed
tabs easily lift out of the holes.
2.3 Volume Adjustment
The volume of the incoming ring, handset, speaker phone, and the headset is adjustable.
To adjust the incoming call volume:
1. Locate the phone volume bar. Do not lift the handset or turn on speaker phone.

Allworx Phone Model 9202E User Guide
+1 866 ALLWORX * +1 585 421 3850 Page 5
www.allworx.com
Version J Updated: February 14, 2019
2. Press the volume bar – (decrease) or + (increase) to adjust the incoming ring audio level. The
phone plays the audio tone.
To adjust all other volumes:
1. Pick up the handset or turn on the speaker phone or headset. Locate the phone volume bar. The
phone screen displays which audio path is being adjusted.
2. Press the volume bar to – (decrease) or + (increase) the audio level.
2.4 Wall Mounting (Optional)
2.4.1 Wall Mounting Plate
Mounting the Allworx phone on a wall requires a mounting plate that meets the TIA-570-B standard
and is available from a local telephone company or local retailer. The mounting plate has studs that
position the Allworx phone flush to the wall surface.
Remove the Allworx phone base and mount the phone over the mounting plate studs. All power and
RJ-45 cable connections should exit between the phone back and the wall, and then routed to the
network connection and/or a power connection.
2.4.2 Handset Retainer Clip
The handset retainer clip prevents the handset from slipping out of the phone cradle while hanging on
a wall.The Allworx phone ships with the adjustable handset retainer clip in the wall mount position on
the phone cradle.
Caution:
If using a standard telephone wall mount plate, DO NOT connect to the RJ-11 jack. This
connection is for analog phones and may cause damage to the Allworx phone, which
voids the warranty.
Leviton 4108W-0SP

Allworx Phone Model 9202E User Guide
Page 6 +1 866 ALLWORX * +1 585 421 3850
www.allworx.com
Version J Updated: February 14, 2019
To adjust the retainer clip for desktop use (for easier handset removal/hang-up) insert a coin in the
retainer clip slot and turn the coin clockwise, 180 degrees. To return the retainer clip to the wall mount
position, insert a coin in the retainer clip slot and turn the coin counter-clockwise, 180 degrees.

Allworx Phone Model 9202E User Guide
+1 866 ALLWORX * +1 585 421 3850 Page 7
www.allworx.com
Version J Updated: February 14, 2019
Chapter 3 Overview
In addition to English, the Allworx phone supports Canadian French and Castilian Spanish on the
phone display. Contact the Allworx Server Administrator to configure the phone to display the
preferred language; users cannot change the phone display language within the phone configuration
menu. After making the change, the preferred language displays during the phone reboot.
Scroll and Select keys
Visual ring
indicator
RJ-11 headset port
Soft keys
Higher audio
fidelity
Handset with cord
expandable up to
nine feet
Full-duplex
speakerphone
Volume control
10/100 Ethernet switch
Five function buttons
Multiple position tilt
base (also wall
mountable)
Power:
• 802.3af PoE
• 24V DC adapter
Call Appearance keys

Allworx Phone Model 9202E User Guide
Page 8 +1 866 ALLWORX * +1 585 421 3850
www.allworx.com
Version J Updated: February 14, 2019
3.1 Buttons
3.2 Screen Icons
3.3 Function Buttons
A function button is a dedicated physical button used to perform a single phone function. The
functionality of each button is explained in more detail in the appropriate section of this guide.
Button Type Description
Key pad Dial phone numbers or to enter PIN numbers/ passwords.
Navigation Up or down navigation arrows to move through the phone screen options. Use the cen-
ter button to Select or Save settings.
Soft key Initiate actions; therefore, the names and behaviors of the soft keys are dependent on the
current phone screen. The functionality of each soft key is explained in the appropriate
section of this guide.
Icon Description
New voicemails
Missed calls
On an active call
Function Button Description
MESSAGES Accesses the voicemail messages. If there is a new message, the number of new mes-
sages displays on the LCD screen, and the MESSAGES button changes to red.
SPEAKER Provides hands-free use of the phone. The SPEAKER button changes to solid green while
in use. Allworx users can toggle between the speaker and the handset.
NOTE: The speaker phone does not work while using a headset.
MUTE/DND Mute: turn off the microphone in the handset. The MUTE button is solid red while in use.
DND: send calls to the next step in the active call route. The MUTE button is solid amber
while in use.
TRANSFER Sends the active call to another recipient.
HOLD Places the active call on hold.

Allworx Phone Model 9202E User Guide
+1 866 ALLWORX * +1 585 421 3850 Page 9
www.allworx.com
Version J Updated: February 14, 2019
3.4 My Allworx Manager
My Allworx Manager provides access to the business directory, conference scheduling page, company
phone list, distribution lists, phone features chart, and shared folders. Enter the My Allworx Manager
address into a web browser (e.g. Internet Explorer). For more information, visit
http://www.allworx.com/ and download the My Allworx Manager User Guide.
The Allworx Server Administrator provides the address: http://ServerLANAddress, and then enter the
log in username and password.
ServerLANAddress is the IP address or domain name of the Allworx server.

Allworx Phone Model 9202E User Guide
Page 10 +1 866 ALLWORX * +1 585 421 3850
www.allworx.com
Version J Updated: February 14, 2019

Allworx Phone Model 9202E User Guide
+1 866 ALLWORX * +1 585 421 3850 Page 11
www.allworx.com
Version J Updated: February 14, 2019
Chapter 4 Operation
The 9202E IP phone users can manage active calls as well as the Presence and DND settings.
4.1 Audio Path Options
Users can place or answer a call using one of the options below. After selecting an option, the Call
Appearance (default line in use) lights green.
•Handset
•Speaker function button: toggle between the speaker phone and the handset. While using the
speaker phone, users can place the handset on hook or pick up the handset to continue using it.
When finished with the call, press the speaker phone function button to hang up.
4.2 Place a Call
To place an outbound call:
1. Lift the handset or press the SPEAKER button.
2. Dial the extension or press the SpDial soft key to automatically dial a programmed number. The
phone configuration enables users to dial without lifting the handset or pressing a button.
Dialing automatically activates the speaker phone or headset.
4.3 Receive a Call
For incoming calls, the audible indicator rings and a Call Appearance flashes, unless configured
otherwise. Do one of the following:
• Lift the handset, the Speaker phone function button or press the flashing Call Appearance to
answer the call.
• Press the IGNORE soft key to stop the audible ringing and the PFK continues to flash until the
user answers the call or the caller hangs up.
• Press the SILENT soft key to stop the audible ringing, the phone screen displays the incoming
call information, and the PFK continues to flash until the user answers the call or the caller
hangs up.

Allworx Phone Model 9202E User Guide
Page 12 +1 866 ALLWORX * +1 585 421 3850
www.allworx.com
Version J Updated: February 14, 2019
4.4 End a Call
Do one of the following:
• Place the receiver on the hook. If using the speaker phone or headset, press the SPEAKER
button.
• Press another Call Appearance. If a second incoming call is on another Call Appearance,
pressing that Call Appearance ends the current call and answers the incoming call (unless the
phone configuration enables auto on hold).
4.5 Headset
Press the SPEAKER button to activate the headset, and then press the SPEAKER button again to
disconnect the call.
4.6 Directory Dialing
1. Press the UP / DOWN scroll keys to view a list of all User Extensions, System Extensions, and
Speed Dial numbers by Name or Description.
2. Use the UP / DOWN scroll keys to highlight the name (or description) and extension or press the
keypad to jump to a specific alphabetic section of the directory. Press SELECT to dial the
number.
4.7 Redial a Number
1. Press the REDIAL soft key on the phone display screen.
2. Press the CALLS softkey. Use the UP / DOWN scroll keys to highlight the call in the display. Press
SELECT .
4.8 Mute/DND
4.8.1 Mute a Call
During a call, press the MUTE/DND button to turn off the microphone in the handset, speaker phone,
or headset. The MUTE/DND button is solid red while in use.
Other manuals for 9202E
1
Table of contents
Other Allworx Telephone manuals

Allworx
Allworx 9202E User manual

Allworx
Allworx 9204 User manual

Allworx
Allworx 9204 User manual

Allworx
Allworx 6x Installation guide

Allworx
Allworx 9224 User manual

Allworx
Allworx 48x User manual

Allworx
Allworx 9212 User manual

Allworx
Allworx 9224 User manual

Allworx
Allworx 24x User manual

Allworx
Allworx 9202 User manual