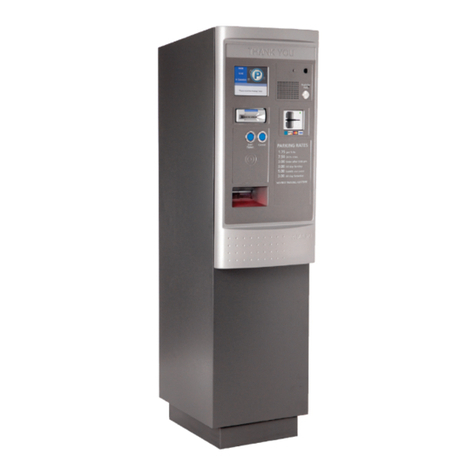
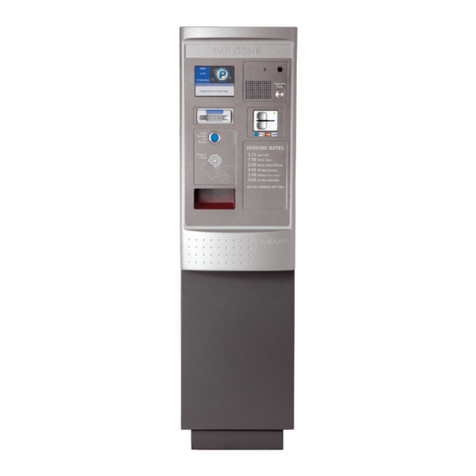
Amano OPUS-7000 Series User manual

OPUS-7000 Series
Pay-on-Foot; Pay-in-Lane Paystation
Distributor’s Manual
OPUS7000_Distributor_10062014

© Copyright 2014 Amano McGann, Inc. OPUS7000_Distributor_10062014 2
OPUS-7000 Distributor’s Manual
Date:
October 7, 2014
Notice of Rights:
© Copyright 2014 by Amano McGann, Inc. All rights reserved. This document contains proprietary information and such
information may not be reproduced whole or in part without written permission from:
Amano McGann, Inc.
2699 Patton Road.
Roseville, MN 55113
Notice of Liability:
Amano makes no representations or warranties with respect to the accuracy or completeness of the contents of this work
and specifically disclaims all warranties, including without limitation, warranties of fitness for a particular purpose. Amano
reserves the right to make equipment changes and improvements that may not be reflected in this document. Portions of
this document may have been updated to include the latest hardware or firmware version, if applicable.
We recommend that this document be read in its entirety before any attempt is made to operate the equipment.
Trademark Notice:
Amano is a registered trademark of Amano Inc. All other trademarks are the property of their respective owners.
Contact Information:
Every effort has been made to ensure the accuracy of this document. If you have comments, question, or ideas regarding
this document please send them to Amano via e-mail to:
techwriter@amanomcgann.com
or, via postal mail to:
Amano McGann, Inc.
Technical Writer
2699 Patton Road
Roseville, MN 55113
For more information about Amano’s complete line of products, visit our web site at:
www.amanomcgann.com
Date
Tuesday, October 07, 2014
Product
OPUS-7000 Series
Build/Revision
A1
Model
Pay-In-Lane, Pay-on-Foot Pay Station
Document Type
Distributor’s Manual
Version
A1
Company Name - Long
Amano McGann, Inc.
Company Name - Short
Amano McGann
Street
2699 Patton Road
City/State/Postal Code
Roseville, Minnesota 55113
Telephone
(612) 331-2020
Fax
(612) 331-5187
Email
Website
www.amanomcgann.com
Copyright
Copyright © 2014 Amano McGann, Inc. All rights reserved.
File Name
OPUS7000_Distributor_10062014

© Copyright 2014 Amano McGann, Inc. OPUS7000_Distributor_10062014 3
OPUS-7000 Distributor’s Manual
OPUS-7000
DISTRIBUTOR’S MANUAL
OPUS-7000 DISTRIBUTOR’S MANUAL
Introduction..................................................................................................................... 4
Amano McGann University............................................................................................ 4
FIRST TIME OPERATION MENU........................................................................................ 5
1.1 Return the Paystation Back to Idle........................................................................... 6
1.2 Check for Paystation Errors and Warnings.............................................................. 7
1.3 Adjust the Date and Time........................................................................................ 8
1.3.1 Changing Paystation Settings........................................................................ 8
1.4 Show the Information Encoded on a Ticket.............................................................. 9
1.5 Check the Quantities of the Coin and Cash Units.................................................... 10
1.6 Set In Operation/Out of Service Status..................................................................... 10
1.6.1 Troubleshooting Codes................................................................................... 11
1.7 Defining Opening/Closing Hours............................................................................... 12
1.8 Shutter Configuration................................................................................................ 13
MANAGER OPERATION MENU.......................................................................................... 13
2.1 Money Management................................................................................................. 14
2.2 Returning Money...................................................................................................... 14
2.3 Transfer Note and Coins to the Safe........................................................................ 15
2.4 Change an Operator’s Password............................................................................... 15
2.5 Invalidating a Parking Ticket..................................................................................... 16
2.6 Invalidating Management Cards............................................................................... 17
ENGINEER OPERATION MENU.......................................................................................... 18
3.1 Setting System Parameters....................................................................................... 19
3.1.1 Default All, Restore All, and Backup All.......................................................... 19
3.1.2 Common and Specific Parameters................................................................. 19
3.1.3 Set Parameters Back to Default..................................................................... 20
3.1.4 Import Parameters from a SD Card................................................................. 21
3.2 Viewing Paystation Log Files................................................................................... 21
3.3 Viewing Function Counts......................................................................................... 21
3.4 Testing Paystation Functions..................................................................................... 22
3.5 Adjusting Voice Tables.............................................................................................. 22
3.6 Issuing Parking Tickets, Validation Coupons, and Mgmt. Cards............................. 23
3.6.1 Parking Tickets............................................................................................... 23
3.6.2 Validation Coupons....................................................................................... 23
3.6.3 Management Cards...................................................................................... 23
3.7 Backing Up and Restoring Paystation Settings........................................................ 24
3.8 Sequence Number Check.......................................................................................... 25
3.9 Device Counter........................................................................................................ 25
3.10 Credit Operation................................................................................................... 26
3.11 Testing the TCP/IP Configuration.......................................................................... 26
3.12 Testing the Rate Configuration................................................................................ 27
OPERATOR OPERATION MENU.......................................................................................... 28
4.1 T-Total/Sub-Total Reports........................................................................................ 28
4.2 Raising and Lowering the Gate.................................................................................. 28
4.3 Printing Receipts for Previous Transactions.............................................................. 28
4.4 Printing Credit Card Settlement Reports................................................................... 28
4.5 Adjusting Voice Announcement Volume................................................................... 29
4.6 Checking the Contents of the Coin and Note Safe.................................................. 29
4.7 Checking Store Validation Amounts......................................................................... 30
4.8 Tax Reports.............................................................................................................. 30
DIP SWITCH BOOT MODES................................................................................................ 30

© Copyright 2014 Amano McGann, Inc. OPUS7000_Distributor_10062014 4
OPUS-7000 Distributor’s Manual
Introduction
The OPUS-7000 Series Central Pay-on-Foot, Pay-in-Lane Station was designed
for flexibility and ease of use in any facility. The fully functional, touch screen
controlled device is the perfect solution for 24/7 unattended operations. The
OPUS-7000 Paystation processes encrypted 2D data matrix barcode tickets from
the OPUS-2000 Series Entry Terminal. Payment options include credit card, bills,
coins, and/or encrypted 2D data matrix barcode bulk validation tickets. Mobile
and barcode validations can be processed through the optional FlexScan
QR400® barcode imager.
The OPUS-7000 Distributor’s Manual is intended to provide assistance on
Paystation operational processes. The processes included in the manual range
from navigating through the configuration menus to changing specific Paystation
aspects. Each section of the Distributor’s Manual describes what the particular
function is, how to navigate to the function, and how to alter the function to best
suit the facility’s needs.
Note: The references in this manual to “OPUS-7000”, “Paystation”,
“OPUS-7xxx”, or “Device” refer to both OPUS-7700 and OPUS-7800.
Any model-specific differences are noted in the appropriate section(s).
Amano McGann University
Any file references made in this manual can be found on Amano McGann
University in the Support Info and Files section. Please email
Amano McGann University URL: amu.amanomcgann.com

© Copyright 2014 Amano McGann, Inc. OPUS7000_Distributor_10062014 5
OPUS-7000 Distributor’s Manual
FIRST TIME OPERATION MENU
The First Time Operation menu contains basic configuration settings for the
OPUS-7000 Paystation. The Operation menus contained within the First Time
Operation menu are Operator Operation and Manager Operation.
Power the Paystation ON and wait for the Device to display the idle screen. Once
idle, open the Paystation door and toggle the Management Switch located in
front of the iCore board. Once the switch is toggled, the First Time Operation
menu is displayed.
[Fig. 1.0A] The Management Switch
The First Time Operation menu displays the date, day, and time at the top of the
menu. The middle of the menu displays the statuses of LC1 (arming loop) and
LC2 (closing loop). The application version of the Paystation is shown below the
arming/closing loop statuses.
The configurable settings within the First Time Operation menu are
Error/Warning, Clock Adjustment, Ticket Information, and Cash Check.
Note: Any button in pink designates the Management password
(C1441104) is required to enter the menu.
Each of the First Time Operation Menu sections begins from the Paystation in an
idle state.

© Copyright 2014 Amano McGann, Inc. OPUS7000_Distributor_10062014 6
OPUS-7000 Distributor’s Manual
[Fig. 1.0B] First Time Operation Menu
1.1 Return the Paystation Back to Idle
To return the Paystation to its idle mode after all desired configurations have
been made, navigate to the root menu of the current function (First Time
Operation,Operator Operation, Manager Operation, Engineer Operation).
Once in the root menu, verify the display is on the second page by looking at the
page number displayed at the top of the menu. Switch to the second page by
pressing the next button in the lower-right corner of the screen, if necessary.
[Fig. 1.1A] The page number is displayed on the top of the root menu

© Copyright 2014 Amano McGann, Inc. OPUS7000_Distributor_10062014 7
OPUS-7000 Distributor’s Manual
Verify the management switch is in the OFF position and press Back to Idle to
return to Kiosk mode.
[Fig. 1.1B] The Paystation Idle/Kiosk screen
Note: If the Paystation makes a clicking sound followed by four beeps
after pressing Back to Idle, verify the Management Switch is in the
OFF position. Once the Management Switch is OFF, press Back to
Idle once more.
1.2 Check for Paystation Errors and Warnings
The Error/Warning page contains Paystation errors encountered during
operation. The Error/Warning menu is located in the first page of the First Time
Operation menu. Open the Paystation door and toggle the Management Switch
to enter the First Time Operation menu. Press Error/Warning to view Paystation
error data.
Navigate through the errors by pressing the Previous and Next buttons. Each
event is labeled with a type (Error or Warning), a description, and the date/time
the error/warning occurred.

© Copyright 2014 Amano McGann, Inc. OPUS7000_Distributor_10062014 8
OPUS-7000 Distributor’s Manual
1.3 Adjust the Date and Time
The Clock Adjustment menu contains settings necessary to configure the current
date and time of the Paystation. Enter the Clock Adjustment menu by opening
the Paystation door and toggling the Management Switch. Press Clock
Adjustment once the First Time Operation menu has loaded.
Enter the Management password (C1441104) when prompted and press E to
confirm. The following section will describe how to change Paystation settings
using the Clock Adjustment menu as an example.
1.3.1 Changing Paystation Settings
[Fig. 1.3A] Use the value types, values, and keypad to adjust the date and time
Value Types:
Press any of the value type buttons to enter edit mode. Once the button becomes
highlighted blue, enter the new value using the on-screen keypad.
Values:
The current values of each value type. The example above shows the year is
2014, the month is 7 (July), the date is the 11th, and the time is 10:29 (24-hour).

© Copyright 2014 Amano McGann, Inc. OPUS7000_Distributor_10062014 9
OPUS-7000 Distributor’s Manual
Keypad:
Use the Keypad to enter the new value. Press the red C to clear the value and
press the green E to accept the new value.
Once all the correct values are inserted, press the Set button in the lower-left
corner of the display. After Set has been pressed, press OK to completely make
the change. Press Return when finished. Verify the settings have been changed
to the desired values by viewing the top of the First Time Operation menu. The
date and time are now the values set in the Clock Adjustment menu. Also verify
the date/time is correct in Kiosk mode by returning the Paystation back to idle.
Please see section 1.1 for instructions on returning to Kiosk/Idle mode.
Note: Amano McGann recommends the use of an NTP server on the
iParcProfessional hosted machine, or the use of the IO100 time. Use
Common Parameter 01-0021 to adjust the Time Sync Communication
setting.
Note: If the IO100 time is used, the Clock Adjustment time is reset to
the current IO100 time. Please use the IO100 webpage to adjust the
current date/time of the device when using the IO100 time sync.
1.4 Show the Information Encoded on a Ticket
It is often helpful to know the information encoded on a ticket when first
configuring the Paystation and troubleshooting ticket/encoding issues. Find the
information encoded on a ticket by opening the Paystation door and toggling the
Management Switch. Press Ticket Information after the Frist Time Operation
menu has loaded.
The Ticket Information menu enables the REPM to accept tickets. Insert a ticket
into the ticket slot. The information encoded on the ticket is shown on the
Paystation display. The ticket is spit out of the ticket slot after the ticket is read.
The information shown for the ticket includes ticket type, site code, lot number,
machine number, fee rate, ticket number, and issued date/time.
[Fig. 1.4A] Information encoded on the ticket inserted into the Paystation
Press the Return button when finished reading tickets.

© Copyright 2014 Amano McGann, Inc. OPUS7000_Distributor_10062014 10
OPUS-7000 Distributor’s Manual
1.5 Check the Quantities of the Coin and Cash Units
Check the coin and cash quantities through the Cash Check menu. Navigate to
the Cash Check menu by flipping the Management Switch and pressing Cash
Check. The quantities of each denomination of coin are displayed. Press the
Coin Unit Sub Total button to print a report of the quantities. The report contains
detailed information regarding the coin denominations, received/dispensed
quantities, and previous coin quantities. Press Return when finished.
[Fig. 1.5A] Press Coin Unit Sub Total/BNR Sub Total to print a report of the unit cash check
Press Coin/Note Select to change to the Note Dispenser menu. Press BNR Sub
Total to print a sub-total report of the current bank note recycler contents, or
press BNR Prev Total to print a sub total report of the previous bank note
recycler contents.
1.6 Set In Operation/Out of Service Status
The operation status menu determines the working state of the Paystation. The
three states of the OPUS-7000 are Open, Automatic, and Close.
Open: Always in-operation
Automatic: In/out of operation is determined by open/closing hours
Close: Always out of operation
Navigate to the In Operation/Out of Service menu by opening the Paystation door
and toggling the Management Switch. Press Next to continue to page two of the
First Time Operation menu and select In Operation/Out of Service.

© Copyright 2014 Amano McGann, Inc. OPUS7000_Distributor_10062014 11
OPUS-7000 Distributor’s Manual
Change the state of the Paystation by pressing the button labeled with the
desired operational state. Press Return when finished. If the Paystation is
returned back to idle with a Closed operational status, the display shows the
message, “Closed please use the intercom button to contact the operator.” The
letter displayed in the bottom-right corner of the screen shows the current
troubleshooting code.
[Fig. 1.6A] The troubleshooting code is located in the bottom-right of the display
1.6.1 Troubleshooting Codes
A: Forced out of service by operator
T: Trouble (i.e. reader dysfunctional, fee engine not properly set, etc.)
M: Coin note safe full
E: Out of change
I: Forced out of service by operation signal
F: Communication buffer full
S: Out of service by parameter or communication
2: Parameter required to initialize is not properly set

© Copyright 2014 Amano McGann, Inc. OPUS7000_Distributor_10062014 12
OPUS-7000 Distributor’s Manual
1.7 Defining Opening/Closing Hours
The Paystation can be set to open and close at designated times. To set the
open/close times, open the Paystation door and flip the Management Switch.
Press the Next button to continue to the second page of the First Time Operation
menu. Select Opening Hours Start/End.
[Fig. 1.7A] Opening hours define the in operation/out of service status if set to Automatic
The Opening Hours Start End menu displays the current open/close hours at the
top of the menu. Set the opening time of the Paystation by pressing the Opening
Start button and using the keypad to enter a new Opening value (24-hour time
format). Press the green E button on the keypad once the desired value is set.
Set the closing time by pressing Opening End and using the keypad to enter the
desired value (24-hour time format). Press E on the keypad once the desired
value is entered.
If the Device is in operation 24 hours a day, press the 24 Hours button. The
times are automatically set.
Press OK to save the changes and select Return to exit the menu.

© Copyright 2014 Amano McGann, Inc. OPUS7000_Distributor_10062014 13
OPUS-7000 Distributor’s Manual
1.8 Shutter Configuration
The OPUS-7000 can be set to two sets of operation modes for the ticket shutter.
To make a change to the current mode, open the Paystation door and toggle the
Management Switch. Press Next to continue to page two of the First Time
Operation menu and select Shutter Control. The Shutter Control menu displays
the current state of the ticket shutter near the top of the display.
Change the current shutter mode by pressing Open or Automatic. An Open
state keeps the ticket shutter open. An Automatic state closes and opens the
shutter automatically based upon input from the arming and closing loops. Press
the desired state and select Return when finished.
1.9 Clearing Management Cards
AManagement card may be cleared of all information so it can no longer be
used at the Paystation. Ensure the Management card is present when performing
this operation. Open the Paystation door and toggle the Management Switch.
Press Next to continue to page two of the First Time Operation menu. Insert the
Management card and select Clear Password. Press Yes on the confirmation
pop-up to clear the information or No to cancel the operation.
MANAGER OPERATION MENU
The Manager Operation menu contains settings for both technicians and site
managers. Manager Operation is designed for the management of the OPUS-
7000 Paystation as it contains settings responsible for configuring money
management, reports, and password management.
To navigate to the Manager Operation menu, open the Paystation door and
toggle the Management Switch to load the First Time Operation menu. Press
Next to continue to page 2 of the First Time Operation menu and select To
Manager Operation. Enter the Management password (C1441104) and press E
to continue.
The following sections will begin from the Manager Operation menu unless
specified otherwise.

© Copyright 2014 Amano McGann, Inc. OPUS7000_Distributor_10062014 14
OPUS-7000 Distributor’s Manual
2.1 Money Management
The current contents of the Paystation may be changed via the Money
Management menu. Coins and bank notes may be added via the coin inlet and
bank note acceptor.
Change the current coin/cash contents by navigating to the Manager Operation
menu and pressing Money Management. The current contents of the coin unit
are displayed.
To change the current coin contents, press Change Current Contents. The
Current Contents menu is displayed. Select the denomination desired to change
and use the keypad to enter a new value. Press Ewhen the desired value is
entered and press OK when finished. Press Return to return to the Money
Management menu.
If more coins are to be added to the Paystation, press the Automatic button. The
coin inlet shutter will open and the LED above the coin inlet will flash. Insert the
denominations as desired and press Stop when finished.
To change the current cash contents, press Coin/Note select. The Cash Unit
denominations are displayed. Press Change Current Contents to change the
current cash contents. Select the denomination desired to change and use the
keypad to enter the new value. Press E after the desired value is entered and
press OK when finished. Press Return to return to the Money Management
menu.
If more notes are to be added to the Paystation, press the Automatic button.
Insert the denominations into the bank note acceptor and press Stop when
finished.
To change the initial count of the coin/cash denominations, press Change Initial
Count. Once the Initial Count menu loads, press the gray button on which
denominations are to be changed. Use the keypad to enter a value and press the
green Eonce all correct values are entered. Press OK to finish and Return to
return to the Money Management menu.
For more details on money management, please see the Money Management
Manual on Amano McGann University in the OPUS manuals section.
2.2 Returning Money
The OPUS-7000 series has the ability to give coin, coin and note, bank note, and
same note change. To define the medium of money returned, navigate to the
Manager Operation menu and select Return Money (Payment Cancel). Press
the desired option, it is highlighted blue once selected. If the facility does not wish
to give change, press No Return Money. Press Return once the desired refund
medium is selected.

© Copyright 2014 Amano McGann, Inc. OPUS7000_Distributor_10062014 15
OPUS-7000 Distributor’s Manual
2.3 Transfer Note and Coins to the Safe
The BNR/Coin Inventory menu provides the ability to transfer bank notes to the
note safe and/or transfer coins to the coin safe. Navigate to the Inventory menu
by entering the Manager Operation menu and pressing BNR/Coin Inventory. It
is also possible to navigate to the menu by inserting an Inventory Card into the
ticket slot while the Paystation is idle.
Press Note Safe to transfer notes to the note safe. Press Coin Outlet to transfer
coins to the coin safe. It is safe to remove the note/coin safes after the Paystation
is finished transferring the contents to the boxes.
Re-insert the safes into the Paystation after the contents have been emptied.
Press Return to return to the Manager Operation menu.
2.4 Change an Operator’s Password
The Password Control menu is responsible for configuring the passwords of all
operators entered into the OPUS Paystation. The Password Control menu can
change the function/role levels of an operator and delete the operator/mark the
operator as “Invalid”.
To make changes to an operator, enter the Manager Operation menu and press
Password Control. A list of the current operators is displayed along with their
function and role levels. To edit the user, press the gray, numbered box beneath
the Operator Number corresponding to the operator to be edited. The Edit menu
is displayed after the box has been pressed. To change the password and/or
role-level, push the gray button of the corresponding value type and use the
keypad to enter a new value. Press E once the desired value is entered. Press
OK when finished.
Use the Previous and Next buttons to navigate through the operators. Press
Invalid if it is desired to invalidate an operator. The password is changed to
Invalid and the Role-Level is ‘–‘.
Press Return to return to the Password Control menu. Press Return once more
to return to the Manager Operation menu.

© Copyright 2014 Amano McGann, Inc. OPUS7000_Distributor_10062014 16
OPUS-7000 Distributor’s Manual
2.5 Invalidating a Parking Ticket
Aparking ticket may be invalidated so it can no longer be used at the facility. To
invalidate a parking ticket, navigate to the Manager Operation menu and press
Invalid Parking Ticket.
Press Regist to register a new parking ticket to be invalidated.
[Fig. 2.5A] Enter the ticket information to be invalidated
Press the gray button for each value type and enter the corresponding ticket
value using the keypad. Press E after the desired value is entered. Once all
value types contain the ticket values, press Regist. The Register Number is
automatically changed to the next Register No.
Press Return to return to the Invalid Parking Ticket menu. The newly registered
ticket is shown in the corresponding register number. Use the delete, all delete,
change, regist, or print buttons to delete the invalidated ticket, delete all the
invalidated tickets, alter the current invalidated ticket information, register a new
invalidated ticket, or print the details of the invalidated ticket via the receipt
printer.

© Copyright 2014 Amano McGann, Inc. OPUS7000_Distributor_10062014 17
OPUS-7000 Distributor’s Manual
2.6 Invalidating Management Cards
Management cards may be invalidated so improper access is not granted to the
Paystation. To invalidate a card, open the Manager Operation menu and press
the Invalid Management Card button.
Registered invalidated management cards along with their corresponding re-
issue number are displayed. Press the Read button to skip to a Management
card issue number.
To add an invalid Management card, press the Add button. Press the Operator
No. value type and insert a new value using the keypad. Press E to confirm the
new value. Enter a re-issue number by pressing Re-Issue and entering a new
issue number using the keypad. Press E to accept the entered value. Press
Regist to register the Management card as invalid.
Press OK and Return to return to the invalidated cards menu. If necessary, print
out a receipt of all invalidated Management cards by pressing the Print button.
[Fig. 2.6A] Enter the Management card information to be invalidated

© Copyright 2014 Amano McGann, Inc. OPUS7000_Distributor_10062014 18
OPUS-7000 Distributor’s Manual
ENGINEER OPERATION MENU
The Engineer Operation menu contains low-level configuration settings and
troubleshooting functions. The sub-menus contained within Engineer Operation
include System Parameter, Function Count, Voice Table Setting,
Backup/Restore, Device Counter, Log File, Function Check, Card Issue,
Sequence Number Check, Device Counter, Credit Operation, AMINET Process,
and Rate Configuration.
To navigate to the Engineer Operation menu, open the Paystation door and
toggle the Management Switch. Press Next to continue to page two of the First
Time Operation menu. Select Manager Operation and enter the Management
password (C1441104).
Navigate to page two of the Manager Operation menu by pressing the Next
button and select Engineer Operation. The Engineer Operation menu is also
contained within page two of the Operator Operation menu.
[Fig. 3.0A] The Engineer Operation menu

© Copyright 2014 Amano McGann, Inc. OPUS7000_Distributor_10062014 19
OPUS-7000 Distributor’s Manual
3.1 Setting System Parameters
System parameters are numbered values representing various Paystation
settings. Each parameter number is assigned a function and a value. For
example, if the first octet of the host IP address (commonly 192) needed to be
changed, the parameter number of the first octet is entered, and a new value is
inserted. In this example, the parameter number is 43-0007 (representing the first
IP octet function) and the default value is 192 (representing the value of the first
octet number: 192.xxx.xxx.xxx). A description is displayed at the bottom of the
Parameter Setting menu when a parameter number button is pressed.
Navigate to the System Parameters menu by opening the Engineer Operation
menu and pressing System Parameter. The menus contained within System
Parameter include Common Parameter, Specific Parameter, Print All, Default All,
Restore All, Backup All, and Difference Parameter.
Common Parameters are categorized as common parts/functions applicable to a
common garage. For example, lot number, iParc server IP address, and use
credit card are parameters found in the Common section as they apply to rules
set by the facility. Specific Parameters are categorized as specific parts/functions
only applicable to the device. For example, machine number, device IP address,
and pay on entry are parameters found in the Specific section as they apply
specifically to the device. Please refer to the parameter guides for the common
parameter and specific parameter functions.
3.1.1 Default All, Restore All, and Backup All
The Default All, Restore All, and Backup All buttons can change all parameters
back to their default values, restore all parameters from a CSV file, and backup
all parameters to a CSV file. Once a menu button is pressed, a pop-up displays
verifying the process is ready to be started. Press Start if ready or press Stop if
cancellation is necessary.
If Backup All is selected, the parameters are backed up to the SD card in
SD\DataBackup\SettingsCSV.
3.1.2 Common and Specific Parameters
Navigate to the System Parameter menu to adjust both common and specific
parameters. Press either Common Parameter or Specific Parameter to enter
the Common/Specific Parameter menus. The sub-menus contained within both
parameter menus are Setting, Default, and Import CSV.
Setting allows the alteration of each individual parameter. Press Setting to
change a parameter. The Setting menu displays the parameter number, the
setting the parameter is referring to, the value of the setting, the navigation
buttons, and the on-screen keypad.
If the parameter desired is not near the first set of parameters, skip to the
parameter by pressing the Read button. Once Read is pressed, enter the

© Copyright 2014 Amano McGann, Inc. OPUS7000_Distributor_10062014 20
OPUS-7000 Distributor’s Manual
address of the parameter setting using the keypad and press E once the desired
parameter is entered. The Parameter menu will then display the parameter range
containing the submitted parameter number.
To change the value of the parameter, press the left most number (the parameter
number). The parameter number is highlighted blue to designate editing mode.
Enter the desired value using the keypad, and press E to confirm the change.
The value of the parameter is changed.
[Fig 3.1A] Adjust the parameter settings to the facility’s needs
Please refer to the appropriate parameter lists to configure the Paystation to the
facility’s needs.
3.1.3 Set Parameters Back to Default
To set the parameters back to default, navigate to the System Parameter menu
followed by Common Parameter or Specific Parameter (depending on which set
of parameters is to be returned back to default). Press the Default button once in
the Common/Specific menu.
Other manuals for OPUS-7000 Series
1
This manual suits for next models
2
Table of contents
Other Amano Touch Terminal manuals

Amano
Amano MTX-15 User manual

Amano
Amano AFR-200 User manual

Amano
Amano MDR900-5-0-AC Series User manual

Amano
Amano MTX-30P PUSH Original operating instructions

Amano
Amano OPU Series User manual

Amano
Amano OPUS-4000 Series User manual

Amano
Amano Time Guardian FRT-40 User manual

Amano
Amano OPUS-4000 Series User manual

Amano
Amano MTX-30 User manual

Amano
Amano AFR-200 Original operating instructions