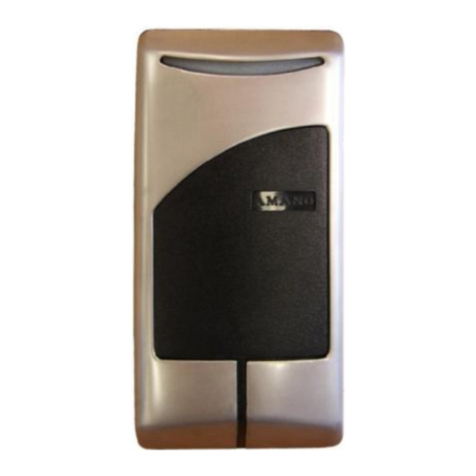
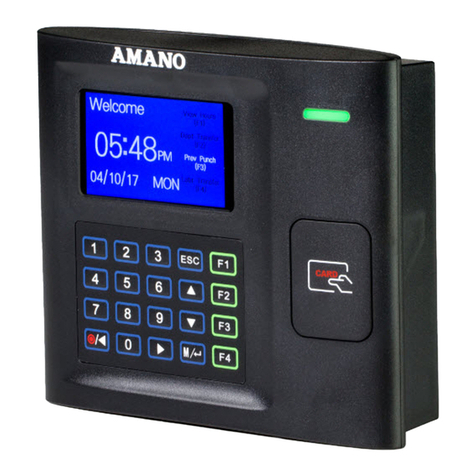
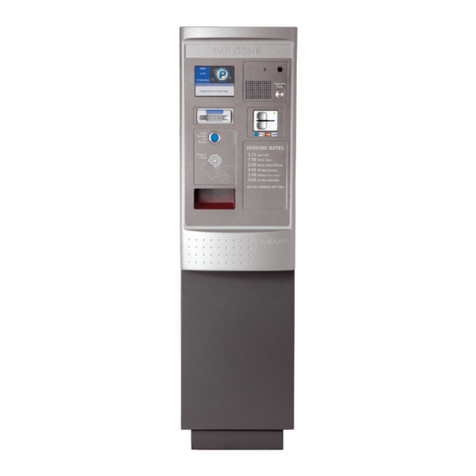
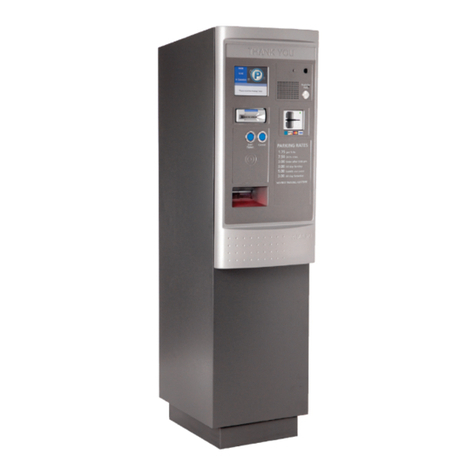
Amano OPUS-4000 Series User manual

OPUS-4000
Exit Terminal
Distributor’s Manual
OPUS4000_Distributor_04162015

© Copyright 2014 Amano McGann, Inc. OPUS4000_Distributor_04162015 2
OPUS-4000 Distributor’s Manual
Date:
Friday, April 17, 2015
Notice of Rights:
Copyright © 2014 Amano McGann, Inc. All rights reserved. This document contains proprietary information and such
information may not be reproduced whole or in part without written permission from:
Amano McGann, Inc.
2699 Patton Road
Roseville, Minnesota 55113
Notice of Liability:
Amano makes no representations or warranties with respect to the accuracy or completeness of the contents of this work
and specifically disclaim all warranties, including without limitation, warranties of fitness for a particular purpose. Amano
reserves the right to make equipment changes and improvements that may not be reflected in this document. Portions of
this document may have been updated to include the latest hardware or firmware version, if applicable.
We recommend that this document be read in its entirety before any attempt is made to operate the equipment.
Trademark Notice:
Amano is a registered trademark of Amano Inc. All other trademarks are the property of their respective owners.
Contact Information:
Every effort has been made to ensure the accuracy of this document. If you have comments, question, or ideas regarding
this document please send them to Amano via e-mail to:
techwriter@amanomcgann.com
or, via postal mail to:
Amano McGann, Inc.
Technical Writer
2699 Patton Road
Roseville, Minnesota 55113
For more information about Amano’s complete line of products, visit our web site at:
www.amanomcgann.com
Date
Friday, April 17, 2015
Product
Amano McGann
Build/Revision
0.0.1.19_R2
Model
OPUS-4000 Exit Terminal
Document Type
Distributor’s Manual
Version
B1
Company Name - Long
Amano McGann, Inc.
Company Name - Short
Amano McGann
Street
2699 Patton Road
City/State/Postal Code
Roseville, Minnesota 55113
Telephone
(612) 331-2020
Fax
(612) 331-5187
Email
Website
www.amanomcgann.com
Copyright
Copyright © 2014 Amano McGann, Inc. All rights reserved.
File Name
OPUS4000_Distributor_04162015

© Copyright 2014 Amano McGann, Inc. OPUS4000_Distributor_04162015 3
OPUS-4000 Distributor’s Manual
OPUS-4000
DISTRIBUTOR’S MANUAL
OPUS-4000 DISTRIBUTOR’S MANUAL
Introduction............................................................................................ 4
Navigation Key....................................................................................... 4
INITIAL OPERATION.................................................................................. 5
1.1 Entering the Initial Operation Menu.................................................. 5
1.2 Return Back to Idle........................................................................... 5
1.3 Adjusting the Date and Time............................................................ 5
1.4 Check for Errors and Warnings........................................................ 6
1.5 Check the Data Printed on an Entry Ticket...................................... 6
1.6 Altering the Exit Mode....................................................................... 6
1.7 Clearing the Management Password................................................ 7
STAFF OPERATION................................................................................... 7
2.1 Raising and Lowering Voice Announcement Volume....................... 7
MANAGEMENT OPERATION.................................................................... 7
3.1 Changing the Exit Mode................................................................... 8
3.2 Adjusting Grace and Comp Times................................................... 8
3.3 Adding Store Validations.................................................................. 9
3.4 Adding Special Days/Periods............................................................ 9
3.4.1 Special Day.............................................................................. 9
3.4.2 Special Period......................................................................... 10
3.5 Close Days....................................................................................... 10
3.6 In-Operation Time............................................................................ 11
3.7 Backlight Time Activation................................................................. 11
3.8 Volume Switch.................................................................................. 12
3.9 Entering Staff Passwords.................................................................. 12
ENGINEER OPERATION............................................................................. 13
4.1 Changing Terminal Parameters........................................................ 13
4.1.1 Backup..................................................................................... 13
4.1.2 Restore..................................................................................... 13
4.1.3 Common Parameters............................................................... 14
4.1.4 Specific Parameters................................................................. 15
4.1.5 Select Function......................................................................... 16
4.2 Testing Exit Terminal Functions........................................................ 17
4.3 Viewing Function Counts................................................................... 17
4.4 Backing Up and Restoring Data....................................................... 18
4.5 Viewing Exit Terminal Logs............................................................... 18
4.6 Backing Up Data Before Moving the SD Card................................. 19
4.7 Restoring SD Data After Replacing the SD Card............................ 19
OPUS-4000 BOOT MODES......................................................................... 19
© Copyright 2014 Amano McGann, Inc. OPUS4000_Distributor_04162015 4
OPUS-4000 Distributor’s Manual
Introduction
The OPUS-4000 Series Exit Terminal utilizes innovative technology and an
encrypted 2D data matrix barcode for expedited exit from parking facilities. The
OPUS-4000 Series offers intuitive user guidance through a dynamic color display
and voice announcement. The Exit Terminal processes encrypted thermal 2D
barcode tickets from the OPUS-2000 Series Entry Terminal. Payment options
include credit card and bulk validation coupons. Other payment options include
credit card out (when installed in a system using the OPUS-2700 Entry Terminal)
and proximity access. Mobile and barcode passes can be processed through the
optional FlexScan QR400® barcode imager.
Note: The references in this manual to “Lag Reader”, “Exit Terminal”,
“Device”, or “OPUS-4000” refer to both OPUS-4xxx series models
unless specified otherwise.
Navigation Key
Exit Terminal: M
Documentation: Mute
Exit Terminal: >
Documentation: Vol Up
Exit Terminal: ˅
Documentation: Chan Down
Exit Terminal: <
Documentation: Vol Down
Exit Terminal: PCH
Documentation: Prev
Exit Terminal: 0-9
Documentation: Numpad
Exit Terminal: P
Documentation: Power

© Copyright 2014 Amano McGann, Inc. OPUS4000_Distributor_04162015 5
OPUS-4000 Distributor’s Manual
INITIAL OPERATION
1.1 Entering the Initial Operation Menu
The configuration menus for the OPUS Exit Terminal are contained within the
Initial Operation menu. The IR remote is required to configure the Terminal.
Power ON the Device and wait for it to boot to its idle state. Once idle, press
Chan Up on the remote. The Initial Operation menu is displayed.
1.2 Return Back to Idle
After the desired configurations have been made, return to the Initial Operation
menu and press Chan Up. The Terminal returns back to its idle state.
1.3 Adjusting the Date and Time
Verify the Exit Terminal is in an idle state and press Chan Up on the remote to
enter the Initial Operation menu. Press Vol Up on the remote to continue to page
two of the Initial Operation menu. Clock Adjustment is displayed in the upper-
right corner of the Initial Operation menu. The 2beside the Clock Adjustment
button designates the button required to be pressed to enter the menu. Press 2
to enter the Clock Adjustment menu.
Adjust the year by pressing 1 on the remote and entering the current year. Press
Vol Up to accept the change.
Adjust the month by pressing 2 on the remote and entering the current year.
Press Vol Up to accept the change.
Note: If the current month is 30 days, the change will not be accepted
if the current days are set to 31. Please set the days before setting the
month if the current month is 30 days.
Adjust the days by pressing 3 on the remote and entering the current day. Press
Vol Up to accept the change.
Adjust the time by pressing 4 on the remote and entering the current time in 24-
hour format. Press Vol Up to accept the change.
Once all desired changes have been made, accept the current date and time by
pressing Chan Down. If Chan Down is not pressed, the changes are not saved.
Press the Power button to return to page two of the Initial Operation menu.

© Copyright 2014 Amano McGann, Inc. OPUS4000_Distributor_04162015 6
OPUS-4000 Distributor’s Manual
1.4 Check for Errors and Warnings
From an idle state, press the Chan Up button on the remote. Continue to page
two of the Initial menu by pressing Vol Up. Enter the Errors/Warnings menu by
pressing 1.
Any errors the Exit Terminal encounters are displayed in the Errors/Warnings
window. Scroll through the errors by pressing Vol Down for previous errors or
Vol Up for the next errors.
1.5 Check the Data Printed on an Entry Ticket
The OPUS-4000 has the ability to read and display the data printed on OPUS-
2000 entry tickets. To read the data on a ticket, enter the Initial Operation menu
by pressing Chan Up on the remote. Navigate to page two of the initial menu by
pressing Vol Up. Enter the Ticket Data Check menu by pressing 3 on the remote.
The ticket shutter will open once in the Ticket Data Check menu. Insert an
OPUS-2000 ticket into the Exit Terminal ticket throat.
The encrypted data on a standard entry ticket will contain the machine number,
lot number, rate letter, ticket number, customer code, and entry date and time.
The type of ticket is displayed near the top of the display.
1.6 Altering the Exit Mode
The Exit Terminal may either vend the gate once the ticket is paid, or vend the
gate automatically without needing payment. To enter the Exit Mode menu, press
Chan Up when the Terminal is idle. Continue to page two of the Initial menu by
pressing Vol Up. Press 4 to enter the Exit Mode menu.
[Fig. 1.6A] Press 1 for normal operation or 2 for no ticket operation
Press 1 for a paid exit mode or press 2 for a free exit/automatic vend mode.

© Copyright 2014 Amano McGann, Inc. OPUS4000_Distributor_04162015 7
OPUS-4000 Distributor’s Manual
1.7 Clearing the Management Password
The management password settings and card information can be cleared from
the Terminal. Verify the Device is in an idle state and press Chan Up to enter the
Initial Operation menu. Press Vol Up to continue to page two of the Initial
Operation menu. Select the Password Release button by pressing 6 on the
remote.
A pop-up window will verify that clearing the management password settings/card
information is desired. Press Chan Down to confirm the deletion.
STAFF OPERATION
The Staff Operation menu contains configurable items fit for parking facility staff
members. The configurable item within the Staff Operation menu is volume
adjustment.
To navigate to the Staff Operation menu, verify the Exit Terminal is in an idle
state and press Chan Up on the remote. Press Vol Up to continue to page two.
Press 9 to enter the Staff Operation menu. Enter the Staff Operation password
([mute]0000000)
2.1 Raising and Lowering Voice Announcement Volume
Navigate to the Staff Operation menu and press 4 to alter the voice
announcement volume. Lower the volume of the voice announcement by
pressing Vol Down on the remote. Raise the volume of the voice announcement
by press Vol Up on the remote. To return the volume back to default, press the
Prev button on the remote. Test the current selected volume by pressing Chan
Down. Press Power to save the voice announcement volume and return to the
Staff Operation menu.
MANAGEMENT OPERATION
The Management Operation menu contains configurable items for managing
OPUS-4000 operations. The configurable items are exit mode, timers, store
validation coupons, special days and periods, closed days, in-operation time,
backlight settings, volume switch settings, exit warning, and password settings.
To navigate to the Management Operation menu, verify the Exit Terminal is in an
idle state and press Chan Up on the remote. Press Vol Up to continue to page
two of the Initial menu. Press 0 to enter the Mgmt. Operation menu. Enter the
management password ([mute]0000000). The following sections are features
contained within the Management Operation menu.

© Copyright 2014 Amano McGann, Inc. OPUS4000_Distributor_04162015 8
OPUS-4000 Distributor’s Manual
3.1 Changing the Exit Mode
(Also seen in section 1.6 Altering the Exit Mode)
The Exit Terminal may either vend the gate once the ticket is paid, or vend the
gate automatically without needing payment. To enter the Exit Mode menu, press
1 from the Management Operation menu.
Press 1 on the remote for the paid exit mode or press 2 on the remote for the
free exit/automatic vend mode.
The selected status is shown near the top of the menu.
[Fig. 3.1A] Current mode
Press Power on the remote once the desired selection is made.
3.2 Adjusting Grace and Comp Times
Exit Terminal rates will often contain a grace and/or comp time. The grace period
allows a parker to enter and exit the facility as long as they exit before the set
number of time.
For example, if a grace timer is set to five minutes, a parker could enter the
facility at 5:00pm and get out for free at 5:04pm. Once over the designated time
(5:05pm in the provided example), the parker would need to pay to exit the lot.
Comp time is similar to grace time in that it is often used as relief for the parker.
The grace timer in an Exit Terminal determines the amount of time a parker gets
as relief.
For example, if the comp time is set to five minutes and a parker stays 1h3m.
The Exit Terminal will see that the parker stayed for 58m.
To adjust the grace/comp time, navigate to the Management Operation menu and
press 2 to enter the Timers Setting menu. Press the number on the remote
designated by the number beside the type of timer desired to edit, and enter the
desired amount of time for the grace/comp/lag timer. Once the desired number is
entered, press Chan Down.
Scroll through the other timers using the Vol Up and Vol Down buttons on the
remote. Press Power once all information is entered.

© Copyright 2014 Amano McGann, Inc. OPUS4000_Distributor_04162015 9
OPUS-4000 Distributor’s Manual
3.3 Adding Store Validations
Store validations provide a discount for parkers with the validation coupon
associated with the Exit Terminal. The device store validations are used when a
lag reader is installed as a standalone device to read entry tickets validated
through an OPUS-9100 eValidator. If connected to iParcProfessional, use the
OPUS Rate Tool to configure store validations. Enter the Store Validation
Coupon menu by navigating the Management Operation menu and pressing 3.
Press 2 on the remote and enter a time discount. Press Chan Down once the
desired time is entered The time entered subtracts from the parkers total time
spent in the facility. If a full discount is desired, press 3. If it is desired to rid of the
validation, press 4 for None.
Scroll through the validations using the Vol Down and Vol Up buttons on the
remote. Once all appropriate store validations have been set, press Chan Down
to accept the changes and Power to return to the Management Operation menu.
3.4 Adding Special Days/Periods
A special day is a set date/period the device is not in operation. To add special
days, navigate to the Management Operation menu and press 6 to enter the
Special Day/Period menu.
3.4.1 Special Day
Once in the Special Day/Period menu, press 1 to create a special day. User
defined rules can be applied to special days. Up to 31 special days are available.
Select a special day by pressing the number on the remote designated by the
number beside the special day.
[Fig. 3.4A] Enter a month and day for the Special Day.
Once in the special day editor, press 1 to alter the month of the special day. Enter
the month using the remote number pad. Press Chan Down after entering the
desired month to accept the change. The Date is automatically selected. Enter
the date and press Chan Down to save the change. Press Power once all
desired information is entered. If the special day falls on a Sunday and the
special day is observed on a Monday, press the designated number beside the
special day to Not slide if it is Sunday.

© Copyright 2014 Amano McGann, Inc. OPUS4000_Distributor_04162015 10
OPUS-4000 Distributor’s Manual
3.4.2 Special Period
From the Special Day/Period menu, press 2 to enter the Special Period menu.
Three periods are available to edit. Select the desired period by pressing the
number on the remote designated by the number beside the special period. Enter
the Start Month and press Chan Down to accept the change. Make the proper
changes to the start and end dates and press Power to return to the Special
Period menu.
3.5 Close Days
Close days may be added to the Terminal to designate what days the Terminal is
not available for use. Enter the close menu by navigating to the Management
Operation menu and pressing 7. A window displaying the current closed days is
shown.
[Fig. 3.5A] Open days are designated by an ‘O’
Select a day to close by pressing the number on the remote designated by the
number beside the day. The O is changed to an X for the selected day.
[Fig. 3.5B] Closed days are designated by an ‘X’

© Copyright 2014 Amano McGann, Inc. OPUS4000_Distributor_04162015 11
OPUS-4000 Distributor’s Manual
Closed days may also be applied to special days and special periods. Press
Power to save the changes and return to the Management Operation menu.
3.6 In-Operation Time
The in-operation time determines the time period the Exit Terminal can be used.
Enter the In-Operation Time Setting menu by navigating to the Management
Operation menu and pressing 8. To activate the Start/End Time Setting press 1.
The current status of the setting is shown near the top of the display.
[Fig 3.6A] Feature is not used
Edit the Start Time by pressing 2 on the remote and entering the desired OPEN
time in a 24-hour format. Once the desired Start Time is set, press Chan Down
to accept the change. Edit the End Time by pressing 3 and entering the desired
CLOSE time in a 24-hour format. Once the desired End Time is set, press Chan
Down to accept the change.
Press Power after the desired changes have been made.
3.7 Backlight Time Activation
The OPUS-4000 backlight may be activated at a user-specified Start and End
time. To navigate to the Backlight Setting menu, open the Management
Operation menu and press 9. To activate the Backlight ON/OFF Time setting
press 1. The current status of the setting is shown near the top of the display.
[Fig. 3.7A] Feature is used
Edit the Start Time by pressing 2 on the remote and entering the desired ON time
in a 24-hour format. Once the desired Start Time is set, press Chan Down to
accept the change. Edit the End Time by pressing 3 and entering the desired
OFF time in a 24-hour format. Once the desired End Time is set, press Chan
Down to accept the change.
Press Power after the desired changes have been made.

© Copyright 2014 Amano McGann, Inc. OPUS4000_Distributor_04162015 12
OPUS-4000 Distributor’s Manual
3.8 Volume Switch
The volume switch time determines the time the Exit Terminal will use Volume
One rather than Volume Two. This feature is often used when ambient noise is
louder at a certain point of time in the day. To add a volume switch time, enter the
Management Operation menu and press 5.
Activate the volume switch by pressing 1. The current status is shown near the
top of the menu. Edit the start time by pressing 2 and entering the desired value
in a 24-hour format. Press Chan Down to confirm the entry. Press 2 and enter
the End Time in a 24-hour format. Press Chan Down to confirm the entry.
Note: The volume switch setting uses volume One in between the
Start and End. Volume Two is used for all times outside of the
Start/End range. Please see section 2.1 Raising and Lowering Voice
Announcement Volume to adjust the voice announcement volumes.
3.9 Entering Staff Passwords
A staff member can be added to the Exit Terminal with a function level and
password. Enter the Management Operation menu and press Vol Up to continue
to page two. Press 2 to enter the Password Setting menu.
[Fig. 3.9A] Select a staff member, enter a function level, and enter a password
Add a new staff member by pressing the number on the remote designated by
the number beside the Stf.No. Once in the second Password Setting menu,
press 1 to add a password for the staff member. Enter a password and press

© Copyright 2014 Amano McGann, Inc. OPUS4000_Distributor_04162015 13
OPUS-4000 Distributor’s Manual
Chan Down to accept the change and move to the function level. Enter a
function level for the user and press Chan Down to accept the change.
To continue adding users, press Vol Up. To exit the Password Setting menu,
press Power until back to the Management Operation menu.
ENGINEER OPERATION
The Engineer Operation menu contains configurations pertaining to Exit Terminal
functionality. The menus contained within the Engineer Operation menu are:
Parameter Setting, Function Check, Function Count, Backup, Log File, Before
SD Replace, and After SD Replace.
To navigate to the Engineer Operation menu, press Chan Up to enter the Initial
menu. Press Vol Up to continue to the second page of the Initial Operation
menu. Press 0 to enter the Mgmt. Operation menu and enter the management
password ([mute]0000000). Press Vol Up to continue to the second Mgmt.
Operation page and press 7 to enter the Engineer Operation menu.
4.1 Changing Terminal Parameters
The Exit Terminal parameters define the low-level functionality of the Terminal.
Parameters are numbered values representing different types of Terminal
settings. Each parameter number is assigned a function and a value. To navigate
to the Parameter Setting menu, enter the Engineer Operation menu and press 1.
The Parameter Setting menu contains the parameters pertaining to Terminal
functionality, Terminal-server communications, and the ability to backup and
restore parameter settings.
IMPORTANT: Improperly adjusting Exit Terminal parameters can
break Terminal functionality. Please backup the current Terminal
parameter settings before making any changes.
4.1.1 Backup
Backup the current parameters by pressing 3 to Backup All. A pop-up window will
confirm the backup process. Press Chan Down to backup the parameters or
Mute to cancel the backup execution. Once the backup is complete, the window
will display a Return button. Press Chan Down to return to the Parameter Setting
menu.
4.1.2 Restore
To restore Terminal parameters, enter the Parameter Setting menu and press 4
to Restore All. Press Chan Down to confirm the parameter restore, or Mute to
cancel the restore. Once the restore is complete, the window will display a
Return button. Press Chan Down to return to the Parameter Setting menu.

© Copyright 2014 Amano McGann, Inc. OPUS4000_Distributor_04162015 14
OPUS-4000 Distributor’s Manual
4.1.3 Common Parameters
Common parameters are categorized as common parts/functions applying to a
common garage. For example, lot number, iParc server IP address, and use
credit card are parameters found in the Common section as they apply to rules
set by the site.
Press 1 while in the Parameter Setting menu to enter the Common Parameter
menu. The menus contained within the Common Parameter menu allow a user to
edit the parameters, return the parameters back to defaults, and import a comma
separated value containing pre-defined parameters.
Press 1 to edit the common parameters.
[Fig. 4.1A] Common Parameter Settings
Each parameter has a description above the current value of the parameter. To
change the value of a parameter, press the number beside the parameter
number desired to edit. Once the parameter is highlighted, enter the desired
value and press Chan Down to accept the change.
Scroll through the parameters using Vol Up or Vol Down. If it is necessary to
skip to a particular parameter, press Chan Down until asked to enter a
parameter number. Enter the parameter number and press Chan Down once
more to skip to the parameter.
Please adjust the parameters to the facility’s needs, and press Power when
finished. If exiting out of the Parameter Setting menu, a pop-up window will
display explaining the Terminal must be restarted to activate the change(s).
Power cycle the Exit Terminal to make the change.

© Copyright 2014 Amano McGann, Inc. OPUS4000_Distributor_04162015 15
OPUS-4000 Distributor’s Manual
4.1.4 Specific Parameters
Specific parameters are categorized as specific parts/functions only applicable to
the device. For example, machine number, device IP address, and central pay
are all parameters found in the Specific section as they apply specifically to the
device.
Press 2 while in the Parameter Setting menu to enter the Specific Parameter
menu. The menus contained within the Specific Parameter menu allow a user to
edit the parameters, return the parameters back to defaults, and import a comma
separated value containing pre-defined parameters.
Press 1 to edit the specific parameters.
[Fig. 4.1B] Specific Parameter Settings
Each parameter has a description above the current value of the parameter. To
change the value of a parameter, press the number beside the parameter desired
to edit. Once the parameter is highlighted, enter the desired value and press
Chan Down to accept the change.
Scroll through the parameters using Vol Up or Vol Down. If it is necessary to
skip to a particular parameter, press Chan Down until asked to enter a
parameter number. Enter the parameter number and press Chan Down once
more to skip to the parameter.
Please adjust the parameters to the facility’s needs, and press Power when
finished. If exiting out of the Parameter Setting menu, a pop-up window will
display explaining the Terminal must be restarted to activate the change(s).
Power cycle the Terminal to make the change.

© Copyright 2014 Amano McGann, Inc. OPUS4000_Distributor_04162015 16
OPUS-4000 Distributor’s Manual
4.1.5 Select Function
The Select Function menu contains the option to enable language selection
options. To navigate to the language selection option, enter the Parameter
Setting menu and press 0 for Select Function. Press 9 to turn ON language
selection. Press Chan Down on the remote to confirm the activation of language
selection or Mute to cancel the activation.
If Chan Down is pressed, the Language Selection menu is displayed.
[Fig. 4.1C] Select a language once the number of available languages is set
Change the number of languages available by pressing 1 and entering the
number of desired languages. Once the desired value is added, press Chan
Down to confirm the change.
Select the new language by pressing 3. Scroll through the available languages
using the Vol Up and Vol Down buttons on the remote. Once the desired
language is found, press the number on remote designated by the number
beside the desired language. Once the language is selected, press Chan Down
to confirm the selection.
After the desired languages are selected, register the selections by pressing
Chan Down. Confirm the changes by pressing Chan Down once more in the
pop-up window.

© Copyright 2014 Amano McGann, Inc. OPUS4000_Distributor_04162015 17
OPUS-4000 Distributor’s Manual
4.2 Testing Exit Terminal Functions
Many of the pieces of hardware in the Exit Terminal have the option to run
diagnostics/tests. To enter the Function Check menu, navigate to the Engineer
Operations menu and press 3 for Function Check.
The available function checks are:
•Ticket Reader: Check versions and test REPM functionality
•iCore Board: Check versions, test RAM, and test EEPROM
•Display Panel: Test backlight and colors/pattern
•LED: Test ticket insert LED.
•Switch: View status of Door Open and Vault bin switches.
•Shutter: Test OPEN/CLOSE shutter functionality
•Announcement: Adjust volume and verify voice guidance
•Communication: Test main board, ARCNET and Ethernet communication.
•Receipt Printer: Print a test receipt and view the status of the printer.
•Message Check: Verify Exit Terminal guidance messages.
4.3 Viewing Function Counts
The Function Count menu allows a technician to view the number of times the
Exit Terminal has performed a particular function. To navigate to the Function
Count menu, enter the Engineer Operation menu and press 4.
Each function is shown with a count of how many times the function has been
performed. If it is desired to clear a count, press the number on the remote
designated by the number beside the function and press Mute. Press Chan
Down to confirm clearing the count. The count is reset to 0.
If it is desired to clear all counts, press the Prev button on the remote. Press
Chan Down to confirm clearing all counts.
Scroll through the functions using the Vol Down and Vol Up buttons. Once
finished viewing the counts, press Power to return to the Engineer Operation
menu.

© Copyright 2014 Amano McGann, Inc. OPUS4000_Distributor_04162015 18
OPUS-4000 Distributor’s Manual
4.4 Backing Up and Restoring Data
The Exit Terminal is able to backup all information to the SD card. The Terminal
also has the ability to restore particular or all information from a previous backup.
To enter the Backup menu, load the Engineer Operation menu and press 5.
[Fig. 4.4A] Back up or restore SD card data
Press 1 to backup the Exit Terminal data to the SD card or 2 to restore the data
from the SD card to the Terminal. Both Backup and Restore menus allow a user
to backup/restore: common parameters, specific parameters, user parameters,
user guidance, and/or all data. Press the number designated by the number
beside each backup/restore setting and press Power until returned back to the
Engineer Operation menu.
4.5 Viewing Exit Terminal Logs
To view the Exit Terminal logs, enter the Engineer Operation menu and press 6.
Once in the Log File menu, press 1 to view the TD Log.
The logs available for the Exit Terminal are:
•Exit Data
•Error Data
•Alarm Data
•Monitor Data
•Operation Monitor
•Power ON/OFF
•Payment
•Unsent Record Count
•Error List
•Online Data

© Copyright 2014 Amano McGann, Inc. OPUS4000_Distributor_04162015 19
OPUS-4000 Distributor’s Manual
4.6 Backing up Data Before Moving the SD Card
When an SD card is going to be replaced, it is a good practice to backup data to
the SD card. Backup Terminal settings/data by entering the Engineer Operation
menu and pressing 8. Confirm the backup execution by press Chan Down. Once
the backup is complete, the Exit Terminal notifies the technician to shut down the
Terminal and replace the SD card. Please do so if necessary.
4.7 Restoring SD Data After Replacing the SD Card.
The most recent backup can be restored to the Exit Terminal. To restore data,
enter the Engineer Operations menu and press 9. Press Chan Down to confirm
the restore.
OPUS-4000 BOOT MODES
The OPUS-4000 contains a bank of dip switches on the iCore board responsible
for determining the boot mode and/or logging. Please use the images below to
select the proper dip switch settings.
Initialization No Initialization

© Copyright 2014 Amano McGann, Inc. OPUS4000_Distributor_04162015 20
OPUS-4000 Distributor’s Manual
Other manuals for OPUS-4000 Series
2
Table of contents
Other Amano Touch Terminal manuals

Amano
Amano OPUS-2000 Series User manual

Amano
Amano MTX-15 User manual

Amano
Amano MTX-30P PUSH Original operating instructions

Amano
Amano Time Guardian FRT-40 User manual

Amano
Amano MTX-30 User manual

Amano
Amano AFR-200 Original operating instructions

Amano
Amano AFR-200 User manual

Amano
Amano FPT-40 User manual

Amano
Amano OPU Series User manual

Amano
Amano OPUS-7000 Series User manual