AmazonBasics B01LW14QNB Operating and safety instructions

Page size: 139.7 x 107.95 mm created by: Impala Services Ltd.
Trépied Pour Caméra Vidéo, 170 cm, Livré Avec Sac
170 cm Videokamerastativ mit Tasche
Treppiede Per Videocamera, 170 cm, Con Borsa
Trípode Para Videocámara Con Funda, 170 cm
170cm ビデオカメラ用三脚 袋付き
170 厘米相机摄像机三脚架,带脚架包
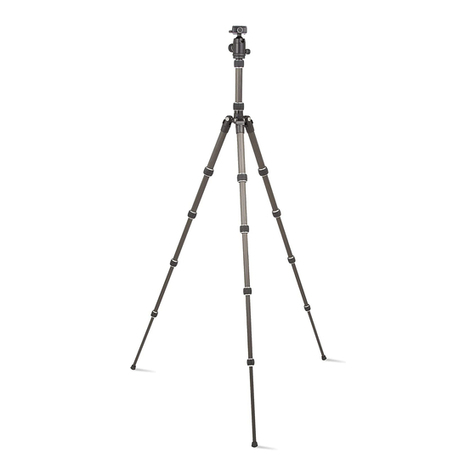
67-Inch Video Camera Tripod with Bag
B01LW14QNB
B01LW14QNB-67-inch Tripod-02-INT.indb 1 4/7/17 12:03 PM

English ..................................... 3
Français ................................. 15
Deutsch.................................. 27
Italiano................................... 39
Español.................................. 51
日本語 ..................................... 63
中文 ........................................ 75
B01LW14QNB-67-inch Tripod-02-INT.indb 2 4/7/17 12:03 PM

3
Welcome Guide •English
67-Inch Video Camera Tripod with Bag
Contents:
Before getting started, ensure the package contains the following components:
Part Qty
Tripod 1
Handle 2
Carrying bag 1
Note: In the case of damage or incomplete delivery, please contact Amazon customer service.
B01LW14QNB-67-inch Tripod-02-INT.indb 3 4/7/17 12:03 PM

4
Setup
Step 1
• Loosen the respective handle knob.
• Insert the handles.
• Tighten the knobs on each side to secure the handles.
• Note: A spirit level is mounted on the tripod to accurately indicate whether a surface is horizontal.
When the bottom surface of the level is matched to a perfectly level surface, the bubble is central
to the centring circle.
Handle knob
Spirit level
B01LW14QNB-67-inch Tripod-02-INT.indb 4 4/7/17 12:03 PM

5
Upper
leg lock
1
2
3
Setup
Step 2
• The legs can be set to 3 different angles.
– 1Pull the upper leg locks out.
– 2Adjust the legs to the desired angle.
– 3Push the upper leg locks back in to secure the legs in place.
B01LW14QNB-67-inch Tripod-02-INT.indb 5 4/7/17 12:03 PM

6
Leg Lock
Lock
Setup
Step 3
• Pull the leg locks open.
• Extend the legs to the desired length.
• Close the locks to secure the legs.
• Loosen the lock on the center column by turning it counterclockwise.
• Lower or raise the center column to the desired height and tighten its lock again.
B01LW14QNB-67-inch Tripod-02-INT.indb 6 4/7/17 12:03 PM

7
Setup
Step 4
• Loosen the locking knob of the mounting plate.
Step 5
• Push the safety lock and slide the quick-release mounting plate out off the tripod.
B01LW14QNB-67-inch Tripod-02-INT.indb 7 4/7/17 12:03 PM

8
Setup
Step 6
Bottom
• Fix the quick-release mounting plate onto the bottom of your camera.
• Note: If the 1/4” screw is too small, use the 5/8” screw located under the mounting plate. Lift the
rubber stopper from the quick-release mounting plate and insert the replacement screw.
Step 7
• Press the safety lock and slide the quick-release mounting plate onto the mounting plate base until
the safety lock clicks in place. Tighten the locking knob of the mounting plate.
B01LW14QNB-67-inch Tripod-02-INT.indb 8 4/7/17 12:03 PM

9
Operation
Adjusting Handle Position
Handle knob
• Loosen the respective handle knob and adjust the handle to the desired position. With the teeth
grooves engaged, tighten the handle knob.
Adjusting Camera Panning Angle
Panning angle adjustment knob
• Loosen the panning angle adjustment knob to adjust the angle. Tighten the knob to secure.
B01LW14QNB-67-inch Tripod-02-INT.indb 9 4/7/17 12:03 PM

10
Operation
Adjusting Camera Tilt Angle
• Loosen the tilt axis adjustment knob to set the angle. Tighten the knob to secure.
Low-Angle Shots
• For low-angle shots, retract all legs, remove the hang hook and then the center column.
• Insert the center column from below, tighten the lock and reattach the hang hook.
B01LW14QNB-67-inch Tripod-02-INT.indb 10 4/7/17 12:03 PM

11
Operation
Metal Spikes and Outdoor Shooting
• For extra grip and stability on rough and uneven ground, rotate the rubber feet counterclockwise
(or remove them completely) in order to expose the metal spikes.
• In case of strong wind when shooting outdoor, you can stabilize the tripod by affixing weights to
the hang hook (or anchor it down with ropes).
B01LW14QNB-67-inch Tripod-02-INT.indb 11 4/7/17 12:03 PM

12
Safety and Compliance
Warning: Do not let children climb on or play with the product.
• Remove all packing materials and keep them away from children. Packing materials should be
recycled where facilities exist.
• Before first use make sure that all parts have been delivered and are in good condition.
• Store the product in a dry and clean area and out of reach of children.
• Handle with care.
• Regularly check that all points of connection and fastening are tightly secured.
• To avoid scratching the floor when using indoor, assemble the product on a soft surface such as
a carpet.
• Do not place heavy items on the product.
• The product should be placed on a stable and horizontal surface.
• Never use accessories which are not recommended by the manufacturer. They could pose a
safety risk to the user and might damage the product.
• Do not use the product if it is damaged or defective. In this case, contact your dealer.
• When not in use store the tripod in the carrying bag.
• No liability will be accepted for damage resulting from improper use or non-compliance with these
instructions.
Specications
Max. height: 68.5 “ (174 cm)
Min. height: 31.5 “ (80 cm)
Min. height (folded): 33.8 “ (86 cm)
Net weight: 8.95 lbs (4.06 kg)
Max. load: 13.4 lbs (6.8 kg)
B01LW14QNB-67-inch Tripod-02-INT.indb 12 4/7/17 12:03 PM

13
Cleaning and Maintenance
• Wipe with a dry cloth as needed to remove dust and dirt.
• Avoid contact with corrosive substances.
Warranty Information
To obtain a copy of the warranty for this product:
Visit amazon.com/AmazonBasics/Warranty
— or —
Contact Customer Service at 1-866-216-1072
B01LW14QNB-67-inch Tripod-02-INT.indb 13 4/7/17 12:03 PM

14
Feedback
Love it? Hate it?
Let us know with a customer review.
AmazonBasics is committed to delivering customer-driven products that live up to your high
standards. We encourage you to write a review sharing your experiences with the product.
Please visit: amazon.com/review/review-your-purchases#
For further services:
Visit amazon.com/gp/help/customer/contact-us
— or —
Contact Customer Service at 1-866-216-1072
B01LW14QNB-67-inch Tripod-02-INT.indb 14 4/7/17 12:03 PM

15
Guide de Bienvenue •Français
Trépied Pour Caméra Vidéo, 170 cm,
Livré Avec Sac
Contenu:
Avant de commencer, veuillez vous assurer que l’emballage contient les composants
suivants :
Pièce Qté
Trépied 1
Poignée 2
Sac de transport 1
Remarque : En cas de dommages ou de livraison incomplète, veuillez contacter le service à la
clientèle Amazon.
B01LW14QNB-67-inch Tripod-02-INT.indb 15 4/7/17 12:03 PM

16
Installation
Étape 1
• Desserrez le bouton de chaque poignée.
• Insérez les poignées.
• Serrez les boutons sur chaque côté pour fixer les poignées.
• Remarque : Un niveau à bulle d’air est monté sur le trépied pour indiquer avec précision si une
surface est horizontale ou pas. Lorsque la surface inférieure du niveau correspond à une surface
parfaitement nivelée, la bulle se place au centre du cercle de centrage.
Bouton de la poignée
Niveau à bulle d'air
B01LW14QNB-67-inch Tripod-02-INT.indb 16 4/7/17 12:03 PM

17
Système
de blocage
des pattes
supérieures
1
2
3
Installation
Étape 2
• Les pattes peuvent être réglées sous 3 angles différents.
– 1Tirez les systèmes de blocage des pattes supérieures pour les dégager.
– 2Réglez les pattes pour former l’angle souhaité.
– 3Poussez le système de blocage des pattes supérieures vers l’intérieur pour fixer les pattes
en place.
B01LW14QNB-67-inch Tripod-02-INT.indb 17 4/7/17 12:03 PM

18
Système
de blocage
des pattes
Système de
blocage
Installation
Étape 3
• Tirez les systèmes de blocage des pattes pour les déplier.
• Étirez les pattes à la longueur souhaitée.
• Fermez les systèmes de blocage pour fixer les pattes.
• Desserrez le système de blocage de la colonne centrale en le tournant dans le sens contraire des
aiguilles d'une montre.
• Abaissez ou faites monter la colonne centrale à la hauteur souhaitée, puis resserrez son système
de blocage.
B01LW14QNB-67-inch Tripod-02-INT.indb 18 4/7/17 12:03 PM

19
Installation
Étape 4
• Desserrez le bouton de blocage de la plaque de montage.
Étape 5
• Poussez le verrou de sécurité et faites glisser la plaque de montage à dégagement rapide hors du
trépied.
B01LW14QNB-67-inch Tripod-02-INT.indb 19 4/7/17 12:03 PM

20
Installation
Étape 6
Partie inférieure
• Fixez la plaque de montage à dégagement rapide sur la partie inférieure de l’appareil photo.
• Remarque : Si la vis de 1/4 po est trop petite, utilisez la vis de 5/8 po située sous la plaque de
montage. Soulevez le bouchon en caoutchouc de la plaque de montage à dégagement rapide,
puis insérez la vis de rechange.
Étape 7
• Appuyez sur le verrou de sécurité et faites glisser la plaque de montage à dégagement rapide sur
le support de la plaque de montage jusqu'à ce que le verrou de sécurité s'enclenche. Desserrez le
bouton de blocage de la plaque de montage.
B01LW14QNB-67-inch Tripod-02-INT.indb 20 4/7/17 12:03 PM
Table of contents
Languages:
Other AmazonBasics Camera Accessories manuals
AmazonBasics
AmazonBasics B06XJ9MWZ8 User manual

AmazonBasics
AmazonBasics B074KGF4D1 User manual

AmazonBasics
AmazonBasics B00DHPCSA0 User manual

AmazonBasics
AmazonBasics B074KHWQH5 User manual

AmazonBasics
AmazonBasics B00CF1LS94 User manual
AmazonBasics
AmazonBasics B07NWYCVPT User manual

AmazonBasics
AmazonBasics B01LQX0P8Q User manual

AmazonBasics
AmazonBasics B0118EP0JM User manual

AmazonBasics
AmazonBasics B074KC7K6Z User manual
AmazonBasics
AmazonBasics B0118EP0JM User manual