manuals.online logo
Brands
  1. Home
  2. •
  3. Brands
  4. •
  5. Ameriwood
  6. •
  7. Indoor Furnishing
  8. •
  9. Ameriwood 5066322PCOM User manual

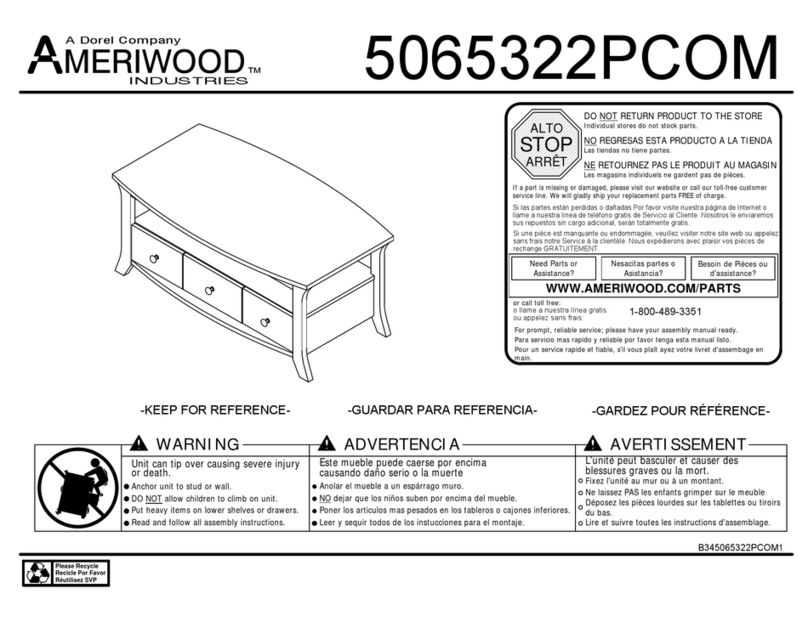
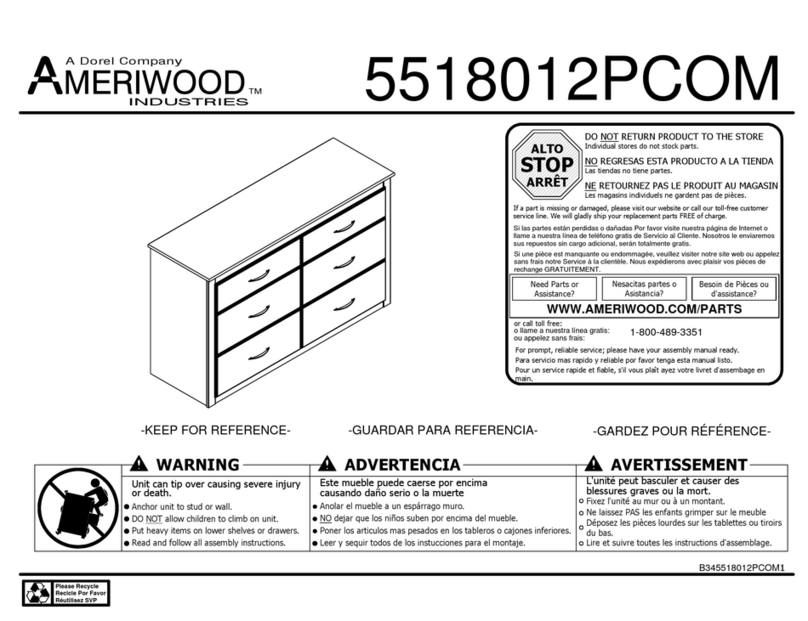
Ameriwood 5066322PCOM User manual

WARNING ADVERTENCIA AVERTISSEMENT
Unit can tip over causing severe injury
or death.
Anchor unit to stud or wall.
DO NOT allow children to climb on unit.
Put heavy items on lower shelves or drawers.
Read and follow all assembly instructions.
Este mueble puede caerse por encima
causando daño serio o la muerte
Anolar el mueble a un espárrago muro.
NO dejar que los niños suben por encima del mueble.
Poner los articulos mas pesados en los tableros o cajones inferiores.
Leer y sequir todos de los instucciones para el montaje.
L'unité peut basculer et causer des
blessures graves ou la mort.
Fixez l'unité au mur ou à un montant.
Ne laissez PAS les enfants grimper sur le meuble
Déposez les pièces lourdes sur les tablettes ou tiroirs
du bas.
Lire et suivre toutes les instructions d'assemblage.
STOP
ALTO
ARRÊT
DO NOT RETURN PRODUCT TO THE STORE
NO REGRESAS ESTA PRODUCTO A LA TIENDA
NE RETOURNEZ PAS LE PRODUIT AU MAGASIN
Individual stores do not stock parts.
Las tiendas no tiene partes.
Les magasins individuels ne gardent pas de pièces.
If a part is missing or damaged, please visit our website or call our toll-free customer
service line. We will gladly ship your replacement parts FREE of charge.
Si las partes están perdidas o dañadas Por favor visite nuestra página de Internet o
llame a nuestra línea de teléfono gratis de Servicio al Cliente. Nosotros le enviaremos
sus repuestos sin cargo adicional, serán totalmente gratis.
Si une pièce est manquante ou endommagée, veuillez visiter notre site web ou appelez
sans frais notre Service à la clientèle. Nous expédierons avec plaisir vos pièces de
rechange GRATUITEMENT.
Need Parts or
Assistance? Nesacitas partes o
Asistancia? Besoin de Pièces ou
d'assistance?
WWW.AMERIWOOD.COM/PARTS
or call toll free:
o llame a nuestra línea gratis:
ou appelez sans frais: 1-800-489-3351
For prompt, reliable service; please have your assembly manual ready.
Para servicio mas rapido y reliable por favor tenga esta manual listo.
Pour un service rapide et fiable, s'il vous plaît ayez votre livret d'assembage en
main.
-KEEP FOR REFERENCE- -GUARDAR PARA REFERENCIA- -GARDEZ POUR RÉFÉRENCE-
B345066322PCOM1
5066322PCOM
Please Recycle
Recicle Por Favor
Réutilisez SVP
A Dorel Company
MERIWOOD
INDUSTRIES
TM
B345066322PCOM1
3 /24
?? www.ameriwood.com ??
PARTS - PIEZAS - PIECES
left panel
panel izquierdo
panneau gauche
35066322010
right panel
panel derecho
panneau droit
35066322020
top
parte superior
panneau supérieur
35066322030
3 drawer bottoms
3 cajones inferiores
3 fonds de tiroir
35066302170
ABCDE
FGHI
JK
L
2 shelves
2 estantes
2 étagères
35066322040
upper apron
faldón superior
tablier supérieur
35066322050
left front leg
pata delantera izquierda
patte avant gauche
35066322060
right front leg
pata delantera derecha
pied avant droite
35066322070
left rear leg
pata trasera izquierda
patte arrière gauche
35066322080
right rear leg
pata trasera derecha
patte arrière droit
35066322090
3 left drawer sides
3 lados del cajón de la izquierda
3 côtés de tiroir gauche
39814302200
3 right drawer sides
3 lados del cajón derecho
3 côtés de tiroir droite
39814302210
3 drawer backs
3 cajón espalda
3 dos de tiroir
35066302160
2 drawer fronts
2 frentes de cajón
2 façades de tiroir
335066322120
middle drawer front
frente del cajón central
façade de tiroir moyen
35066322130
2 drawer partitions
2 particiones de cajón
2 partitions de tiroir
35066322100 drawer shelf
estante de cajón
étagère tiroir
35066322110
Q
PU
T
M
B345066322PCOM1
4 /24
?? www.ameriwood.com ??
PARTS - PIEZAS - PIECES
x
915
#A11600
1-1/4" flat head
cabeza plano 1-1/4"
tête plate 1-1/4"
x716
#A21110
nail
clavo
clou
tète plate 1 3/4"
cabeza plano 1 3/4"
1 3/4" flat head
x
#A13410
84
x
2
20
cam bolt
#A22510
perno de leva
boulon de came
30
#A11080
6
7/16" cabeza plano
7/16" flat head
7/16" tête plate
x
x
312
#A22920
connector
comectador
raccord
right cabinet memberleft cabinet member left drawer runner right drawer runner
corredera de mueble derechacorredera de mueble izquierda deslizador izquierdo de cajón deslizador derecha de cajón
131313
13 3
x
#A56030
cdba
13
glissière gauche du cabinet glissière droite du cabinet coulisse gauche du tiroir coulisse droite du tiroir
x
12 3
#A50240
knob
perilla
bouton
x
5
20
#A12120
7/16" pan head
cabeza redondo 7/16"
tête ronde
7/16"
x
412
#A22910
connector bolt
perno del conectador
boulon de reccordement
x
10 6
#A54200
drawer bracket
soporte de caón
support de tiroir
This piece is paperboard construction. It is not made
from wood but is required for the assembly of your unit.
Esto pedazo son la construcción del cartón.
Ello no son hecho de madera, pero se requlere
para la asamblea de su unidad.
Ces peèce sont de construction en carton.
Alle ne sont pas fabriquées de bois, mais nécessaires
pour l'assemblage de votre meuble.
back panel
panel trasero
panneau arriere
K506632200
V
x
11 3
#A17500
machine screw
tornillo
vis
x
#A22570
cam lock
cerradura de leva
serrure de came
120
B345066322PCOM1
5 /24
?? www.ameriwood.com ??
2
3½ turn to fully
lock.
½ se vuelven a
totalmente
cerradura.
½ tour pour
verrouiller
complètement.
4
Tighten to fully seat. Do not over
tighten.
Apriétese a totalmente asiento. No
haga encima de apriétese.
Serrez pour mettre le siège bien en
place. Ne pas trop serrer.
Proper orientation of cam.
La orientación apropiada de leva.
Bonne orientation de la came.
1
This illustration shows how the CAM fastening system works.
Esta ilustración muestra el sistema de fijación de leva y como funciona.
Cette illustration montre le système de fixation CAME et son fonctionnement.
Lock
Apretar
Serrer
Titus
Titus
Titus
1
B345066322PCOM1
6 /24
?? www.ameriwood.com ??
x
2
6
x
36
x
6x3
13 a
x
1
13
32
A
13a
13a
6
Be sure the connector is positioned as shown before
pushing into holes. You may need to tap with a hammer
to insert.
Asegúrese de que el conector está posicionado como
mostrado antes de presionar en los agujeros. Puede que
necesites golpear con un martillo para insertar.
Assurez-vous que le connecteur est placé comme
indiqué avant de pousser dans les trous. Vous devrez
peut-être taper avec un marteau à insérer.
x
12
Proper orientation of CAM LOCK
Posición correcta de la cerradura de leva.
Bonne orientation de la SERRURE DE CAME
Titus
2
B345066322PCOM1
7 /24
?? www.ameriwood.com ??
x
2
6
x
36
x
6x3
b
1
x
13
1
3
3
2
13b
13b
6
B
Be sure the connector is positioned as shown before
pushing into holes. You may need to tap with a hammer
to insert.
Asegúrese de que el conector está posicionado como
mostrado antes de presionar en los agujeros. Puede que
necesites golpear con un martillo para insertar.
Assurez-vous que le connecteur est placé comme
indiqué avant de pousser dans les trous. Vous devrez
peut-être taper avec un marteau à insérer.
x
12
Proper orientation of CAM LOCK
Posición correcta de la cerradura de leva.
Bonne orientation de la SERRURE DE CAME
Titus
3
B345066322PCOM1
8 /24
?? www.ameriwood.com ??
x
2
8
C
E
9
2
x
93
raw surface
superficie cruda
surface crue
4
B345066322PCOM1
9 /24
?? www.ameriwood.com ??
D
K
1
1
1
1
X 2
x
112
Proper orientation of CAM LOCK
Posición correcta de la cerradura de leva.
Bonne orientation de la SERRURE DE CAME
Titus
5
B345066322PCOM1
10 /24
?? www.ameriwood.com ??
Finished Edge
Borde Acabado
Bord Fini
X 2
x
6x12
13 a
x
2
b
2
x
13
J
13b
13a
6
1
6
6
13a
J
x
14
Proper orientation of CAM LOCK
Posición correcta de la cerradura de leva.
Bonne orientation de la SERRURE DE CAME
Titus
6
B345066322PCOM1
11 /24
?? www.ameriwood.com ??
F
G
H
I
x
412
4
44
4
7
B345066322PCOM1
12 /24
?? www.ameriwood.com ??
8
x
4
J
J
K
8
Finished Edge
Borde Acabado
Bord Fini
8
B345066322PCOM1
13 /24
?? www.ameriwood.com ??
K
D
D
A
B
UNLOCK LOCK
APRETAR
DESAPRETAR
OUVRIR SERRER
Titus
9
B345066322PCOM1
14 /24
?? www.ameriwood.com ??
D
D
K
B
C
UNLOCK LOCK
APRETAR
DESAPRETAR
OUVRIR SERRER
Titus
10
B345066322PCOM1
15 /24
?? www.ameriwood.com ??
F
G
H
I
Turn connector screw clockwise to lock in place.
Gire el conector tornillo en sentido horario para
bloquearlo en su lugar.
Tourner la vis du connecteur vers la droite pour
verrouiller en place.
Carefully place unit on its top side.
Con cuidado coloque la unidad en su parte superior.
Placer soigneusement l'appareil sur sa partie supérieure.
D
D
A
11
B345066322PCOM1
16 /24
?? www.ameriwood.com ??
product collapse, and/or serious injury.
Por favor asegúrese que las Parte de atrás se atan
firmemente. Todos los clavos deben manejarse en las
partes recto y deben apretarse firmemente. El fracaso para
hacer para que podría causar inestabilidad, derrumbamiento
del producto, y/o la lesión seria.
S’il-vous-plaît assurez-vous que les PANNEAUX
ARRIÈRES sont attachés solidement. Tous les clous
doivent être enfoncés perpendiculairement et solidement
dans les parties. Sinon le meuble peut devenir instable,
s’effondrer subitement et/ou causer des blessures graves.
tightened firmly. Failure to do so could cause instability,
All nails must be driven into the parts straight and
Please make sure that the Backs are attached securely.
ADVERTENCIA
AVERTISSEMENT
WARNING
7x16
raw surface
superficie cruda
surface crue
Flush the edge of the back panel with the bottom edge of
the bottom shelf. Align squarely and nail straight through
into back edges.
Alinie el borde del panel trasero con el borde inferior del
estante inferior. Alinee en ángulo recto y clave derecho
dentro o en los bordes traseros.
Alignez le bord du panneau arrière avec le bord inférieur
de la tablette inférieure. Alignez à égalité et enfoncez les
clous perpendiculairement dans les bords arrière.
Carefully place unit on its front side.
Con cuidado, coloque la unidad sobre su parte frontal.
Placez soigneusement le meuble sur son devant.
Assure that the unit is square.
Distance from corner to corner must be equal as shown.
Asegura que el unidad es cuadrada.
Distancia de esquina a esquina debe ser igual como se muestra por favor.
Assurez-vous que le meuble està égalité.
La distance de coin en coin doit être égale comme montré.
x
5
8
5
5
7
V
IMPORTANT!
THE BACK PANEL IS A STRUCTURAL PART OF THIS UNIT AND MUST BE INSTALLED PROPERLY.
IMPORTANTE!
EL PANEL TRASERO ES UNA PARTE ESTRUCTURAL DE ESTA UNIDAD Y DEBE SER INSTALADO CORRECTAMENTE.
IMPORTANT!
LE PANNEAU ARRIÈRE EST UNE PIÈCE STRUCTURELLE DU MEUBLE ET DOIT ÊTRE INSTALLÉ CORRECTEMENT.
12
B345066322PCOM1
17 /24
?? www.ameriwood.com ??
Lay the drawer sides down on a flat hard surface. Carefully line up the drawer bracket with the holes in the drawer side
as shown. Using a hammer, tap each drawer bracket stem part way into each hole. Repeat this process until the drawer
bracket is fully seated on the drawer side.
Coloque los lados del cajón sobre una superficie plana y dura. Alinee cuidadosamente el soporte del cajón con los
agujeros en el lado del cajón, como se muestra. Con un martillo, golpee cada vástago del soporte del cajón
parcialmente en cada orificio. Repita este proceso hasta que el soporte del cajón esté completamente asentado en el
lado del cajón.
Déposez les côtés du tiroir sur une surface plane et rigide. Alignez soigneusement le support de tiroir avec les trous
dans le côté du tiroir comme montré. Avec un marteau, tapez chaque tige de support de tiroir en partie dans chaque
trou. Répétez cette procédure jusqu'à ce que le support de tiroir repose entièrement sur le côté du tiroir.
Bracket Orientation
Orientación del soporte
Orientation du support
Bracket Orientation
Orientación del soporte
Orientation du support
x
10 6
TU
X 3 X 3
10 10
13
B345066322PCOM1
18 /24
?? www.ameriwood.com ??
X 3
5
5
x
5
12
T
U
L
M
X 2
X 1
14
B345066322PCOM1
19 /24
?? www.ameriwood.com ??
X 3
T
U
Q
Q
Finished Surface
Superficie Acabado
Surface Fini
15
B345066322PCOM1
20 /24
?? www.ameriwood.com ??
X 3
T
U
P
x
912
9
9

Other Ameriwood Indoor Furnishing manuals
Ameriwood 5959325K User manual

Ameriwood

Ameriwood 5959325K User manual

Ameriwood 7224012PCOM User manual

Ameriwood

Ameriwood 7224012PCOM User manual

Ameriwood Altra 5932012COM User manual

Ameriwood

Ameriwood Altra 5932012COM User manual

Ameriwood good to GO 3600303KP User manual

Ameriwood

Ameriwood good to GO 3600303KP User manual

Ameriwood 9867303KP User manual

Ameriwood

Ameriwood 9867303KP User manual

Ameriwood 6421403COM User manual

Ameriwood

Ameriwood 6421403COM User manual

Ameriwood 5670308PCOM User manual

Ameriwood

Ameriwood 5670308PCOM User manual

Ameriwood 1213012PCOM User manual

Ameriwood

Ameriwood 1213012PCOM User manual

Ameriwood 1844335COM User manual

Ameriwood

Ameriwood 1844335COM User manual

Ameriwood Altra 1789308S User manual

Ameriwood

Ameriwood Altra 1789308S User manual

Ameriwood 5206015GM User manual

Ameriwood

Ameriwood 5206015GM User manual

Ameriwood 5518012PCOM User manual

Ameriwood

Ameriwood 5518012PCOM User manual

Ameriwood 9298301PCOM User manual

Ameriwood

Ameriwood 9298301PCOM User manual

Ameriwood 4105012PCOM User manual

Ameriwood

Ameriwood 4105012PCOM User manual

Ameriwood 7224328PCOM User manual

Ameriwood

Ameriwood 7224328PCOM User manual

Ameriwood BASICS 7642015COM User manual

Ameriwood

Ameriwood BASICS 7642015COM User manual

Ameriwood 7390056PCOM User manual

Ameriwood

Ameriwood 7390056PCOM User manual
Ameriwood 348012PCOM User manual

Ameriwood

Ameriwood 348012PCOM User manual

Ameriwood AX1 User manual

Ameriwood

Ameriwood AX1 User manual
Ameriwood 9402328WP User manual

Ameriwood

Ameriwood 9402328WP User manual

Ameriwood AX1 User manual

Ameriwood

Ameriwood AX1 User manual

Ameriwood AX1 User manual

Ameriwood

Ameriwood AX1 User manual

Ameriwood good to GO 3599303KP User manual

Ameriwood

Ameriwood good to GO 3599303KP User manual

Ameriwood 3597318PCOM User manual

Ameriwood

Ameriwood 3597318PCOM User manual

Popular Indoor Furnishing manuals by other brands

Costco 319231 Original instructions

Costco

Costco 319231 Original instructions

Costway KC53799 manual

Costway

Costway KC53799 manual

Ameriwood HOME 1222012PCOM manual

Ameriwood HOME

Ameriwood HOME 1222012PCOM manual

LHFD C1930023 Assembly instructions

LHFD

LHFD C1930023 Assembly instructions

Express Mobel GD39ZHKH DIRECTIONS FOR ASSEMBLY

Express Mobel

Express Mobel GD39ZHKH DIRECTIONS FOR ASSEMBLY

RKC INSTRUMENT Pipari 180 Assembly instructions

RKC INSTRUMENT

RKC INSTRUMENT Pipari 180 Assembly instructions

Urban Barn PAULSEN EXTENSION DINING TABLE Assembly instructions

Urban Barn

Urban Barn PAULSEN EXTENSION DINING TABLE Assembly instructions

Dantel 41060 Installation & operation manual

Dantel

Dantel 41060 Installation & operation manual

Lightolier Lighting Systems LP-18 Specification sheet

Lightolier

Lightolier Lighting Systems LP-18 Specification sheet

Zaor Miza GripRack MKII 2 Assembly manual

Zaor

Zaor Miza GripRack MKII 2 Assembly manual

Madeli Soho B400-72D-001-XX installation guide

Madeli

Madeli Soho B400-72D-001-XX installation guide

Advanta ADVANCED DYNAMIC Mechanism user guide

Advanta

Advanta ADVANCED DYNAMIC Mechanism user guide

ERARD Cub 1600 instruction manual

ERARD

ERARD Cub 1600 instruction manual

Amada Homefurnishing AMFS10 instruction manual

Amada Homefurnishing

Amada Homefurnishing AMFS10 instruction manual

Astonica 50103523 instruction manual

Astonica

Astonica 50103523 instruction manual

Steelcase Tableau-Run-offs Assembly Directions

Steelcase

Steelcase Tableau-Run-offs Assembly Directions

OSP Home Furnishings SIERRA SRA09 Assembly instructions

OSP Home Furnishings

OSP Home Furnishings SIERRA SRA09 Assembly instructions

HON 3301 instructions

HON

HON 3301 instructions

manuals.online logo
manuals.online logoBrands
  • About & Mission
  • Contact us
  • Privacy Policy
  • Terms and Conditions

Copyright 2025 Manuals.Online. All Rights Reserved.