manuals.online logo
Brands
  1. Home
  2. •
  3. Brands
  4. •
  5. Amewi
  6. •
  7. Toy
  8. •
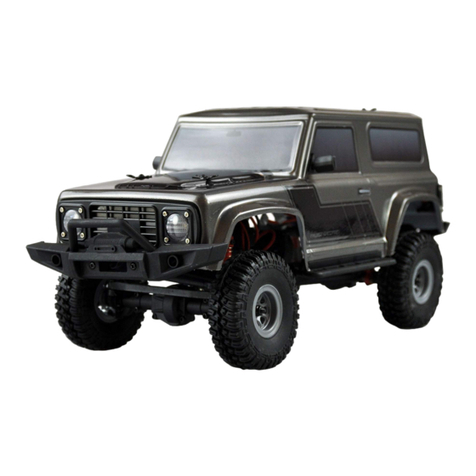
  9. Amewi AMX ROCK RCX 10 User manual

Amewi AMX ROCK RCX 10 User manual

BEDIENUNGSANLEITUNG
INSTRUCTION MANUAL
Art.-Nr.: 22432, 22433
22434, 22435
Amewi Trade e.K.
Nikolaus-Otto-Str. 18
33178 Borchen
[email protected]
www.amewi.com
https://www.facebook.com/amewicom/
https://www.youtube.com/user/Amewicom
BEDIENUNGSANLEITUNG / INSTRUCTION RCX10B & RCX10P
VIELEN DANK / THANK YOU
Vielen Dank für den Kauf unseres RCX10 Modells.
Bitte lesen Sie diese Anleitung aufmerksam durch bevor Sie dieses Modell benutzen und heben Sie sie für
spätere Rückfragen auf.
Das Amewi-Team wünscht Ihnen viel Spaß mit diesem Fahrzeug.
Thank you for purchasing our RCX10 Model.
Please read these instructions carefully before using this model and keep them for later questions.
The Amewi team wishes you a lot of fun with this vehicle.
HAUPTMERKMALE / KEY FEATURES
550 Crawler Motor brushed
60A brushed ESC WP-1060
9kg MG Lenkservo
0,9kg Schaltservo
0,9kg Diff-Schalt Servos (nur RCX10P)
2,4GHz Sender 4-Kanal (RCX10B)
2,4GHz Sender 6-Kanal (RCX10P)
Portal Achsen
2-Gang Schaltgetriebe
Flip-Top Karosserie mit Magnetverriegelung
Hoch Präzisionlager (RCX10P)
550 Crawler motor brushed
60A brushed ESC WP1060
9kg steering servo MG
0,9kg Gear Box Servo
0,9kg diff lock servos (RCX10P only)
2,4GHz Remote 4CH (RCX10B)
2,4GHz Remote 6CH (RCX10P)
Portal Axle
2-CH Gear Box
Flip-Top Body with magnetic buckle
High precision Ball Bearing (RCX10P)
TECHNISCHE DATEN / SPECIFICATION
Länge:
Breite:
Höhe:
Radstand:
Bodenfreiheit:
Raddurchmesser:
Gewicht:
530mm
220mm
265mm
313mm
50mm
110mm
2,65 (2,75 Pro)
Length
Width
Height
Wheelbase
Ground Clearance
Wheel diameter
Weight
BEDIENUNGSANLEITUNG / INSTRUCTION RCX10B & RCX10P
ANLEITUNG / INSTRUCTIONS
Fahren Sie mit beiden Fingern unter die
Haube und Ziehen Sie sie nach oben.
Step into the fingers from both sides of
the car and turn the car shell up slightly.
Drücken Sie in der Mitte des Verschlusses und
ziehen Sie diesen anschließend mit dem Finger nach
oben.
Press down slightly in the middle of battery button
and pull up the battery button.
1. Nach dem Öffnen der Karosserie, öffnen Sie das
Akku Fach.
2. Legen Sie einen vollgeladenen Akku ein.
3. Stellen Sie sicher, dass der Regler aus ist.
Verbinden Sie den Regler-Akkuanschluss mit
dem Akku.
4. Schalten Sie den Regler ein und schließen Sie
die Karosserie.
1. After turning the body shell back, open the battery
case.
2. Insert the fully charged battery into the battery
clip.
3. Make sure the ESC is off, plug in the battery
cable and ESC cable.
4. Turn on the ESC and cover the body shell.
BEDIENUNGSANLEITUNG / INSTRUCTION RCX10B & RCX10P
FERNBEDIENUNG / REMOTE CONTROL
1. Ziehen Sie wie angezeigt die Batteriefachabdeckung ab.
2. Legen Sie 4 Batterien des Typs AA ein. Bitte achten Sie auf die
Polarisation. Schließen Sie die Abdeckung.
1. Slide in the direction of the arrow to remove or install the
transmitter battery cover.
2. Install 4AA batteries with sufficient power, pay attention to
positive and negative as show in figure, do not install the
opposite.
1. Vordere Differentialsperre
(Kanal 5 RCX10P)
2. Hintere Differentialsperre
(Kanal 6 RCX10P)
3. Lenkung Umkehrschalter
4. Gas Umkehrschalter
5. Lenk-Trimmung
6. Gas-Trimmung
7. Lenk Dual Rate
8. Gas Dual Rate
9. An-/Aus Schalter
10. Beleuchtung (Kanal 4)
11. Lenkrad (Kanal 1)
12. Gas-/Bremshebel (Kanal 2)
13. Schaltknopf (Kanal 3)
14. Batteriefach
1. Front differential lock (CH5
RCX10P)
2. Rear differential lock (CH6
RCX10P)
3. Steering Reverse Switch
4. Throttle Reverse Switch
5. Steering Trim
6. Throttle Trim
7. Steering D/R
8. Throttle D/R
9. On/Off Switch
10. Light (CH4)
11. Steering Wheel (CH1)
12. Throttle Trigger (CH2)
13. High and Low Speed shift
(CH3)
14. Battery Compartment
Die Beleuchtung der Knöpfe 1 und 2 zeigen den Zustand der Achsen. Leuchtet der Knopf, ist die Achse
gesperrt. Leuchtet der Knopf 13, zeigt das, dass der schnelle Gang eingelegt ist.
Press the 1 and 2 switch, both buttons lights indicates the differentials are locked. Press 13 switch, the
button light indicates switch to High Speed mode.
Drehen Sie das Lenkrad nach links
um das Fahrzeug nach links lenken
zu lassen. Drehen Sie das Lenkrad
nach rechts um das Fahrzeug nach
rechts lenken zu lassen.
Turn the steering wheel to the left to
make the car turn left. Turn the
steering wheel to the right to make
the car turn right.
BEDIENUNGSANLEITUNG / INSTRUCTION RCX10B & RCX10P
Wenn das Fahrzeug nicht
geradeaus fährt, benutzen Sie den
Trimm-Poti (5) um die Räder gerade
zu richten.
If the car don’t run straight, turn the
steering-Trim button (5) to trim the
front wheels.
Drehen Sie den Dual-Rate Poti (7)
um den Lenkwinkel zu vergrößern
oder zu verkleinern.
Turn the steering D/R knob (7) to
adjust front wheels with less or
more steering angles.
Wenn das Fahrzeug von alleine
nach vorne oder hinten fährt,
drehen Sie die Gas-Trimmung (6)
bis das Fahrzeug still steht.
When the vehicle drives forward or
backward by itself, turn the throttle
trim (6) to stop the car.
Um die maximale Geschwindigkeit
zu erhöhen oder senken, drehen
Sie den Gas Dual-Rate Poti (8).
To increase or decrease the
maximum speed, turn the gas dual
rate button (8).
BEDIENUNGSANLEITUNG / INSTRUCTION RCX10B & RCX10P
ANSCHLUSS DIAGRAMM / CONNECTION DIAGRAM
Servo Sperre vorderes Differential
Front Differential Lock Servo
Servo Sperre hinteres
Differential
Rear Differential
Lock Servo
LED Beleuchtung
LED Light
Lenk Servo
Steering Servo
Rot
Red
Akku
Battery
Motor
Schwarz
Black
Rot
Red
Schwarz
Black
Getriebe Servo
Shift Servo
Empfänger
Receiver
Regler
ESC
Schaltservo (3. Kanal)
Shift Servo (CH3)
Lenk
Servo
(Kanal 1)
Steering
Servo
(CH1)
Servo vordere Differential -
Sperre (Kanal 5)
Front differential lock
Servo (CH 5)
Servo hintere Differential Sperre
(Kanal 6)
Rear differential lock Servo (CH 6)
BEDIENUNGSANLEITUNG / INSTRUCTION RCX10B & RCX10P
SPEZIFIKATIONEN FAHRTENREGLER / SPECIFICATIONS ESC
Vorw. Kont. / Vorw. Max.
Rückw. kont. / Rückw. Max.
60A / 360A
30A / 180A
Fwd. Cont. / Peak. Current
Rev. Cont. / Peak Current
Spannungsbereich
2-3S LiPo / 5-9 NiMH
Voltage Range
Geeignet für Fahrzeuge
1/10: Tourenwagen/Touring Car, Short
Course Truck, Monster, Truggy, Rock
Crawler
Cars Applicable
Motor Limit
2S LiPo oder 6 NiMH
540 / 550 12T oder/or
RPM < 30000 @ 7,2V
Motor Limit
2S LiPo or 6 NiMH
3S LiPo oder 9 NiMH
540 / 550 18T oder/or
RPM < 20000 @ 7,2V
3S LiPo or 9 NiMH
Widerstand
Vorw./Fwd. 0.001Ω,
Rückw/Rev 0.002Ω
Resistance
BEC Ausgangsspannung
3A / 6V
BEC Output
Abmessungen
36,5 x 32 x 18mm
Dimension
Gewicht
39g
Gewicht
Fahr Modi
Vorwärts / Rückwärts / Bremse
Forward / Reverse / Brake
Vorwärts / Bremse
Forward Brake
Vorwärts / Rückwärts
Forward / Reverse
Running Modes
EINSTELLEN DES ESC / ESC SETTINGS
1. Schalten Sie den Regler aus, verbinden Sie den Akku, Motor, Regler, Empfänger wie dargestellt.
Überprüfen Sie die Verkabelung bevor Sie fortfahren.
ACHTUNG: Wenn der Akku falsch angeschlossen wird (Verpolung), können irreparable Schäden an
Regler und Akku auftreten. Achten Sie stets auf eine korrekte Polung der Akkukabel.
Um die Motordrehrichtung zu ändern, können Sie die Motoranschlusskabel tauschen.
BEDIENUNGSANLEITUNG / INSTRUCTION RCX10B & RCX10P
2. Schalten Sie den Sender ein und stellen Sie den Trimm-Poti des Gaskanals auf 0 und den Dual Rate
Poti des Gaskanals auf 100.
Bedeutung der Akustischen Signale
LED Status (Im Betrieb)
1x Piep: NiMH Modus erkannt
2x Piep: 2S LiPo Akku erkannt
3x Piep: 3S LiPo Akku erkannt
1x Piep lang: Selbsttest und Gaswegkalibrierung.
Der Regler ist Betriebsbereit
Gashebel in Neutralstellung LED ist aus.
Gashebel im Regelbereich vorwärts, rückwärts
oder Bremse. LED blinkt
Gashebel auf Vollanschlag vorwärts, rückwärts
oder Bremse. LED leuchtet.
3. Der Gasweg wird eingestellt indem Sie den Regler einschalten. Belassen Sie den Gashebel in der
Neutralposition und warten Sie drei Sekunden bis die Selbstkalibrierung abgeschlossen ist. Ein Piepton
bestätigt die erfolgreiche Durchführung der Kalibrierung. Der Regler ist jetzt betriebsbereit.
1. Switch off the controller, connect the battery, motor, controller, receiver as shown. Check the wiring
before proceeding.
ATTENTION: If the battery is incorrectly connected (reverse polarity), irreparable damage to the
controller and battery can occur. Always pay attention to correct polarity of the battery cables.
To change the direction of motor rotation, you can replace the Motor connection cables.
2. Turn on the transmitter and set the trim potentiometer of the gas channel to 0 and the dual rate
potentiometer of the gas channel to 100.
Importance of acoustic signals
LED Status (in operation)
1x beep: NiMH mode detected
2x beep: 2S LiPo Battery detected
3x beep: 3S LiPo Battery detected
1x beep long: Self text and throttle range
calibration. The ESC is ready for operation
Throttle trigger in neutral position LED is off.
Throttle trigger in the forward, reverse or brake
range. LED flashes
Throttle trigger at full forward, backward or brake.
LED lights up.
3. The throttle range is set by switching on the controller. Leave the throttle in neutral position and wait
three seconds for self-calibration to complete. A beep confirms successful calibration. The controller is
now ready for use.
F/B/R: Vorwärts/Bremse/Rückwärts
F/B: Vorwärts/Bremse
F/R: Vorwärts/Rückwärts (Crawler Modus)
Das Bild zeigt die Positionen der Jumper.
Um die Einstellungen vorzunehmen.
Schalten Sie den Regler aus.
F/B/R: Forward/Brake/Reverse
F/B: Forward/Brake
F/R: Forward/Reverse (Crawler mode)
The picture shows the positions of the
jumpers.
To make the settings. Switch off the ESC.
BEDIENUNGSANLEITUNG / INSTRUCTION RCX10B & RCX10P
Vordere Baugruppe
Front Assembly
BEDIENUNGSANLEITUNG / INSTRUCTION RCX10B & RCX10P
Stoßdämpfer
Shock Absorber
Hintere Baugruppe
Rear Assembly
Füllhöhe Öl / Oil Height
BEDIENUNGSANLEITUNG / INSTRUCTION RCX10B & RCX10P
Getriebebox
Gear Box
Feder Einstellung / Spring Setting
BEDIENUNGSANLEITUNG / INSTRUCTION RCX10B & RCX10P
Chassis
BEDIENUNGSANLEITUNG / INSTRUCTION RCX10B & RCX10P
Karosserie
Body
BEDIENUNGSANLEITUNG / INSTRUCTION RCX10B & RCX10P
Vorne
Front
Hinten
Rear
Motorhalter
Motor Mount
RCX10B ohne Differentiale
RCX10B without Differentials
BEDIENUNGSANLEITUNG / INSTRUCTION RCX10B & RCX10P
ERSATZTEILE & ZUBEHÖR / SPARE PARTS & ACCESSORIES
Die Ersatzteile-Nummern finden Sie in den Explosionszeichnungen. Die Nummer setzt sich aus der
Vornummer: 021-17223 +Nummer in den Zeichnungen zusammen.
The spare parts number you will find in explosion draw. The number consists of number: 021-17223 +
number in the drawings.

This manual suits for next models

4

Other Amewi Toy manuals

Amewi A110 User manual

Amewi

Amewi A110 User manual

Amewi T-90 User manual

Amewi

Amewi T-90 User manual

Amewi AMXFlight SCORPION - 90 User manual

Amewi

Amewi AMXFlight SCORPION - 90 User manual

Amewi 22641 User manual

Amewi

Amewi 22641 User manual

Amewi 3D CLIMBER User manual

Amewi

Amewi 3D CLIMBER User manual

Amewi BuZZard V2 User manual

Amewi

Amewi BuZZard V2 User manual

Amewi RC Magic Traxx Glow User manual

Amewi

Amewi RC Magic Traxx Glow User manual

Amewi DRF AFX-135 PRO Brushless User manual

Amewi

Amewi DRF AFX-135 PRO Brushless User manual

Amewi Hurricane User manual

Amewi

Amewi Hurricane User manual

Amewi F16B User manual

Amewi

Amewi F16B User manual

Amewi Jetstar V2 User manual

Amewi

Amewi Jetstar V2 User manual

Amewi AMXFlight P40 FIGHTER User manual

Amewi

Amewi AMXFlight P40 FIGHTER User manual

Amewi AMX PLANES SWIFT 2100 User manual

Amewi

Amewi AMX PLANES SWIFT 2100 User manual

Amewi SKYLARK User manual

Amewi

Amewi SKYLARK User manual

Amewi HYPER GO 22602 User manual

Amewi

Amewi HYPER GO 22602 User manual

Amewi THUNDER 1400 User manual

Amewi

Amewi THUNDER 1400 User manual

Amewi AMXFLIGHT AFX-105 User manual

Amewi

Amewi AMXFLIGHT AFX-105 User manual

Amewi SU 27 User manual

Amewi

Amewi SU 27 User manual

Amewi 22197 User manual

Amewi

Amewi 22197 User manual

Amewi Junior Fly Ball User manual

Amewi

Amewi Junior Fly Ball User manual

Amewi F22 User manual

Amewi

Amewi F22 User manual

Amewi Focke Wolf FW190 Warbird User manual

Amewi

Amewi Focke Wolf FW190 Warbird User manual

Amewi Bonanza A36 ST User manual

Amewi

Amewi Bonanza A36 ST User manual

Amewi AFX180PRO User manual

Amewi

Amewi AFX180PRO User manual

Popular Toy manuals by other brands

Faller 282788 manual

Faller

Faller 282788 manual

Eduard Bf 110G-2 manual

Eduard

Eduard Bf 110G-2 manual

Fisher-Price W9956 instructions

Fisher-Price

Fisher-Price W9956 instructions

REVELL 04888 manual

REVELL

REVELL 04888 manual

Eduard ZOOM F-84F manual

Eduard

Eduard ZOOM F-84F manual

Lionel Tinplate Power Station owner's manual

Lionel

Lionel Tinplate Power Station owner's manual

Hobbico FLWA4110 - PT17-XS instruction manual

Hobbico

Hobbico FLWA4110 - PT17-XS instruction manual

Radica Games 20Q P6624 instruction manual

Radica Games

Radica Games 20Q P6624 instruction manual

Lionel 2544W Santa Fe owner's manual

Lionel

Lionel 2544W Santa Fe owner's manual

Extreme Networks SS1-CV instruction manual

Extreme Networks

Extreme Networks SS1-CV instruction manual

Hangar 9 Timber 110 30-50cc instruction manual

Hangar 9

Hangar 9 Timber 110 30-50cc instruction manual

ROBBE VAYU Instruction and user's manual

ROBBE

ROBBE VAYU Instruction and user's manual

Märklin 55045 manual

Märklin

Märklin 55045 manual

Eduard Jagdpanther Late manual

Eduard

Eduard Jagdpanther Late manual

LEGO STAR WARS 9516 Building instructions

LEGO

LEGO STAR WARS 9516 Building instructions

roco 42660 quick start guide

roco

roco 42660 quick start guide

Black Horse Model MDM-1FOX Instruction manual book

Black Horse Model

Black Horse Model MDM-1FOX Instruction manual book

Eduard 49 644 manual

Eduard

Eduard 49 644 manual

manuals.online logo
manuals.online logoBrands
  • About & Mission
  • Contact us
  • Privacy Policy
  • Terms and Conditions

Copyright 2025 Manuals.Online. All Rights Reserved.