Analog Devices MicroConverter ADuC706x Specification sheet

ADuC706x GetStarted Guide
A tutorial guide for use with the ADuC706x Development Systems
REV 1.0 -- 1 -- www.analog.com/microconverter
ADuC706x MicroConverter™ Get Started Guide
Tutorial Guide for use with the ADuC706x QuickStart™ and ADuC706x QuickStart Plus
Development Systems
Version 1.0
http://www.elecfans.com 电子发烧友 http://bbs.elecfans.com 电子技术论坛

ADuC706x GetStarted Guide
A tutorial guide for use with the ADuC706x Development Systems
REV 1.0 -- 2 -- www.analog.com/microconverter
Introduction pg 3
(1) Installation pg 4
(2) Keil µ
µµ
µVision3 Integrated Development Environment pg 7
(5) The Windows Serial Downloader pg 14
(6) Installed Documentation and Code Directory pg 18
The ADuC706x QuickStart Plus Development System
Technical Support:
Europe: euro[email protected]
China: [email protected]
CONTENTS:
http://www.elecfans.com 电子发烧友 http://bbs.elecfans.com 电子技术论坛

ADuC706x GetStarted Guide
A tutorial guide for use with the ADuC706x Development Systems
REV 1.0 -- 3 -- www.analog.com/microconverter
The following GetStarted tutorial guide will bring the user through the various tools that are part of the MicroConverter development systems. All
the tools will be ADuC706x generic.
The same tools are provided in the three options of developments systems:
QuickStart Plus kits, QuickStart kits and minikit. Only the hardware in the different kits limit the debugging capability.
The QuickStart Plus kits (EVAL-ADUC7060QSPZ) include an emulator and allows non intrusive emulation.
The QuickStart kit EVAL-ADUC7060QSZ doesn’t include an emulator and only allow for emulation via UART.
Both options will be presented.
The tools discussed during this GetStarted tutorial guide are as follows:
TOOL EXECUTABLE FUNCTION
KEIL µ
µµ
µVISION3
INTEGRATED
DEVELOPMENT
ENVIRONMENT
Uv3.exe
µVision3 is a complete IDE (Integrated Development Environment) integrating all the tools necessary
to edit, assemble/compile/link and debug ARM/Thumb code and C code, via the JTAG port.
A simulator is also available, simulating the peripherals of the ADuC706x parts.
Non-intrusive emulation is done through JTAG using the mIDAS-Link provided in the QuickStart Plus
development system.
IAR EMBEDDED
WORKBENCH IDE IarIdePM.exe
The IAR Embedded Workbench IDE provided on this CD is a complete IDE (Integrated Development
Environment) integrating all the tools necessary to edit, assemble/compile/link and debug ARM/Thumb
code and C code, via the JTAG port or the serial port.
Non-intrusive emulation is done through JTAG using the mIDAS-Link provided in the QuickStart Plus
development system.
Debugging via UART is done using a ROM monitor included on the CD.
DOWNLOADER ARMWSD.exe
The Serial Downloader is a windows software program that allows a user to serially download
Extended Intel Hex files as created by µVision3 to the MicroConverter while in circuit.
INTRODUCTION
http://www.elecfans.com 电子发烧友 http://bbs.elecfans.com 电子技术论坛

ADuC706x GetStarted Guide
(1) Installation
REV 1.0 -- 4 -- www.analog.com/microconverter
Installing from CD:
•Close all your applications.
•If you have any previous version of the CD, please uninstall it by selecting from the start menu, “Settings -> Control Panel”. Remove also any
previous version of uVision3 and of IAR Embedded Workbench.
•Insert the MicroConverterDevelopment System CD ROM into you CD ROM drive and double-click on the file "setup.exe" if installation
doesn’t start automatically.
•Press “yes”. Then follow the on-screen instructions to install the software on your PC.
•Although you can install the MicroConverterDevelopment System, the IAR Embedded workbench and Keil software onto any hard drive and
into any directory you wish, for the purposes of simplicity, the rest of this document will assume that you’ve installed at the default location of
C:\ADuC706x, C:\Program Files and C:\keil. Also the Keil tools will automatically be installed under an ARM directory and are fully
compatible with uVision2 or tools for 8051.
•Press “yes”. Then follow the on-screen instructions to install the software on your PC.
Tools installation options:
After installing documents, code examples and utilities provided by ADI, the installation will offer you to select the tools to be installed
automatically by this setup: Keil uVision3 and IAR Embedded Workbench. Both options are described in detail below.
Keil uVision3 installation:
•The Keil µVision3 IDE is based on the GNU tools and requires you to install the IDE and the GNU tools separately. The setup will call both
installations automatically, GNU installation being silent. If the CYGNUS folder wasn’t installed automatically on the C drive, please run
gccarm331.exe under the Keil folder of the CD.
•Both installs are initiated by ticking the “Yes, I want to install Keil uVision3 tools” as shown below:
•Press “Next” and follow the on screen instruction.
(1) INSTALLATION
http://www.elecfans.com 电子发烧友 http://bbs.elecfans.com 电子技术论坛

ADuC706x GetStarted Guide
(1) Installation
REV 1.0 -- 5 -- www.analog.com/microconverter
•If you choose not to install the tools now, you can install them later by double clicking on the files “MDk315a.exe” and “GCCARM331.exe” in
the Keil folder on the CD.
•When plugging the mIDAS-Link emulator for the first time, the
following window appears:
Select “Install from a list or specific location” and press next.
Then select “Include this location in the search” and enter the
path of the USB driver:
C:\ADuC706xV1.0\ADuC706xV1.0\USBDriver. Press next.
In the hardware installation window, select Continue anyway.
Finally when the following window appears press the Finish
button.
IAR Embedded Workbench installation:
•If you choose not to install the IAR Embedded Workbench now, you can install it later by double clicking on the file “EWARM-KS-CD-
511.exe” under the IAR folder on the CD.
•Follow the on screen instructions. IAR Embedded Workbench will require registering on IAR website to obtain a license key.
http://www.elecfans.com 电子发烧友 http://bbs.elecfans.com 电子技术论坛

ADuC706x GetStarted Guide
(2) Keil µVision3 Integrated Development Environment
REV 1.0 -- 6 -- www.analog.com/microconverter
The µVision3 IDE integrates all the tools necessary to edit, assemble and debug code. The ADuC706x Development System supports non-intrusive
emulation limited to 16kByte code.
2.1 Starting µVision3
1. From the START menu choose Programs Keil uVision3. This loads the µVision3 IDE. The µVision3 executable is located at
C:\Keil\UV3\Uv3.exe. µVision3 can use the GNU tools which should have been installed in the C:\Cygnus\ directory.
2.2 Toolbars
2. Under the VIEW menu, four toolbars are available:
a. Status Bar
b. File Toolbar
c. Build Toolbar
d. Debug Toolbar
The Build Toolbar will be active only when the IDE is in Edit/Compile mode. The Debug toolbar will be active only in Download/Debug
mode.
2.3 Starting a project
3. From the project menu select New Project as shown below.
4. Create a new folder ADIdemo under C:\Keil\ARM\ Examples and enter the name of the project as Demo. You will then be asked to select the
device. Select the part number corresponding to your evaluation board under Analog Devices. For simplicity, this GetStarted guide will always
refer to the ADuC7060.
The following message appears. Select “No” not to include
automatically the startup file startup.s to your project.
(2)
K
EIL
µ
µµ
µ
V
ISION
3
I
NTEGRATED
D
EVELOPMENT
E
NVIRONMENT
http://www.elecfans.com 电子发烧友 http://bbs.elecfans.com 电子技术论坛

ADuC706x GetStarted Guide
(2) Keil µVision3 Integrated Development Environment
REV 1.0 -- 7 -- www.analog.com/microconverter
5. Right click on Target1 and select “Option for Target1”to configure the settings of this project. By default, uVision3 will use the RealView
compiler. It is possible to change compiler by selecting “setup file extensions, books and environment”, “folder extension”.
6.
a. Using the ARM RealView tools (Linker Tab): this panel will generate the linker script. Using the ARM Real View tools: this panel
will generate the linker script. Add “ --first startup_RV.o(Reset)” in the Misc controls field. This ensures that the Startup code in your
application is executed first.
Also add “0x80000” into the R/O Base and “0x40000” in to the R/W Base to indicate to the Compiler the Flash and RAM start
addresses.
b. In the “Output” panel select “Create HEX File”. The HEX file can be used by the serial downloader.
http://www.elecfans.com 电子发烧友 http://bbs.elecfans.com 电子技术论坛

ADuC706x GetStarted Guide
(2) Keil µVision3 Integrated Development Environment
REV 1.0 -- 8 -- www.analog.com/microconverter
c. In the “Target” panel, ensure the IROM1 and IRAM1 Start and Size tabs are filled in correctly.
http://www.elecfans.com 电子发烧友 http://bbs.elecfans.com 电子技术论坛

ADuC706x GetStarted Guide
(2) Keil µVision3 Integrated Development Environment
REV 1.0 -- 9 -- www.analog.com/microconverter
d. If you have an emulator, power up the evaluation board using the 9V power supply. Connect the evaluation board to the mIDAS-Link
and the mIDAS-Link to your PC’s USB port using the provided USB cable.
Note: a green LED on the mIDAS-Link emulator blink a few times before staying on, indicating that the emulator is communicating
correctly with the PC.
In the “Debug” panel, select Use … and choose RDI Interface Driver if you have a mIDAS-Link emulator. Select the settings button
and give the path to the mIDAS-Link dll C:\ADuC706xV1.0\ADuC706xV1.0\code\mIDASLinkRDI\mIDASLinkRDI.dll
If your development system doesn’t include a JTAG emulator, use the simulator for this exercise.
e. Select the “configure RDI Driver” button. And in the “Flash” panel, tick all the options and in the Flash memory box, select your part
number. Ensure that the flash is configured at 0x80000. Press ok.
http://www.elecfans.com 电子发烧友 http://bbs.elecfans.com 电子技术论坛

ADuC706x GetStarted Guide
(2) Keil µVision3 Integrated Development Environment
REV 1.0 -- 10 -- www.analog.com/microconverter
f. In the “Utilities” panel, select Use Target Driver for Flash Programming”, chose “RDI Interface Driver” and tick the option “Update
Target before Debugging”.
7. Press OK again, all the options should be properly configured to compile, assemble, link, download and debug using mIDAS-Link or the
simulator.
8. All the files relative to the project will be in the folder C:\ADuC706xV1.0\ code \Realview\ Timer
9. C:\ADuC706xV1.0\ code\\Realview\Timer\
From Windows Explorer or any other way, copy the files C:\ADuC706xV1.0\code\Realview\Timer\Timer0_IRQ.c and ADuc706x.s into the
following directory C:\Keil\ARM\Examples\ADIdemo.
10. To add the file to the project right click on the “Source Group” folder in the “Project Workspace” and select “Add Files to Group”. Add the
files C:\Keil\ARM\GNU\Examples\ADIdemo\ Timer1_IRQ.c and ADuc706x.s. Also, add the file irq_arm.c from the directory
C:\Keil\ARM\INC\ADI.
http://www.elecfans.com 电子发烧友 http://bbs.elecfans.com 电子技术论坛

ADuC706x GetStarted Guide
(2) Keil µVision3 Integrated Development Environment
REV 1.0 -- 11 -- www.analog.com/microconverter
Note that you can use under Project the option “Component, Environment, Books” to rename the target and add the file relative to your project.
11. Double click on the file name (Timer1_IRQ.c) in the Workspace window to open the source file.
2.4 Assembling/Compiling Code
12. To compile/link Timer1_IRQ.cclick on the (translate current file) icon in the toolbar. The file should compile correctly and the following
will be seen in the status window. If there are errors in your source code these will appear in the status window. To identify the line of code
which corresponds to the error double click on the error in the Output window and an arrow will appear highlighting the line of code in which
the error appears.
The ADuC7060.h file will automatically be included under Timer1_IRQ.c in the Project Workspace window.
13. Before the code can be downloaded to the MicroConverter the entire project must be built. This is done by clicking on the (rebuild all
target files) icon on the toolbar. It will also create a pot.elf file used by the debugger.
2.5 Downloading/Debugging Code
http://www.elecfans.com 电子发烧友 http://bbs.elecfans.com 电子技术论坛

ADuC706x GetStarted Guide
(2) Keil µVision3 Integrated Development Environment
REV 1.0 -- 12 -- www.analog.com/microconverter
14. To start debugging, select Start/Stop Debug in the Debug
dropdown menu or press the icon (Start/stop debug
session). The debugger will indicate that you are using an
evaluation version. Press OK.
15. From the Peripheral pull down menu, select Digital/Analog Converter, DAC1 and select Analog/Digital Converter.
The following window will appear:
16. Close the disassembly window. Go to Timer1_IRQ.c file. Set a breakpoint on the instruction while (1) This is done by right clicking on the line
of code and then selecting “insert/remove breakpoint” or by double clicking on the left of the instruction. Notice that the breakpoint is
indicated by a large red dot to the left of the line.
http://www.elecfans.com 电子发烧友 http://bbs.elecfans.com 电子技术论坛

ADuC706x GetStarted Guide
(2) Keil µVision3 Integrated Development Environment
REV 1.0 -- 13 -- www.analog.com/microconverter
http://www.elecfans.com 电子发烧友 http://bbs.elecfans.com 电子技术论坛

ADuC706x GetStarted Guide
(5) Windows Serial Downloader
REV 1.0 -- 14 -- www.analog.com/microconverter
17. Press the run code button . The Timer1 values should be updated.
18. Press the push button S2 (INT0). The toggle rate of the LED D6 should change
19. To stop the code running press and to stop debugging press .
2.6 Using the GNU compiler
Under Project choose the option “Manage”, “Component, Environment, Books” and select GNU compiler in the Folders/Extensions panel.
Also add arm-uclibc- in the GNU-Tool-Prefix text box. Click “Ok”.
http://www.elecfans.com 电子发烧友 http://bbs.elecfans.com 电子技术论坛

ADuC706x GetStarted Guide
(5) Windows Serial Downloader
REV 1.0 -- 15 -- www.analog.com/microconverter
The Windows Serial Downloader for ARM based part (ARMWSD) is a windows software program that allows a user to serially download Intel
Extended Hex files as created by assembler/compilers to the MicroConverter via the serial port. The Intel Extended Hex file is downloaded into the
on-chip Flash/EE program memory via a selected PC serial port (COM1 to COM4).
5.1 Opening the ARMWSD
1. Power up the evaluation board using the 9V power supply. Connect the evaluation board header J1 to your PC’s COM1 serial port using the
RS-232 dongle cable provided. The PC serial COM port may be changed from COM1 via the WSD ‘configuration’ option…see section 4.3
below.
2. The user should put the MicroConverter into serial download mode using the following sequence:
a. S1 & S3 are Release.
b. Push S3 (Serial Download) and keep it pressed
c. Push S1 (/RESET)
d. Release S1.
e. Release S3
3. From the START menu choose Programs →ADuC706x →
ARMWSD. This launches the Windows Serial Downloader
application. The ARMWSD executable is located at
C:\ADuC706x\Download\ARMWSD.exe.
5.2 Downloading using ARMWSD
4. Select the file at C:\ADuC706xV1.0\code\Realview\Timer\Timer0_IRQ.hex.
5. Press the Configure button and in the Parts panel select the
part you are using. Press OK.
6. Press the Start button. The ARMWSD automatically sends
the reset command to the MicroConverter. If the
MicroConverter is in serial download mode and the comms
between the PC and the evaluation board are setup correctly
then the ARMWSD should start downloading the hex file and
display a progress bar while the file is downloading. Once the
file has been successfully downloaded monitor status box
will be updated with “Download Complete Click Run to run
program”.
5.3 Running the downloaded file
Running using the ARMWSD
7.Click the run button. The monitor status box will be updated with the message “Running. Click Start for new Download”. The program start
running from 80000h (start of the Flash/EE).
Manual Run option
8. Press RESET on the evaluation board with the SERIAL DOWNLOAD switch released. The program starts running automatically after reset
as can be seen by the flashing LED.
5.4 Additional options
(5) THE WINDOWS SERIAL DOWNLOADER
http://www.elecfans.com 电子发烧友 http://bbs.elecfans.com 电子技术论坛

ADuC706x GetStarted Guide
(5) Windows Serial Downloader
REV 1.0 -- 16 -- www.analog.com/microconverter
The ADuC706x family incorporates a serial download protocol that allows various options (see ARMWSD_protocol technote). These options can be
selected in the Configuration window as shown below.
http://www.elecfans.com 电子发烧友 http://bbs.elecfans.com 电子技术论坛

ADuC706x GetStarted Guide
(5) Windows Serial Downloader
REV 1.0 -- 17 -- www.analog.com/microconverter
If the protect option is selected, another panel is available. Select the pages to protect, enter the key and press OK. Note that using the ARMWSD,
only a mass erase will be able to erase the protection.
NOTE: use of the PC COM port
Only one application may use the PC serial port at any time. Close the ARMWSD before using any other application that uses the PC COM serial
port
http://www.elecfans.com 电子发烧友 http://bbs.elecfans.com 电子技术论坛

ADuC706x GetStarted Guide
(6) Installed Documentation and Code Directory
REV 1.0 -- 18 -- www.analog.com/microconverter
Installed Documentation Directory
Installing the MicroConverterDevelopment System CD installs documentation for the ADuC706x products at C:\ADuC706x\Documentation.
C:\ADuC706xV1.0\ADuC706xV1.0\documentation\DataSheets\
ADuC706x_A_draft.pdf ADuC706x rev A draft datasheet documenting released silicon
C:\ADuC706xV1.0\ documentation\EvalDoc\
Eval-ADuC7060 Reference Guide_R0.pdf ADuC7060 Eval Board Reference Guide version 1.0
7060grbrs_A1.zip ADuC7020 gerber files
ADuC7060_pcb.pdf ADuC7020 Eval Board Schematic Rev A1
C:\ADuC706xV1.0\ documentation\Technotes\ Tech notes for ADuC706x
C:\ADuC706xV1.0\ documentation\SoftwareQRG.pdf Summary of ARM and Thumb instruction set
C:\ADuC706xV1.0\ documentation\GCC_FAQ_V03.pdf FAQ for the GNU tools used with Keil uVision3
Any user of the ADuC706x Development System should consult all these documents before proceeding to ‘explore’ the ADuC706x.
Installed Code Directory
Installing the MicroConverterDevelopment System CD installs a code directory for the ADuC706x products at C:\ADuC706x\Code. C example
codes are available for most of the ADuC706x peripherals.
C:\ADuC706xV1.0\ code\KeilCodeExamples\GNU Tools\
Primary_ADC - code examples for the ADC0
Auxiliary_ADC - code examples for the ADC1
DAC - code examples for the DAC
I2C - code example for I2C communication
INT - code example for XIRQ
PWM - example of PWM configuration
SPI - code example for Serial Peripheral Interface communication
Timers - code examples for the Timers
UART - code examples for configuring the UART
(6) INSTALLED DOCUMENTATION AND CODE DIRECTORY
http://www.elecfans.com 电子发烧友 http://bbs.elecfans.com 电子技术论坛
This manual suits for next models
1
Table of contents
Other Analog Devices Microcontroller manuals
Analog Devices
Analog Devices AN-951 Installation and operating instructions

Analog Devices
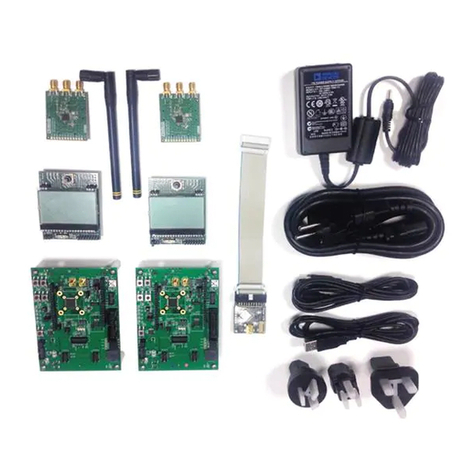
Analog Devices EVAL-ADUCM10QSPZ User manual

Analog Devices
Analog Devices ADuCM360 User manual

Analog Devices
Analog Devices ADuCM4050 EZ-KIT User manual
Analog Devices
Analog Devices EV-AD7284TMSDZ User manual

Analog Devices
Analog Devices Linear Technology ADI Power DC3159A Quick setup guide

Analog Devices
Analog Devices EV1HMC8362LP6G User manual
Analog Devices
Analog Devices DC1840C Quick setup guide
Analog Devices
Analog Devices Linear ADI Power DC3091 User manual
Analog Devices
Analog Devices ADuCM355 Quick user guide