Anetic Aid QA4 21359 User manual

Document No. 992053. Issue 1 –22.05.23


Document No. 992053. Issue 1 –22.05.23 Page 1
1. Introduction
These instructions are intended to assist you with the use and maintenance of the split
leg positioner accessory. It is important that these instructions are read thoroughly
before using the equipment. The device will be adversely affected, and its life
expectancy reduced, if the following instructions are not observed.
We also recommend that the user familiarise themselves with the QA4 Powered Mobile
Surgery System instructions for use, document no. 992010.
NOTE:
If any part of the split leg positioners are damaged or faulty, the device must
be taken out of use with immediate effect and the fault reported to Anetic
Aid, your authorised dealer or maintenance department. The split leg
positioners must not be used until the damage or fault has been repaired.
1.1. Warnings & Cautions
Various warnings and cautions are made throughout these operating instructions.
A WARNING is given when the personal safety of the patient or user may be
affected and when disregarding this information could result in injury.
A CAUTION is given when special instructions must be followed. Disregarding
this information could result in permanent damage being caused to the device.
1.2. Intended Use & Contraindications
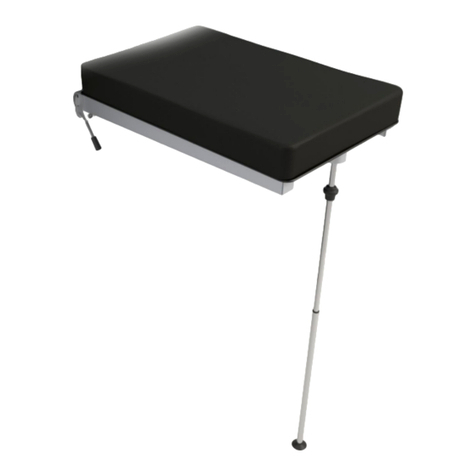
The split leg positioner accessory is intended for use within a theatre environment to
aid with the positioning and abducting of patients legs during operative procedures.
1.3. Equipment Classification
The equipment referenced in this document has been classified as a Class 1 Medical
Device, and is both CE and UKCA marked under the scope of the Medical Devices
Regulation 2017/745 and the UK Medical Devices Regulations 2002.
1.4. Putting the Split Leg Positioner into Service
It is important that the split leg positioner sections are cleaned and disinfected before
being put into service. Use this manual to check all the functions and refer to the
‘Cleaning and Disinfecting’ instructions.

Document No. 992053. Issue 1 –22.05.23 Page 2
2. Product Specifications
Key to Fig. 1
1.
Mounting blade
2.
Twist-to-release handle
3.
Side bar for accessory mounting
Dimensions:
Product size, per section
L1000mm x W420mm
Mattress area, per section
L650mm x W350mm
Product weight, per section
7.5kg
Abduction angle, per section
25° out from stretcher mid-line
Adduction angle, per section
10° in from stretcher mid-line
Elevation angle, per section
30° up from horizontal
Articulation angle, per section
50° down from horizontal
Weight Limits:
Maximum patient weight limit
160kg (353lbs)
Safe working load
180kg (397lbs)
WARNING: Exceeding the maximum specified patient weight limit could result
in failure of the split leg positioner and injury to the user.
Side Bar Clamp Accessory:
The split leg positioner should be used in conjunction with the following Anetic Aid
side bar clamp: Item No. 10250, Clamp - Universal (Socket & Rail) - Handwheel - for UK
& EU Side Bar.

Document No. 992053. Issue 1 –22.05.23 Page 3
3. Setting Up and Using the Split Leg Positioner
As illustrated in fig. 3, the split legs must be abducted prior to attaching to the
stretcher; this ensures they sit outside of the patients’ legs on the leg section. Each split
leg is adjusted using the twist-to-release adjustment handle (fig. 1, item 2).
As shown in fig. 2, insert the mounting blade (A) of the split leg into the side bar clamp
(B); see fig. 1 for details of the clamp required. Note; ensure the leg section release
buttons are accessible (C).
WARNING: Ensure the side bar clamps are firmly tightened to prevent any
movement of the leg section positioners during use.
When the splits legs are securely affixed, lift the patients legs off the leg section, and
onto each split leg. Next, depress the leg section release buttons (C), and remove the
stretcher leg section (D); the split legs can now be positioned as required.
Following the procedure, the split legs should be abducted to allow the leg section to
be refitted; align the spigots of the leg section into the mating female sockets on the
stretcher and push home firmly until the leg section is fully engaged.
WARNING: Ensure that the leg section is fully engaged and securely locked in
position.

Document No. 992053. Issue 1 –22.05.23 Page 4
4. Cleaning and Disinfecting
It is recommended that only CE marked cleaning products are used in the cleaning of
this device. Cleaning and Disinfection should be carried out by hand only.
Clean the device with warm water and neutral detergent and dry the surfaces
thoroughly using a soft cloth. Suitable disinfectants are: quaternary ammonium
compounds, isopropyl alcohol & chlorine bleach up to 1% (10,000 ppm). Apply
disinfectant by cloth, spray or disinfectant wipe. Following disinfection, wash off the all
surfaces with clean warm water and dry thoroughly using a soft cloth.
The product will be adversely affected and its life expectancy reduced if the following
cautions are not observed;
CAUTION:
-Do not steam clean or jet wash any area of this device.
-Do not soak or immerse the device.
-Do not use concentrated bleaching disinfectant solutions, organic solvent or
abrasive powders in the cleaning or disinfection of this product.
-Dilute all disinfectants in accordance with the manufacturer’s guidelines.
-Disinfectant products are corrosive in nature; failure to properly wash and
dry the product surface could leave a corrosive residue which may cause
damage to the product.
5. Product Maintenance
The split leg positioner does not require servicing. However, before use, visually inspect
the device for any loose or damaged parts.
NOTE:
If any part of the split leg positioners are damaged or faulty, the device must
be taken out of use with immediate effect and the fault reported to Anetic
Aid, your authorised dealer or maintenance department. The split leg
positioners must not be used until the damage or fault has been repaired.
CAUTION: In line with the MHRA Device Bulletin DB2006(5), maintenance
work should only be conducted by suitably trained personnel following
manufacturer’s guidelines.
6. Product Warranty
The product, when new, is guaranteed to be free from defects in materials and
workmanship and to perform in accordance with the manufacturer’s specification for a
period of 12 months from the date of purchase from Anetic Aid Ltd or their approved
Distributor. Anetic Aid Ltd will repair or replace, at their discretion, any components
found to be defective or at variance with the manufacturer’s specification within this
time at no cost to the purchaser. The warranty will take effect from the date of
purchase, subject to the purchaser registering the product with Anetic Aid to confirm its
receipt, installation date and product details.
The warranty does not provide cover for breakage or failure due to tampering, misuse,
neglect, accidents, modifications or shipping. The warranty is also void if the product is
not used in accordance with the manufacturer’s instructions or is repaired during the
warranty period by any persons other than Anetic Aid or its appointed agent. No other
expressed or implied warranty is given.
For details of our extended warranty packages please contact Anetic Aid or your
authorised dealer.
Document No. 992053. Issue 1 –22.05.23 Page 5
7. Label Identification
The following list is a description of all the labels used on the device;
Label indicating maximum patient
weight and the safe working load for
the device.
Anetic Aid CE product label.
Anetic Aid operating table screen
print.
Do Not Sit; indicates that neither of the
split leg positioner sections should be
sat upon.

Document No. 992053. Issue 1 –22.05.23
Table of contents
Other Anetic Aid Medical Equipment manuals

Anetic Aid
Anetic Aid QA4 User manual

Anetic Aid
Anetic Aid QA4 User manual

Anetic Aid
Anetic Aid 10233 User manual

Anetic Aid
Anetic Aid QA4 User manual

Anetic Aid
Anetic Aid 21380 User manual

Anetic Aid
Anetic Aid QA3 21110 User manual

Anetic Aid
Anetic Aid QA3 User manual

Anetic Aid
Anetic Aid AT4 User manual

Anetic Aid
Anetic Aid QA3 User manual
Popular Medical Equipment manuals by other brands

Drive DeVilbiss
Drive DeVilbiss 123S User instructions

Storz
Storz CLICKLINE Instruments 10 mm Instructions for use

O_TWO
O_TWO e600 user manual

Sizewise
Sizewise SW Rest Secure System user manual

Boso Bosch+Sohn
Boso Bosch+Sohn bosolux auris instructions

Beurer medical
Beurer medical IPO 61 Instructions for use