manuals.online logo
Brands
  1. Home
  2. •
  3. Brands
  4. •
  5. antoniolupi
  6. •
  7. Bathroom Fixture
  8. •
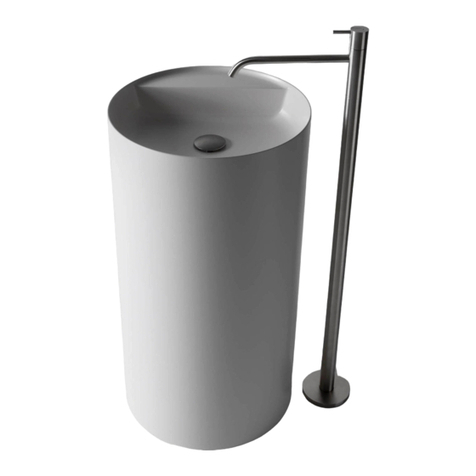
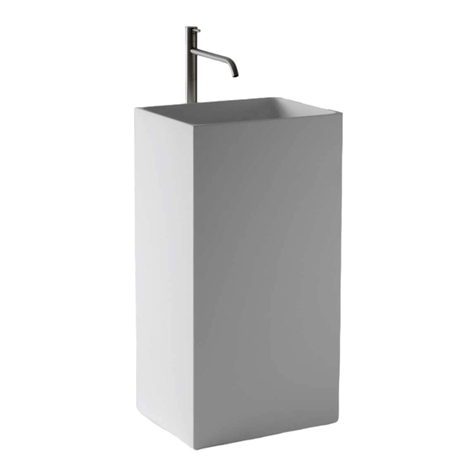
  9. antoniolupi ALBUME10 User manual

antoniolupi ALBUME10 User manual

ALBUME
design Carlo Colombo
2
Ø110mm
1
2
3
PEDANA 1 _ BOX 4 - scala@A3 1:20
SHOW ROOM ANTONIOLUPI 06/05/2016 - Stabbia
Art. ALBUME21
Art. ALBUME30
Art. ALBUME10
Art. ALBUME11
manuale d’installazione - installation manual - manuel d’installation - installationsanleitung - manual de instalación - руководство по установке
Art. ALBUME
IT_NB: Diametro interno castelletto 110mm.1_Vincolare il castellletto al
suolo.
EN_P.S. Internal diameter of the frame 110mm.1_Bind the frame to the
oor.
FR_NB: Diamètre interne du support 110mm 1_Fixer le support au sol.
ES_NB: Diámetro interior soporte 110mm. 1_Fijar el soporte a suelo.
DE_NB: interner Durchmesser der Halterung 110mm. 1_Die Halterung
am Boden befestigen.
RU_Примечание: Внутренний диаметр рамы-крепежа 110 мм.1_
Закрепите раму-крепеж к полу
IT_1_Avvitare il tubo corrugato al sifone, appoggiare il bacino alla colonna,
vincolare i componenti avvitando la piletta.
EN_1_ Screw the exible hose to the siphon, rest the sink on the base, secu-
re the components together by screwing the drain.
FR_1_ Vissez le tuyau exible au siphon, placez la vasque sur la colonne,
xez les composants en vissant la bonde.
ES_1_ Atornillar el tubo corrugado al sifón, colocar el lavabo en la columna,
asegurar los componentes atornillando el desagüe.
DE_1_ Schrauben Sie das Wellrohr an den Siphon, setzen Sie das Becken
auf die Säule, sichern Sie die Komponenten durchAnschrauben desAblaufs.
RU_1_ Прикрутите гофрированную трубу к сифону, уложите раковину на
пьедестал, соедините все детали сливной системы прикрутив донный
клапан.
3
manuale d’installazione - installation manual - manuel d’installation - installationsanleitung - manual de instalación - руководство по установке
Art. ALBUME
IT_3_Sollevare l’articolo e ssare il tutto con silicone o collante a secon-
da del tipo di pavimento.
EN_3_Lift the article and x it with silicone or glue depending on the
type of oor.
FR_3_Lever l’article et le xer avec du silicone ou de la colle selon le
type de sol.
ES_3_Levantar el artículo y jar todo con silicona o cola según el tipo
de suelo.
DE_3_Heben Sie das Artikel und befestigen Sie mit Silikon oder Klebe-
mittel je nach Bodentyp.
RU_3_Приподнимите изделие и закрепите зафиксируйте силиконом
или клеем, в зависимости от типа напольного покрытия.
IT_2_Inserire il tubo corrugato nel foro di scarico.
EN_2_ Insert the corrugated pipe in the drain hole.
FR_2_Insérez le tube exible dans le trou d’évacuation.
ES_2_Colocar el tubo corrugado en el agujero de desagüe.
DE_2_ Führen Sie das Wellrohr in das Abussloch ein.
RU_2_Вставьте гофрированной шланг в отверстие слива.
4
Ø110mm
1
2
3
Art. ALBUME20
PEDANA 1 _ BOX 4 - scala@A3 1:20
SHOW ROOM ANTONIOLUPI 06/05/2016 - Stabbia
Art. ALBUME10
Art. ALBUME11
manuale d’installazione - installation manual - manuel d’installation - installationsanleitung - manual de instalación - руководство по установке
Art. ALBUME
IT_1_Tagliare il tuborigido amisura eavvitarlo al sifone, appoggiareil bacino alla
colonna attraverso l’incastro, vincolare i componenti avvitando la piletta.
EN_1_ Cut the rigid pipe to size and screw it to the siphon, rest the sink on the
base at the joint, secure the components together by screwing the drain.
FR_1_ Coupez le tuyau rigide à la longueur voulue et vissez-le au siphon,
placez la vasque sur la colonne en l’encastrant, connectez les éléments en
vissant la bonde.
ES_1_ Cortar el tubo rígido a medida y atornillarlo en el sifón, colocar el lava-
bo en la columna a través de la junta, conectar los componentes atornillando
el desagüe.
DE_1_ Schneiden Sie den starren Schlauch nach Maß und schrauben Sie
ihn an den Siphon, setzen Sie das Becken auf die Säule, sichern Sie die
Komponenten durch Anschrauben des Ablaufs.
RU_1_ Отрежьте жесткую трубу по размеру и привинтите ее к сифону.
Прижмите раковину к пьедесталу и соедините донный клапан с жесткой
трубой.
IT_NB: Diametro interno castelletto 110mm.1_Vincolare il castellletto al
suolo.
EN_P.S. Internal diameter of the frame 110mm.1_Bind the frame to the
oor.
FR_NB: Diamètre interne du support 110mm 1_Fixer le support au sol.
ES_NB: Diámetro interior soporte 110mm. 1_Fijar el soporte a suelo.
DE_NB: interner Durchmesser der Halterung 110mm. 1_Die Halterung
am Boden befestigen.
RU_Примечание: Внутренний диаметр рамы-крепежа 110 мм.1_
Закрепите раму-крепеж к полу
5
manuale d’installazione - installation manual - manuel d’installation - installationsanleitung - manual de instalación - руководство по установке
Art. ALBUME
IT_2_Collegare il tubo rigido del lavabo allo scarico a pavimento.
EN_2_Connect the rigid tube of the sink to the oor drain
FR_2_ Raccordez le tuyau rigide de la vasque à l’évacuation au sol.
ES_2_ Conectar el tubo rígido del lavabo al desagüe a suelo.
DE_2_ Verbinden Sie den starren Schlauch des Beckens an den Bode-
nablauf.
RU_2_ Подсоедините жесткую трубу раковины к сливу в полу.
IT_3_Sollevare l’articolo e ssare il tutto con silicone o collante a secon-
da del tipo di pavimento.
EN_3_Lift the article and x it with silicone or glue depending on the type
of oor.
FR_3_Lever l’article et le xer avec du silicone ou de la colle selon le
type de sol.
ES_3_Levantar el artículo y jar todo con silicona o cola según el tipo
de suelo.
DE_3_Heben Sie das Artikel und befestigen Sie mit Silikon oder Klebe-
mittel je nach Bodentyp.
RU_3_Приподнимите изделие и закрепите зафиксируйте силиконом
или клеем, в зависимости от типа напольного покрытия.
6
manuale d’installazione - installation manual - manuel d’installation - installationsanleitung - manual de instalación - руководство по установке
Art. ALBUME
NOTE
7
manuale d’installazione - installation manual - manuel d’installation - installationsanleitung - manual de instalación - руководство по установке
Art. ALBUME
NOTE
IMPORTANTE
Per la pulizia consultare la scheda tecnica scaricabile dal nostro sito www.antoniolupi.it
IMPORTANT
For cleaning consult the technical data sheet downloadable from our website www.antoniolupi.it
IMPORTANT
Pour le nettoyage, veuillez vous référer à la che technique téléchargeable sur notre site www.antoniolupi.it
IMPORTANTE
Para la limpieza consultar la cha técnica descargable de nuestro sitio web www.antoniolupi.it
WICHTIG
Für die Reinigung schauen Sie bitte das technische Datenblatt auf unserer Webseite herunterladbar www.antoniolupi.it
ВНИМАНИЕ!
Информацию по уходу за изделием вы найдете в технической схеме, которая доступна на нашем сайте www.antoniolupi.it

This manual suits for next models

1

Other antoniolupi Bathroom Fixture manuals
antoniolupi VORTICE User manual

antoniolupi

antoniolupi VORTICE User manual

antoniolupi SIMPLO85 User manual

antoniolupi

antoniolupi SIMPLO85 User manual

antoniolupi GI-RA CARTATENSO User manual

antoniolupi

antoniolupi GI-RA CARTATENSO User manual

antoniolupi LASTRA User manual

antoniolupi

antoniolupi LASTRA User manual

antoniolupi CANALE User manual

antoniolupi

antoniolupi CANALE User manual

antoniolupi AURA ASTRO User manual

antoniolupi

antoniolupi AURA ASTRO User manual

antoniolupi MYSLOT 72 User manual

antoniolupi

antoniolupi MYSLOT 72 User manual

antoniolupi RAINDROP User manual

antoniolupi

antoniolupi RAINDROP User manual

antoniolupi BEMADE User manual

antoniolupi

antoniolupi BEMADE User manual

antoniolupi FUSTO User manual

antoniolupi

antoniolupi FUSTO User manual

antoniolupi STECCA600 User manual

antoniolupi

antoniolupi STECCA600 User manual

antoniolupi GHOST User manual

antoniolupi

antoniolupi GHOST User manual

antoniolupi CARTAINTENSO User manual

antoniolupi

antoniolupi CARTAINTENSO User manual

antoniolupi INTRECCIO User manual

antoniolupi

antoniolupi INTRECCIO User manual

antoniolupi borghi User manual

antoniolupi

antoniolupi borghi User manual

antoniolupi PLISSE User manual

antoniolupi

antoniolupi PLISSE User manual

antoniolupi CATINO43 Programming manual

antoniolupi

antoniolupi CATINO43 Programming manual

antoniolupi FUORIMETEO SLIM User manual

antoniolupi

antoniolupi FUORIMETEO SLIM User manual

antoniolupi DAFNE User manual

antoniolupi

antoniolupi DAFNE User manual

antoniolupi BIVIOCOMBI User manual

antoniolupi

antoniolupi BIVIOCOMBI User manual

Popular Bathroom Fixture manuals by other brands

Graff Camden E-8509 Instructions for assembly and use

Graff

Graff Camden E-8509 Instructions for assembly and use

Dornbracht 27 802 892-FF installation instructions

Dornbracht

Dornbracht 27 802 892-FF installation instructions

DURAVIT OpenSpace 770001 Mounting instructions

DURAVIT

DURAVIT OpenSpace 770001 Mounting instructions

Hans Grohe Flat Duschpaneel 27170000 Assembly instructions

Hans Grohe

Hans Grohe Flat Duschpaneel 27170000 Assembly instructions

DURAVIT 0067241000 Mounting instructions

DURAVIT

DURAVIT 0067241000 Mounting instructions

Oxygenics PawSpa 78166 quick start guide

Oxygenics

Oxygenics PawSpa 78166 quick start guide

DURAVIT 2814300000 Mounting instructions

DURAVIT

DURAVIT 2814300000 Mounting instructions

Franke 7612210081965 Installation and operating instructions

Franke

Franke 7612210081965 Installation and operating instructions

Helpmation GFS-302 manual

Helpmation

Helpmation GFS-302 manual

Jacuzzi 67661-X5104 quick start guide

Jacuzzi

Jacuzzi 67661-X5104 quick start guide

CEA AQC01 manual

CEA

CEA AQC01 manual

Pressalit R2040 Mounting instruction

Pressalit

Pressalit R2040 Mounting instruction

Bossini Oki Renovation H72405 INSTALLATION AND CARE INSTRUCTIONS

Bossini

Bossini Oki Renovation H72405 INSTALLATION AND CARE INSTRUCTIONS

Hans Grohe Raindance Showerpipe 27235000 Instructions for use/assembly instructions

Hans Grohe

Hans Grohe Raindance Showerpipe 27235000 Instructions for use/assembly instructions

Signature Hardware Hartfield 948523 quick start guide

Signature Hardware

Signature Hardware Hartfield 948523 quick start guide

Miomare 353239 2007 Assembly and Safety Advice

Miomare

Miomare 353239 2007 Assembly and Safety Advice

Oceanic OCEAMIXSC05 Instruction booklet

Oceanic

Oceanic OCEAMIXSC05 Instruction booklet

agape DROP XL Assembly instruction

agape

agape DROP XL Assembly instruction

manuals.online logo
manuals.online logoBrands
  • About & Mission
  • Contact us
  • Privacy Policy
  • Terms and Conditions

Copyright 2025 Manuals.Online. All Rights Reserved.