INSTALLATION INSTRUCTIONS
Sliding Door Enclosure
Note:
The product can be constructed either way up, for left or right hand opening.This instruction is showing a RIGHT hand
opening. If the door is being fitted with a Side Panel please follow this instruction to complete installation.
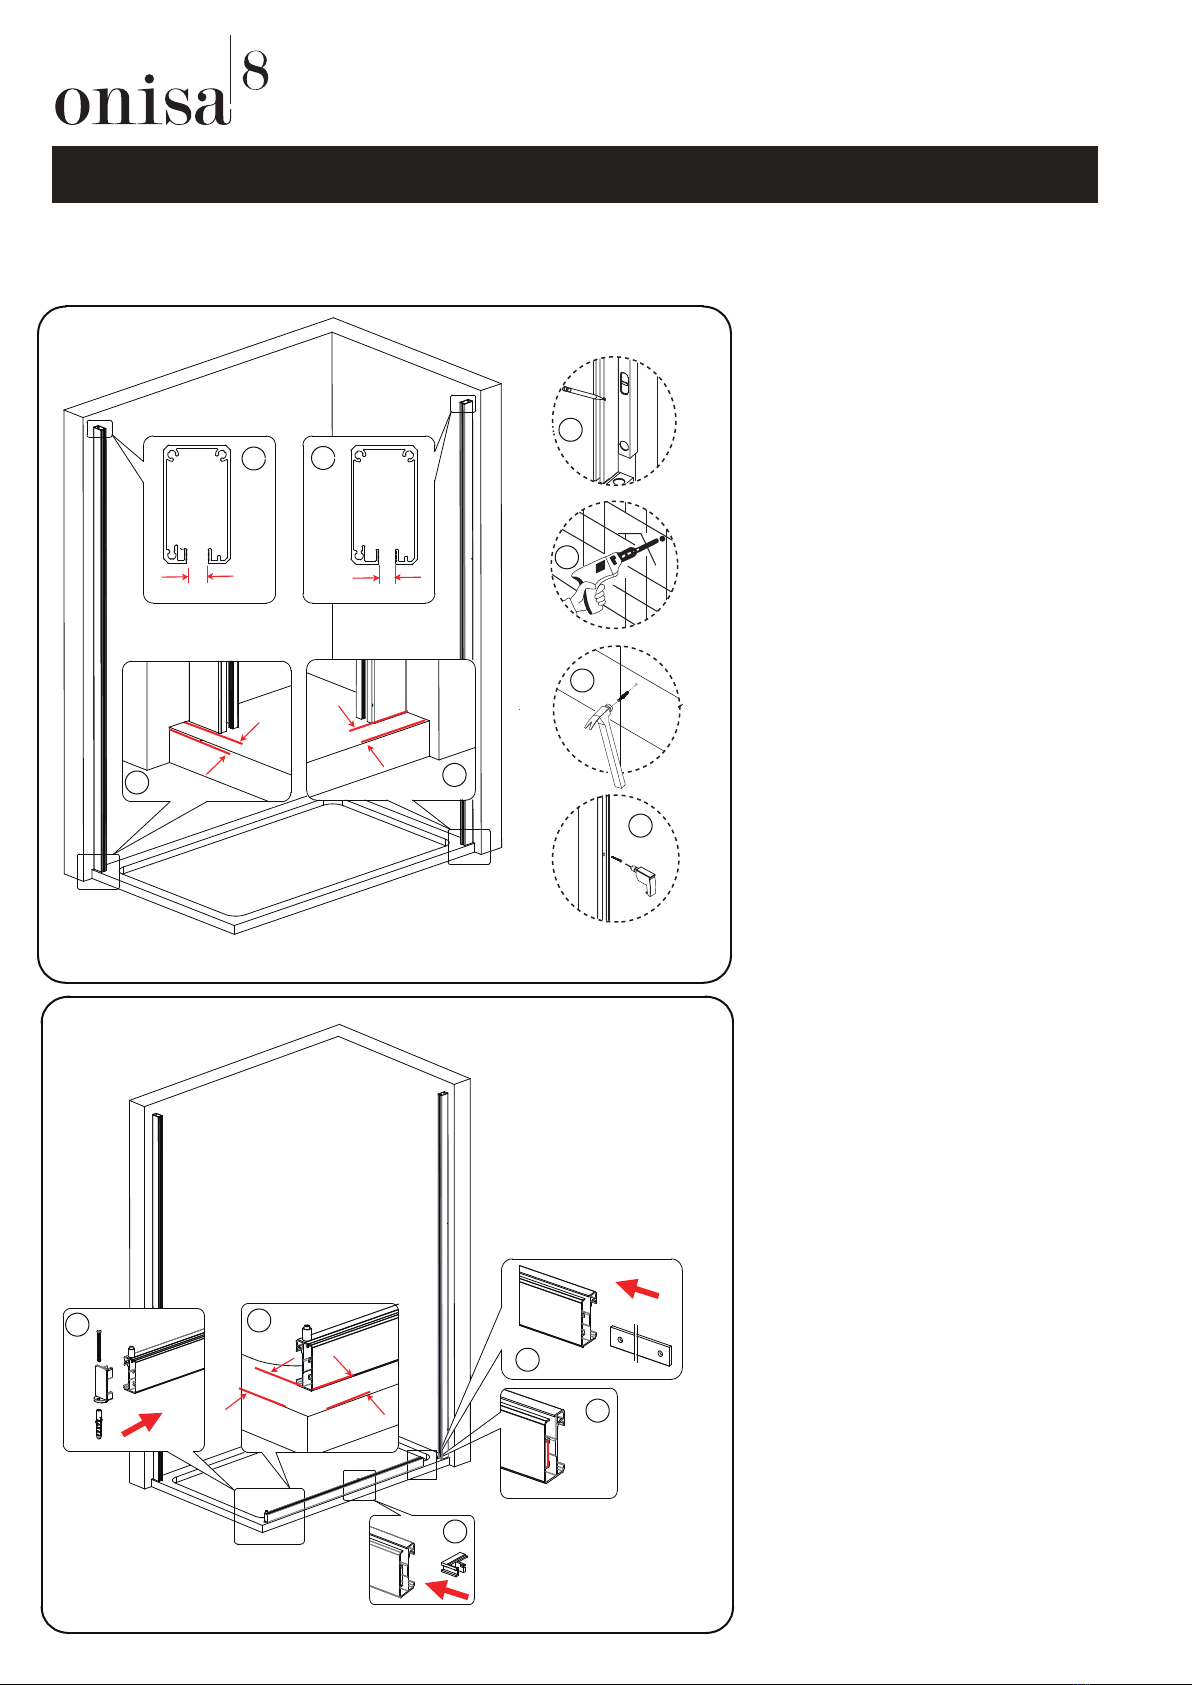
10mm
edisnI
edisnI
9.2mm 7.2mm
10mm
Step 1.1 Place the side panel wall profile
(9.2mm glass groove) (no 37) and
sliding door wall profile (7.2mm glass
groove) (no.5) onto the wall, roughly
10mm away from the front edge of
the shower tray.(Diagram A1/A2)
NOTE: you may find it easier to mark and drill the
wall if you apply masking tape to it first
A2
B1
C
D
A1
Important: the side with one fixing hole should face
the inside of the enclosure for the SIDE PANEL wall
profile,side with two fixing holes should face the
inside of the enclosure for the SLIDING DOOR wall
profile (Diagram B1/B2)
B2
Level the wall profiles using a spirit
level .Once the profiles sit on the tray
correctly mark the wall through 4 pre-
drill screw holes in the wall profiles
(Diagram C)
Step 1.2
Step 1.3 Remove the wall profiles and drill the
marked points using an 6mm masonry
drill bit (Diagram D),once this is done
insert wall plugs ( no.2/no.36).
(Diagram E).
E
Step 1.4 Secure the wall profiles to the wall
using the screws ST 4x45 (no.3/no.35)
(Diagram F)
F
Step 2.1 Fit the correct hand of the glass edge
cover (no.6) onto the bottom rail (no.4)
(Diagram G).
Insert the glass fixing strip (no.7)
into the bottom rail (no.4),ensure
it’s flush with the end of the rail
profile so the fixing holes on the
strip line up with the holes on the rail
profile.(Diagram H1/H2).
Step 2.2 Next place the bottom rail onto the
tray, it’s 14mm away from the tray
front edge and 52mm away from the
tray end edge (Diagram I).
Insert the correct hand of the rail end
fixing (no.1) into the bottom rail then
mark the point on the tray through the
screw hole on the fixing. Drill the hole
on the tray then insert the wall plug
(no.2), secure the pieces onto the tray
using scews ST 4x45 (no.3)
(Diagram J).
Flush
H1
H2
J
G
I