Aquaread Aquaprobe Lite User manual

Instruction Manual
for the
Aquaprobe® Lite
Optical Water Quality Probe
and associated
Aquameter®, Utilities Accessories
Aquameter® Software Version 6.00 and Above
AP-Lite Software Version 4.00 and Above
Document No. 10401-00976
Revision: F
Date: February 19, 2015

quaprobe® Lite Instruction Manual 10401-00976 Rev F
PROPRI TARY NOTIC
The information disclosed within this document or separately supplied in furtherance of this document includes
proprietary rights of Aquaread® Ltd. Neither this document nor the information disclosed herein or of a
supplementary nature shall be reproduced or transferred to other documents or used for any other purposes,
except as specifically authorised in writing by Aquaread® Ltd. Copyright 015 Aquaread® Ltd. All rights
reserved.
SOFTWAR LIC NC AGR M NT
By using the Aquameter®, its associated probes and PC based software (AquaLink),
you agree to be bound by the terms and conditions of the following software licence
agreement. Please read this agreement carefully.
Aquaread® Ltd grants you a limited license to use the software embedded in the devices (the “Software”) in
binary executable form in the normal operation of the products. Title, ownership rights and intellectual
property rights in and to the Software remain in Aquaread® Ltd.
You acknowledge that the Software is the property of Aquaread® Ltd and is protected under British
copyright laws and international copyright treaties. You further acknowledge that the structure, organisation
and code of the Software are valuable trade secrets of Aquaread® Ltd.
You agree not to decompile, dissemble, modify, reverse assemble, reverse engineer or reduce to human
readable form the Software or any part thereof or create any derivative works based on the Software.
R CYCLING
Any product bearing this symbol must be handed over to an applicable collection point for the
recycling of electrical and electronic equipment. By ensuring this product is disposed of properly,
you will prevent possible adverse consequences for the environment which could be caused by
inappropriate waste handling.
Note: For return for recycling, please contact Aquaread® Ltd for instructions on how to return end-of-life
equipment, accessories, and all auxiliary items for proper disposal.
WARNING
Favourable indications made by this equipment do not guarantee water is safe for human or
animal consumption. This equipment can not detect the presence of harmful bacteria or toxins. If in
doubt, ALWAYS TR AT SUSP CT WAT R PRIOR TO CONSUMPTION.
Limitations of Liability
Aquaread® Ltd and its affiliates specifically disclaim liability for any and all direct, indirect, special,
general, incidental, consequential, punitive or exemplary damages including, but not limited to, loss
of profits or revenue or anticipated profits or revenue or expenses incurred arising out of the use or
inability to use any Aquaread® product, miscalibration, loss of data or product failure, even if
Aquaread® Ltd and/or its affiliates has been advised of the possibility of such damages or they are
foreseeable or for claims by any third party. Notwithstanding the foregoing, in no event shall
Aquaread® Ltd and/or its affiliates aggregate liability arising under or in connection with Aquaread®
products, regardless of the number of events, occurrences, or claims giving rise to liability, be in
excess of the price paid by the purchaser for the Aquaread® product.
TRAD MARKS
Aquaread®, AquaPlus™, Aquameter®, Aquaprobe®, AquaLink™ and RapidCal™
are all trademarks of Aquaread® Ltd.
Microsoft®, Windows® and Excel® are trademarks of Microsoft Corporation
GOOGLE™ is a trademark of Google, Inc. StablCal® is a trademark of the HACH company
Aquaread ®
Ltd has no affiliation with Microsoft Corporation, Google, Inc. or HACH
© 2015 quaread® Ltd. www.aquaread.com Page 2 of 72

quaprobe® Lite Instruction Manual 10401-00976 Rev F
Table of Contents
1. INTRODUCTION............................................................................................................................................................7
2. WHAT’S IN THE BOX?.................................................................................................................................................7
2.1. ABOUT THE AQUAMETER®..............................................................................................................................................7
2.2. AP-LITE MINIMUM AND MAXIMUM INSERTION LEVELS .......................................................................................................7
2.3. ABOUT THE PROBE SLEEVE AND END CAP.........................................................................................................................8
2.4. TOP TIPS FOR SUCCESSFUL MEASUREMENTS USING OPTICAL ELECTRODES ..................................................................................
2.5. ABOUT FLUORESCENT MEASUREMENT...............................................................................................................................
3. BATTERY INSTALLATION AND CARE.................................................................................................................10
3.1. CHOICE OF BATTERY TYPE............................................................................................................................................10
3.2. BATTERY LIFE..............................................................................................................................................................10
3.3. BATTERY CHARGING ....................................................................................................................................................10
3.4. BATTERY CONDITION ICON ............................................................................................................................................10
3.5. BATTERY SAVER FUNCTIONS..........................................................................................................................................10
4. OVERVIEW OF THE OPERATING SYSTE .........................................................................................................11
4.1. INITIAL SWITCH ON, LANGUAGE AND CLOCK SETUP .........................................................................................................11
5. FITTING ELECTRODES.............................................................................................................................................12
5.1. SOCKET ASSIGNMENT....................................................................................................................................................12
5.2. AP-LITE OPTICAL ELECTRODES ....................................................................................................................................12
5.3. INITIAL CALIBRATION ....................................................................................................................................................13
6. CONNECTING THE AP-LITE TO AN AQUA ETER®........................................................................................14
7. TAKING EASURE ENTS ....................................................................................................................................15
7.1. TREND INDICATION.......................................................................................................................................................15
7.2. TEMPERATURE MEASUREMENT AND COMPENSATION..........................................................................................................15
7.3. GPS RECEPTION..........................................................................................................................................................16
8. E ORY ODE ........................................................................................................................................................17
8.1. MANUALLY SAVING READINGS.......................................................................................................................................17
8.2. RECALLING AND VIEWING SAVED READINGS....................................................................................................................17
8.3. RECALLING GLP DATA................................................................................................................................................17
8.4. CLEARING THE MEMORY................................................................................................................................................18
8.5. AUTOMATIC DATA LOGGING..........................................................................................................................................18
8.6. BATTERY AND MEMORY DURATION IN LOW POWER LOGGING MODE ..................................................................................1
9. SETUP & INSTALL......................................................................................................................................................20
.1. SETTING UNITS OF MEASUREMENT..................................................................................................................................20
10. ABOUT CALIBRATION............................................................................................................................................21
10.1. PRECAUTIONS DURING CALIBRATION.............................................................................................................................21
10.2. CALIBRATION ERROR MESSAGES...................................................................................................................................21
10.3. RESETTING TO FACTORY CALIBRATION DEFAULTS...........................................................................................................22
10.4. CALIBRATION DATA STORAGE......................................................................................................................................22
10.5. CALIBRATION REPORTS................................................................................................................................................22
11. ELECTRODE CALIBRATION AND AINTENANCE........................................................................................23
11.1. TOP TIPS FOR SUCCESSFUL MEASUREMENTS USING OPTICAL ELECTRODES ..............................................................................24
11.2. ELECTRODE CALIBRATION SEQUENCE.............................................................................................................................24
11.3. 2000-TURB TURBIDITY ELECTRODE...........................................................................................................................24
11.3.1. About Turbidity..............................................................................................................................................24
11.3.2. Precautions During Use.................................................................................................................................25
11.3.3. Negative Turbidity Readings..........................................................................................................................25
11.3.4. Calibrating t e Turbidity Electrode...............................................................................................................26
11.3.5. Calibration Points..........................................................................................................................................26
11.3.6. Turbidity Zero Point Calibration...................................................................................................................26
© 2015 quaread® Ltd. www.aquaread.com Page 3 of 72

quaprobe® Lite Instruction Manual 10401-00976 Rev F
11.3.7. Verifying t e Zero Calibration.......................................................................................................................27
11.3.8. Calibrating t e Turbidity 20 NTU & 1000 NTU Points.................................................................................27
11.3.9. Errors During Calibration.............................................................................................................................28
11.3.10. Lens and Sleeve Maintenance......................................................................................................................28
11.3.11. Turbidity References....................................................................................................................................28
11.4. 2000-BGA-PC FRESHWATER BLUE-GREEN ALGAE (PHYCOCYANIN) ELECTRODE ..............................................................2
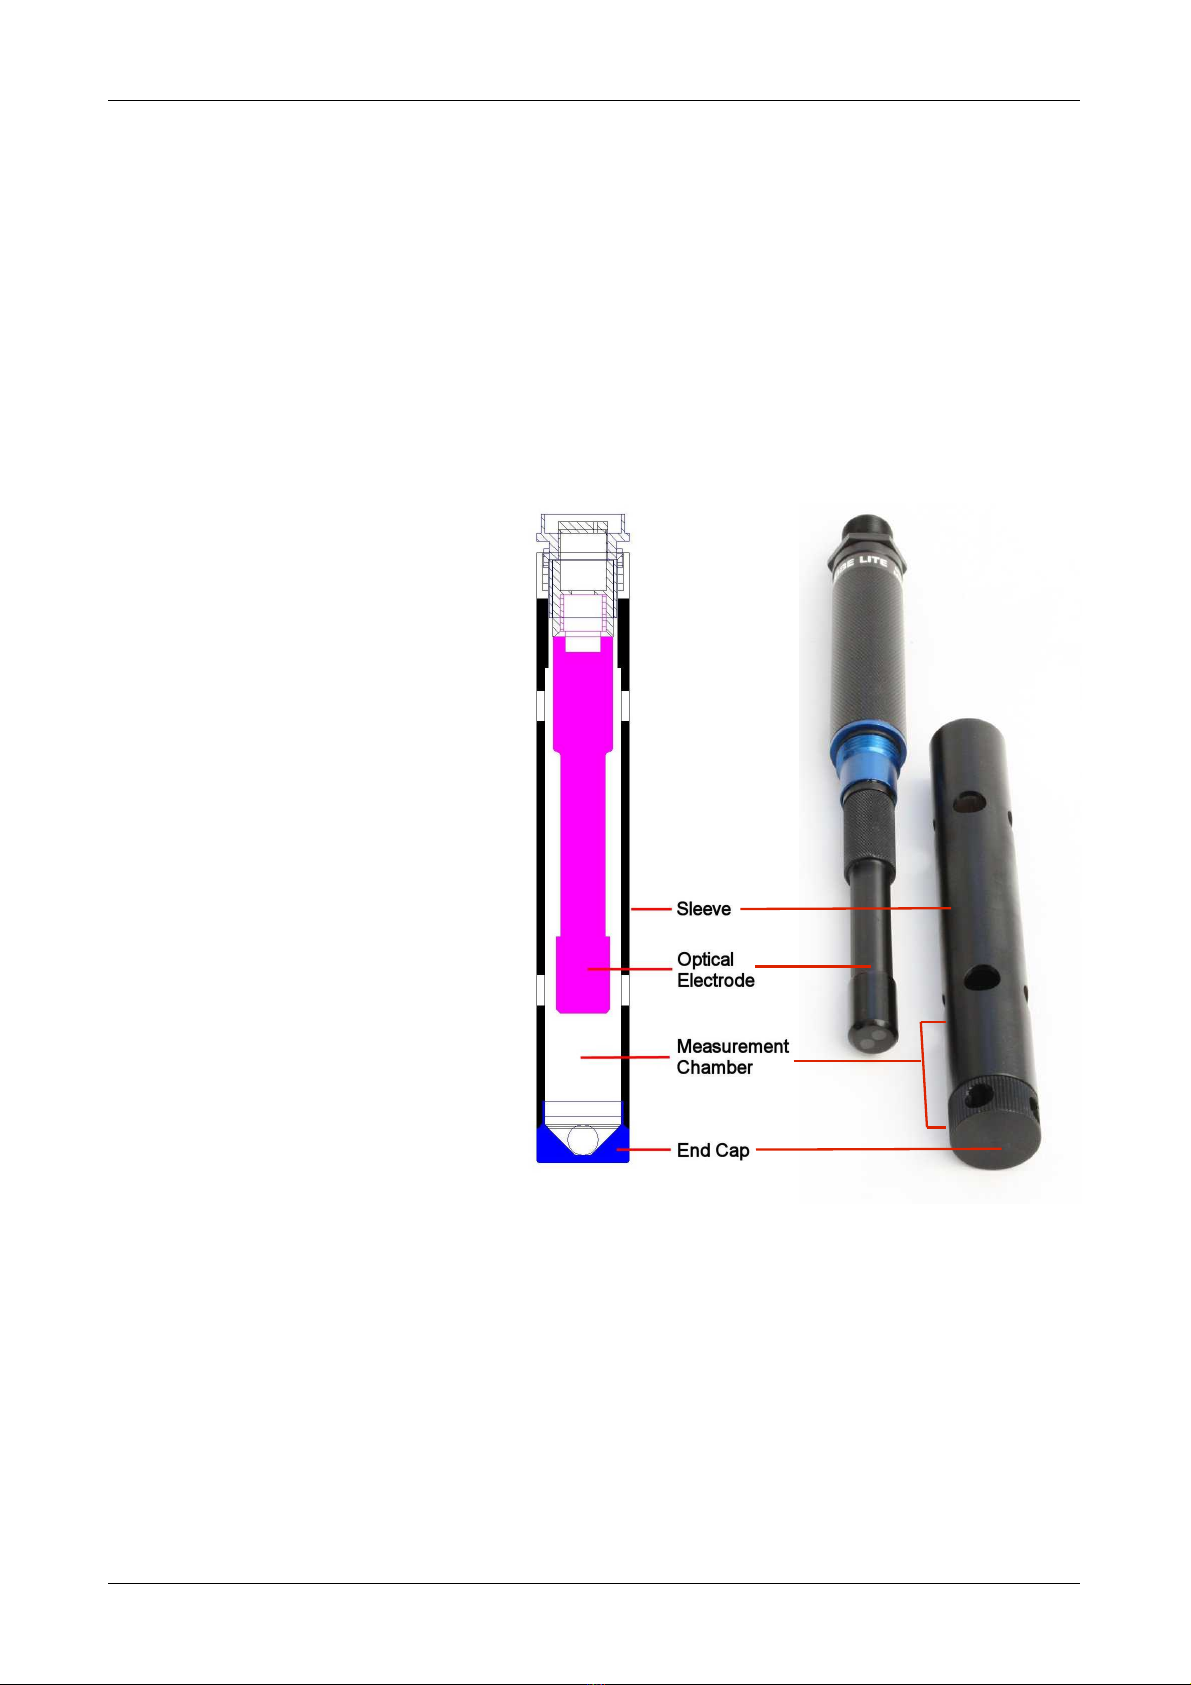
11.4.1. Principle of Operation...................................................................................................................................29
11.4.2. Limitations of Use..........................................................................................................................................29
11.4.3. Calibrating t e BGA-PC Electrode...............................................................................................................29
11.4.4. Calibration Solution Preparation..................................................................................................................30
11.4.5. Serial Dilution................................................................................................................................................30
11.4.6. Zero Point Calibration...................................................................................................................................30
11.4.7. Calibrating Point 2.........................................................................................................................................31
11.4.8. Errors During Calibration.............................................................................................................................32
11.4.9. Lens and Sleeve Maintenance.......................................................................................................................32
11.5. 2000-BGA-PE SALTWATER BLUE-GREEN ALGAE (PHYCOERYTHRIN) ELECTRODE .............................................................33
11.5.1. Principle of Operation...................................................................................................................................33
11.5.2. Limitations of Use..........................................................................................................................................33
11.5.3. Calibrating t e BGA-PE Electrode................................................................................................................33
11.5.4. Calibration Solution Preparation..................................................................................................................34
11.5.5. Serial Dilution................................................................................................................................................34
11.5.6. Zero Point Calibration...................................................................................................................................34
11.5.7. Calibrating Point 2.........................................................................................................................................35
11.5.8. Errors During Calibration.............................................................................................................................36
11.5.9. Lens and Sleeve Maintenance.......................................................................................................................36
11.6. 2000-CPHYLL CHLOROPHYLL ELECTRODE.................................................................................................................37
11.6.1. Principle of Operation...................................................................................................................................37
11.6.2. Limitations of Use..........................................................................................................................................37
11.6.3. Calibrating t e CPHYLL Electrode..............................................................................................................37
11.6.4. Calibration Solution Preparation..................................................................................................................38
11.6.5. Serial Dilution................................................................................................................................................38
11.6.6. Zero Point Calibration...................................................................................................................................38
11.6.7. Calibrating Point 2.........................................................................................................................................39
11.6.8. Errors During Calibration.............................................................................................................................40
11.6.9. Lens and Sleeve Maintenance.......................................................................................................................40
11.7. 2000-RHOD RHODAMINE WT ELECTRODE.................................................................................................................41
11.7.1. Principle of Operation...................................................................................................................................41
11.7.2. Limitations of Use..........................................................................................................................................41
11.7.3. Calibrating t e RHOD Electrode..................................................................................................................41
11.7.4. Calibration Solution Preparation..................................................................................................................41
11.7.5. Serial Dilution................................................................................................................................................42
11.7.6. Zero Point Calibration...................................................................................................................................42
11.7.7. Calibrating Point 2.........................................................................................................................................43
11.7.8. Errors During Calibration.............................................................................................................................43
11.7.9. Lens and Sleeve Maintenance........................................................................................................................44
11.8. 2000-FSCEIN FLUORESCEIN WT ELECTRODE.............................................................................................................45
11.8.1. Principle of Operation...................................................................................................................................45
11.8.2. Limitations of Use..........................................................................................................................................45
11.8.3. Calibrating t e FSCEIN Electrode...............................................................................................................45
11.8.4. Calibration Solution Preparation..................................................................................................................45
11.8.5. Serial Dilution................................................................................................................................................46
11.8.6. Zero Point Calibration...................................................................................................................................46
11.8.7. Calibrating Point 2.........................................................................................................................................47
11.8.8. Errors During Calibration.............................................................................................................................47
11.8.9. Lens and Sleeve Maintenance........................................................................................................................48
11. . 2000-REFOIL REFINED OIL ELECTRODE....................................................................................................................4
11.9.1. Principle of Operation...................................................................................................................................49
11.9.2. Limitations of Use..........................................................................................................................................49
11.9.3. Special Precautions W en Using t e REFOIL Electrode..............................................................................50
11.9.4. Calibrating t e REFOIL Electrode...............................................................................................................50
11.9.5. Calibration Solution Preparation..................................................................................................................50
11.9.6. Serial Dilution................................................................................................................................................50
© 2015 quaread® Ltd. www.aquaread.com Page 4 of 72

quaprobe® Lite Instruction Manual 10401-00976 Rev F
11.9.7. Zero Point Calibration...................................................................................................................................51
11.9.8. Calibrating Point 2.........................................................................................................................................52
11.9.9. Errors During Calibration.............................................................................................................................53
11.9.10. Lens and Sleeve Maintenance......................................................................................................................53
11.10. 2000-CDOM/FDOM CHROMOPHORIC (FLUORESCENT) DISSOLVED ORGANIC MATTER ..................................................54
11.10.1. Principle of Operation.................................................................................................................................54
11.10.2. Limitations of Use........................................................................................................................................54
11.10.3. Calibrating t e CDOM Electrode...............................................................................................................55
11.10.4. Calibration Solutions...................................................................................................................................55
11.10.5. Zero Point Calibration.................................................................................................................................55
11.10.6. Calibrating Point 2.......................................................................................................................................57
11.10.7. Errors During Calibration...........................................................................................................................57
11.10.8. Lens and Sleeve Maintenance......................................................................................................................57
12. AFTER USE..................................................................................................................................................................58
13. AQUALINK PC SOFTWARE....................................................................................................................................59
13.1. DOWNLOADING AQUALINK™ PC SOFTWARE FROM THE AQUAREAD® WEBSITE .................................................................5
13.2. SOFTWARE INSTALLATION............................................................................................................................................5
13.3. DRIVER INSTALLATION.................................................................................................................................................5
13.4. RUNNING AQUALINK..................................................................................................................................................5
13.5. UPLOADING DATA FROM YOUR AQUAMETER®..............................................................................................................60
13.6. DISPLAYING GPS CO-ORDINATES.................................................................................................................................60
13.7. ON SCREEN HELP.......................................................................................................................................................61
13.8. SAVING LOGGED DATA...............................................................................................................................................61
13. . RETRIEVING LOGGED DATA ........................................................................................................................................61
13.10. EXPORTING DATA.....................................................................................................................................................61
13.11. EXPORTING TEXT REPORTS.......................................................................................................................................61
13.12. EXPORTING EXCEL® FILES.......................................................................................................................................62
13.13. EXPORTING GOOGLE™ FILES.....................................................................................................................................62
13.14. IMPORTING FILES INTO GOOGLE™ EARTH ...................................................................................................................62
13.15. GOOGLE™ EXAMPLE................................................................................................................................................63
14. LI ITED WARRANTY.............................................................................................................................................64
14.1. CLEANING PRIOR TO RETURN......................................................................................................................................64
14.2. DECONTAMINATION CERTIFICATE..................................................................................................................................65
15. TROUBLESHOOTING...............................................................................................................................................66
16. DECLARATION OF CONFOR ITY......................................................................................................................67
17. APPENDIX 1. FLOW THROUGH CELL................................................................................................................68
17.1. INTRODUCTION............................................................................................................................................................68
17.2. ADAPTER COLLAR INSTALLATION ..................................................................................................................................68
17.3. SPIGOT INSTALLATION.................................................................................................................................................6
17.4. AP-LITE INSTALLATION ..............................................................................................................................................6
17.5. OPERATION................................................................................................................................................................6
17.6. CAUTION...................................................................................................................................................................6
17.7. CLEANING..................................................................................................................................................................6
17.8. FLOWCELL TROUBLESHOOTING......................................................................................................................................70
18. APPENDIX 2. STANDARD ELECTRODES DETAILED SPECIFICATION AND FAQS ...............................71
18.1. WHAT ARE THE EXCITATION AND DETECTION WAVELENGTHS?............................................................................................71
18.2. HOW DOES THE REFINED OIL SENSOR WORK?.................................................................................................................71
18.3. I CAN SEE ALGAE IN THE WATER BUT MY SENSOR IS GIVING LOW READINGS. WHY? ...............................................................72
18.4. WHAT IS THE RANGE AND RESOLUTION OF THE OPTICAL ELECTRODES? ............................................................................72
18.5. WHAT IS THE ACCURACY OF THE OPTICAL ELECTRODES?.................................................................................................73
© 2015 quaread® Ltd. www.aquaread.com Page 5 of 72

quaprobe® Lite Instruction Manual 10401-00976 Rev F
1. Introduction
This manual covers the setup, operation, calibration and maintenance of the Aquaprobe®
AP-Lite V4.00+, Aquameter® V6.00+ Meter, AquaLink V4.00+ PC software and associated
Aquaprobe® accessories. If your Aquaprobe® or Aquameter® are running earlier software,
the functionality may differ from that shown in this manual. In this case, contact Aquaread
for an earlier version of this manual or return your equipment for software upgrade.
2. What’s in the Box?
The AP-Lite is supplied with the following:
Sleeve End Cap.
One mounting nut (pre-fitted).
Getting started card for quick reference.
Pot of Silicone Grease
To complete your system, you will need an Aquameter® (AM- 00) an Optical Electrode of
your choice and an Aquaprobe® Extension Cable, which should be purchased separately.
2.1. About the Aquameter®
The Aquameter® is designed to be used outdoors and is rated to IP67, that is to say it is
waterproof but it is not designed for submersion. In order to prevent accidental dunking or
loss, a lanyard is supplied.
Please note that the socket on the Aquameter® is only waterproof when the
associated plug is fitted. Without the plug fitted, water can enter the socket. Damage
caused by water ingress through the socket is not covered by your warranty.
You may notice a small hole on the rear of the unit near the top. This is a waterproof vent
for the internal barometric sensor. Do not poke anything in this hole! Doing so will cause
major damage to the vent’s waterproof membrane and invalidate your warranty.
The lanyard supplied with the Aquameter® may, at first, appear to be a little long. This is
intentional. In order to keep the Meter out of the way whilst your hands are full, the lanyard
has been made long enough to wear round your neck and over your shoulder so the Meter
sits on your hip.
The extra length also allows the meter to be held in a comfortable position in front of you
during normal use. In order to prevent you being dragged into the water in the event of the
Probe cable becoming snagged, the lanyard includes a quick-release clip.
2.2. AP-Lite Minimum and Maximum Insertion Levels
The AP-Lite is designed to be fully submerged in water and is rated to IP68, that is to say, it
is rated for continual immersion to a depth of 30 meters, and short term immersion to 100
meters.
Temperature is measured in the AP-Lite by a sensor located in the blue socket block. The
recommended minimum level of insertion is therefore the blue line half way up the Probe.
The Probe will operate with just the lower row of holes in the Sleeve covered, but the
temperature measurement response will be slower as the temperature of the liquid being
measures will take a short time to conduct to the socket block via the Probe's Sleeve.
© 2015 quaread® Ltd. www.aquaread.com Page 6 of 72

quaprobe® Lite Instruction Manual 10401-00976 Rev F
2.3. About the Probe Sleeve and nd Cap
Please refer to the diagram and photograph below when reading the following important
information.
All Aquaread® Optical Electrodes are incredibly sensitive. For example, the Turbidity
electrode is capable of measuring between 0 and 3000NTU with an internal resolution of
greater than 0.1NTU. This means that the electrode is able to detect changes in turbidity
that are less than 0.003% of the full range! The other optical electrodes have a similar level
of sensitivity.
It follows, therefore, that in order to provide stable, repeatable readings, the environment in
which the measurements are made must be completely stable and repeatable.
The AP-Lite is constructed with a
matt black aluminium sleeve and
end cap that enclose the sensing
electrode and provide a closed,
constant condition, non reflective
measurement chamber.
This is essential for the correct
calibration and operation of all types
of optical electrodes.
In order to obtain consistent
results, the measurement
chamber created within the AP-
Lite must remain physically
constant during both calibration
and measurement.
Both the Sleeve and Sleeve nd
Cap must be fitted during
calibration and measurement
including when using the AP-Lite
with the optional Flow Through
Cell (Flowcell).
If the optical electrode is calibrated under one set of conditions then used to measure under
another set of conditions, the readings will naturally be erroneous, especially at low
concentrations.
A perfect example of this is calibrating with the end cap removed then measuring with the
end cap fitted (or vice-versa). By changing the physical characteristics of the measurement
chamber, you also change the calibration and response of the electrode.
© 2015 quaread® Ltd. www.aquaread.com Page 7 of 72

quaprobe® Lite Instruction Manual 10401-00976 Rev F
Another particular problem when trying to measure very low
concentrations is air in the form of both visible and
microscopic bubbles. These act like tiny prisms and can
refract and reflect both the excitation light and the return
signal being measured.
The photograph to the right was taken in a calibration tube
after fresh water was poured in. The bubbles are clearly
visible in the light beam.
2.4. Top Tips for successful measurements using optical electrodes
Always keep the measurement chamber and electrode lenses clean.
Always fit the sleeve and end cap during both calibration and measurement.
Always allow the readings to settle completely during both calibration and
measurement.
Always try to eliminate air bubbles by agitating the Probe after insertion both during
calibration and measurement. On the AP-7000, activate the self-cleaning mechanism to
clear bubbles.
Always calibrate and zero the electrode as close to your sample temperature as
possible. This is especially important with the Ref-Oil electrode.
Always zero the electrode just prior to use in clean water (bottled still mineral water is
ideal). This is also especially important with the Ref-Oil electrode.
2.5. About Fluorescent Measurement
All Optical Electrodes, with the exception of the Turbidity Electrode, employ fluorescent
measurement techniques. Interference from microbiological species and compounds which
fluoresce at similar wavelengths and differences in fluorescence caused by temperature,
ambient light and turbidity can all cause inaccuracies.
Fluorescence measurement is ideal for researchers who are interested in detecting the
presence or absence of a specific substance in reasonable concentrations and measuring
relative fluorescence changes that can be used as an indication of increasing or decreasing
concentrations.
Fluorescence measurement techniques are not ideal for quantitative measurement and it is
therefore impossible to specify an absolute accuracy.
In order to obtain accurate results, data obtained with a fluorescent electrode in the
field must be post-calibrated with data from standard laboratory analysis of grab
samples acquired during the study.
© 2015 quaread® Ltd. www.aquaread.com Page 8 of 72

quaprobe® Lite Instruction Manual 10401-00976 Rev F
3. Battery Installation and Care
The Aquameter® requires five AA size batteries. To install the batteries, loosen the two
screws on the centreline of the rear of the meter and remove the battery compartment lid.
Following the battery polarity markings inside the battery compartment, insert five AA cells
then replace the compartment lid and tighten the screws.
3.1. Choice of Battery Type
Alkaline or rechargeable batteries may be used, but never mix battery types in the meter. If
you choose to use rechargeable batteries, we recommend nergizer 500mAh (or greater)
Nickel-Metal Hydride cells, which are widely available.
If the Meter is to be out of use for a long period, remove the batteries to prevent damage
due to possible leakage.
3.2. Battery Life
A set of fresh alkaline cells will give over 0 hours use in the AM- 00 GPS Aquameter®. A
fully charged set of 500mAh NiMH cells will give up to 40 hours use in the AM- 00 GPS
Aquameter®.
3.3. Battery Charging
During the charging process, batteries generate heat and vent gasses, and must never be
charged inside a sealed unit. Because the Aquameter® is a sealed unit, we do not allow
charging in-situ. Batteries must be removed and charged with a suitable battery charger
outside the Meter. We recommend the use of one of the nergizer range of NiMH chargers.
3.4. Battery Condition Icon
On the main Aquameter® screens, a battery condition icon is displayed in the top left
corner. The icon shows full when the batteries are fresh, and gradually empties as the
batteries are used. When the batteries need replacing, the empty battery icon will flash on
and off. If you ignore this, the Meter will automatically switch itself off when the battery
voltage becomes too low for reliable operation.
When using rechargeable batteries, the battery icon will not show completely full, even with
freshly charged cells. This is due to the fact that rechargeable batteries are only rated at
1. V per cell compared to 1.5V per cell for alkaline batteries. This indication does not affect
battery life. The icon will simply sit at the ¾ full mark for a longer period of time.
3.5. Battery Saver Functions
The Aquameter® is designed to switch off automatically if you do not touch any of the keys
for 30 minutes. The only exception to this is if you have activated the Automatic Data
Logging feature. In this case, the Meter will continue to operate until either the memory is
full or the batteries go flat.
The display on the Aquameter® incorporates a white backlight to improve visibility in low-
light conditions. As on a mobile phone, the backlight switches on each time a key is
pressed, and stays on at full brightness for 15 seconds. After 15 seconds, the backlight will
fade to half brightness. After a further 15 seconds the backlight will switch off.
During normal operation, if you want to activate the backlight without changing the Meter
function, simply press the SC or OK key.
© 2015 quaread® Ltd. www.aquaread.com Page 9 of 72

quaprobe® Lite Instruction Manual 10401-00976 Rev F
4. Overview of the Operating System
The operating software in the Aquameter® has been designed for simple, intuitive use.
Similarly, a great deal of development work has been put into simplifying and automating
the calibration procedures in the Aquameter® in order to allow normal field operatives (as
opposed to trained lab technicians) to achieve quick and accurate results.
If you are used to operating a mobile phone or programming audio/visual equipment using
a remote control, you should feel at home with the familiar up/down left/right arrow shaped
navigation keys and central OK key.
The tree structure behind the M NU key should also be very familiar. Each item on the
menu leads to a sub menu and then either onto further menus or final choices. Each
branch of the menu system is navigated using the arrow keys. At each point, selections can
be made by either pressing the OK key or the right arrow key.
To reverse along a branch of the menu system, use the SC (escape) key or left arrow
key. After a short time, you should be able to navigate around the entire menu system at
speed using just the four arrow keys. If, at any time, you leave the Meter in one of the sub-
menu screens, it will automatically back out to the main operating screen after 15 seconds.
4.1. Initial Switch On, Language and Clock Setup
To switch the meter on or off, briefly press the red key. Do not hold it down. The meter
contains a clock and is capable of operating in several different languages. When switching
on for the first time, you must select an operating language and set the clock. The first
screen you will see is the Language Selection Screen.
English
Francais
Deutsch
Espanol
To select a language, move the cursor down the list using the down arrow key. To enter
your selection, press the OK key or the right arrow key.
The next screen to be displayed is the Time & Date Setting Screen.
Time & Date
Time:15:46:37
Date:15/Jun/12
To set the time and date, use the arrow keys to move the cursor around the screen. Use
the up and down arrow keys to adjust values. When the time and date are correct, press
the OK key. Don’t worry if you make a mistake first time round. You can easily get back to
these screens later through the M NU key.
© 2015 quaread® Ltd. www.aquaread.com Page 10 of 72

quaprobe® Lite Instruction Manual 10401-00976 Rev F
5. Fitting lectrodes
There are several different types of Optical Electrodes designed for use with the AP-Lite.
The Aquameter® recognises the socket on the AP-Lite as Aux1 (axillary socket 1). Other
models of Aquaprobe® have up to six Aux sockets.
Before the AP-Lite can be used, an Electrode must be fitted and correctly assigned. To fit
an Electrode, first remove the sleeve from the AP-Lite by unscrewing at the blue split-line.
Apply a small amount of silicone grease (supplied with the AP-Lite) to the threaded section
and the O-ring of the AUX Electrode (see photograph). NSUR NO GR AS IS
APPLI D TO TH GOLD CONTACTS.
Using a clean cloth or tissue paper, polish the gold contacts ensuring they are completely
clean. Carefully insert the electrode into the socket and tighten firmly by hand until the O-
ring is completely compressed. Do not over-tighten or use any tool (such as pliers).
After fitting the Electrode, replace the Sleeve and ensure the Sleeve End Cap is fitted.
5.1. Socket Assignment
After installation, it is essential to connect the AP-Lite to an Aquameter® and assign the
new electrode type to the AUX Socket. On the Aquameter®, press the MENU key, then
select Setup & Install followed by Socket Assignment. When the Socket Assignment option
has been selected, the following screen will be displayed.
OCKET A IGNMENT
1:EMPTY l 4:N/A
2:N/A l 5:N/A
3:N/A l 6:N/A
Move the cursor to the right by pressing the right arrow key. When the cursor has moved to
the right of the number 1, use the up and down arrow keys to select the appropriate
electrode type. The table below show the available electrode options and the selection that
should be made on this screen:
5.2. AP-Lite Optical lectrodes
lectrode Part No. Function Aquameter® Selection
000-TURB Turbidity TURB
000-CPHYLL Chlorophyll Cphl
000-BGA-PC Phycocyanin (Blue-Green Algae PC) BGA-PC
000-BGA-PE Phycoerythrin (Blue-Green Algae PE) BGA-PE
000-RHOD Rhodamine WT Dye Rhod
000-FSCEIN Fluorescein Dye Fcein
000-REFOIL Refined Oil R-OIL
000-CDOM CDOM/FDOM CDOM
© 2015 quaread® Ltd. www.aquaread.com Page 11 of 72

quaprobe® Lite Instruction Manual 10401-00976 Rev F
When the desired electrode type is showing, move the cursor back to the left of the socket
number then press OK to send the selection to the AP-Lite. The socket assignments are
stored in the AP-Lite. If you press the ESC key whilst in this screen, any changes you have
made will not be transferred to the AP-Lite.
5.3. Initial Calibration
When a new electrode is fitted it is essential to carry out a full two-point calibration
prior to use. Refer to the relevant section in this manual for detailed calibration instructions
of your new Electrode type.
YOUR N W L CTROD WILL NOT GIV S NSIBL R ADINGS UNTIL IT HAS B N
FULLY CALIBRAT D.
Please note: changing an AUX Socket assignment will clear all the calibration data
for that socket.
© 2015 quaread® Ltd. www.aquaread.com Page 12 of 72

quaprobe® Lite Instruction Manual 10401-00976 Rev F
6. Connecting the AP-Lite to an Aquameter®
The AP-Lite is designed to connect to the Aquameter® using an EX- 000 Aquaprobe®
Extension Cable. The Aquaprobe® Extension Cable features high-pressure metal
connectors, which incorporate several O-ring seals at the Probe end. Prior to first
connection, the seals must be lubricated using the silicone grease provided.
Apply a generous smear of grease to the O-rings where indicated above. Be careful not to
get any grease inside the connector near the gold contacts. A small smear of grease
should also be applied to the thread on the Probe to allow easy tightening of the collar.
To connect the Extension Cable to the AP-Lite, align the white dot on the AP-Lite with the
◄AQUAR AD logo on the plug body, then press the plug into the socket and tighten the
retaining collar fully. DO NOT TWIST TH CONN CTOR BODY WITH R SP CT TO TH
PROB . Once the AP-Lite has been connected to the Extension Cable, the Aquameter®
can be connected.
Always ensure the Aquameter® is switched off prior to connecting or disconnecting an AP-
Lite. Align the ◄AQUAR AD logo on the plug body with the red on/off switch on the
Aquameter®, then press the plug into the socket and tighten the retaining collar.
Once the AP-Lite is connected to the Aquameter®, switch the Meter on by pressing the red
on/off switch.
The Aquameter® should detect the Probe and automatically start displaying readings.
© 2015 quaread® Ltd. www.aquaread.com Page 13 of 72

quaprobe® Lite Instruction Manual 10401-00976 Rev F
7. Taking Measurements
Prior to first use after fitting a new Electrode, it is essential to assign the new electrode type
to the AUX Socket and to calibrate it. See section 5. Fitting Electrodes for full details.
Ensure the Sleeve and Sleeve End Cap are fitted. Switch the Aquameter® on and immerse
the AP-Lite in the sample water, making sure that the water level covers the bottom row of
holes in the Probe sleeve and preferably comes up as far as the blue line on the Probe.
If the AP-Lite is connected correctly, the meter will read the Probe’s serial number and
model type. Initial Probe readings will then be displayed on the meter’s screen along with
the current GPS status. The initial data screen for the GPS Aquameter® in conjunction with
the AP-Lite with a chlorophyll electrode fitted is shown below.
TEMP:018.5°C
Cphl:00.00 ug/L
GP :Acquiring
Left/right arrows at the bottom corners of the screen indicate another data screen is
available. To access the GPS Status screen, simply press either the left or right arrow keys.
Any value that is out of range or unavailable will be displayed as dashes.
The GPS Status screen is shown below.
Lat:N51 °21.498
Long:E001°24.323
Alt:00050M 1013mb
ats in use:09
If an asterisk (*) character is flashing just below the battery symbol, this indicates that Auto
Data Logging is switched on. See Automatic Data Logging in section 8.
7.1. Trend Indication
To the right of each reading, a trend indication is given. This consists of either an upwards
facing arrow (which indicates the numeric value of the reading is rising), a downwards
facing arrow (which indicates the numeric value of the reading is falling) or a two-headed
arrow, which indicates a stable reading. Readings are judged to be stable when the
variation over a ten second period drops below 1%.
7.2. Temperature Measurement and Compensation
The fluorescent properties of all solutions change with the solution's temperature. In
addition, the response of the measuring electrodes change with temperature. It is a
fundamental, practical requirement in the field of water quality monitoring that test
measurements taken at different temperatures can be compared.
During calibration of the optical electrodes, variations in the calibration solutions due to
temperature are automatically compensated for. During the measurement, temperature is
automatically compensated for.
© 2015 quaread® Ltd. www.aquaread.com Page 14 of 72

quaprobe® Lite Instruction Manual 10401-00976 Rev F
Remember, temperature is measured in the AP-Lite by a sensor located in the blue socket
block. The temperature of the liquid being measures is quickly conducted to the socket
block by the Probe's Sleeve. The deeper the Probe Sleeve is submerged, the quicker the
temperature will stabilise. See section . AP-Lite Minimum and Maximum Insertion Levels
for more details.
7.3. GPS Reception
The Aquameter® (AM- 00) contains a built-in GPS receiver and antenna. The antenna is
situated at the top of the case, just behind the AQUAREAD Logo. For optimum signal
reception, the antenna must be able to ‘see’ a reasonably large amount of the sky. The
GPS receiver will not work indoors or when shielded from the sky by any solid
structure.
After switch-on, the GPS receiver will automatically start to search for satellites. During this
phase, the message GPS:Acquiring will be shown on the bottom line of all the screens. As
soon as three satellites are acquired, two dimensional position (no altitude) will be
calculated and the message GPS:2D POS will be shown on the bottom line of the screens.
Once a fourth satellite is acquired, altitude will be calculated and GPS:3D POS will be
shown on the bottom line of the screens. With a good view of the sky, position should be
calculated within ninety seconds of switch-on. To see your geographic position and the
number of satellites in use, use the left or right arrow keys to scroll to the Position page.
If you switch the meter on indoors, then carry it outside after several minutes, there may be
a considerable delay in acquiring satellites. In this case, switch the meter off, then back on
again to reset the acquisition process.
© 2015 quaread® Ltd. www.aquaread.com Page 15 of 72

quaprobe® Lite Instruction Manual 10401-00976 Rev F
8. Memory Mode
8.1. Manually Saving Readings
When you are happy that the readings are stable, press the M+ key to snapshot the
readings along with the time, date, GLP (calibration) data and position (GPS models only).
As each reading is saved, a numeric memory location ‘Tag’ will be briefly displayed which
you can note down. This Tag can be used to identify readings at a later date, both on the
Aquameter® and when using AquaLink software.
8.2. Recalling and Viewing Saved Readings
To recall your readings, press the MR key. On entering Memory Recall mode, the most
recent Tag and set of readings are displayed first along with the date and time the readings
were taken shown on the bottom line of the screen.
M M
TEMP:018.5°C
Cphl:05.23 ug/L
02/Apr/12 15:04:01
During Memory Recall, an ‘M’ is flashed in the top left and right corners of the screen
alternatively with an up/down arrow and a left/right arrow. This is to indicate that the Meter
is in Memory Recall mode and that other screens can be accessed using the arrow keys.
To see earlier readings, press the up arrow key. Just before each set of readings is
displayed, the Tag will be briefly displayed. To view all the parameters within one set of
readings, use the left/right arrow keys as described earlier. To exit Memory Recall mode,
press the SC key. If no key is pressed for 30 seconds, Memory Recall mode will be
automatically cancelled.
8.3. Recalling GLP Data
Each time a set of readings is added to memory, the date of the last successful calibration
of each electrode is also appended. This is called GLP (Good Laboratory Practice) Data.
To view the last successful calibration date for the electrode for any particular stored
reading, enter Memory Recall mode, scroll to the reading you are interested in using the
up/down keys, then press the M NU key. The screen below will be displayed.
GLP DATA FOR Cphl
ZERO [30/Jun/13]
Pt-2 [07/Feb/13]
This example shows that the electrode type fitted was Chlorophyll and the last successful
calibration, prior to the recorded reading being taken, was June 30th for the Point 1 and
February 7th for Point . If the date field is dashed (==/===/==), this means the electrode
had not been calibrated at that point.
To exit this screen press the SC key or the left arrow key.
© 2015 quaread® Ltd. www.aquaread.com Page 16 of 72

quaprobe® Lite Instruction Manual 10401-00976 Rev F
8.4. Clearing the Memory
The memory within the Aquameter® is capable of storing over 1000 full sets of readings.
To clear the entire memory, switch the Meter off, hold down the M+ key, then switch the
Meter back on. A screen will be displayed asking you to confirm your request. Press OK to
clear the memory or ESC to cancel and return to normal operation.
8.5. Automatic Data Logging
If you want to save readings on a regular basis, in order, say, to check water quality at a
certain location over a period of time, you can set the Meter to record readings
automatically.
Readings can be logged for short periods with the Meter permanently displaying readings,
or for much longer periods in a Low Power Mode, where the Meter switches itself off
between readings in order to extent the battery life.
Please note: Low Power Logging Mode is only available on Meters running version 4.54
software and above.
To activate Automatic Logging, press the M NU key. The Main Menu screen will be
displayed. Please note, the first item on the menu, 'Clean Probe', will only be active if an
Aquaprobe® AP-7000 (which has an automatic cleaning system) is connected.
Clean Probe
Auto Data Logging
Calibration
etup & Install
Select Auto Data Logging by pressing the down arrow key then the right arrow key or the
OK key. The Auto Data Logging screen will be displayed.
Auto Data Logging
Interval:10 Mins
tatus:OFF
Using the arrow keys to navigate, set the desired logging interval anywhere between 1 and
90 minutes.
To select permanent display logging mode, set the Status to ON. To select Low Power
logging mode, set the Status to LOW POW R.
To activate the selected logging mode, press the OK key then revert back to the normal
operation screen from the Main Menu by pressing the left arrow key.
To indicate that Auto Data Logging is switched on, an asterisk (*) character will flash on
and off just below the battery symbol on all the main reading screens.
If permanent display logging mode was selected (Status set to ON), the Meter will record a
full set of data automatically at the set rate until either the memory is full or the batteries go
flat.
© 2015 quaread® Ltd. www.aquaread.com Page 17 of 72

quaprobe® Lite Instruction Manual 10401-00976 Rev F
If Low Power Logging Mode was selected (Status set to LOW POW R), the Meter will
switch itself off 30 seconds after your last key-press. Thereafter it will switch back on at the
set rate, stay on for 30 seconds, log the data, then switch back off again. This will be
repeated until either the memory is full or the batteries go flat.
If you press any key while the Meter is off between readings in low power mode, the Meter
will switch back on. If no further key is pressed, the Meter will switch back off again after 30
seconds and resume Low Power Mode.
You can cancel Auto Data Logging at any time by going back into the screen above and
setting the Status to OFF. Auto Data Logging will also be cancelled if you switch the Meter
off manually.
8.6. Battery and Memory Duration in Low Power Logging Mode
Low Power Logging Mode is specifically designed for long term data logging. In order to
estimate battery life and memory usage, the following table can be used.
The battery life figures quoted below are based on fresh, good quality alkaline batteries at
a Meter temperature of 1°C or over. Colder Meter temperatures will drastically reduce the
battery life. For example, at 5°C, the battery life will be approximately half that quoted.
Logging Rate Battery Life (at 21°C) Memory Duration
90 mins 38 Days 66 Days
60 mins 36 Days 44 Days
45 mins 34 Days 33 Days
30 mins 30 Days Days
15 mins 0 Days 11 Days
5 mins 10 Days 3.6 Days
1 min Days 17 Hours
So, it can be seen that although the Meter has a maximum data capacity of 66 days, for
logging rates above 45 minutes, fresh batteries would need to be fitted after approximately
one month in order to make use of the Meter's full memory capacity.
Conversely, logging rates below 45 minutes will fill the Meter's memory on a single set of
batteries (at 1°C or greater).
Useful Tip: If you want GPS data logged in association with your other data, ensure the
Meter is positioned face up with a clear view of the sky.
© 2015 quaread® Ltd. www.aquaread.com Page 18 of 72

quaprobe® Lite Instruction Manual 10401-00976 Rev F
9. Setup & Install
To alter the way the Aquameter® displays readings, press the M NU key to get to the Main
Menu, then choose Setup & Install. The Settings Menu will be displayed. Please note,
many of the setup options do not apply to the AP-Lite and are only used when the
Aquameter® is connected to other models of Aquaprobe®.
Time & Date
Units
Language
ocket Assignment
9.1. Setting Units of Measurement
From this screen choose Units. The Units Menu will be displayed. Remember, you can use
just the arrow keys to navigate through the branches of the menus. You don’t need to press
OK or SC at each level.
Units Menu
DO/EC/TD
TEMP/pH/ORP/ AL
BARO/Alt & Depth
At the Units Menu, you have a choice of which units you want to adjust. Choose the first
line if you want to adjust Dissolved Oxygen, Electrical Conductivity or TDS (not applicable
to the AP-Lite). Choose line if you want to adjust Temperature, pH, ORP or Salinity
(Temperature only applicable to the AP-Lite). Finally, line 3 will give access to Barometric
Pressure, Altitude and Depth settings (depth not applicable to the AP-Lite).
Selecting the second line of the Units Menu will display the following screen.
Units
TEMP:°C
pH:pH
AL:P U
The only valid AP-Lite option on this screen allows you to change the temperature display
between °C and °F.
Selecting the third line of the Units Menu will display the following screen.
Units
BARO:mb
ALT:Metres
The first line allows you to choose between displaying Barometric pressure in millibars (mb)
or in mm of mercury (mmHg).
The second line allows you to choose between displaying altitude in metres (M) or feet (F).
© 2015 quaread® Ltd. www.aquaread.com Page 19 of 72

quaprobe® Lite Instruction Manual 10401-00976 Rev F
10. About Calibration
Calibration is a very important part of successful water quality measurement and should be
carried out regularly as detailed in the following section of this manual. A great deal of
development work has been put into simplifying and automating the calibration procedures
in the Aquameter® in order to allow normal field operatives (as opposed to trained lab
technicians) to achieve quick and accurate results.
The AP-Lite is designed to be calibrated and operated with the Probe Sleeve and Sleeve
nd Cap fitted.
The Probe Sleeve and nd Cap form an integral, working part of the Probe’s
measurement system, and MUST be fitted during calibration and measurement for
correct operation.
10.1. Precautions During Calibration
•Use a non-fluorescent container for calibration solutions. Some plastics may
fluoresce and interfere with calibration.
•Use a reasonably deep container for calibration in order to ensure a fast temperature
response. The calibration solution should preferably be up to the blue line on the
Probe. See section . AP-Lite Minimum and Maximum Insertion Levels for more
details.
•Avoid strong artificial lighting during calibration. The alternating nature of artificial
lights (especially fluorescent tubes) can interfere with calibration.
•Avoid strong sunlight when calibrating the Refined Oil Electrode. The UV in the
sunlight can interfere with calibration.
•Always be sure that the Probe Sleeve and nd Cap are fitted during
calibration.
•
10.2. Calibration rror Messages
If the Aquameter® detects a problem with either the AP-Lite or the calibration solution
during the calibration procedure, an error will be indicated. The chart below shows the
possible errors and how to correct them.
rror
Message Problem Action
BATTERIES
TOO LOW
Battery Voltage is too low for reliable
calibration Replace the batteries
NO PROBE
RESPONSE The Probe is not responding Check connections / cycle power
READINGS
UNSTABLE
Readings did not stabilise within the
expected period
Top up / replace the calibration
solution. Allow longer for
stabilisation.
OUT OF CAL
RANGE
Readings are outside calibration limits (can
be caused by low level / incorrect calibration
solution). Or the Probe Sleeve is not fitted
Top up / check calibration
solution is correct type. Ensure
the Probe Sleeve is fitted
OUT OF TEMP
RANGE Temperature is outside 5°C – 40°C limit Warm / cool the calibration
solution
CAL ZERO
FIRST
You are trying to calibrate an upper
calibration point on an optical electrode
without first calibrating the zero point.
Calibrate the zero point first,
then without switching the
Aquameter off, calibrate the
upper point.
© 2015 quaread® Ltd. www.aquaread.com Page 20 of 72
Table of contents
Other Aquaread Measuring Instrument manuals