manuals.online logo
Brands
  1. Home
  2. •
  3. Brands
  4. •
  5. Argos
  6. •
  7. Indoor Furnishing
  8. •
  9. Argos Merrick 214/7071 User manual

Argos Merrick 214/7071 User manual

Dimensions
Merrick
Assembly Instructions -Pleasekeepforfuture reference
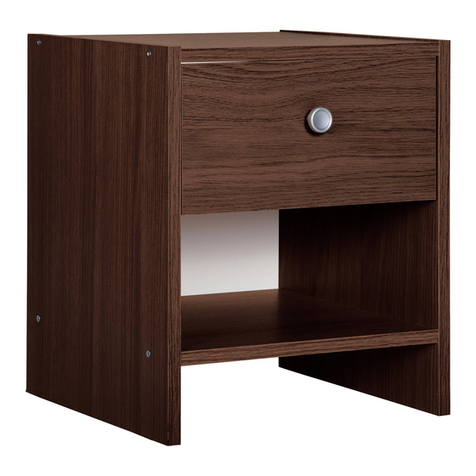
5Drawerchest (Tall Boy)
214/7071
Important –Pleasereadtheseinstructions fully before starting assembly
Width-33cm
Depth-33cm
Height-108,5cm
Issue 1- 14/04/21
Ifyouneedhelporhavedamagedormissingparts, call the Customer Helpline: 08450778888
14-3B-237_01
Important –Please read these instructionsfully before starting assembly
• Checkyouhaveall the
componentsandtoolslisted on
the followingpages.
•Removeallfittingsfrom the
plasticbags andseparatethem
intotheirgroups.
• Keepchildrenandanimals
awayfromtheworkarea, small
partscouldchokeif swallowed.
• Make sureyouhaveenough
spacetolayoutthepartsbefore
starting.
• Donotstand orputweight on
the product, thiscouldcause
damage.
•Assembletheitemas close to
itsfinalposition (-inthe same
room)as possible.
• Assembleonasoft levelsurface
toavoiddamagingthe unit or your
floor.
• Partsof the assemblywill be
easierwith2people.
Care and maintenance
• Onlyclean using adampcloth
and milddetergent, do no use
bleach or abrasive cleaners.
• Fromtimetotimecheck that
there are no loose screwson
thisunit.
• Thisproduct shouldnot be
discarded withhouseholdwaste.
Take toyour local authority
wastedisposal centre.
1
SafetyandCareAdvice
• Toreduce the
likelihood of
damagingyour
productplease
ensure thatyour
powerdrillisset
onalowtorque
setting.
HandyHints
• Assembleall partsand bolts
looselyduring assembly, only
once the product iscomplete
shouldyou fullytighten the bolts.
• Regularlycheck and ensure that
all boltsand fittings are tightened
properly.
12
3
4
67
8
Components- Panels
Please check you have all the panels listed below
If you havedamagedormissing commponents,
callthe Customer Helpline: 08450778888
2
Rightsidepanelx1
(33 x89,3cm) Leftsidepanelx1
(33 x89,3cm)
Toppanelx1
(33x33cm)
Base x1
(33 x33cm)
Backpanel x1
(31,4 x91,4cm)
Rightdrawersidex5
(25 x11cm)
Leftdrawersidex5
(25 x11cm) Drawerbackx5
(24,8 x11cm)
Drawer frontx5 (28,6 x
17,5cm) Drawerbasex5
(23,9 x25,3cm)
Legx4
(4,6x15,7cm)
5
9
10 12
ABC
DE F
Components-Fittings
Please check you have all the fittingslisted below
3
Note:Thequantitiesbelowarethecorrectamounttocompletetheassembly.Insomecasesmorefittings may
besuppliedthanarerequired.
Toolsrequired
Ruler-Use this rulerto help correctly identifythe screws
Phillipsscrewdriver
(medium&large)
Flatblade screwdriver
(medium)
Hammer
Ruler/tape
measure
8/30mmWoodendowelx8 6/30mmWoodendowelx10
Nailx38 Boltx28 9mmScrewx20
Spanner13mmx1
The screwslengthismeasuredfromtheheadtothepoint (30mm screw shown)
GH
JKL
MN
RS
Z
Largelockingnut x8
U
T
V
Nutx4
Washer x4 Self-adhesivecap x4
O
X
I
Washer x1
Y
12mmScrewx1
Wallstrap(12x145)x1
Smalllockingnutx20 Knobx5
Plasticdowelx20 20mmScrewx20 RunnerleftA x5
RunnerleftB x5 RunnerrightB x5
RunnerrightA x5 22mmBoltx5
13mmScrewx10
Step 1
Step 2
4
E
E
EE
U
T
4
6
6
4
3
Repeatassembly forthe
remaining legs.
Preparationforthe
attachingofsidepanels
InsertscrewsEintothe
drilledholesofthebasa4
andtoppanel3andfix
them.
Preparationforthe
attaching of side
panels
Insertscrewsintothe
drilledholesof thebase
andtoppaneland
fix them
4
6
Attachinglegs
Positionthelegas
shownonthepicture,
placethe washer and
fixthe nutTusingthe
spanner.
6
43
T
AssemblyInstructions
U
E
Step 4
Side panels
Top panel assembly
IInsertwooden dowelsB
Intotheholesinside
panels1and2.
Placethe toppanel3
ontothesidepanels1
and2.Insertlarge
lockingnutsG.intothe
drilledholesinside
panels1and2and
turnclockwisetolock
5
G
BB
G
B
B
B
G
B
G
B
3
2
1
Step 3
InsertwoodendowelsB
intothedrilledholesin
sidepanels1and2
andplacethe side
panels1and2onto
the base4.
Insertlargelockingnuts
Gintothedrilledholesin
sidepanels1and2
andturnthemclockwise
tolock.
4
6
4
6
12
4
12
2
1
12
2
1
12
3
G
B
B
G
AssemblyInstructions
B
2
1
Step 5
Note: Youmustensure
the bedsidechestis
squarebefore attaching
the backpanel.
6
Step 6
F
R
L
FF
LR
F
D
D
Attaching back panel
Positionbackpanel
inpositionontheback of
drawerchest.Position
nails5mminfrom
sideedgeoftheback
panelwithdistance
100mmbetweeneach
other.Fixthemusing the
hammer.
5
5
5
Attaching runners
Positionleftrunnerand
rightrunnerontothe
drilledholesoftheside
panels1and2 .
Fixthroughholesshown
usingscrewsF.
12
F
AssemblyInstructions
L
R
2
1
D
E
J
J
E
J
J
J
J
C
C
77
Drawerassembly
a: Insertscrewsinto
drawer front.
b: Insertwooden dowels
intoleftandright
drawer sides, .
c: Insertplasticdowels
intoleftdrawer
sideanddrawer back
andfixittogetherusing
thehammer.
d: Insertplasticdowels
intorightdrawer
sideanddrawer back
andfixittogether
usingthehammer.
a:
b:
c:
d:
continuedon nextpage
Step 8
V
V
10
8
7
9
7
7
8
9
10
7 8
8
9
9
7
Stickthe self-adhesive
capsontotheholesas
shownonthepicture.
AssemblyInstructions
V
Step 7
G
H
K
N
M
S
K
N
M
K
K
K
H
S
8
f:
e:
e: Slidedrawerbase
intothegrooves.
f: Placedrawerfront
ontosides.
8
g: Aligncorrectly and
insertsmalllockingnuts
intoleftandright
drawer sides,and
turnthemclockwiseto
lock.
h: Positionleftandright
runnersB,on
toleftandrightdrawer
sides, , fix using
screws.
i:Alldrawers:
Attachknobs
todrawerfronts
usingbolts.
Repeatassembly for
the remaining drawers.
h:
g:
i:
I
9
9
7
7
8
8
12
12
10
7
8
9
12
10
7 8
7 8
12
Step8-continued
AssemblyInstructions
10
R
L
Step11
Step10
9
Inserting drawers
Insertthedrawers
movingupanddown as
shownandensure that
wheelsfitontoleftand
rightrunners, .
X
X
Note: Wallfixingsarenot
suppliedwiththisunit.
Thecorrecttypeoffixing must
beusedforyourwall, seek
professionaladviceifindoubt.
Fixing to wall
Itisrecomendedthatthe
chestisfixedtoawall.
Pokewallstrap
throughtheholein the
backpanelandfixittotop
panelunderneathusing
screwandunderlay.
Markfixingholeontowall.
Drillaholeandinserta
suitablewallplug.Fixwall
strapusingasuitable
screw.
Warning:
Beforedrilling,
checkwallfor
hiddenpipes and
cables.
Withhelp,movechest
intoposition.
Warning:
Thechest
isheavy.
Liftwith care.
X
X
YO
Y
O
X
AssemblyInstructions
L
Step11
RL
F
F
RL
F
L
F
Z
F
L
L
F
Z
Drawerrunneradjustment
To move drawers up or
down: loosenscrews as
shown and move runners
,up ordownas
required.
Retightenscrews and fix
the runners ,using
screws .
a:
c: d:
b:
If you needhelporhave damagedor missingparts, call the Customer Helpline: 0845 077 8888
Home Retail GroupPlc, 489 -499 Avebury Boulevard, MiltonKeynes, MK9 2NW
Assembly is complete.
AssemblyInstructions
10
No.3"ShieldAnchor"Wall Plug
Heavy Loads
ForusewithheavierloadssuchasTV
&HiFiSpeakersand Satellite Dishesetc.
No.4"Cavity Fixing"Wall Plug
Forusewithplasterboardpartitionsor
hollowwoodendoors.
No.5 "CavityFixing-Heavy Duty"
Wall Plug
For usewhen fitting orsupportingheavy
loadssuchasshelving,wall cabinets,
coat racks.
IMPORTANT:
When drilling intowallsalways check that thereareno
hidden wiresorpipesetc. Makesure thatthe screwsand
wallplugsbeingused aresuitableforsupporting yourunit.
Consulta qualifiedtradesperson if you are unsure.
HINTS:
1)GeneralRule Alwaysusea largerscrew and wallplug if youarenot sure.
2)Ensureyou usethe recommended drillbit tomatchthewallplug and hole size.
3)Ensureyou drillthehole horizontally, do not force the drillorenlarge the hole.
4)Takeextra carewhen drilling highwalls, ceilingsandceramic tiles.Ensuretheplugis fittingbelow theceramic
tileto avoidsplitting orcracking.
5)Ensurewallplugsare wellfitted andare atight fitinthe drilledhole.
TypesOfWalls
You can useone ofthe following types
of wall plug ifyourwallsaremade of
brick,breezeblock,concrete, stone,
woodor plaster board.
No.1"Standard"WallPlug
General Wall Materials
Thesecomeinvarioussizesandaremade
fromplasticorsometimeswood fiber.
No.2"General Purpose"Wall Plug
Aerated/ BreezeBlock
Generallyaerated blocks should not be
used tosupportheavy loads,usea
specialistfitting in thiscase.
Forlightloads,a GeneralPurposePlug
canbeused.
No.6"HammerFixing"Wall Plug
Forusewithwallsstuckwithplaster
board.The hammerfixingallowsitto
befixedtothewallratherthantheplaster
board. Alwayscheckthefixing issecure
tothe retainingwall.
CARE&MAINTENANCE
SAFETY
Always check the fitting and
location toensure yoursafetyin
and aroundthehome.
FITTING
Fromtime totimecheck the fitting
toensurethewallplugsorscrews
donot become loose.
Wall Mounting &Fixings
A Guideto

Other Argos Indoor Furnishing manuals

Argos FUTON 656/0032 User manual

Argos

Argos FUTON 656/0032 User manual

Argos Boston Basic Modular 2 609/0069 User manual

Argos

Argos Boston Basic Modular 2 609/0069 User manual

Argos 2463834 User manual

Argos

Argos 2463834 User manual

Argos AVR 4 Seater Patio Set User manual

Argos

Argos AVR 4 Seater Patio Set User manual

Argos Calgary 476/7978 User manual

Argos

Argos Calgary 476/7978 User manual

Argos Mia Daybed & Drw. White 8042572 User manual

Argos

Argos Mia Daybed & Drw. White 8042572 User manual

Argos Atlas 157/3309 User manual

Argos

Argos Atlas 157/3309 User manual

Argos Nordic 1441572 User manual

Argos

Argos Nordic 1441572 User manual

Argos 548/5840 User manual

Argos

Argos 548/5840 User manual

Argos Ohio 309/5256 User manual

Argos

Argos Ohio 309/5256 User manual

Argos Knightsbridge 259/3034 User manual

Argos

Argos Knightsbridge 259/3034 User manual

Argos Verona Beech User manual

Argos

Argos Verona Beech User manual

Argos New Hallingford User manual

Argos

Argos New Hallingford User manual

Argos 600/037 User manual

Argos

Argos 600/037 User manual

Argos Malvern 395/6632 User manual

Argos

Argos Malvern 395/6632 User manual

Argos Foley 358/8914 Datasheet

Argos

Argos Foley 358/8914 Datasheet

Argos 487/8317 User manual

Argos

Argos 487/8317 User manual

Argos Dalton 246/6422 User manual

Argos

Argos Dalton 246/6422 User manual

Argos Canterbury 3 DR Robe User manual

Argos

Argos Canterbury 3 DR Robe User manual

Argos SASHA 609/5600 User manual

Argos

Argos SASHA 609/5600 User manual

Argos 0845 6400800 User manual

Argos

Argos 0845 6400800 User manual

Argos BRADLEY 2581747 User manual

Argos

Argos BRADLEY 2581747 User manual

Argos 401/8854 User manual

Argos

Argos 401/8854 User manual

Argos LOUIE RGE 8231493 User manual

Argos

Argos LOUIE RGE 8231493 User manual

Popular Indoor Furnishing manuals by other brands

Sleepmasters TOLH45 Assembly instructions

Sleepmasters

Sleepmasters TOLH45 Assembly instructions

Amart Furniture ARUBA 73972 Assembly instruction

Amart Furniture

Amart Furniture ARUBA 73972 Assembly instruction

composad FSC Galaverna PN4012K56104 manual

composad

composad FSC Galaverna PN4012K56104 manual

Teamson Home VERSANORA VNF-00026 Assembly instructions

Teamson Home

Teamson Home VERSANORA VNF-00026 Assembly instructions

Brevetti LAMPOLET BL7-H12 Series instructions

Brevetti

Brevetti LAMPOLET BL7-H12 Series instructions

Next 878917 Assembly instructions

Next

Next 878917 Assembly instructions

Ercol Ancona 5152 quick start guide

Ercol

Ercol Ancona 5152 quick start guide

Bush Business Furniture HATB24DGM-03K Assembly instructions

Bush Business Furniture

Bush Business Furniture HATB24DGM-03K Assembly instructions

Happy Babies HAPPY RW15 Assembly instructions

Happy Babies

Happy Babies HAPPY RW15 Assembly instructions

Aspire PTM638005 user manual

Aspire

Aspire PTM638005 user manual

BATTLEBULL RED TWELVE quick start guide

BATTLEBULL

BATTLEBULL RED TWELVE quick start guide

PHI VILLA THD5-096B-116 Use and care guide

PHI VILLA

PHI VILLA THD5-096B-116 Use and care guide

Mäusbacher MARLIN 0663/1H Assembly instructions

Mäusbacher

Mäusbacher MARLIN 0663/1H Assembly instructions

The Land of Nod Springwood Assembly instructions

The Land of Nod

The Land of Nod Springwood Assembly instructions

Furniture of America CM-BK633TF Assembly instructions

Furniture of America

Furniture of America CM-BK633TF Assembly instructions

FourStar 11210533CB Assembly instructions

FourStar

FourStar 11210533CB Assembly instructions

Abbyson Lauren Nailhead Trim Armchair HS-SF-155 Assembly instructions

Abbyson

Abbyson Lauren Nailhead Trim Armchair HS-SF-155 Assembly instructions

Next HARTFORD 749841 Assembly instructions

Next

Next HARTFORD 749841 Assembly instructions

manuals.online logo
manuals.online logoBrands
  • About & Mission
  • Contact us
  • Privacy Policy
  • Terms and Conditions

Copyright 2025 Manuals.Online. All Rights Reserved.