Argos Sainbury's 955/8319 User manual

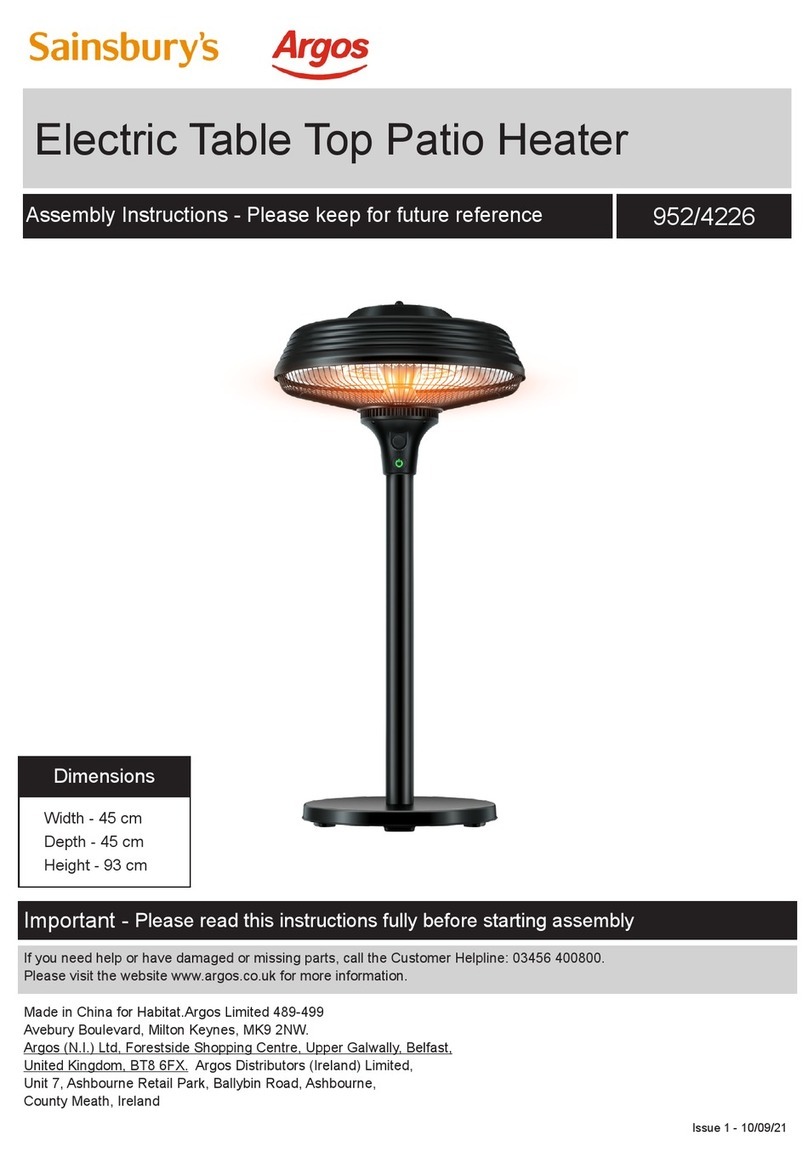
Electric Patio Heater
Assembly Instructions - Please keep for future reference 955/8319
If you need help or have damaged or missing parts, call the Customer Helpline: 03456 400800.
Please visit the website www.argos.co.uk for more information.
Produced in China. Sainsbury's Supermarkets Ltd. 33 Holborn, London EC1N 2HT.
Sainsbury’s (NI) Ltd, Forestside Shopping Centre, Upper Galwally, Belfast, United Kingdom, BT8 6FX.
Argos Limited, 489-499 Avebury Boulevard, Milton Keynes MK9 2NW.
Argos (N.I.) Ltd, Forestside Shopping Centre, Upper Galwally, Belfast, United Kingdom, BT8 6FX.
Argos Distributors (Ireland) Limited, Unit 7, Ashbourne Retail Park, Ballybin Road, Ashbourne,
County Meath, Ireland
Important - Please read this instructions fully before starting assembly
Issue 1 - 10/09/21
Please retain for future reference
Dimensions
Width - 210 cm
Depth - 50 cm
Height - 50 cm

2
1 Heating Element Assembly
2 Knob
3 Body
4 Position Indication Plate
5 Pull Switch
6 Tube Cover
7 Upper Post Assembly
8 3 x M5*6 Screw
9 Middle Post
10 3 x M5*6 Screw
11 Lower Post Assembly
12 Clamp
13 Power Cord
14 Base Cover
15 4 x M6*30 Screw
16 Base Assembly
Please check you have all the panels listed below
Parts Description
2
1
3
4
5
6
7
8
9
10
11
12
13
14
15
16

3
WARNING: In order to avoid overheating, do not cover the heater.
Do not cover
■ Thiselectricalappliancecomplieswithtechnicalsafetyandelectromagnetic
compatibility standards.
■ Nevertouchyourheaterwheninoperation(riskofburns).
■ Nevertouchtheheaterwithwethands.
■ Neverrotatetheheaterduringoperation.Tochangetheangleoftheheater,
waitatleast15minutesaftertheheaterhasbeenturnedotoallowtheheater
to cool down.
■ Neverplaceanythingontheheaterssafetyguard(e.g.Towel)asthiscould
leadtotheheateroverheatingorare.
■ Neveruseyourappliancetodrywashing.
■Althoughtheheatingelementhasstoppedglowing,itmaystillbehotand
potentiallydangerous.Checkthattheselectionindicator(5)isinpositiono
before taking any action.
■Switchoyourappliance:
- After use
- In the event of malfunction
- Before cleaning it.
■Neveroperateyourapplianceifithasfallenover.
■Neverdismantleyourappliance.Anincorrectlyrepairedappliancemaybe
dangerous to the user. If you encounter any problems seek professional advice
fromasuitablequaliedprofessional.
Warning Symbols
Warnings

4
■Thewarrantywillbevoidintheeventofdamagearisingfromimproperuse.
■Donotusethisheaterintheimmediatesurroundingofabath,ashowerora
swimming pool.
■ Thismovableapplianceisdesignedforuseingardens,andcanbeused
indoor and outdoor. The warranty will not apply to appliances used for
professional usage. Although the heater may be used outdoors, the main plug
must only be connected to the supply indoors.
■ Theheaterisprovidedwithananti-tiltswitchwillswitchotheheaterifitis
overturned, and will switch it on again automatically when it is restored to its
upright position.
■ Onlyuseonaatandlevelsurface.Donotplaceongrassorgravel.
■ Thiselectricalappliancecomplieswithtechnicalsafetyandelectromagnetic
compatibility standards.
■ Donotcoverheater.
■ Thisheaterisnotequippedwithadevicetocontroltheroomtemperature.
Do not use this heater in small rooms when they are occupied by persons
not capable of leaving the room on their own, unless constant supervision is
provided.(IEC 60335-2-30)
■Thisheatermustnotbeusedonornearcombustiblematerials,suchas
wooden decking or fencing.
Warnings

5
Beforeusingtheapplianceatthersttime,ensurethatyourmainsvoltage
corresponds to voltage indicated on the appliance. It is a class I appliance and
must be earthed.
CAUTION: Before tting or removing the appliance, ensure that the
heater's power line supplying the heater is disconnected. Check that the
power line is connected to a 30A dierential circuit breaker.
■Thisapplianceisdesignedforuseingardens,andanyroominyourhouse,
including those where there is a risk of splashing. The installation and use of
your appliance must comply with the applicable standards in your country.
■Whenitisswitchon,anelectricalheatingappliancereachesveryhigh
temperature liable to cause burns. Make sure that all other users are aware of
the risks.
■Children,theelderlyandtheinrmmaynotalwaysbeawareofthedanger
involved in using electrical appliances. Never allow this appliance to be used
without supervision.
■Theappliancemustbepositionedsothattheplugisaccessible.
■Donotuseifthecordisdamaged.
■Donotusethisheaterwithaprogrammer,timeroranyotherdevicethat
switchestheheateronautomatically,sinceareriskexistsiftheheateris
covered or positioned incorrectly.
■Donotplacetheapplianceclosetocurtainsandothercombustiblematerials.
Before Using
Safety

6
■Before installing your appliance, you must disconnect the electrical
supply at the circuit breaker.
Step 1
Step 2
Assembly
Toxthebaseplate
to the ground. Take 8
pieces of M6*30 and
seperate the base plate
and base assembly
into two pieces. Take
3 expansion screws,
line up with the
corresponding holes
Take 3x M4*50 screws
toxintotheground.
Now cover the base
assembly. Take 4x
M6*30toxthebase
assembly to the base
plate. See diagram.
Insert the lower post
assembly (11) into the
base assembly (16) and
thenxittightlyusing
4 x M6*30 screw, and
insert the clamp (12)
into the lower post (11).
See diagram.
4-M6X30
Base Assembly
Lower Post Assembly

7
Assembly
Step 3
Step 4
Join the lower post
assembly and the
middle post (9) together
with 3-M5X6 screw.
See diagram.
Join the upper post
assembly (7) and the
middle post (9) together
with 3-M5X6.screw.
See diagram.
Middle Post
Clamp
3 - M5X6
Lower Post Assembly
Clamp
Upper Post Assembly
Clamp
3 - M5X6

8
Assembly
Step 5
Step 6
Join the heating element
assembly (1) and the
upper post assembly
(7)together,thenx
them tightly by rotating
the knob(2), and put the
power cord(13) supply
into the clamp(12).
See diagram.
The head of the heater
can be tilted to direct
heat downwards.
DONOTADJUSTTHE
HEAD WHILE IT IS
HOT
Heating Element Assembly
Power Cord
Power Cord
Clamp
45
Body
Heating Element Assembly

9
The appliance is switched on by means of the pull switch (5). The slight vibration
noticeable when the appliance is switched on will stop after a few seconds.
- Power rate:2000w
- Cable length:1.8m
- Height adjustment:1.8m~2.1m
- Position0:O
- Position 1: 650W (normal power)
- Position 2: 1300W (intermediate power)
- Position 3: 2000W (full power)
Operation
Specication
The product complies with the applicable UK directives
and an evaluation method of conformity for these
directives was done.
The product complies with the applicable European
directives and an evaluation method of conformity for
these directives was done.
WEEE symbol. Waste electrical products should not be
disposed of with household waste. Please recycle where
facilities exist. Check with your local authority or local
store for recycling advice.
Read the instruction manual before operating this machine.
The product complies with the RoHS directives and an evaluation
method of conformity for these directives was done.
The product complies with IP34 standard.

10
Your appliance dose not requires any particular maintenance. However, in the
event of a malfunction, please consult a suitably qualied electrician.
Maintenance
If you need help or have damaged or missing parts, call the Customer Helpline: 03456 400800.
Please visit the website www.argos.co.uk for more information.
Produced in China. Sainsbury's Supermarkets Ltd. 33 Holborn, London EC1N 2HT.
Sainsbury’s (NI) Ltd, Forestside Shopping Centre, Upper Galwally, Belfast, United Kingdom, BT8 6FX.
Argos Limited, 489-499 Avebury Boulevard, Milton Keynes MK9 2NW.
Argos (N.I.) Ltd, Forestside Shopping Centre, Upper Galwally, Belfast, United Kingdom, BT8 6FX.
Argos Distributors (Ireland) Limited, Unit 7, Ashbourne Retail Park, Ballybin Road, Ashbourne,
County Meath, Ireland
Table of contents
Other Argos Patio Heater manuals