MANTENIMIENTO
ADVERTENCIAS
1. Lubricar sólo cuando sea necesario el uso de lubricante basado
en silicona.
2. Limpie todas las piezas de plástico periódicamente con un paño
suave y húmedo y un detergente suave. No utilizar lejía.
3. Revise las ruedas periódicamente para detectar signos dedesgaste
o daño y mantenerlos limpios de polvo o arena.
4. La exposición prolongada a la luz solar hará que el tejido se
desgaste.
5. La bandeja de servir se puede lavar en el lavavajillas. La bandeja
principal se puede limpiar con un paño húmedo y detergente suave.
6. No utilizar lejía.
7. Es importante para la seguridad de su hijo que no quite la barra de
la entrepierna de la bandeja.
9. IMPORTANTE! MANTENGA PARA FUTURA REFERENCIA
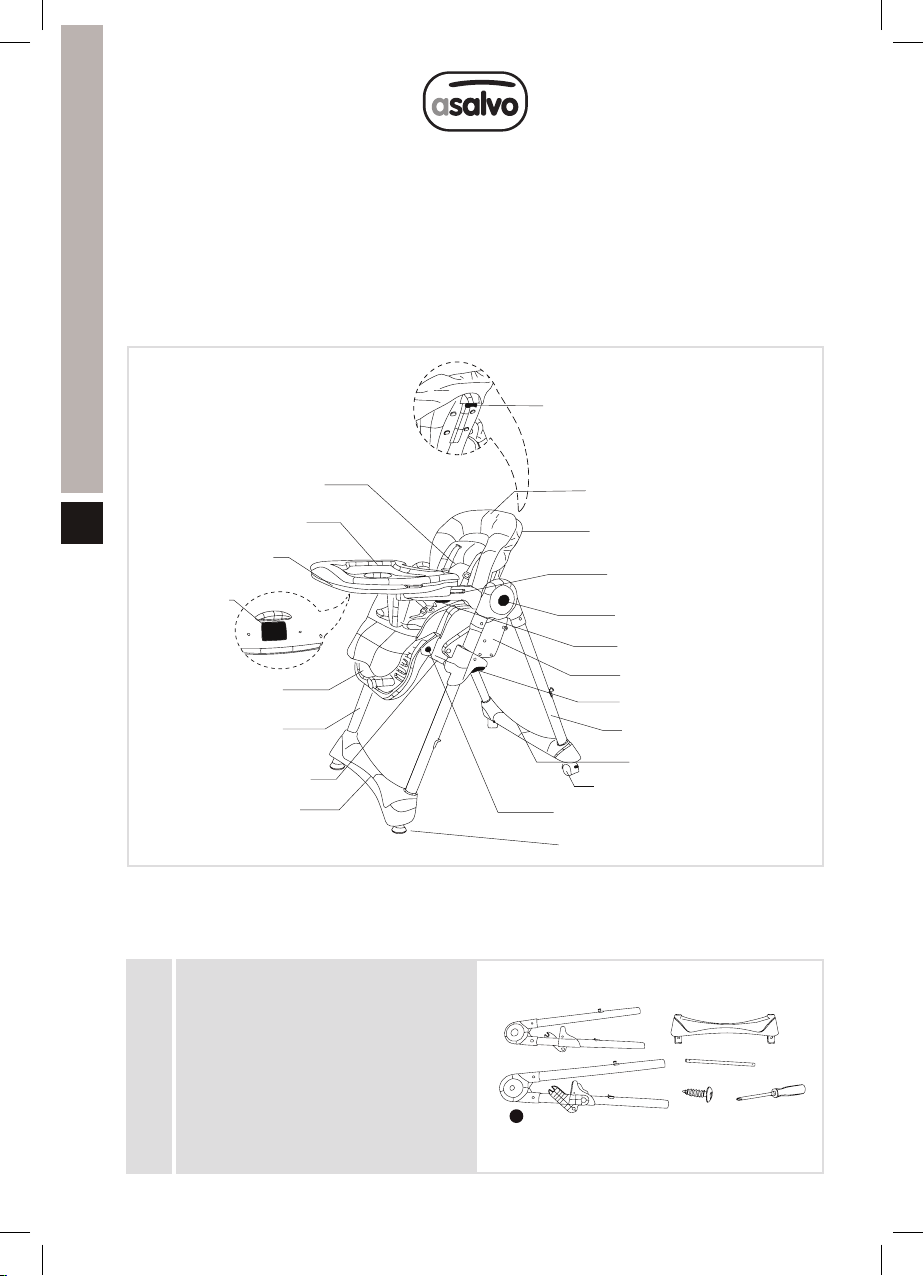
MANUAL DE INSTRUCCIONES
ES
ACERCA DE LA LIMPIEZA Y MANTENIMIENTO DE LA CUBIERTA
IMPORTANTE
La cubierta es una característica de seguridad. No utilice nunca la trona sin ella, no ponga
la seguridad del niño en situación de riesgo mediante el uso de otra cubierta de repuesto.
La cubierta es extraíble y lavable a 30C. Solo limpieza en seco. Los cinturones de seguridad
de base y componentes de plástico se pueden limpiar con un estropajo suave y agua tibia.
• No utilice blanqueadores químicos y corrosivos
• Lavar en frío (30º)
• Lavado en y seco, con cualquier solvente excepto el tricloroetileno
• No utilizar lejía
• No usar la secadora
• No planchar
• No dejar nunca al niño desatendido.
• Utilice siempre el sistema de sujeción.
• Riesgo de caída: evite que el niño trepe por el producto.
• Utilice el producto únicamente cuando todos sus componentes
estén correctamente fijados y ajustados.
• Existe un riesgo al situar el producto cerca del fuego o de todas
fuentes importantes de calor.
• Existe riesgo de vuelco si el niño apoya los pies en una mesa o
cualquier otra estructura.