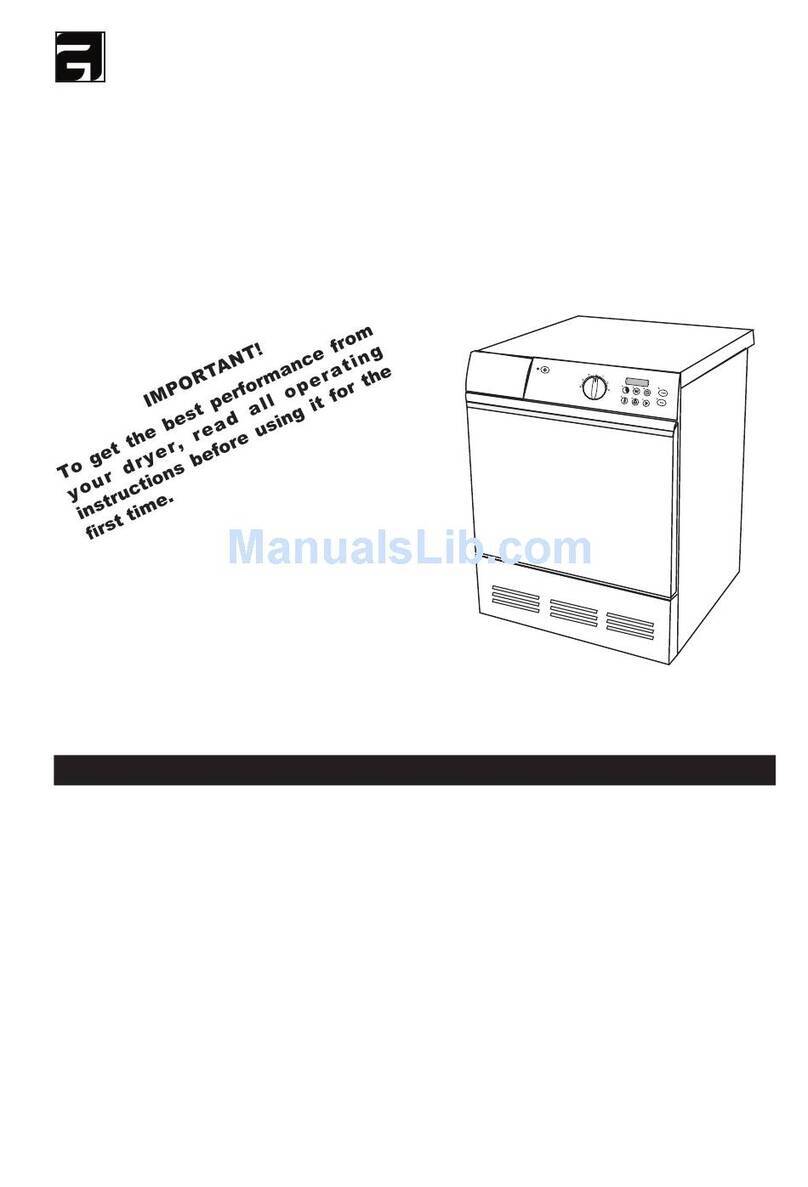
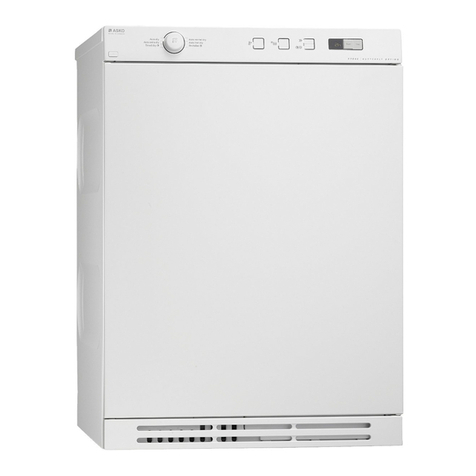
Asko T721 User manual

TumbleDryer
Dear ASKO customer,
ThankyouforchoosingthisScandinavianqualityproductmade
inVara, Sweden.
We want you to feel confident that the inside of your new
machineisasgoodastheoutside,andthattheethicalandmoral
principlesonwhichwebuiltthismachinearejustashighasthe
qualityandperformancethatyouobtainfromit.Wehopethat
our machine will keep you happy for many years to come.
Toderivethebestpossiblebenefitfromyourproduct,werecom-
mend that you read this Use & Care Guide and the Installa-
tion Instructions before using the machine.
ASKOT721

2
CONTENTS
READ FIRST Page
1 Before tumble drying for the first time 3
2 Safety instructions 4
General.Installation.Safety.Children’s
safety. Interrupting a program. Trans-
port/Winter storage. Packing materi-
al. Disposal.
3 Parts of the dryer 6
4 Panel 7
INSTALLATION
See instructions for installation.
TUMBLE DRYING
5 Before tumble drying 8-9
Spin-dried? Recommended washing
labelling.Sorting.Programs.Options.
Temperature. Drying time.
6 Tumble dry 11-13
Puttinginthewashing.Selectoptions.
Select temperature. Select time . Start
tumbledrying.Tumbledryingcomple-
ted.Aftertumbledrying.Cleaningthe
lint filter. Emptying the condensation
water tank. Hints.
7 Consumption values 14
CARE Page
8 Care and cleaning 15-17
Cleaning the lint filter. Emptying the
condensationwatertank.Cleaningthe
outside of the machine. Cleaning the
fan. Cleaning the condenser.
PROBLEMS?
9 Trouble shooting 18
Machine will not start. Overheating
protection. Tumble drying takes too
long.
MISCELLANEOUS
10 Technical information 20
Technical data. Standard tests.
11 Service and guarantee 21
12 Quick guide 22
13 Index 23

3
1BEFORETUMBLEDRYINGFORTHEFIRSTTIME
DO NOT TUMBLE DRY
Certain fabrics are sensitive to tumble drying.
Alwayscheckandfollowtherecommendedgar-
mentlabellingontheitemsconcerned,andstu-
dy Chapter 5, Before tumble drying.
NOTE
When you start the tumble dryer the first time,
or after a long period when it has not been in
use,youmayhearalightrumblingnoise.Thisis
quitenormalandthe sound will disappear after
a few drying operations.
For brief operating instructions; see Chapter 12, Quick guide.

4
2SAFETYINSTRUCTIONS
GENERAL
• Study and save this Use and Care Guide for
future reference.
• Electrical installation, if required, must be
carried out by an authorized electrician.
• The machine may only be used for tumble
drying in accordance with this Use and Care
Guide.
• Repairs and maintenance which affect safety
or performance must be carried out by an aut-
horized specialist.
INSTALLATION
Seethe accompanying installation instructions.
SAFETY
The tumble dryer is not to be used if industrial
chemicals have been used for cleaning.
The tumble dryer is intended only for drying
textile material washed in water.
The tumble dryer is fitted with an overheating
protection device, which switches the machine
off in the event of excessive temperature.
Afloat valveswitchesthemachine offifthecon-
densationwaterhosebecomesclogged, orifthe-
re is danger of water ower flowing from the
container.
Theapplianceisnotintendedforusebyyoung
children or infirm persons without supervision
CHILDREN’S SAFETY
Young children should be supervised to ensure
that they do not play with the appliance.
The tumble dryer is fitted with a magnetic
catch,whichallowsthedoor tobeopened from
the inside.The door is equipped with a switch,
which automatically stops the tumble dryer
whenthe door isopened.The machinewill not
start automatically on closing the door (eg, if a
child should close the door from the inside).
INTERRUPTING A PROGRAM
The easiest way to stop the tumble dryer is to
open the door, causing the drum to stop auto-
matically. If you wish to continue the drying
process, just close the door and press the Start
button and the machine will start where it was
interrupted.
You can also stop the tumble dryer by pres-
sing the button.
TRANSPORT/WINTER STORAGE
If the machine is to be transported or stored
during the winter, on unheated premises, ensu-
re that the condensation water tank is drained.
PACKING MATERIAL
Sort the packing material for recycling accor-
ding to recommendations by the local authori-
ties.
DISPOSAL
Contact your local refuse collection service or
yourlocalauthoritiesforadviceonhowtoscrap
the tumble dryer in a proper manner for recyc-
ling.
The tumble dryer is made and marked to
facilitate recycling.

5
To minimize the risk of fire in a tumble dryer,
the following should be observed:
• Items that have been spotted or soaked with
vegetable or cooking oil constitute a fire
hazard and should not be placed in a tumble
dryer.
Oil-affected items can ignite spontaneously, es-
pecially when exposed to heat sources
such as in a tumble dryer. The items become
warm, causing an oxidation reaction in
the oil. Oxidation creates heat. If the heat can-
not escape, the items can become hot
enough to catch fire. Piling, stacking or storing
oil-affected items can prevent heat
from escaping and so create a fire hazard.
If it is unavoidable that fabrics that contain ve-
getable or cooking oil or have been
contaminated by hair care products be placed
in a tumble dryer they should first be
washed in hot water with extra detergent - this
will reduce, but not eliminate, the
hazard.The ’cool down’ cycle of tumble dryers
should be used to reduce the
temperature of the items. They should not be
removed from the tumble dryer or piled
or stacked while hot.
• Items that have been previously cleaned in,
washed in, soaked in or spotted with
petrol/gasoline, dry-cleaning solvents or other
flammable or explosive substances
should not be placed in a tumble dryer.
Highly flammable substances commonly used
in domestic environments include
acetone, denatured alcohol, petrol/gasoline,
kerosene, spot removers (some brands),
turpentine, waxes and wax removers.
• Items containing foam rubber (also known
as latex foam) or similarly textured rubberlike
materials should not be dried in a tumble dryer
on a heat setting.
Foam rubber materials can, when heated, pro-
duce fire by spontaneous combustion.
• Fabric softeners or similar products should
not be used in a tumble dryer to eliminate
the effects of static electricity unless this practi-
ce is specifically recommended by the
manufacturer of the fabric softener or product.
• Undergarments that contain metal reinfor-
cements should not be placed in a tumble
dryer.
Damage to the tumble dryer can result if metal
reinforcements come loose during
drying. When available a drying rack could be
used for such items.
• Plastic articles such as shower caps or babies’
waterproof napkin covers should not
be placed in a tumble dryer.
• Rubber-backed articles, clothes fitted with
foam rubber pads, pillows, galoshes and
rubber-coated tennis shoes should not be pla-
ced in a tumble dryer.
VENTED DRYERS
• that there has to be adequate ventilation to
avoid the back flow of gases into the room
from appliances burning other fuels, including
open fires, when operating the tumble dryer.
• that exhaust air must not be discharged into a
flue which is used for exhausting fumes
from appliances burning gas or other fuels
2SAFETYINSTRUCTIONS

6
1. LINT-FILTER HOLDER
2. DATA PLATE
3. CONDENSATION WATER TANK
4. PANEL
5. OUTER DOOR
3PARTSOFTHETUMBLEDRYER
4
1
2
5
8
6. FAN (BEHIND THE FRONT PANEL)
7. CONDENSER (BEHIND THE LOWER
COVER)
8. LINT FILTER
6
3
7

7
4PANEL
35 7
2468 9
1. CONDENSATION WATER TANK
2. INDICATION LAMP ON/OFF
3. MAIN SWITCH
4. BUZZER
5. ANTI-CREASE
6. QUICK COOLING
7. START BUTTON
8. TEMPERATURE/AIRING KNOB
9. PROGRAM TIME KNOB
1

8
5BEFORETUMBLEDRYING
Before you start tumble drying, here is some
advice that can be useful.
SPIN-DRIED?
Items that are to be tumble dried should first
bespin-dried,preferablyat800revsper minute
or more so as to save both time and energy.
RECOMMENDED GARMENT LABELLING
Material suitable for tumble drying
The symbol above indicates that the material
can be tumble dried. Cotton fabrics, towelling
and synthetic fibres are best suited to tumble
drying. Clothes and fabrics become softer and
fluffierwhentumbledriedthanwhendriedona
line.
NOTE
Wear and tear of fabrics in a tumble dryer is
minimal. The lint caught in the lint filter con-
sists of dust and fibre residue that has been for-
med when the fabrics were in use.
Material which should not be tumble
dried
Thissymbolindicates that the material will not
withstand tumble drying.
Certain materials will melt or become dan-
gerously flammable if heated, while others will
loose their shape or shrink.
Do not tumble dry...
• Materials that are marked “Do not dry close
to heat”.
• Items that have been dry-cleaned at home.
• Foam plastic.
• Glass-fibre materials.
• Woollen items, because of the risk of felting.
SORTING FABRICS
Themost even resultsare obtainedifall articles
are of the same material.
Close zip-fasteners, button up garments, tie
belts, and sort the fabrics and adapt the load
and the temperature as indicated in the table
below.
PROGRAM
Thelenghtoftheprogramthatyoushouldchoo-
se depends on what you wish to do with the
fabrics after tumble drying. Dry different times
for different materials to find the right combi-
nation.See also Chapter7, Consumption valu-
es, for recommended program times.
NOTE
Knitted fabrics in particular are
liable to shrink. Choose shorter
program time for these materials.
Always stretch garments out di-
rectly after drying.
FABRICS LOAD TEMPERATURE
White, colour- Cotton and 1/1 (5.0 kg) Normal
ed and synthe- linen
tic washing Polyester/ 1/2 (2.5 kg) Normal
cotton
Delicate and Acrylic, rayon, 1/2 (2.5 kg) Low
mild washing acetate, etc.
Sort by amount and type of fabric.

9
Timed program
Whenusingatimedprogramwithmixedwash-
ing it may occur that some of the items will not
besufficientlydried.Suchitemscansuitably by
driedbyrunningtheminthetimedprogramfor
a further 10 minutes or so.
NOTE
When using the timed program it is possible to
over-dry fabrics if you set too long a time.This
can cause fabrics to shrink or crease and feel
rough.Syntheticmaterialscanalsobecomechar-
ged with static electricity. Set a shorter time if
you tumble dry at Temperature Normal.
Air fluff program
Usethe Air fluffprogram just toshakedust out
of garments, air them or soften them up.
OPTIONS

Quick cooling
You can choose quicker cooling if you wish.
Normal cooling lasts 18 minutes and Quick
cooling lasts 9 minutes. This option cannot be
selected in combination with the Anti-crease
option, see below.
Buzzer
The machine offers you the possibility of hea-
ring when the drying program ends. Press the
Buzzer button to give a three second acoustic
signal when the program is completed.
Anti-crease program
Using the Anti-crease option you can prevent
garments from lying still and becoming unne-
cessarily creased at the end of tumble drying.
This is a useful option if you cannot take out
garments promptly at the end of the tumbling
phase. This option cannot be selected in com-
bination with Quick cooling.
The drum will continue to rotate intermit-
tently at the end of the drying program, ie, th-
ree seconds every minute for one hour.
If you have pressed the Buzzer option, a buz-
zer will sound each time the drum rotates as a
reminder that the drying program has ended.
TEMPERATURE
YoucanchoosetemperatureNormal( )orLow
().
DRYING TIME
Drying time depends on a number of factors,
suchasthe amount of washing,how damp itis,
the type of fabrics, rated power of the machine
and temperature and humidity of the input air.
It also depends on which program you choose.

10
This page has been left blank for technical printing reasons.

11
6TUMBLE DRY
Step by step instructions to help you achieve
the best drying results.
PUTTING THE WASHING IN
Turnonthemainswitchfirst, ,thenopen
the door and put the washing in. Close the
door.
SELECT OPTIONS
By setting the Temperature/Airing knob
and pressing suitable option buttons you
can choose a program to suit your washing.
Options
Quick cooling
You have the possibility of selectingQuickcoo-
ling. Normal cooling lasts 18 minutes. Press
the Quick cooling button and cooling will last
9 minutes. This option cannot be selected in
combination with the Anti-crease option.
Buzzer
If you press the Buzzer there will be a three
secondacousticsignalwhentheprogramiscom-
pleted.
Anti-crease
This option will make the drum continue to
rotate three seconds every minute at the end of
the drying program. This option cannot be se-
lectedincombinationwithQuickcooling.This
option prevents garments from lying still and
becoming creased. This is a helpful option if
you cannot take out garments promptly at the
end of the program.
If you have pressed the Buzzer , a bell will
soundeach time the drumrotatesin this phase,
ie, as a reminder that the drying program has
ended.
SELECT TEMPERATURE
TheTemperature/Airing knob will allow
you to choose temperature Normal, ,
or Low, , or Air fluff program only, .
Use the airing program if you only wish to
shake dust out of garments, air them or soften
them up.
SELECT TIME
Setthedesiredtimefortumble drying or
the Air fluff program with the program
time knob.The program length that you choo-
se depends on what you wish to do with the
fabrics after tumble drying. Dry different times
for different materials to find the right combi-
nation.See also Chapter7, Consumption valu-
es, for the recommended program times.
In Chapter 12, Quick guide, there is a table
whereyou can fillin differentdryingtimes that
you have found suitable for different fabrics.
NOTE
When using the timed program it is possible to
over-dry fabrics if you set too long a time.This
can cause fabrics to shrink or crease and feel
rough.Syntheticmaterialscanalsobecomechar-
ged with static electricity. Find a time that suits
you by choosing a shorter time to begin with.
Also set a shorter time if you tumble dry at
Temperature Normal.
1
1
2
2
3
3
4
4

12
1
2
START TUMBLE DRYING
Close the door and press the Start but-
ton.
Stopping to put in more washing
Openthe door andthe drum willstop automa-
tically. To restart, close the door and press the
Start button.
ON COMPLETION
Open the door and take out the wash-
ing.
AFTER TUMBLE DRYING
•TurnOFF the main powerswitch, .
•Clean the lint filter after each opera-
tion. If the lint filter becomes clogged the over-
heat protection device may trigger. The filter
must then be cleaned and the device must be
reset to enable the machine to be started, see
Chapter 9, Trouble shooting.
• Emptythecondensationwatertankaftereach
tumledrying.
CLEANING THE LINT FILTER
1.Graspthefilterhandleand pull towards you.
2.Pull the lint filter out
of the holder.
3.Open the filter
and brush away the
lintwithyourhand.
4.Fold the lint filter together and put it back
in the filter holder.
EMPTYING THE CONDENSATION WATER TANK
Empty the condensation water tank after each
tumbledrying.
Pull out the condensation water tank, empty
the water and put the tank
back.
If the tank becomes too full the program will
be interrupted. Empty the tank and press the
Start button and the program will continue
7
7
5
5
6
6
NOTE
Regularly clean the lint filter.

13
fromwhere it wasinterrupted, seealso Chapter
9, Trouble shooting.
NOTE
Do not pull out the condensation water tank
while the tumble dryer is running.
HINT
Thecondensation water is soft,and istherefore
suitablefor use in a steamiron.Strainthewater
through a coffee paper filter.
If you want the water to be emptied automa-
tically, see the Installation instructions.

14
The following conditions apply for the consumption values indicated below:
Temperature of intake air: 20ºC
Humidity of intake air: 65%
Drying temperature: Normal ( ),Low ( )
Element power: 2500 W
Cotton fabrics spin-dried, prior to tumble drying, at 800 and 1600 revs per minute (low spin) in
ASKO washing machine.
Otherfabrics (non-iron andacrylic)spin-dried, prior totumbledrying, at 800revsper minute (short
spin) in ASKO washing machine.
7CONSUMPTIONVALUES
MATERIAL LOAD POWERCONSUMPTION RECOMMENDED PROGR.
(approx. kWh) TIME (approx. minutes)
800 rpm - 1600 rpm 800 rpm - 1600 rpm
Cotton, linen, 1/1 (5.0 kg) 3.1 - 2.4 84 - 66
Non-iron, polyester/ 1/2 (2.5kg) 1.2 --- 30 ---
cotton,
Acrylic, rayon, 1/2 (2.5 kg) 1.7 --- 114 ---
acetate,

15
1
2
CLEANING THE LINT FILTER
Clean the lint filter after each use.
If your water is very hard a deposit of lime
may be formed on the lint filter. Check when
cleaninglintfromthefilterifthereisanysignof
lime,ifsowash thelintfilter byhandtoremove
any deposits.
1.Graspthefilterhandleand pull towards you.
2.Pull the lint filter out of
the holder.
3. Open the filter and remove fluff from all
sides of the filter by hand. Use a soft dry cloth
to remove any remaining fluff.
4. Replace the filter in the filter holder.
8CARE - CLEANING
EMPTYING THE CONDENSATION WATER TANK
Empty the condensation water tank after each
tumbledrying.
Pull out the condensation water tank, empty
the water and put the tank back.
If the tank becomes too full the program will
be interrupted. Empty the tank and press the
Start button and the program will continue
fromwhere it wasinterrupted, seealso Chapter
9,Trouble shooting.
NOTE
Do not pull out the condensation water tank
while the tumble dryer is running.
CLEANING THE OUTSIDE OF THE MACHINE
Use a mild detergent to clean the panel and the
outside of the machine. Do not use any sol-
vents, they can damage the machine. Do not
spray the machine with water.
NOTE
Do not allow dust to accumulate round the
machine. Keep clean and cool around the tum-
ble dryer. Dust, heat and moisture prolong the
dryingtime.
NOTE
If limescale develops on the filter, rinse it in
water to remove the limescale.
Dry the filter thoroughly with a hand towel.

16
2
2
1
2
2
1
4
3
5
2
CLEANING THE FAN
The fan should be cleaned at least once a year.
If you have any household pets the fan must be
cleaned more often.
1.Turn OFF the main power switch.
2.Remove the lower cover.
3. Remove
the safety
screw (1). Prise out the four clips in the order
shown and remove the fan cover.
4.Unscrew the
nut while holding the fan.
5.Take out the fan and clean it with a brush
and water.
6.Putthefanback
into place and
screw on the nut.
7. Refit the fan cover, making sure the clips
hold the cover in place. Don’t forget to fit the
safety screw.
8.Fit the lower cover back in place.
1
3
22
1
33
44

17
UPP
UP
OBEN
CLEANING THE CONDENSER
The condenser should be cleaned at least three
timesayear. If youhaveanyhousehold pets the
condenser must be cleaned more often.
1.Turn OFF the main power switch.
2.Rem-
ove the
lower co-
ver.
3. Turnthe
two levers
anticlock-
wise to
open the condenser cover.
4.Take the
condenser out
and rinse the
condenserfins
clean,eg,using
2
2
1
2
2
ahand-held shower.Donotpokeanythingbet-
weenthefins,youmightdamagethecondenser.
Do not use any sharp object when cleaning the
fins.
NOTE
Do not attempt to clean the condenser in a
dishwasher.
5.Refit the condenser, taking care to fit it the
right way up. The top of the condenser is mar-
ked “upp”, “up” and “oben”.
6.Fit the lower cover back in place.

18
THE MACHINE WILL NOT START
Check that:
• The door is properly closed.
• The main switch is pressed in.
• You have correctly set the required time in
the timed program.
• The condensation water tank is emptied.
• The electric plug, if any, is plugged into its
socket.
• All fuses are intact. Switch two fuses over to
check. It is not always possible to see directly if
a fuse has blown.
• Theoverheatingdevice has not triggered, see
below.
OVERHEATING PROTECTION
The overheating protection device switches
OFF the tumble dryer if the temperature beco-
mes too high, eg, because the lint filter is clog-
ged. If this happens, clean
the filter, empty the con-
densation water tank and
clean the condenser, see
Chapter 8, Care and clea-
ning.Thenresettheoverhea-
ting device by pressing the
block rubber button on the back of the machi-
ne.
9TROUBLESHOOTING
TUMBLE DRYING TAKES TOO LONG
Empty the water container and check that the
lint filter and the condenser are not clogged,
see Chapter 8, Care and Cleaning. Excessive
drying times can also be caused by the machine
being installed in a very confined space and by
the air in the room (which cools the machine)
becomingtoowarm.Inthissituationmakesure
that ventilation is improved, eg, by opening
doors and/or windows.

19
This page has been left blank for technical printing reasons.

20
10TECHNICALINFORMATION
TECHNICAL DATA
Height: 850 mm.
Width: 595 mm.
Depth: 585 mm.
Weight: 47kg.
Drumvolume: 111 litre.
Max. drying capacity: 5.0 kg.
Speed: 52 r/min.
Rated power: See data plate.
Rated power, element: See data plate.
Material: Drum Stainless steel.
Material: Outer cover Powder-lacquered and hot-galvanized steel
sheet or stainless steel.
Positioning: Washing tower or free-standing
Drain: 2.0 m rubber hose.
STANDARD TESTS
Europe: EN 611 21 (92/ 13/ EEC)
Dryingperformance: Program time 90 minutes, 5.0 kg cotton, tem-
perature Normal.
Energy declaration: EN 611 21 (92/ 13/ EEC)
Program time 90 minutes, 5.0 kg cotton, tem-
perature Normal.
Procedure for acoustic measurement: IEC 60 704-2-6
Other manuals for T721
4
Table of contents
Other Asko Dryer manuals

Asko
Asko DC7784HP.W.AU User manual

Asko
Asko T410HD.W.AU User manual

Asko
Asko DC 7171 Service manual

Asko
Asko T744 Assembly instructions

Asko
Asko T208CW User manual

Asko
Asko T781 User manual

Asko
Asko T884XLHP User manual

Asko
Asko TD25 User manual

Asko
Asko T793C User manual

Asko
Asko T408HD W Series User manual