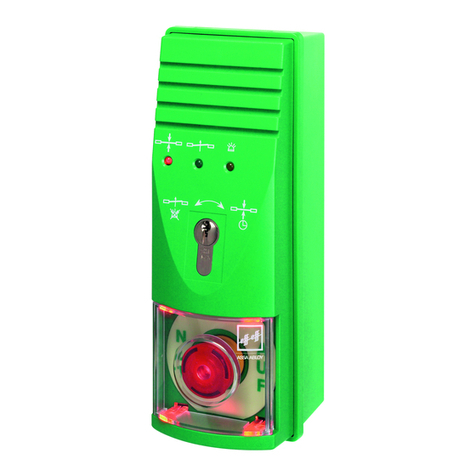
Assa Abloy Effeff ePED 1386CMC User manual

The global leader in
door opening solutions
DXXXXXNN
Installations- und Montageanleitung
Produktname
Produktname
www.assaabloy.de
The global leader in
door opening solutions
Installation and Operating Instructions
D0122800
ePED®
1386CMC central escape route control
ePED®escape route technology
1386CMC

2EN
Hi-O Technology™ is a registered trademark of the
ASSA ABLOY Group.
ePED®is a registered trademark of
ASSA ABLOY Sicherheitstechnik GmbH.
Open Source Licenses ASSA ABLOY Sicherheitstechnik GmbH has the source code of
the software used in the scope of Open Source licenses
(such as FreeRTOS™, newlib, lwIP) available on request:
http://www.assaabloy.com/com/global/opensourcelicense/
Publisher
ASSA ABLOY Sicherheitstechnik GmbH
Bildstockstrasse 20
72458 Albstadt
Germany
Phone: +49 (0)7431 1230
Telefax: +49 (0)7431 123 240
Internet: www.assaabloy.de
Email: albstadt@assaabloy.com
Document number and date
D0122800 12.2019
Copyright
©2019, ASSA ABLOY Sicherheitstechnik GmbH
This document and all its parts are copyrighted. Any use or changes outside the
strict limits of the copyright are prohibited and liable to prosecution unless prior
consent has been obtained from ASSAABLOYSicherheitstechnikGmbH .
This particularly applies to any copying, translations, microforms, or storing and
processing in electronic systems.
EN Read this manual thoroughly before use and keep it in a safe place for later
reference. The manual contains important information about the product,
particularly for the intended use, safety, installation, use, maintenance and
disposal.
Hand the manual over to the user after installation and pass the manual on to
the purchaser together with the product if the product is sold.

3
EN
Product information . . . . . . . . . . . . . . . . . . . . . . . . . . . . . . . . . . . . 4
ePED®escape route technology. . . . . . . . . . . . . . . . . . . . . . . . . . . . . . . . . . . . . . . . . . . . . . . 4
ePED®1386CMC central escape route control . . . . . . . . . . . . . . . . . . . . . . . . . . . . . . . . 4
Explanation of terms. . . . . . . . . . . . . . . . . . . . . . . . . . . . . . . . . . . . . . . . . . . . . . . . . . . . . . . . . . 5
Safety instructions . . . . . . . . . . . . . . . . . . . . . . . . . . . . . . . . . . . . . . 6
About this manual . . . . . . . . . . . . . . . . . . . . . . . . . . . . . . . . . . . . . . . . . . . . . . . . . . . . . . . . . . . . 6
Meaning of the symbols . . . . . . . . . . . . . . . . . . . . . . . . . . . . . . . . . . . . . . . . . . . . . . . . . . . . . . 6
Intended use . . . . . . . . . . . . . . . . . . . . . . . . . . . . . . . . . . . . . . . . . . . . . . . . . . . . . . . . . . . . . . . . . 9
Functions and operation. . . . . . . . . . . . . . . . . . . . . . . . . . . . . . . .10
Operating elements . . . . . . . . . . . . . . . . . . . . . . . . . . . . . . . . . . . . . . . . . . . . . . . . . . . . . . . . . 10
Emergency button for central release . . . . . . . . . . . . . . . . . . . . . . . . . . . . . . . . . . . . . . . . 11
Double release delay . . . . . . . . . . . . . . . . . . . . . . . . . . . . . . . . . . . . . . . . . . . . . . . . . . . . . . . . 12
Monitoring status . . . . . . . . . . . . . . . . . . . . . . . . . . . . . . . . . . . . . . . . . . . . . . . . . . . . . . . . . . . 14
Test key. . . . . . . . . . . . . . . . . . . . . . . . . . . . . . . . . . . . . . . . . . . . . . . . . . . . . . . . . . . . . . . . . . . . . . 17
Acoustic alarm signal . . . . . . . . . . . . . . . . . . . . . . . . . . . . . . . . . . . . . . . . . . . . . . . . . . . . . . . . 17
Fitting and installation . . . . . . . . . . . . . . . . . . . . . . . . . . . . . . . . .18
Circuit board . . . . . . . . . . . . . . . . . . . . . . . . . . . . . . . . . . . . . . . . . . . . . . . . . . . . . . . . . . . . . . . . 19
Configuration. . . . . . . . . . . . . . . . . . . . . . . . . . . . . . . . . . . . . . . . . .20
Configuration with CMCFG software . . . . . . . . . . . . . . . . . . . . . . . . . . . . . . . . . . . . . . . . . 20
Notes on configuration . . . . . . . . . . . . . . . . . . . . . . . . . . . . . . . . . . . . . . . . . . . . . . . . . . . . . . 21
Basic sequence in configuration. . . . . . . . . . . . . . . . . . . . . . . . . . . . . . . . . . . . . . . . . . . . . . 22
General operation . . . . . . . . . . . . . . . . . . . . . . . . . . . . . . . . . . . . . . . . . . . . . . . . . . . . . . . . . . . 30
Technical data . . . . . . . . . . . . . . . . . . . . . . . . . . . . . . . . . . . . . . . . .32
Logging via event logger . . . . . . . . . . . . . . . . . . . . . . . . . . . . . . . . . . . . . . . . . . . . . . . . . . . . . 32
Technical data . . . . . . . . . . . . . . . . . . . . . . . . . . . . . . . . . . . . . . . . . . . . . . . . . . . . . . . . . . . . . . . 33
Communication . . . . . . . . . . . . . . . . . . . . . . . . . . . . . . . . . . . . . . . . . . . . . . . . . . . . . . . . . . . . . 33
Maintenance . . . . . . . . . . . . . . . . . . . . . . . . . . . . . . . . . . . . . . . . . .34
Warranty, disposal . . . . . . . . . . . . . . . . . . . . . . . . . . . . . . . . . . . . .35
Warranty . . . . . . . . . . . . . . . . . . . . . . . . . . . . . . . . . . . . . . . . . . . . . . . . . . . . . . . . . . . . . . . . . . . . 35
Updated information . . . . . . . . . . . . . . . . . . . . . . . . . . . . . . . . . . . . . . . . . . . . . . . . . . . . . . . . 35
Disposal . . . . . . . . . . . . . . . . . . . . . . . . . . . . . . . . . . . . . . . . . . . . . . . . . . . . . . . . . . . . . . . . . . . . . 35
Table of contents
4EN Product information
ePED®escape route technology
Electrical locking devices of doors along escape routes protect escape routes
from misuse. The door is blocked in the escape direction in the process. In case of
danger, the escape door is released with an emergency open button and an alarm
is triggered. The alarm simultaneously serves as a deterrent against misuse.
The system has been tested in compliance with the German ‘Guidelines for
Electronic Locking Systems in Doors along Escape Routes’ (EltVTR) and satisfies
the technical safety requirements for a release in case of danger.
Safety-related features include:
· Fail-safe functionality (an error does not influence the release or lead to an
automatic release),
· Fail-unlocked functionality (short-circuit or interruption of the conductor to the
locking unit leads to automatic unlocking),
· Automatic release in case of an operating voltage failure (emergency power
supply is permitted),
· Identification of the emergency open button,
· Tested permanent function.
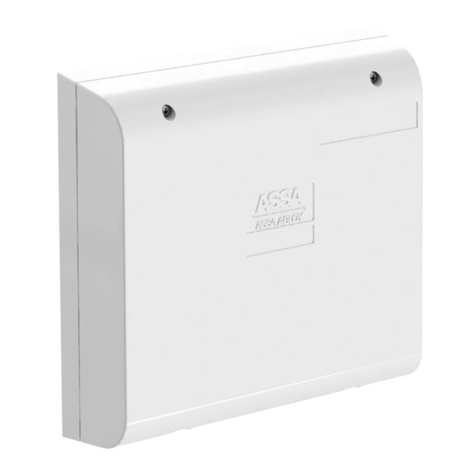
ePED®1386CMC central escape route control
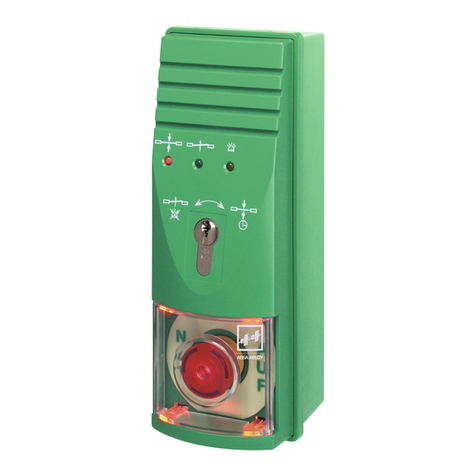
The ePED® 1386CMC central escape route control system (Fig. 1) is a central operat-
ing panel with which authorised persons monitor and operate the electrically-
controlled escape door system, including
· the double release delay and
· the blocking of the release.
The escape door system is equipped with ePED®escape route technology. The
Ethernet connection is established with an ePED®CMC Connector 1386CMC-CON
on every escape door (manual D01118xx ePED CMC Connector 1386CMC-CON),
with the following applicable limits:
·a1386CMC central escape route control can control a maximum of 126 escape
doors via 126 CMC connectors 1386CMC-CON,
and
· one escape door can be controlled by no more than 32 1386CMC central es-
cape route control systems via a 1386CMC-CON CMC connector.
Safety-related
characteristics
Central operating
panel for
monitoring and
operation
Product information

5
EN
Product information
Fig. 1:
ePED®1386CMC
central escape
route control
1386CMC
Explanation of terms
Term Description
Release delay The release delay is the wait time until the escape door is unlocked after
actuation of the Emergency Open push-button.
Terminal The ePED®1386-00 door terminal (terminal) comprises several modules installed
in a wall-mounted housing.
Ethernet Ethernet is a data network (LAN technology).
Escape door
system
Escape door system describes the scope of all electrical components of an escape
door.
Hi-O Technology™ The Hi-O Technology™ bus (Highly Intelligent Opening) is a bus for the connec-
tion of electronic components (devices) in door systems.
Hi-O group Assignment to a Hi-O group offers the possibility of organising components into
groups.

6EN Safety instructions
About this manual
The installation and configuration of the product must be performed by a
qualified expert in electromechanical equipment; assembly work must be
performed by a person with expertise in the type of work to be performed or by
appropriately trained personnel.
Meaning of the symbols
Danger!
Safety notice: Failure to observe these warnings will lead to death or serious
injury.
Warning!
Safety notice: Failure to observe these warnings may lead to death or serious
injury.
Caution!
Safety notice: Failure to observe these warnings may lead to injury.
Important!
Note: Failure to observe these warnings can lead to property damage and impair
the function of the product.
Note!
Note:Additional information on operating the product.
D
!
!
A
I
Safety instructions

7
EN
Safety instructions
Warning!
Danger arising from modification of the product: The safety features of this
product are an essential requirement for its conformity with EltVTR. No changes
which are not described in this manual may be undertaken.
Danger due to missing Emergency Open button on the escape door: If the
release of the escape door is centrally controlled, it is no longer possible to
independently choose to exit the danger area in the case of danger. This always
requires an approval from the responsible inspection authority. Normally, a
constantly manned station equipped with a central release mechanism is
prerequisite for the approval.
Danger due to faulty commissioning: In order to ensure the safety of the
product, commissioning must be performed by a qualified person. ASSA ABLOY
Sicherheitstechnik GmbH offers training for qualification in the requisite skills.
Danger due to faulty maintenance: The owner is responsible for correct instal-
lation and functional inspection of the product and connected components. The
safe function must be tested by a trained qualified expert at least once per year
(“Maintenance”, page34). Requirements established by inspection authorities
must be complied with. ASSA ABLOY Sicherheitstechnik GmbH offers training for
qualification in the requisite skills.
Danger arising from tampering or improperly performed repairs: If the ePED®
terminal 1386-00 or parts of the device cannot resume normal operation after a
fault or alarm message, or if there is evidence of damage, the device may only be
repaired by a qualified person. Please contact the customer service of the installa-
tion company or the support department of ASSA ABLOY Sicherheitstechnik GmbH
(“Warranty”, page35).
Danger due to manipulation or unauthorised access to the network: manip-
ulation or sabotage to the network by unauthorised access can influence the
secure operation of the 1386CMC central escape route control system.
Suitable measures have to be taken by a qualified person in order to prevent, or at
least impede, unauthorised access to the network or manipulation.
!

8EN Safety instructions
Warning!
Violation against mandatory conditions: If release is blocked, then the escape
door is not released. If the release delay is activated, the escape door is only
released after expiry of the set wait time.
· Security personnel must be able to see the affected escape door directly or via
video monitoring. It is not permissible to extend the release delay or blocking
without being able to see the escape door.
· The relevant inspection authority must approve before activation/use of release
blocking and/or release delay.
Important!
Restricted function due to insufficient network connection: the quality of the
network connection is decisive for the availability of the 1386CMC central escape
route control system. If the quality of the network connection is insufficient, the es-
cape door equipped with ePED®escape route technology is automatically switched
to a “local mode” and the functions of the central escape route control system are
no longer available.
· Ensure that the network connection is trouble-free. In order to exclude influ-
ences by other network devices, ASSA ABLOY Sicherheitstechnik GmbH recom-
mends a separate network structure for the escape route.
!
A

9
EN
Safety instructions
Intended use
Electrical locking devices on doors along escape routes are intended for use in
commercial applications.
The ePED® 1386CMC central escape route control system is a central operating panel
with which authorised persons monitor and operate the electrically-controlled
escape door system.
The escape door system is equipped with ePED®escape route technology. The
Ethernet connection is established with an ePED®CMC Connector 1386CMC-CON
on every escape door (manual D01118xx ePED®CMC Connector 1386CMC-CON),
with the following applicable limits:
·a1386CMC central escape route control can control a maximum of 126 escape
doors via 126 CMC connectors 1386CMC-CON,
and
· one escape door can be controlled by no more than 32 1386CMC central es-
cape route control systems via a 1386CMC-CON CMC connector.
The product has been designed for safeguarding escape routes and has been
tested to the requirements specified in the German guidelines on electrical
locking systems for doors in escape routes (EltVTR). Deviating uses or device
combinations not described are not permitted.
Security personnel must be able to see the affected escape door directly or via
video monitoring. It is not permissible to extend the release time or blocking
without being able to see the escape door.
ASSA ABLOY Sicherheitstechnik GmbH can provide the necessary planning information
for approved solutions and the device combinations required for your application.
The security functions for the release of the electrical locking meet the require-
ment for fail-safe functionality in DINEN13637:2015, “safety integrity level” SIL2
of the IEC61508:2010 parts 1 to 7 (reference: technical data).
Compliance with all relevant inspection authority requirements is mandatory for
use, particularly with respect to the
· coordination of the safety concept with the responsible inspection authority
and
· modifications of door elements.
The relevant inspection authority must approve before activation/use of release
blocking and/or release delay.
The device is suitable for installation, configuration and use, according to these
instructions. Any use beyond this is deemed as non-intended use; devices
combinations which are not described are not permitted.

10 EN Functions and operation
Operating elements
Fig. 2:
ePED®1386CMC
central escape
route control
1386CMC
2
1
3
4
5
6
7
8
910 11 12 13
No. Description No. Description
1 Emergency Open switch 2 LED (red/green) – status of the
emergency button
3 Push-button – activate extend-
ed release time
4 LED (red) – status of the escape
doors – locked
5 LED (green) – status of the
escape doors – unlocked
6 LED (yellow) – alarm issued
7 LED (yellow) – failure of escape
route control system
8 LED (yellow) – connection to
the alarm system
9 Key switch
Reset Emergency Open
10 Key switch – activate extended
release delay
11 Push-button (green) – deacti-
vate extended release time
12 Push-button (yellow) – test
13 Push-button (blue) – switch off
acoustic alarm signal
Tab. 1:
Key for Fig. 2
Functions and operation

11
EN
Emergency button for central release
With the emergency button for central
release (Fig. 2– 1 , Fig. 3) , all escape doors of
the building or escape door groups are
released from one or more central points in
an emergency or panic situation.
The emergency button light ups if the power
supply is switched on and the LED 2
illuminates green.
The central points are manned by security
personnel. An emergency button can be
manned by anyone in the security personnel
rooms.
Emergency button actuation display
The emergency key button flashes red after
actuation and the LED 2 illuminates red.
Reset panic alarm
An alarm is triggered via the emergency button on the 1386CMC central escape
route control system. The emergency key button flashes red and all connected
escape doors are released. The alarm is to be withdrawn.
1 Unscrew the pushed in emergency button (Fig. 2– 1 , Fig. 3) until the
emergency button is released.
2 Authorise yourself as an authorised safety person at the key switch under the
emergency button (Fig. 2– 9 ).
The alarm ends.
Fig. 3:
Emergency button
and key switch

12 EN
Double release delay
Note!
The release delay must be activated: the release delay must be activated at the
affected escape door systems (on the hardware side).
There are escape door terminals on the escape doors (manual D01022xx ePED®
door terminal 1386-00) with a red emergency button. If an emergency button is
actuated, the terminal for the relevant escape door reports a release request.
If a release request is triggered on one or multiple escape doors, the release delay
is initially 15 seconds (t1). The escape doors remain locked during this time. The
red button (Fig. 2– 3 , Fig. 4) flashes.
The double release delay extends a triggered release delay from 15 to a maximum
of 180 seconds (t2). The release delay can be extended from one or more points
by authorised security personnel during release delay t1. The red LED button (Fig. 4)
illuminates.
If the emergency buttons on several doors were actuated at the same time, the
release delay is extended on all relevant escape doors. If more emergency buttons
are then actuated, the red button flashes again and the release delay can also be
extended for these escape doors.
To assess the situation, the security personnel must be able to view all relevant
escape doors directly or via video monitor-
ing. It is not permissible to extend the release
delay without being able to see the escape
doors.
Depending on the networking of compo-
nents in one or more escape routes, one or
more escape door systems can be controlled
by one or more 1386CMC central escape route
control systems.
Depending on the configuration, the initial
release delay may be less than 15 seconds
and the extended release time may be less
than 180 seconds.
I
ePED®
door
terminal
1386–00
t = 15 s
t = 180 s
1
2
Fig. 4:
Buttons for
activation and
deactivation of
extended release
delay

13
EN
Activate extended release delay
The red push-button is flashing.
1 Authorise yourself as an authorised safety person at the key switch
(Fig. 2– 10 , Fig. 4).
2 Press the red push-button (Fig. 2– 3 , Fig. 4).
The extended release delay is activated.
The red push-button illuminates.
Deactivate extended release delay
3 Press the green push-button (Fig. 2– 11 , Fig. 4).
The relevant doors are released.

14 EN
Monitoring status
Emergency button status
The status of the central emergency button is displayed via a red/green LED
(Fig. 2 – 2 ).
Status Description
Illuminates
red
The central emergency button has been actuated –
emergency button is engaged
or
Illuminates
green
The central emergency button has not been actuated
– emergency button is disengaged
Status of escape doors
The locking status of the escape doors is displayed by a red and a green LED
(Fig. 2– 4 and – 5 ).
Status Description
Flashes At least one escape door, but not all, report as
locked
Flashes At least one escape door, but not all, report as
unlocked
Illuminates Off All escape doors report as locked
Off Illuminates All escape doors report as unlocked
or

15
EN
Alarm issued
If one or more release requests have been triggered – the Emergency Open
button on the terminals was actuated – this is displayed by a yellow LED
(Fig. 2– 6 ).
Status
Off No alarm
Flashes At least one escape door, but not all,
report alarm and release request
Illuminates All escape doors report alarm and
release request
Status of the central escape route control systems
The conditions of the escape route control systems are displayed by a yellow LED
(Fig. 2– 7 ).
Status
Off All connections of central escape
route control systems report correct
function
Flashes At least one escape door has been
deactivated
Illuminates The central escape route control
system is down or
At least one connected central es-
cape route control system is down or
The remote connection is down

16 EN
Status of the connection to the alarm system
The condition of the connection to the alarm system is displayed by a yellow LED
(Fig. 2– 8 ).
Status
Off The connection to the alarm
system works
Flashes The alarm system has been
deactivated
Illuminates The communication between
the central escape route control
system and alarm system is
interrupted

17
EN
Test key
Test the central escape route control system
The proper function of all indicators must be tested, in a maintenance, for
example.
1 Press the yellow push-button.
All indicators illuminate and an acoustic signal sounds.
Acoustic alarm signal
Switch off acoustic alarm signal (alarm horn)
The alarm has been triggered. The acoustic alarm signal is to be switched off.
1 Press the blue push-button.
The acoustic alarm is switched off.
The alarm status has not ended.

18 EN Fitting and installation
Fig. 5:
Principle of integration of ePED®central escape route control systems in an overall system
1386C MC 1386C MC
Central
escape route control
1386CMC
1 ... 32
1 ... 126 doors
901 Hub 01
CMC connector
1386 CMC-CON
Interface for
locking systems
1386S00
24 VDC
Escape door
locking system
Door terminal 1386
Fitting and installation

19
EN
Fitting and installation
Circuit board
Fig. 6:
Circuit board
ON
OFF
ON
OFF
456
CAN_H
CAN_L
+24 V
GND
4 3 2 1
1
3
2Factory setting:
DIP switch 1 ( 5 ) ON
DIP switch 2 ( 6 ) OFF
No. Description No. Description
1 Ethernet 2 USB connection for event log-
ger (“Logging via event logger”,
page32)
3 Connection for
ePED Service Interface 1386-SIF
(separate instructions
D01113xx)
4 Hi-O Technology™ – Bus
1 CAN_H
2 CAN_L
3 +24V
4 GND
5 DIP switch 1–
Hi-O Technology™ – termina-
tion with terminating resistor
OFF – no termination
ON – termination
6 DIP switch 2–
Hi-O Technology™ – group
OFF – group 0
ON – group 1
Tab. 2:
Key for Fig. 6

20 EN Configuration
Configuration with CMCFG software
The CMCFG1) software serves to configure an ePED® escape route control system
made up of
· a maximum of 32 ePED® 1386CMC central escape route controls and
· an ePED® CMC connector 1386 CMC-CON for each door.
An ePED® escape route control system checks and controls an escape route. The
communication of the components takes place using TCP/IP via Ethernet.
The function of the escape route control system is adjusted to the local condi-
tions in detail during configuration.
Terms
The following abbreviations are used in the following description and in the
software:
Software element Example
ePED® escape route control system Control system
ePED® 1386CMC central escape route control CMC box
ePED® CMC connector 1386 CMC-CON CMC connector
In the following description the following examples are used for software
elements:
Software element Example
Menu item System
Keyboard shortcut
Software button
Symbol/icon
Column header of a table Box 1
Requirement for configuration via CMCFG.
All components have been properly fitted, wired and installed according to the
separately attached instructions.
Tab. 3:
Abbreviations in
the software
and in the text
Tab. 4:
Illustration of
software elements
in the text F2
OK
1) Download a current software version:
https://www.effeff.de Service Software & Updates ePED Service Software
ePED Konfiguration Fluchtwegsteuerung CMC
I
Configuration
Table of contents
Other Assa Abloy Control Unit manuals

Assa Abloy
Assa Abloy Incedo InControl 3270 User manual

Assa Abloy
Assa Abloy LCU9101 User manual

Assa Abloy
Assa Abloy TRAKA UD0011 User manual

Assa Abloy
Assa Abloy EffEff 1340-20 User manual

Assa Abloy
Assa Abloy OneSystem Service Module User manual

Assa Abloy
Assa Abloy LCU9101IV User manual

Assa Abloy
Assa Abloy Norton ADAEZ User manual

Assa Abloy
Assa Abloy HES iCLASS IC0020 Owner's manual

Assa Abloy
Assa Abloy Medeco XT AIM Operation manual

Assa Abloy
Assa Abloy OneSystem N5952 User manual