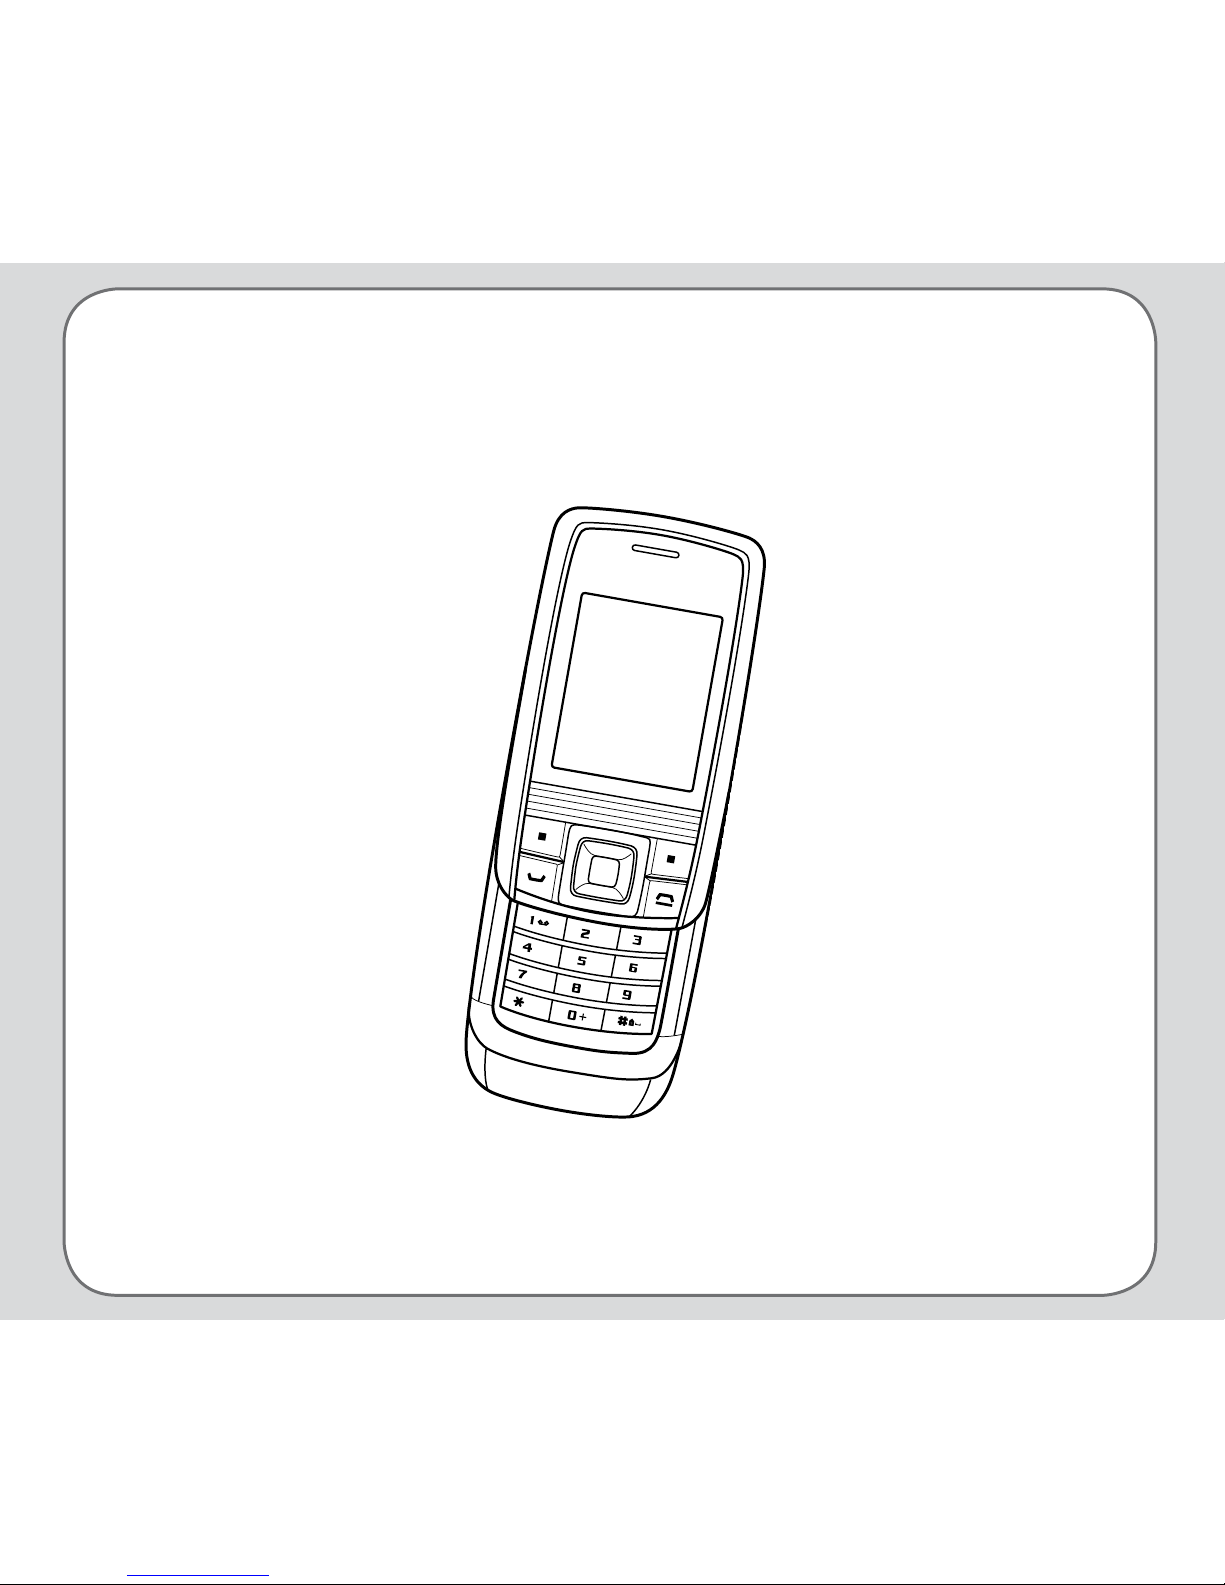
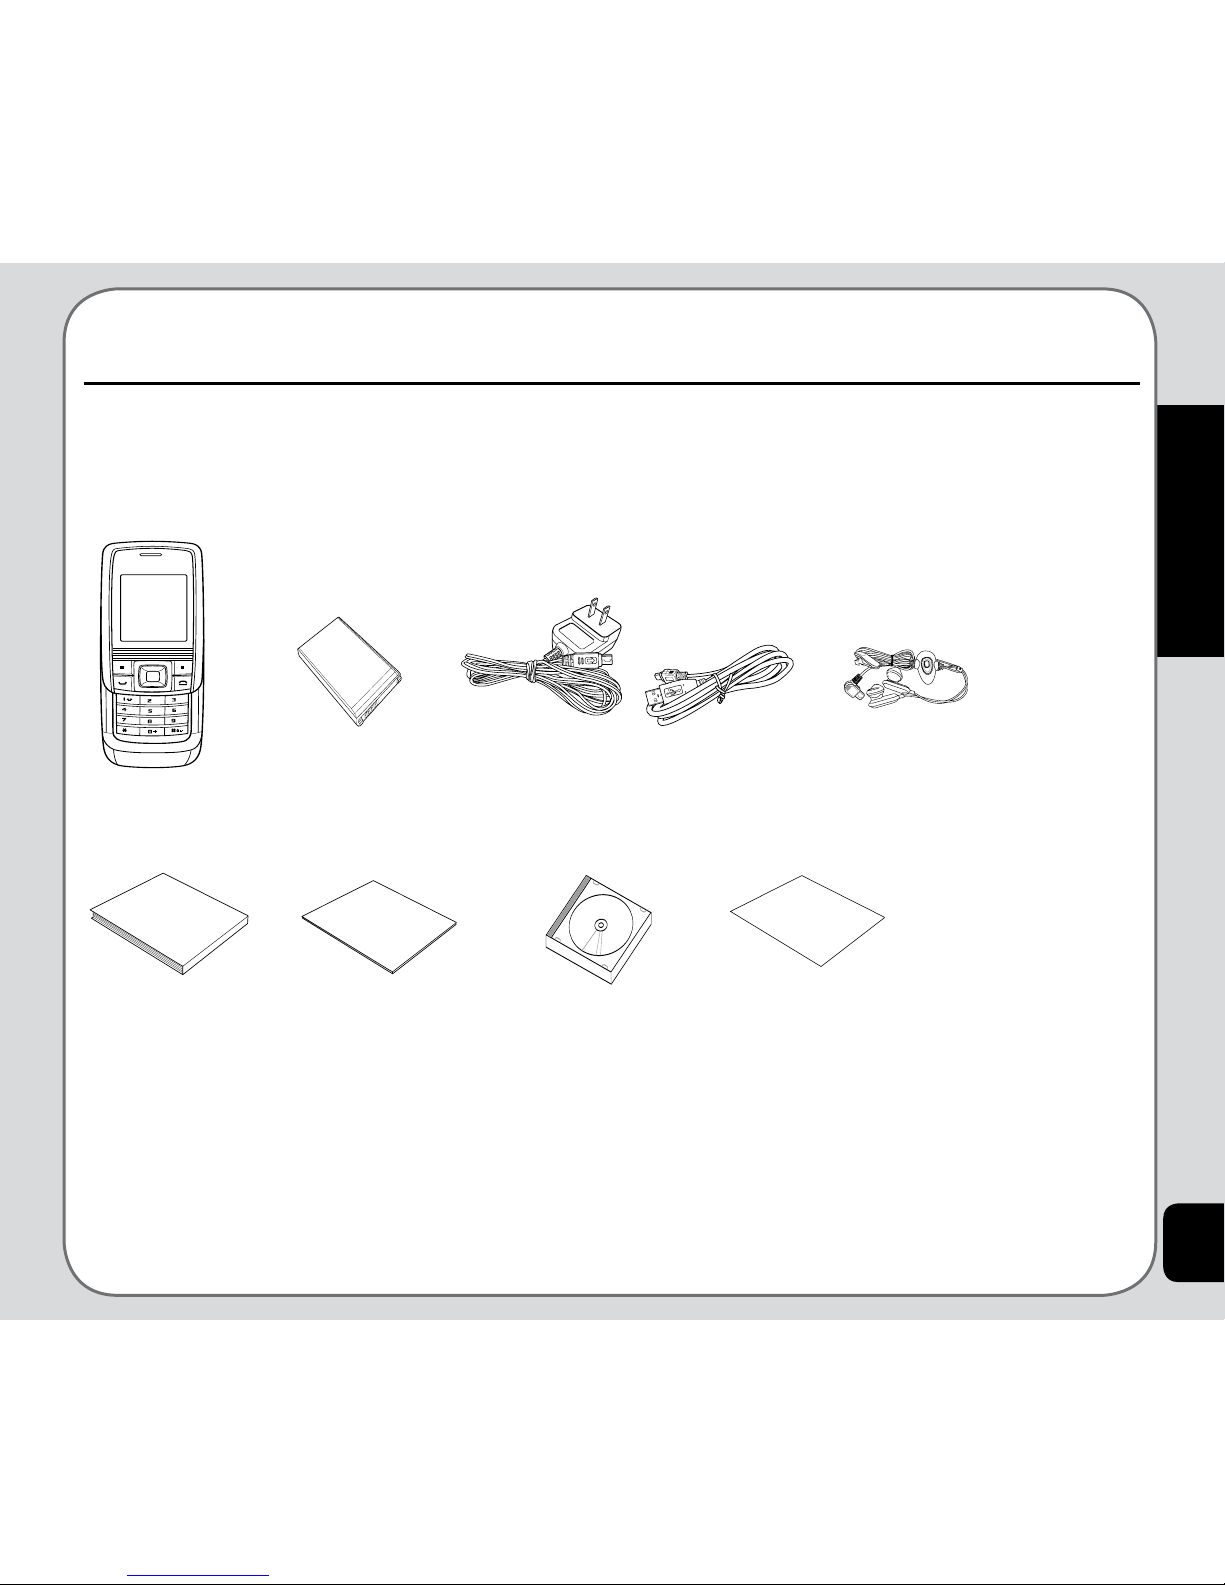
Asus J208 User manual

ASUS J208
User Manual
ABC
JKL
TUV
A
a
GHI
PQRS
DEF
MNO
WXYZ
/

Welcome 1
Package contents 1
Overview 2
Specications 3
Menu Map 4
Getting started 7
Inserting the SIM card, microSD™ card,
and battery 7
Charging the battery 8
Turning the phone on/off 8
Function Keys 8
Front view 10
Left view 11
Back view 11
Top view 11
Unlocking the Keypad and Slide 11
Standby Mode 12
Using the Menu 12
Connecting to a Computer 15
Calls and Call History 16
Making a call 16
Answering a call 16
Diverting a call 16
Redialing a number 17
Call history 17
Call time/cost 18
SMS Counter 18
GPRS Counter 18
Options during a call 18
Other call options 19
Contents
Phonebook 20
Adding contacts 20
Searching for a contact 20
Shortcut to contact entries 21
Copying contacts 21
Deleting Contacts 22
Caller Groups 22
Extra Number 23
Settings 23
My vCard 24
Messages 25
SMS 25
MMS 27
Chat 28
Email 29
Voice Mail Server 29
Broadcast Message 30
User Proles 31
ProleSettings 31
Settings 32
Phone Setup 32
Call Setup 35
Network Setup 37
Security Setup 38
Restore Factory Settings 39
Camera 40
Taking Photos 40

Viewing and Managing Photos 40
Photo Capture Settings 40
Recording Videos 42
Viewing and Managing Videos 42
Video Capture Settings 43
Photo Artist 44
Multimedia 46
Camera/Video Recorder/ Video Player 46
Image Viewer 46
Audio Player 46
Sound Recorder 48
FM Radio 48
Schedule FM Record 49
Melody Composer 50
Organizer 51
Calendar 51
To Do List 51
Alarm 52
World Clock 52
Services 53
Service Provider Settings 53
WAP 53
Data Account 54
Fun & Games 55
Java 55
Games 55
Extra 56
Bluetooth 56
Calculator 57
Unit Converter 57
Currency Converter 58
Shortcuts 59
Creating a shortcuts list 59
Creating joystick shortcuts 59
File Manager 60
Phone 60
DRM Rights 60
Appendix 61
Additional Information 61
European Notice 61
RF Exposure Information (SAR) 61
Proper Disposal 62
Safety Warnings 63

Preface
Congratulations on your purchase of an ASUS J206 mobile phone. Read this manual carefully and
keep it in a safe place for future reference.
About this manual
Every effort has been made to ensure that the contents of this manual are correct and up to date.
However, the manufacturer makes no guarantee regarding the accuracy of the contents, and
reserves the right to make changes without notice.
Copyright© ASUS 2006

1
Welcome
Package contents
warranty card
User Manual
Quick Start Guide
J208 handset 750 mAh Li-ion
battery
Travel charger Stereo headset
Warranty card
User manual Quick start guide Handset Manager
CD-ROM
USB cable
Welcome
Congratulations on your purchase of an ASUS J208 cell phone. The following illustration displays
the package contents of your new phone.
ABC
JKL
TUV
A
a
GHI
PQRS
DEF
MNO
WXYZ
/

2
* NOTE: The microSD™ card is an optional accessory. The accessory bundle may vary in different territories.
Overview
The J208 is a stylish and fashionable new phone from ASUS, with all the functions and utilities
to make it a useful tool in today’s mobile world. The J208 comes equipped with a built-in camera,
MMS/SMS messaging capability, organizer, Java games, audio player, Bluetooth capability, WAP,
GPRS, and a microSD™ card slot. In addition to the internal 60 MB phone memory, the microSD™
card* provides additional memory where you can store your contact information, messages, text,
graphics,andaudioles.TheJ208’saudioplayerenablesyoutoplaybackyourfavoritemusic.
Features
• Wide variety of calling and messaging functions
• Built-in camera
• Media center with audio player and games for your entertainment
• MMS and SMS messaging capability
• Personal information organizer with alarm, calendar, calculator and other useful tools to
manage your time
• WAP and GPRS capability to check e-mail or browse web services
• Bluetooth capability

3
Welcome
Specications
System supported Triband GSM1800/1900; GPRS Class B/Multi-Slot
Dimensions 99.9 (L) x 48.1 (W) x 17.2 (T) mm
Battery 750 mAh Li-ion
Standby time 200~300 hours
Talk time 2.5 ~ 5 hours
Main display 1.9” TFT, 262K colors, 176 x 220 pixels
Phonebook 500 sets
Messaging Supports SMS, EMS, MMS, Email
Camera 2.0 Megapixel CMOS
Video recording Recordsanunlimitednumberofles,dependingoninternalandexernalmemorystatus
Supports MPEG4 video recording
Ringtone 64 chord polyphonic ring tones
Supports MP3
Voice recording Recordsanunlimitednumberofles,dependingoninternalandexternalmemorystatus
Memory 60 MB internal memory and microSD™ external slot
Java Supports MIDP 2.0 and JSR 185
Games 3 Java games
Connectivity USB 2.0 support
Bluetooth1.2(SupportsGAP,SDP,HSP,HFP,SPP,DUN,OPPproles)
WAP WAP 2.0
Other features MP3 Music Player/MP3 Ringtone/FM radio
Support H.263/MPEG4 (3GP/MP4)/AAC
Support 15 fps QVGA video encode
Handfree Support
Support Bluetooth data transfer
Support Bluetooth Stereo headset/skype
Equipped HID
* NOTE:Allspecicationsaresubjecttochangewithoutnotice.

4
Menu Map
Phonebook
n Quick Search
n Search Entry
n Add New Entry
n Copy All
n Move All
n Delete
n Caller Group
n Extra Number
- Owner Number
- Service Dial Number
- SOS Number
n Settings
- Memory Status
- Preferred Storage
- Fields
- My vCard
Messages
n SMS
n MMS
n Chat
n Email
n Voice Mail Server
n Broadcast Message
Call History
n Missed Calls
n Dialed Calls
n Received Calls
n Delete Call Log
n Call Time
n Call Cost
n SMS Counter
n GPRS Counter
Settings
n Phone Setup
• Time and Date
• Schedule Power On/Off
• Language
• Preferred Input Methods
• Default Encoding Type
• Display Settings
- Wallpaper
- Screen Saver
- Themes
- Power On Display
- Power Off Display
- Show Date and Time
- Show Owner Number
- Show Operator Name
- Show Idle Shortcut
- Clock Type
• Greeting Text
• Speed Dial
• Dedicated key
• Auto update of date and time
• Flight Mode
• LCD Backlight
n Call Setting

5
Welcome
• Caller ID
• Call Waiting
• Call Divert
• Call Barring
• Line Switching
• Call Time Reminder
• Call Time Display
• Auto Redial
• Closed User Group
• Call Filter
n Network Setting
• Network Selection
• Preferred Networks
• Band Selection
• GPRS Connection
n Security Setting
• SIM Lock
• Phone Lock Code
• Auto Keypad Lock
• Slide Keypad Lock
• Fixed Dial
• Barred Dial
• Change Password
n Restore Factory Settings
Multimedia
n Camera
• Album
• Camera Setting
• Image Setting
• White Balance
• Scene Mode
• Effect Setting
• Add Frame
• Storage
• Restore Default
n ImageViewer
n Video Recorder
• To Player
• CamCorder Setting
• Video Setting
• Effect Setting
• Storage
• Restore Default
n Video Player
n Photo Artist
n Audio Player
n Sound Recorder
n FM Radio
n Schedule FM Record
n Melody Compose
File Manager
n Phone
n DRM Rights
Fun & Game
n Java
n Games
n Game Setting
n Java Setting
n Java Bookmark

6
User Proles
n General
n Meeting
n Outdoor
n Indoor
n Headset
Organizer
n Calendar
n To Do List
n Alarm
n World Clock
Services
n WAP
n Data Account
Extra
n Bluetooth
n Shortcuts
n Calculator
n Unit Converter
• Weight
• Length
n Currency Converter
Shortcuts

7
Getting started
Getting started
Inserting the SIM card,
microSD™ card, and battery
When you register with a service provider, you
receive a Subscriber Identity Module (SIM)
card. Your phone must have a SIM card in order
to make calls. The SIM card is a computer chip
that contains your phone number, phonebook
information, and service provider information.
Handle it with care and do not bend it or expose
it to static electricity or dirt. Be sure the power
to your phone is off before you insert your SIM
card.
The SIM card slot is situated underneath the
battery.
To insert the SIM card:
2. Pulltheprotrudinglm
on top of the battery
in the direction of the
arrow, then carefully
lift the battery out of its
compartment.
3. Insert the SIM card into
the holder. The gold
contacts of the SIM card
should face down.
To insert the microSD™ card:
NOTE: In some regions the microSD™ card may be supplied as
an optional accessory only.
1. Slide the cover in the
direction of the arrow.
Lift and set it aside.
1. Place the microSD™
card in the slot with
the gold contacts
facing down.
2. Place the battery
back into the battery
compartment noting
the correct polarity.
3. Replace the back
cover, sliding it
upward until it snaps
in place.

8
Turning the phone on/off
To turn the phone on:
• Hold down the power/end key until
the screen lights up.
If needed, enter your SIM card PIN code
and press the Enter key.
To turn the phone off:
• Press the power/end key and hold until
the phone shuts down.
NOTE: If you set an alarm using the Organizer menu, then turn
off the phone, the phone will turn itself on when the alarm is
activated. After you disable the alarm, the phone prompts you if
you want to keep the phone turned on or off. See the Organizer
section for details about setting an alarm.
Function Keys
The following table lists the phone keys and
their functions.
Power/end key
• Hold to turn the phone on or off.
• Press to stop an incoming call or
cancel a call you are dialing.
• Press to exit a menu or
submenu.
NOTE: For best battery performance, allow the battery to
chargeanddischargecompletelytherstfewtimesyouuseit.
Charging the battery
1. Connect the charger plug to a power
outlet.
2. Connect the charger to the socket at the
side of the phone. The connector can
only be inserted one way.
Caution:
• Use only the battery recommended by the
manufacturer. Using an incompatible battery with the
phone may cause risk of an explosion.
• Dispose of the used batteries according to the
manufacturer’s instructions, or ask your local
authorities for assistance.
Low battery indicators
The battery indicator on the upper right corner
of the screen indicates how much charge
remains in the battery. As an additional
reminder, the phone emits a double beep when
the battery is low. The message “battery low”
also appears on the screen.
Note: If the battery has been deeply discharged, it may take the
battery level indicator several minutes to display.

9
Getting started
Down joystick key
• Press to scroll down through
menu items.
• Press to open Audio Player
when the phone is in standby
mode.
• Press to play the previous MP3
leinAudioPlayer.
Left joystick key
• Press to scroll left through menu
items.
• Press to display a list of your
shortcuts when the phone is in
standby mode.
• Press to play/ the previous MP3
leinAudioPlayer.
Right joystick key
• Press to scroll right through
menu items.
• Press to display the Bluetooth
menu when the phone is in
standby mode.
•PresstoplaythenextMP3le
in Audio Player.
Center joystick key (Enter)
• Press to scroll right through
menu items.
Call/OK key
• Press to dial or answer calls.
•Presstoconrmselectionofa
menu item.
• Press to display the call logs or
to redial the last number called.
Left soft key
• Press to display the menu when
the phone is in standby mode.
•Presstoconrmselectionofa
menu item.
• Press to perform the function
currently displayed on the lower
left corner of the screen.
Right soft key
• Press to view phone book when
the phone is in standby mode.
• Press to perform the function
currently displayed on the lower
right corner of the screen.
Up joystick key
• Press to display the menu when
the phone is in standby mode.
• Press to scroll up through menu
items.
• PresstoplaythenextMP3le
in Audio Player.

10
Right soft key
Earpiece
Screen
Up joystick key
Power/end key
Right joystick key
Down joystick key
Left soft key
Call key
Left joystick key
Joystick
Front view
NOTE: Refer to the previous page for function key descriptions.
Alphanumeric keypad
ABC
JKL
TUV
A
a
GHI
PQRS
DEF
MNO
WXYZ
/

11
Getting started
Left view Top view
Charger/USB/
Headphone port
MicroSD™ card slot
Camera lens
Mirror
Battery
cover
Back view
Unlocking the Keypad and
Slide
The keypad and the slide lock of the phone
canbelockedautomaticallyafteraspecic
time interval to prevent tampering or accidental
pressing of any buttons. Refer to Security Setup
in the Settings section to learn how to lock the
keypad and slide lock.
To unlock the keypad, do the following:
1. The screen shows Unlock in the lower
right corner of the screen. Select this
option by pressing the Right Soft Key
which is just under the word Unlock on
the screen.
2. Press the Left Soft Key on the keypad
to unlock the keypad as prompted on
the screen. The keypad and slide is
unlocked.
Standby Mode
When your phone is on, but not in use, it is in
standby mode. During standby mode, the upper
part of the display screen shows various icons.
The date and time are displayed in the top of
third of the screen. At the bottom of the screen
are Menu in the left corner and Name in the
right corner. Press the left soft key to view the
main menu, and the right soft key to view the
phone book.

12
Standby Mode
When your phone is on, but not in use, it is in
standby mode. During standby mode, the upper
part of the display screen shows various icons.
The date and time are displayed at the lower
center of the screen. Under the date and time
are Menu on the left corner and Phonebook
on the right corner. Press the left soft key to
view the main menu, and the right soft key
to view the phone book.
The Standby screen icons and their
descriptions are as follows:
Vertical bars indicate the strength of
the GSM network signal. Four bars
indicate that your current position has
the best reception.
Line 1 or line 2 is selected for calls.
Alarm has been set.
A text message has been received.
A multimedia message has been
received.
The SMS memory is full (blinking
icon).
Indicates battery charge status.
Phone is using GPRS network.
Phone is in roaming mode.
Ringtone is enabled.
Ringtone is disabled.
Indicates a missed call.
Vibrate mode is enabled.
Call divert is enabled.
Stopwatch is enabled.
Countdown is enabled.
Using the Menu
To view the main menu, go to standby mode,
then press the left soft key . Follow these
tips to navigate through the menu and menu
options.
• Use the up, down, left, and right joystick
keys to move through the various menu
items.
• The lower left part of the screen displays
the name of the menu item currently

13
Getting started
selected while the lower right corner
displays Back. Press the left soft key
key to select the menu item. Press the
right soft key under Back to exit the
menu.
• Below each menu item is a small
number. You can also select the menu
item by pressing the corresponding
number on the keypad.
• To quickly exit from the menu, press the
Power/End key.
• Use the joystick keys to select the
submenu items and options. You can
also use the left soft key to open
various options in some submenus.
For example, to view missed calls:
1. Use the joystick keys to select Calls from
the main menu.
2. Press the left soft key toconrmthe
selection. The Calls submenu opens.
3. Press the left soft key to select the
Missed Calls option. A list of missed calls
opens.
Text Entry
When you add names to your phone book,
send a text message, or use your WAP
browser, you need to enter text. Your cell phone
has several text entry methods. You can enter
letters individually or with predictive text entry,
which helps you complete words as you enter
them. You can enter letters in upper case, lower
case, or both, or insert symbols.
Basics
• Use the alphanumeric keypad to enter
letters and numbers. Each key is
assigned multiple characters.
• Press the right soft key to select Clear,
on the lower right corner of the screen, to
delete a letter if you make a mistake.
• To enter spaces or symbols, press “0”.
• To swtich between input methods eg.
Alpha, Numeric, Thai, shortly or long
press *.
Key Assigned characters
. , - ? ! ‘ @ : # $ / _ 1
A B C 2
D E F 3
G H I 4
J K L 5
M N O 6
P Q R S 7
T U V 8
W X Y Z 9
Space, 0

14
Choosing text entry methods
From any text entry screen, such as a text
message window, select Options > Input
Method.
Multitap input
Multitap input enables you to enter individual
letters one by one. This is ideal for adding a
phonebook entry or entering a WAP address.
When you press a key, the characters assigned
to the key appear in the lower center of the
screen. Press the key repeatedly to scroll
through these characters. Pause for a moment
and the selected letter appears on the screen.
For practice, try creating a text message (SMS)
as follows:
From the menu, go to Messages > SMS >
Write Message. Before entering text, press
correct word by pressing the keys repetitively
and scrolling through the words suggested
by the phone. By reducing the number of
keystrokes, the smart ABC helps some users to
type messages more quickly.
Whenever you press a key, a list of possible
characters or character combinations is
created. To enter text, use the up and down
joystickkeystondthecharactercombination
you want. Press the right joystick key to
proceed entering the next character. If you
make a mistake, press Clear.
Here is an example of how to enter the word
“baby” using smart text entry.
1. Press . The letter a appears on the
screen.
2. Press again quickly to go to the
next suggestion which is ba. If you press
the up/down joystick keys, the phone
scrolls through all possible two-letter
combinations of the letters a, b, and c.
3. Press again quickly to display three-
letter combinations of the letters a, b, and
c.
4. Press The word “baby” is complete.
5. Press Option > Donewhennished.
NOTE: For smart text entry to work properly, ensure the
language settings in your phone match the language you want
to type in. To set the language, go to Settings > Phone Settings
> Language.
Numeric text entry
Numeric text entry allows you to create a text
Option and select Multitap ABC/Multitap abc.
To enter the words “my phone” into the text
entry area, follow these steps:
1. Press to select m.
2. Press three times to select y.
3. Press , followed by the enter key or
left soft key to enter a space.
4. Press to enter p, then press twice
to enter h. Continue in this fashion until
the word “phone” is entered.
Smart ABC
Smart ABC is a predictive text entry method,
which uses a built-in dictionary to predict the
word you are typing. You can choose the

15
Getting started
message composed of numbers. To use this
method, select Option > Input Method and
then select Numeric. Now you can directly input
the numbers using the keypad.
Symbols text entry
With this method, you can enter various types
of symbols. Select Option > Input Method >
Insert Symbols or long press “0” to display a
list of symbols. Use the joystick keys to select
the desired symbol and press OK when done.
Connecting to a Computer
Connect the mobile phone to a computer using
the supplied USB cable. The phone will display
theUSBcongurationmenu.
• Charge only - allows you to only recharge
the phone, without acting as a USB mass
storage device.
• Mass Storage-The phone memory
appears on your computer as a
removable disk. If the microSD™ card is
installed in the phone, it also appears on
the computer as a removable disk. You
cantransferlesbetweenthecomputer
andthephoneusingaleviewer,such
as Windows®Explorer or My Documents.

16
following:
1. Press the Call key to answer the
call.
2. Press the Power/end key to end the
call and disconnect.
You may also select Option > Answer to
answer the call.
Rejecting an incoming call
To reject an incoming call, press the Power/end
key; or, press the right soft key to select
the Reject option. Depending on your service
provider, the caller may be transferred to your
voice mail or you may hear a busy signal.
Diverting a call
To divert an incoming call to another number:
1. When you receive the call, press Option
and then select the Deect item.
2. Use the keypad to enter the phone
number to which you want to divert, or
select Search using the left soft key
then browse through the phone book to
select a number.
3. Press OK when done.
Calls
Making a call
To place a call:
1. Enter the number you want to dial using
the keypad. If you make a mistake, select
Clear to delete at any time. The right soft
key is just under the word Clear on
the lower right screen; select this key to
clear a number.
2. To cancel the call and return to standby
mode, press the Power/end key.
3. Press the Call key to connect the
callafteryounishdialingthenumber.
4. Press the Power/end key to
disconnect the call.
Making international calls
To make an international call:
1. Enter “+” by holding down the key.
2. Enter the international access code for
the country you want to dial, followed by
the area code and the telephone number.
Answering a call
When you receive a call, the phone alerts
you by sounding the ring tone and vibration
accordingtothespeciedringtoneand
vibration settings. To answer the call, do the
Other manuals for J208
1
Table of contents
Other Asus Cell Phone manuals

Asus
Asus P565 User manual

Asus
Asus P750 Assembly instructions

Asus
Asus ZENFONE 2 User manual

Asus
Asus Padfone X Station (T00DP) Operation and maintenance manual

Asus
Asus PadFone Station User manual

Asus
Asus Zenfone 2 Laser User manual

Asus
Asus I01WD User manual

Asus
Asus M303 User manual

Asus
Asus ZB501KL User manual

Asus
Asus Zenfone 3 ZE552KL User manual