manuals.online logo
Brands
  1. Home
  2. •
  3. Brands
  4. •
  5. AtGames
  6. •
  7. Arcade Game Machine
  8. •
  9. AtGames LEGENDS PINBALL ARCADE CONTROL PANEL User manual

AtGames LEGENDS PINBALL ARCADE CONTROL PANEL User manual

1
2
3
4
Arcade Control Panel
(included)
Phillips head screwdriver
(not included)
Warranty Info
The manufacturer warrants this product to be free and clear of
defects in the materials and workmanship, under normal
residential use and conditions, for a period of ninety (90) days
from the original invoice date. Shipping and handling fees are to
be paid for by the customer. To make a warranty claim, please
submit a service request here:
https://www.atgames.net/arcades/contact
Standard warranty coverage for the AtGames Arcade Control
Panel does not apply to and is considered invalid due to misuse,
improper maintenance, self-repair, tampering, or invasive
hardware modifications of any kind, and damages or dysfunction
caused by shipping or non-manufacturing related causes.
Note: Standard warranty services are valid with receipt from an
authorized retailer. Purchases through third-party sellers and
resellers do not fall under the standard warranty program. For
warranty support, please contact the third-party seller or reseller
where you purchased the product.
This equipment has been tested and found to comply with the
limits for a Class B digital device, pursuant to Part 15 of the FCC
Rules. These limits are designed to provide reasonable protection
against harmful interference in a residential installation. This
equipment generates, uses and can radiate radio frequency
energy and, if not installed and used in accordance with the
instructions, may cause harmful interference to radio
communications. However, there is no guarantee that interference
will not occur in a particular installation. If this equipment does
cause harmful interference to radio or television reception, which
can be determined by turning the equipment off and on, the user
is encouraged to try to correct the interference by one or more of
the following measures:
• Reorient or relocate the receiving antenna.
• Increase the separation between the equipment and receiver.
• Connect the equipment into an outlet on a circuit different from
that to which the receiver is connected.
• Consult the dealer or an experienced radio/TV technician
for help.
Changes or modifications not expressly approved by the party
responsible for compliance could void the user’s authority to
operate the equipment.
This device complies with Part 15 of the FCC Rules. Operation is
subject to the following two conditions:
(1) this device may not cause harmful interference, and
(2) this device must accept any interference received, including
interference that may cause undesired operation.
CAN ICES‐3 (B)/NMB‐3(B)
• Do not submerge the device in water or expose it to extreme
heat or to strong magnetic fields. Doing so may cause
permanent damage to your device.
• Always use a dry towel to clean the device.
• Transformers are suitable for indoor use only. Transformers and
power supplies for toys are not intended to be used as toys, and
the use of these products by children shall be under the full
supervision of parents.
USB port
Haptic feedback speaker cable
1
2
7
3
5
4
6
8
9
10
Joystick
X button
Y button
Z button
5
6
A button
B button
C button
Trackball
7
8
9
10
USB port
3 screws on the front
10 screws on the side panels
Haptic feedback
speaker cable
Haptic feedback speaker cable
D-pad cable port
Step 3. Place the Arcade Control Panel over the original control
top. Take the USB cable from the inner side of the pinball machine
and connect both that and the haptic feedback speaker cable to
the Arcade Control Panel.
Step 4. Repeat Step 1 in reverse to re-assemble the machine. Place
the left and right side panels back to their original positions by the
main display and secure them with the 10 screws. Once both left
and right side panels are reattached, replace the front panel and
fasten with the 3 screws.
Step 1. Use a Phillips head screwdriver to remove the 3 screws on the
front of the apron. Remove all 10 screws on the side panels to the left
and right of the main display. Put all screws and panels aside.
Step 2. Remove the screws and lift up the original control top.
Carefully detach the D-pad connecting cable and haptic feedback
speaker cable. Remove the screws holding the USB cable.
Safety Notice
FCC Statement
Assembly Steps
2
2
3
3
5
4
1
1
7
6
8
9
10
Tools/Parts Required
Arcade Control Panel Features
FRONT
BACK
Note: Be careful not to tug or pull on the
haptic cable while you are connecting.
1
2
3
4
©2023 AtGames Interactive
www.atgames.net
PO Box 1691, El Segundo, CA 90245
All rights reserved.
*Content and images are for reference only and subject to change.
The trademarks and images are the properties of their respective owners. © 2023 AtGames
Made in China
www.atgames.us
Please find the most updated product info at www.atgames.us.
For customer service, warranty info, and technical support please find us here:
https://www.atgames.net/arcades/contact/
MANUEL D’INSTRUCTION
Étape 1. Utilisez un tournevis '"Phillips" pour enlever les 3 vis à
l'avant de l'apron. Retirez les 10 vis des panneaux latéraux à gauche
et à droite de l'écran principal. Mettez les panneaux et les vis de côté.
1
2
3
4
Arcade Control Panel
(inclus)
Tournevis tête “Phillips”
(non inclus)
Info Garantie
Le fabricant garantit que ce produit est exempt de défauts de
matériaux et de fabrication, dans des conditions d'utilisation
normales et résidentielle,pendant une période de quatre-vingt-dix
(90) jours suivant la date de la facture originale.
Les frais d'expédition et de manutention sont à la charge du client.
Pour l’assistance supplémentaire, veuillez visiter :
https://www.atgames.net/arcades/contact
La couverture de la garantie standard pour l'AtGames Arcade
Control Panel ne s'applique pas et est considérée comme nulle et
non avenue en cas de mauvaise utilisation, entretien inadéquat,
auto-réparation, altération ou modifications matérielles invasives
de tout ou partie du matériel, ainsi que les dommages ou
dysfonctionnements causés par l'expédition ou des causes non
liées à la fabrication. Remarque : les services de garantie standard
sont valables sur présentation d'une facture reçue par un
détaillant autorisé. Les achats effectués auprès de vendeurs tiers
et de revendeurs ne sont pas couverts par le programme de
garantie standard. Pour obtenir une assistance, veuillez contacter
le vendeur tiers ou le revendeur où vous avez acheté le produit.
Cet équipement a été testé et déclaré conforme aux limites d'un
appareil numérique de classe B, conformément à la partie 15 des
règles de la FCC. Ces limites sont conçues pour fournir une
protection raisonnable contre les interférences nuisibles dans une
installation résidentielle. Cet
équipement génère, utilise et peut émettre une énergie de
radiofréquence et, s'il n'est pas installé et utilisé conformément
aux instructions, peut provoquer des interférences nuisibles aux
communications radio. Cependant, il n'y a aucune garantie que
des interférences ne se produiront pas dans une installation
particulière. Si cet équipement causait des interférences nuisibles
à la réception de la radio ou de la télévision, ce qui peut être
déterminé en allumant et en éteignant l'équipement, l'utilisateur
est encouragé à essayer de corriger les interférences par une ou
plusieurs des méthodes suivantes :
• Réorientez ou déplacez l'antenne de réception.
• Augmentez la séparation entre l'équipement et le récepteur.
• Connectez l'équipement à une prise sur un circuit différent de
celui auquel le récepteur est connecté.
• Consultez votre revendeur ou un technicien radio/TV
expérimenté pour obtenir de l'aide.
Les changements ou modifications qui ne sont pas expressément
approuvés par la partie responsable de la conformité peuvent
annuler l'autorisation de l'utilisateur à utiliser l'équipement.
Cet appareil est soumis à la Partie 15 des règles de la FCC.
Le fonctionnement est soumis aux deux conditions suivantes :
(1) cet appareil ne doit pas causer d'interférences nuisibles, et
(2) cet appareil doit accepter toutes les interférences reçues, y
compris les interférences susceptibles de provoquer un
fonctionnement indésirable.
CAN ICES‐3 (B)/NMB‐3(B)
Port USB
Câble retour tactile haut-parleur
Joystick
Bouton X
Bouton Y
Bouton Z
5
6
Bouton A
Bouton B
Bouton C
Trackball
7
8
9
10
Port USB
3 vis à l’avant
10 vis sur les panneaux lateraux
Câble Haut-parleur
retour tactile
Câble haut-parleur retour tactile
Port câble Pad Directionnel
Étape 3. Placez l'Arcade Control Panel au dessus du panneau de
contrôle original. Prenez le câble USB depuis le côté intérieur du
flipper et connectez-le ainsi que le câble haut-parleur retour
tactile à l'Arcade Control Panel.
Étape 4. Répétez l’étape 1 à l'envers pour ré-assembler la machine.
Placez les panneaux latéraux gauche et droite à leur position
originale à coté de l'écran principal et attachez-les avec les 10 vis.
Une fois les panneaux gauche et droite ré-attachés, replacez le
panneau avant et attachez-le avec les 3 vis.
Avertissement de sécurité
Déclaration FCC
Étapes d’assemblage
2
2
3
3
5
4
1
1
7
6
8
9
10
Outils/Parties Nécessaires
Caractéristiques de l’Arcade Control Panel
AVANT
ARRIÈRE
Note: Faites attention à ne pas tirer sur le câble
tactile lorsque vous le connectez.
1
2
7
3
5
4
6
8
9
10
Étape 2. retirez les vis et soulevez le panneau de contrôle d'origine.
Détachez ensuite avec précaution le câble de connexion du D-pad.
Détachez le câble du haut-parleur / retour haptique. Retirez les vis
qui maintiennent le câble USB.
• Ne plongez pas l'appareil dans l'eau et ne l'exposez pas à une
chaleur extrême ou à des champs magnétiques puissants. Vous
risqueriez de causer des dommages permanents à l'appareil.
• Utilisez toujours une serviette sèche pour nettoyer l'appareil.
• Les transformateurs sont adaptés à une utilisation en intérieur
uniquement. Les transformateurs et les blocs d'alimentation
pour jouets ne sont pas destinés à être utilisés comme jouets.
L'utilisation de ces produits par des enfants doit se faire sous la
surveillance totale des parents.
Pour soumettre une demande de garantie, veuillez la
soumettre chez : https://www.atgames.net/arcades/contact
*Les images du produit sont illustratives et
peuvent ne pas refléter son état final.
1
2
3
4
Other AtGames Arcade Game Machine manuals

AtGames LEGENDS PINBALL User manual

AtGames

AtGames LEGENDS PINBALL User manual

AtGames LEGENDS PINBALL User manual

AtGames

AtGames LEGENDS PINBALL User manual

AtGames HA8801 User manual

AtGames

AtGames HA8801 User manual

AtGames LEGENDS PINBALL User manual

AtGames

AtGames LEGENDS PINBALL User manual

AtGames Legends Ultimate Mini User manual

AtGames

AtGames Legends Ultimate Mini User manual

AtGames Legends Connect AN-101 User manual

AtGames

AtGames Legends Connect AN-101 User manual

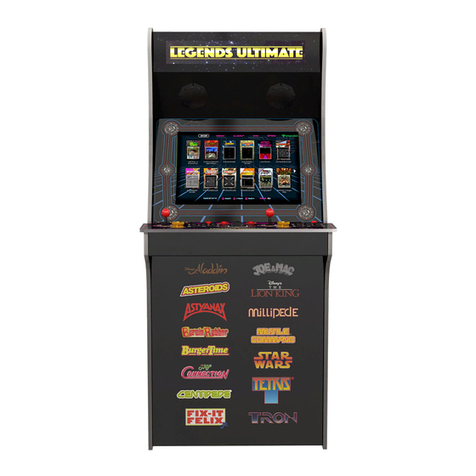
AtGames Legends Ultimate User manual

AtGames

AtGames Legends Ultimate User manual

AtGames LEGENDS PINBALL User manual

AtGames

AtGames LEGENDS PINBALL User manual

AtGames LEGENDS PINBALL MICRO User manual

AtGames

AtGames LEGENDS PINBALL MICRO User manual

AtGames Legends Ultimate User manual

AtGames

AtGames Legends Ultimate User manual

AtGames Legends Ultimate User manual

AtGames

AtGames Legends Ultimate User manual

Popular Arcade Game Machine manuals by other brands

Home Leisure Direct ArcadePro Venus 2605 user manual

Home Leisure Direct

Home Leisure Direct ArcadePro Venus 2605 user manual

WAHLAP TECH Crazy Rafting owner's manual

WAHLAP TECH

WAHLAP TECH Crazy Rafting owner's manual

Tecmo Super Pinball Action Service manual

Tecmo

Tecmo Super Pinball Action Service manual

Family Fun Companies Pharaohs Revenge Operation manual

Family Fun Companies

Family Fun Companies Pharaohs Revenge Operation manual

Sega The House Of The Dead 4 29"STD owner's manual

Sega

Sega The House Of The Dead 4 29"STD owner's manual

Bay-Tek Big Bass Wheel Service manual

Bay-Tek

Bay-Tek Big Bass Wheel Service manual

LAI Games Speed Of Light Operator's manual

LAI Games

LAI Games Speed Of Light Operator's manual

Magic Play SWEET SPINNER Operation manual

Magic Play

Magic Play SWEET SPINNER Operation manual

Ice Harpoon Lagoon Marquee install guide

Ice

Ice Harpoon Lagoon Marquee install guide

Merit Slim MAXX Removal/Installation Instructions

Merit

Merit Slim MAXX Removal/Installation Instructions

Roberto Sport COLLEGE PRO COVER quick start guide

Roberto Sport

Roberto Sport COLLEGE PRO COVER quick start guide

GRS BUILD-A-CADE instruction manual

GRS

GRS BUILD-A-CADE instruction manual

Bay Tek Games Big Bass Wheel Service manual

Bay Tek Games

Bay Tek Games Big Bass Wheel Service manual

MD SPORTS CTC14804 Assembly instructions

MD SPORTS

MD SPORTS CTC14804 Assembly instructions

Universal Space DUO DRIVE Operation manual

Universal Space

Universal Space DUO DRIVE Operation manual

ARCADE1UP INFINITY quick start guide

ARCADE1UP

ARCADE1UP INFINITY quick start guide

ELAUT Coast to Coast FUN ZONE manual

ELAUT

ELAUT Coast to Coast FUN ZONE manual

UNIS BEAT THE GOALIE Operation manual

UNIS

UNIS BEAT THE GOALIE Operation manual

manuals.online logo
manuals.online logoBrands
  • About & Mission
  • Contact us
  • Privacy Policy
  • Terms and Conditions

Copyright 2025 Manuals.Online. All Rights Reserved.