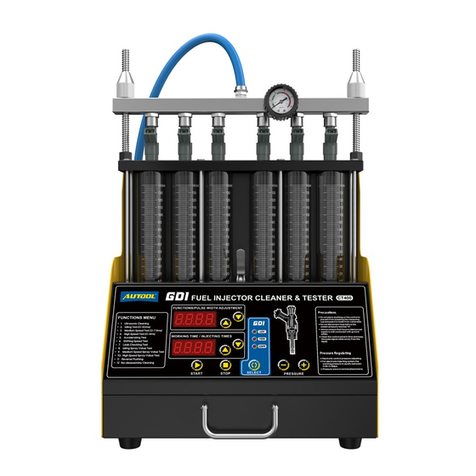
AU Tool CT180 User manual

www.autooltech.com
AUTOOL CT180
Fuel Injector Tester
User Manual

Copyright Information
All rights reserved by AUTOOL TECH. CO., LTD. No part of this publication may be reproduced, stored
in a retrieval system, or transmitted in any form or by any means, electronic, mechanical, photocopying,
recording or otherwise, without the prior written permission of AUTOOL. The information contained
herein is designed only for the use of this unit. AUTOOL is not responsible for any use of this information
as applied to other units.
Neither AUTOOL nor its affiliates shall be liable to the purchaser of this unit or third parties for damages,
losses, costs, or expenses incurred by purchaser or third parties as a result of: accident, misuse, or
abuse of this unit, or unauthorizedmodifications, repairs, or alterations to this unit, or failure to strictly
comply with AUTOOL operating and maintenance instructions.
AUTOOL shall not be liable for any damages or problems arising from the use of anyoptions or any
consumable products other than those designated as OriginalAUTOOL Products or AUTOOL Approved
Products by AUTOOL.
Other product names used herein are for identification purposes only and may betrademarks of their
respective owners. AUTOOL disclaims any and all rights in those marks.
This unit is made for the purpose of persons who have special techniques and certifications.
Manual are either trademarks, registered trademarks, service marks, domain names, logos, company
names of or are otherwise the property of AUTOOL or its affiliates. Incountries where any of the
AUTOOL trademarks, service marks, domain names, logos and company names are not registered,
AUTOOL claims other rights associated with unregistered trademarks, service marks, domain names,
logos, and company names. Other products or company names referred to in this manual may
be trademarks of their respective owners. You may not use any trademark, service mark, domain name,
logo, or company name of AUTOOL or any third party without permission from the owner of the applica-
ble trademark, service mark, domain name, logo, or company name. You may contact AUTOOL by
written permission to use Materials on this manual for purposes or for all other questions relating to this
manual.

EN
Disclaimer
Ɣ7RWDNHIXOODGYDQWDJHRIWKHXQLW\RXVKRXOGEHIDPLOLDUZLWKWKHYHKLFOHHQJLQHZRUNLQJSULQFLSOH
Ɣ$OOLQIRUPDWLRQLOOXVWUDWLRQVDQGVSHFLILFDWLRQVFRQWDLQHGLQWKLVPDQXDODUHEDVHGRQWKHODWHVW
information available at the time of publication. The manufacturer resume the right of modify this manual
and the machine itself with no prior notice.
Safety Precautions
Read all service procedures and precautions, installation instructions and equipment operating manuals
thoroughly. Failure to observe these precautions, or the improper use of equipment, could result in
property damage, serious injury or death. Never allow improperly trained personnel to perform these
procedures or operate the equipment.
Ɣ5HDGWKHRSHUDWLQJLQVWUXFWLRQVEHIRUHDWWHPSWLQJWRRSHUDWHWKHXQLW.HHSWKLVPDQXDOZLWKWKH
unit at all times.
Ɣ&DUHPXVWEHWDNHQDVEXUQVFDQRFFXUIURPWRXFKLQJKRWSDUWVRIWKHHTXLSPHQWRULQWKHHQJLQH
Ɣ'RQRWRSHUDWHHTXLSPHQWZLWKDGDPDJHGFRUGRULIWKHHTXLSPHQWKDVEHHQGURSSHGRUGDPDJHG
until it has been examined by qualified service personnel.
Ɣ'RQRWKDQJFRUGVRYHUWKHHGJHRIWKHWDEOHEHQFKRUFRXQWHURUFRPHLQFRQWDFWZLWKKRWPDQL-
folds or moving fan blades.
Ɣ,IDQH[WHQVLRQFRUGLVQHHGHGDFRUGZLWKDUDWHGFXUUHQWHTXDOWRRUJUHDWHUWKDQWKDWRIWKH
equipment should be used. Cords rated for lower current than that of the equipment may overheat.
Ɣ$OZD\VXQSOXJHTXLSPHQWIURPHOHFWULFDORXWOHWZKHQWKHPDFKLQHLVQRWLQXVH1HYHUSXOOWKHFRUG
when unplugging from the outlet.
Ɣ0DNHVXUHWKHHTXLSPHQWFRROVGRZQFRPSOHWHO\EHIRUHSXWWLQJLWDZD\/RRSFRUGORRVHO\DURXQG
the equipment when storing.
Ɣ7RSURWHFWDJDLQVWULVNRIILUHGRQRWRSHUDWHWKHHTXLSPHQWLQWKHYLFLQLW\RIRSHQFRQWDLQHU
containing flammable liquid (gasoline).
Ɣ0DNHVXUHWKDWWKHXQLWLVLQWKHZHOOYHQWLODWLRQDUHDZKHQRSHUDWLQJWKHIXHOHQJLQH
Ɣ.HHSOLJKWHGFLJDUHWWHVVSDUNVIODPHVRURWKHULJQLWLRQVRXUFHVDZD\IURPIXHOV\VWHPVDWDOO
times.
Ɣ.HHSKDLUFORWKHVILQJHUVRUWKHRWKHUERG\SDUWVDZD\IURPWKHUXQQLQJSDUWVRIWKHXQLW
Ɣ,QRUGHUWRDYRLGHOHFWULFVKRFNNHHSDZD\IURPWKHGDPSSDUWRIDZRUNLQJXQLWDQGDYRLGH[SRV-
ing it to the rain.
Ɣ3OHDVHRSHUDWHWKHXQLWDFFRUGLQJWRWKHRSHUDWLRQSURFHGXUHVLQWKHPDQXDO2QO\XVHWKHDFFHV-
sories recommended by the manufacturer.
Ɣ'RQRWVZLWFKRQWKHXOWUDVRQLFV\VWHPZKHQWKHUHLVQRXOWUDVRQLFGHWHUJHQWLQWKHXOWUDVRQLF
cleaning chamber. Otherwise, damage to the ultrasonic cleaner can be resulted.
Ɣ.HHSWKHXQLWZHOOJURXQGHG
Ɣ3URYLGHYHQWLODWLRQWKURXJKDQH[KDXVWJDVUHPRYDOV\VWHPYHQWLODWLRQIDQVRUODUJHGRRUV&DUERQ
monoxide gas, which is odorless and colorless, can cause serious illness, injury or death.
Ɣ$YRLGFRQWDFWLQJKRWVXUIDFHVVXFKDVH[KDXVWSLSHVUDGLDWRUHWF
Ɣ%HIRUHWHVWLQJYHKLFOHVSXWWKHWUDQVPLVVLRQOHYHULQ1(875$/SRVLWLRQDSSO\WKHSDUNLQJEUDNH
and block the front wheels.
Ɣ$/:$<6:($56$)(7<*2**/(6&RPPRQXVHGJODVVHVDUH127VDIHW\JODVVHV
Ɣ:KHQGLVFRQQHFWLQJDQ\FRQQHFWRURIWKHSUHVVXUL]HGIXHOKRVHZUDSWKHFRQQHFWRUZLWKWRZHOWR
SUHYHQWWKHIXHOIURPVSXUWLQJRXW6SXUWHGIXHOPD\FDXVHSHUVRQDOLQMXU\RUILUH
Ɣ7HVWOLTXLGLVXVHGE\WKHPDLQXQLW'HWHUJHQWLVXVHGIRURQYHKLFOHFOHDQLQJ7KHXOWUDVRQLF
cleaning uses specified ultrasonic detergent.
1RWH6SHFLI\LQJRSHUDWLRQVWKDWUHTXLUHDWWHQWLRQZKHQRSHUDWLQJWKHHTXLSPHQW
:DUQLQJ6SHFLI\LQJDSRVVLEOHKD]DUGWKDWFRXOGUHVXOWLQGDPDJHWRWKHPDFKLQHRUSHUVRQDO
injury.

EN
Functions
Ɣ8OWUDVRQLFFOHDQLQJ7RSHUIRUPVLPXOWDQHRXVFOHDQLQJRQVHYHUDOLQMHFWRUVDQGWRUHPRYHWKH
carbon deposits on the injector completely.
Ɣ8QLIRUPLW\6SUD\DELOLW\WHVW7RWHVWWKHXQLIRUPLW\RILQMHFWLQJDPRXQWRIHDFKLQMHFWRUDQGWR
monitor the spraying status of each injector with the help of backlight. This test is also for reverse flush.
Ɣ/HDNDJHWHVW7RWHVWWKHVHDOLQJDQGGULEEOLQJFRQGLWLRQVRILQMHFWRUVXQGHUV\VWHPSUHVVXUH
Ɣ,QMHFWLQJIORZWHVW7RFKHFNWKHLQMHFWLQJDPRXQWRIWKHLQMHFWRULQVHFRQGVRIFRQVWDQWLQMHFWLRQ
Ɣ$XWRPDWLFWHVW7RWHVWLQMHFWRUVE\VLPXODWLQJGLIIHUHQWZRUNLQJFRQGLWLRQV
Ɣ2QYHKLFOHFOHDQLQJ7KHXQLWLVHTXLSSHGZLWKYDULRXVDGDSWHUVDQGFRXSOHUVWKDWIDFLOLWDWHFOHDQLQJ
on the injectors on vehicle.
Features
Ɣ$GRSWLQJWKHSRZHUIXOXOWUDVRQLFFOHDQLQJWHFKQRORJ\WKHHTXLSPHQWRIIHUVFRPSOHWHFOHDQLQJWRWKH
injectors.
Ɣ)XHOSUHVVXUHFRQWUROWKURXJKPLFURFRPSXWHURIIHUVVWDEOHSUHVVXUHFRQWURODQGODUJHDGMXVWDEOH
UDQJHZKLFKLVVXLWDEOHIRUDOO(*,YHKLFOHVDQGFDQKHOSWRDFKLHYHDXWRPDWLFFOHDQLQJDQGWHVWLQJRI
injectors.
Ɣ:LWKWKHKHOSRIPLFURFRPSXWHUFRQWURODQGGLJLWDOGLVSOD\WKHHTXLSPHQWPDNHVSRVVLEOHDXWRPDWLF
cleaning, testing injectors and real-time monitoring of the dynamic values.
Ɣ$XWRPDWLFIXHOGUDLQLQJWKURXJKSUHVHWSURJUDPVIRUVRPHWHVWLWHPV7HVWOLTXLGGHWHUJHQWFDQDOVR
be drained by pushing a button on the control panel after the test.
Ɣ$GRSWLQJKXPDQL]DWLRQGHVLJQFDQPDNHWKHV\VWHPSUHVVXUHIDVWUHVWRUHGWRWKHGHIDXOWYDOXHV
6SHFLILFDWLRQV
Working conditions:
Ɣ7HPSHUDWXUHa℃;
Ɣ5HODWLYHKXPLGLW\<
Ɣ,QWHQVLW\RIRXWHUPDJQHWLFILHOG<$P
Ɣ1RIODPHZLWKLQPHWHUV
Specifications:
Ɣ0DLQXQLWSRZHUVXSSO\$&9+]
Ɣ0DLQXQLWSRZHU:
Ɣ'LPHQVLRQRIPDLQXQLWFP[FP[FP
Ɣ8OWUDVRQLFFOHDQHUSRZHU:
Ɣ)XHOSUHVVXUHEDU
Ɣ6LPXODWHG530UDQJH~USP
Ɣ3XOVHZLGWK~PVVWHSPV
Ɣ8QLIRUPLW\6SUD\DELOLW\WHVWGXUDWLRQaPLQ
Ɣ/HDNDJHWHVWGXUDWLRQaPLQ
Ɣ,QMHFWLQJIORZWHVWGXUDWLRQaV
Ɣ$XWRPDWLFGUDLQV
Ɣ3UHVVXUHXQLW%DU3VL.SDPP+J.JFP
Ɣ'HOLYHU\GLPHQVLRQ[[PP
Ɣ'HOLYHU\:HLJKWNJ9DULHVDFFRUGLQJWRFRQILJXUDWLRQ
1

EN
Structure
Overview
7KH,QMHFWRU&OHDQHU7HVWHUVWUXFWXUHKDVEHHQVKRZQLQ)LJ
)LJ
A-Power socket & ON/OFF Switch & Fuse
For introduce AC power into the unit, and there’s a fuse socket, and a ON/OFF switch to turn on/off the
unit.
B-Control/display panel
All the data will be shown on this touch screen, and adjustment of parameter could be done by finger
tap. Refer to the Control Panel section for details
C-Control knob
Fast Navigation and control knob, turn left/right to switch between parameters and press to confirm.
D-Fuel filler port
)RUUHILOORIWHVWIXHO7KHIXHOUHVHUYRLUFDSDFLW\LVPODOZD\VUHIHUWRWKH)XHOOHYHOLQGLFDWRUZKLOH
refill.
E-Fuel level indicator
Note the fuel level at refilling, and before testing. The fuel level shall be checked at a regular basis,
always make sure the fuel level over MIN line, otherwise, pump faulty could be resulted.
F-Fuel drain port
If the fuel becomes dirty, drain the fuel, pour the fuel through a strainer and refill it back in from the Fuel
filler port.
G-Fuel supply hose
Used to introduce fuel to the Fuel distributor.
H- Fuel distributor assembly
Different type of fuel distributor assembly may come with the unit according to changes of hardware
configuration. The Fuel distributor assembly is used to distribute fuel into mounted injectors for testing.
I-Return fuel connector
Used for introduce return fuel from the vehicle at on-vehicle-testing function.
J-Sockets for pulse signal cable
6WDQGDORQH6RFNHWVIRULQMHFWRUGULYHVLJQDOQRWHWKHLQGH[RIWKHVLJQDOVRFNHW
Note: The illustrations in this manual may be slightly different from the actual product!
2

EN
Control Panel
All control of the unit is finished on a single touch LCD and a knob, which can be turned left/right to
select and press to confirm.
All explanation with a >>> means its a menu item.
All explanation with a * mark, means its editable, and a window as below would pop up while tap the
entry.
$'HFUHDVH%,QFUHDVH&'UDJXSWRLQFUHDVHDQGGUDJGRZQWRGHFUHDVH'$FWXDOYDOXH
Close the pop All control of the unit is finished on a single touch LCD and a knob, which can be turned
left/right to select and press to confirm. All explanation with a >>> means its a menu item.
E- All explanation with a * mark, means its editable, and a window as below would pop up while tap the
entry.up window
Main Screen
$&RQWURO.QRE%8OWUDVRQLF3XOVH'ULYHU!!!&8QLIRUPLW\6SUD\DELOLW\7HVW!!!'/HDNDJH7HVW!!!
(,QMHFWLQJ)ORZ7HVW!!!)$XWRPDWLF7HVW!!!*2Q9HKLFOH7HVW!!!+)XHO'UDLQ!!!,6HWWLQJ!!!
Ultrasonic Pulse Driver
$6WDWXV,FRQ%'XUDWLRQ&'UDLQ)XHO%XWWRQ'6WDUW6WRS%XWWRQ(5HWXUQWR0DLQ6FUHHQ
E
C
A%
A
%C D E
F*HI
A
%
C D E
3

EN
Uniformity/Spray-ability test
$6WDWXV,FRQ%3UHVVXUH,QGLFDWLRQ&530'3XOVH('XUDWLRQRIWKH7HVW),QMHFWRU,QGH[
PHDQVDOOLQMHFWRUVZKLOHaUHIHUWRVLJQDOVRFNHWWR*3UHVVXUH/HYHO+'UDLQ)XHO%XWWRQ
,6WDUW6WRSEXWWRQ-5HWXUQWR0DLQ6FUHHQ
Leakage test
$6WDWXV,FRQ%3UHVVXUH,QGLFDWLRQ&'XUDWLRQRIWKHWHVW'3UHVVXUH/HYHO('UDLQ)XHO%XWWRQ
)6WDUW6WRSEXWWRQ5HWXUQWR0DLQ6FUHHQ
Injecting flow test
$6WDWXV,FRQ%3UHVVXUH,QGLFDWLRQ&'XUDWLRQRIWKHWHVW'3UHVVXUH/HYHO('UDLQ)XHO%XWWRQ
)6WDUW6WRSEXWWRQ5HWXUQWR0DLQ6FUHHQ
Automatic Test
$6WDWXV,FRQ%3UHVVXUH,QGLFDWLRQ&0RGH'3UHVVXUH/HYHO(5306WDWXV)7LPH6WDPS
6WDWXV*,QMHFWLRQ&RXQWGRZQVWDWXV+'UDLQ)XHO%XWWRQ,6WDUW6WRS%XWWRQ-5HWXUQWR0DLQ
6FUHHQ
A
%
C
D
E
F*
H I -
A
%
C
D
E F *
A
C
D
E F *
%
A
C D
E
F
*
H I -
%
4

EN
Mode
On-Vehicle Test
$6WDWXV,FRQ%3UHVVXUH,QGLFDWLRQ&'XUDWLRQRIWKH7HVW'3UHVVXUH/HYHO('UDLQ)XHO%XWWRQ
)6WDUW6WRS%XWWRQ*5HWXUQWR0DLQ6FUHHQ
Fuel Drain
$6WDWXV,FRQ%'XUDWLRQ&6WDUW6WRS%XWWRQ'5HWXUQWR0DLQ6FUHHQ
Setting
$6WDWXV,FRQ%'HIDXOW530&'HIDXOW3XOVH''HIDXOW6SUD\WHVW'XUDWLRQ('HIDXOW/HDNDJH
'XUDWLRQ)'HIDXOW,QMHFWLQJ)ORZ'XUDWLRQ*'HIDXOW2Q9HKLFOH7HVWLQJ'XUDWLRQ+'HIDXOW3UHV-
VXUH/HYHO,'HIDXOWSUHVVXUH8QLW-6DYHWKHVHWWLQJ.'HFUHDVH6ZLWFKEDFN/,QFUHDVH6ZLWFK
IRUZDUG05HWXUQWR0DLQ6FUHHQ
Injecting for 8 seconds,
+DOWIRUVHFRQGV
'UDLQVHFRQGV
,QMHFWLQJIRUWLPHVDWUSPPV
+DOWIRUVHFRQGV
'UDLQVHFRQGV
,QMHFWLQJIRUWLPHVDWUSPPV
+DOWIRUVHFRQGV
'UDLQVHFRQGV
0RGH
0RGH
0RGH
ZRUNLQJF\FOHV USPUSPVWHSUSPDWHYHU\FKHFNSRLQWLQMHFWWLPHVUHVSHFWLYHDW'XW\5DWLR
DQG
+DOWIRUVHFRQGV
'UDLQVHFRQGV
0RGH0RGHRQHZRUNLQJF\FOH
A
C
D
EF*
%
A
C D
%
A
%
C
D
E
F
*
H
I
ML.-
The setting page is used to
setup the default value while
the unit every time start up.
5

EN
Installation
Ɣ0RYHWKHPDFKLQHRQWRWKHZRUNEHQFKDIWHUXQSDFNLQJDQGORRVHQWKHVWULSVRQWKHRXWOHWKRVHV
Ɣ0RXQWWKHSXOVHVLJQDOFDEOHVRQWRWKHVRFNHWVRQWKHWRSULJKWVLGHRIWKHPDFKLQH
Ɣ7DNHWKHWZRDGMXVWLQJEROWVRXWIURPWKHNLWDQGLQVWDOOWKHPWRWKHSUHVVSODWHRQWKHWRSRIWKH
glass tube.
Ɣ7DNHWKHWZRNQXUOHGQXWVIURPWKHNLWDQGLQVWDOOWKHPRQWKHDGMXVWLQJEROWV
Ɣ7DNHWKHIXHOGLVWULEXWRUIURPWKHNLWDQGLQVWDOOLWRQWKHNQXUOHGQXWVDQGWLJKWHQWKHPZLWKWKH
pressing bolts.
Ɣ7DNHWKHSRZHUFDEOHVRXWIURPWKHNLWDQGLQVHUWLWLQWRWKHLQSXWVRFNHWDWWKHERWWRPRIWKHXQLW
Ɣ7DNHWKHSRZHUFDEOHVRXWIURPWKHNLWDQGLQVHUWLWLQWRWKHLQSXWVRFNHWRIWKHXOWUDVRQLFFOHDQHU
Operating Procedures
Preparation
Ɣ5HPRYHWKHLQMHFWRUIURPWKHYHKLFOHHQJLQHWRFKHFNWKHRULQJVIRUGDPDJH5HSODFHWKHGDP-
aged O-ring with another same type O-ring to avoid leakage during testing. Put the outside of injectors
in gasoline or detergent, and wipe them with soft cloth after cleaning the outside oil sludge carefully.
Ɣ&KHFNWKHOLTXLGOHYHODQGUHILOOWHVWOLTXLGZKHQQHFHVVDU\)LOOWKHWHVWOLTXLGWKURXJKWKHILOOHURQWKH
side of the unit and observe the liquid level in the fuel level viewer.Do NOT exceeding the Max line.
Ɣ7XUQRQWKHSRZHUVZLWFKRQWKHOHIWVLGHRIWKH&DELQHW
Ɣ)LOOXOWUDVRQLFGHWHUJHQWLQWRWKHXOWUDVRQLFFOHDQLQJODXQGHUVRWKDWWKHQHHGOHYDOYHRIWKHLQMHFWRU
is covered by the detergent.
Ɣ&RQQHFWWKHLQMHFWRUVZLWKWKHFRUUHFWFRXSOHUV
Note:
Test liquid and detergent won’t be provided by the manufacturer.
Cleaning & testing sequences
A complete cleaning and testing sequence shown below should be followed:
Ɣ8OWUDVRQLFFOHDQLQJ
Ɣ8QLIRUPLW\6SUD\DELOLW\WHVW
Ɣ/HDNDJHWHVW
Ɣ,QMHFWLQJIORZWHVW
Ɣ$XWRPDWLFWHVW
6HOHFWWKHFRUUHVSRQGLQJSDUDPHWHUDQGVHWXSDFFRUGLQJIRUYDULRXVWHVWV)RUGHWDLOHGRSHUDWLRQV
please refer to Operation and Control Panel section.
Tidy up after operating
Tidy-up should be done after cleaning and testing is completed:
Ɣ3UHVV>'UDLQ@EXWWRQWRGUDLQWKHWHVWOLTXLGLQWRIXHOWDQN
Ɣ6ZLWFKRIIWKHSRZHU
Ɣ'UDLQWKHLQMHFWRUGHWHUJHQWWRLWVRULJLQDOERWWOHDQGWKHQZLSHWKHXOWUDVRQLFFOHDQHUZLWKVRIWFORWK
Ɣ&OHDQWKH,QMHFWRU&OHDQHU7HVWHUFRQWUROSDQHOZLWKVRIWFORWK
Ɣ'UDLQWKHWHVWOLTXLGIURPWKHWDQNLQWRDFRQWDLQHUWRDYRLGYRODWLOL]DWLRQ6WRUHWKHWHVWOLTXLGLQD
safe place if it can be used again, or dispose of it in accordance with relevant regulations if it is too dirty.
6

EN
Operation
Ultrasonic Cleaning
Injector Cleaner takes advantage of the penetrability and cavitation impact wave caused by ultrasonic
wave traveling through the medium to provide powerful cleaning on objects with complex shapes,
cavities and pores, so that the stubborn carbon deposits can be removed from the injectors.
Procedures
ƔConnect the power supply: connect one end of the power cable to the power socket on ultrasonic
cleaner and the other end to power socket.
ƔPlace the injectors which have gone through surface cleaning in a launder.
Ɣ$GGHQRXJKLQMHFWRUGHWHUJHQWLQWRXOWUDVRQLFFOHDQHUVRWKDWWKHOLTXLGOHYHOLVDERXWPPDERYH
the needle valve of injectors.
ƔPlug the injector pulse signal wires to injectors respectively then turn on the power switch of the
ultrasonic cleaner.
Ɣ7DS8OWUDVRQLFFOHDQLQJ!LFRQRQWKHPDLQVFUHHQ7DSWKHWLPHWRVHWWKHWLPHUaPLQDQG
minutes by default) then tap the <Run> button.
Ɣ:KHQWKHWLPHLVXS,QMHFWRU&OHDQHU7HVWHUZLOOVWRSDXWRPDWLFDOO\
ƔTurn off the power of the ultrasonic cleaner, take the injectors out of the launder and wipe them with
a dry soft cloth. And they are ready for next operation.
Note:
ƔNever operation the ultrasonic cleaner when the tank’s empty, otherwise, damage may be incurred.
ƔDo not dip the pulse signal cables plug and the injector’s body into the detergent.
Uniformity/Spray-ability Test
Uniformity test is to find out if the flow of different injectors meets the requirement or specifications under
the same working condition. This test can reflect the comprehensive influences on the injector caused
E\HOHFWULFDOQDWXUHERUHYDULDWLRQDQGFORJJLQJ6SUD\DELOLW\WHVWLVWRLQVSHFWWKHVSUD\LQJSHUIRUPDQFH
by observing the injectors.
Installing and testing procedures for top-supply injectors
Ɣ&KRRVHWKHIXHOGLVWULEXWRUVWRSSHUIURPWKHFRXSOHUER[DQGPRXQWDSURSHU2ULQJRQLW
5HPHPEHUWRDSSO\DOLWWOHOXEULFDWLQJJUHDVHRQWKH2ULQJ0RXQWWKHIXHOGLVWULEXWRUVWRSSHURQWR
the top-supply fuel distributor.
Ɣ0RXQWWKHFUHVFHQWSODWHDQGWLJKWHQLWZLWKDSODWHEROW
Ɣ&KRRVHDSURSHUDGDSWRUDFFRUGLQJWRWKHLQMHFWRUW\SHDQGPRXQWLWWRWKHFRUUHVSRQGLQJ
coupler under the top-supply fuel distributor.
ƔInstall the injectors in forward direction (Apply a little lubricating grease on the O-ring.)
ƔInstall the top-supply fuel distributor and the injector on the fuel distributor supporter with a proper
DGMXVWDEOHVFUHZDQGNQXUOHGQXWVDQGWLJKWHQWZRULIIOHVFUHZVEODFN6HH)LJ
ƔConnect the injector pulse signal wire.
Ɣ%HIRUHGRLQJWKLVWHVWWDS'UDLQ!EXWWRQWRGUDLQWKHWHVWOLTXLGIURPWKHPHDVXULQJWXEHLIWKHUHLV
any.
Ɣ7DS8QLIRUPLW\6SUD\DELOLW\WHVW!LFRQRQWKHFRQWUROSDQHOVHWFRUUHVSRQGLQJSDUDPHWHUVFRQVXOW
the appendix for pressure setting, consult vehicle manuals for other parameters as needed), and then
press <Run> button to start the test.
Ɣ:KHQWKHWHVWLVFRPSOHWHGWKHHTXLSPHQWZLOODXWRVWRSZLWKWKHULQJRIWKHEX]]HU
7

)LJ)RUIXHOWRSVXSSO\LQMHFWRU
3ODWHEROW5LIIOHVFUHZ&UHVFHQWSODWH)XHOGLVWULEXWRUVWRSSHU$GDSWHUIRUIXHOWRSVXSSO\
LQMHFWRU,QMHFWRU.QXUOHGQXW$GMXVWDEOHVFUHZ
Installing and testing procedures for side-supply injectors<while parts are available>
Ɣ&KRRVHSURSHUFRXSOHUVIRUVLGHVXSSO\LQMHFWRUVDQGSURSHU2ULQJVDQGPRXQWWKHPWRJHWKHU
(Remember to apply a little lubricating grease.)
Ɣ0RXQWWKHLQMHFWRUVRQWKHFRXSOHUVDQGLQVWDOOWKHPRQWRWKHVLGHVXSSO\IXHOGLVWULEXWRU
Ɣ0RXQWWKHFURVVSODWHDQGWLJKWHQLWZLWKEROWV
Ɣ0RXQWWKHIXHOGLVWULEXWRUDQGLQMHFWRUVRQWRWKHIXHOGLVWULEXWRUVXSSRUWHUDQGWLJKWHQWKHPZLWKWZR
ULIIOHVFUHZVEODFN6HH)LJ
Ɣ&RQQHFWWKHLQMHFWRUSXOVHVLJQDOZLUH
Ɣ%HIRUHGRLQJWKLVWHVWWDS'UDLQ!EXWWRQWRGUDLQWKHWHVWOLTXLGIURPWKHPHDVXULQJFXSLIWKHUHLV
any.
Ɣ7DS8QLIRUPLW\6SUD\DELOLW\WHVW!RQWKHFRQWUROSDQHOVHWWKHFRUUHVSRQGLQJSDUDPHWHUVDQGWDS
<Run> button to start the testing.
Ɣ:KHQWKHWHVWLQJLVILQLVKHG,QMHFWRU&OHDQHU7HVWHUZLOOVWRS
)LJ
&URVVSODWH)XHOVLGHVXSSO\LQMHFWRU&RXSOHUIRUIXHOVLGHVXSSO\LQMHFWRU2ULQJ
6LGHVXSSO\IXHOGLVWULEXWRU。
Note:
Ɣ:KLOHWHVWLQJ,QMHFWRU&OHDQHU7HVWHUFDQGUDLQIXHOE\WDS'UDLQ!NH\DWDQ\WLPH$WGHIDXOW
VROHQRLGYDOYHLVVHWDWWKHFORVHGVWDWH8QLIRUPLW\WHVWFDQEHGRQHDWWKLVVWDWH:KHQGUDLQ!NH\LV
SUHVVHGVROHQRLGYDOYHZLOOGUDLQRLOIRUVHFRQGV
Ɣ7KHGHIDXOWF\OLQGHUQXPEHURIWKHV\VWHPLVZKLFKPHDQVWKDWDOOLQMHFWRUVDUHZRUNLQJZKHQ
Injector Cleaner & Tester is running. A specific cylinder can be selected by setting the number of the
cylinder.
Ɣ7KH6\VWHP3UHVVXUH5303XOVHFDQEHDGMXVWHGGXULQJWHVWLQJ
EN
8

Ɣ.HHSWKHIXHOOHYHOWRDWOHDVWPOZKLOHWHVWLQJ)RDPZLOOEHSURGXFHGLQWKHOLTXLGGXULQJLQMHF-
tion. In order to prevent spillover, set the related parameter with reference to the following formula :Pulse
ZLGWKPVîWLPHVîVSHHGUSP
Ɣ7KLVIXQFWLRQLVIRUFKHFNLQJWKHXQLIRUPLW\RIHDFKF\OLQGHU,QMHFWLQJGLIIHUHQFHRIDOOLQMHFWRUVRQ
RQHYHKLFOHVKRXOGEHNHSWZLWKLQGXULQJXQLIRUPLW\WHVWLQJ
Reverse flush
Injector Cleaner & Tester can also perform reverse flush by connecting with flush-back adaptor at
>8QLIRUPLW\6SUD\DELOLW\WHVW@PRGH5HYHUVHIOXVKLVDZD\WRFOHDQWKHLQMHFWRUVZLWKWKHWHVWOLTXLG
flowing from the outlet to the inlet of the injector. Reverse flush may remove the dirt inside the injector or
WKHLQMHFWRU6WUDLQHU2QO\IRUWKHWRSIXHOVXSSO\LQMHFWRU
Procedures:
Ɣ&KRRVHDUHYHUVHIOXVKFRXSOHUDQGSURSHU2ULQJDQGPRXQWWKHPXQGHUWKHIXHOGLVWULEXWRU
Ɣ,QVWDOOWKHLQMHFWRUVLQUHYHUVHGLUHFWLRQRXWOHWXSZDUGDQGLQOHWGRZQZDUG
Ɣ&KRRVHDSURSHUFRXSOHUDFFRUGLQJWRWKHVKDSHRIWKHLQMHFWRUDQGSXWLWXQGHUWKHLQMHFWRU
Ɣ,QVWDOOWKHIXHOGLVWULEXWRUDQGWKHLQMHFWRURQWKHIXHOGLVWULEXWRUVXSSRUWHUZLWKDSURSHUDGMXVWDEOH
VFUHZDQGNQXUOHGQXWVDQGWLJKWHQWZRULIIOHVFUHZVEODFN6HH)LJ
Ɣ&RQQHFWWKHLQMHFWRUSXOVHVLJQDOZLUH
Ɣ7DS,QMHFWLQJ)ORZ7HVW!LFRQDQGWDS>5XQ@EXWWRQWRVWDUWFOHDQLQJ
Ɣ:KHQWKHFOHDQLQJLVRYHU,QMHFWRU&OHDQHU7HVWHUZLOODXWRPDWLFDOO\VWRS
Note:
Ɣ7KHV\VWHPSUHVVXUHFDQEHDGMXVWHGZKHQSHUIRUPLQJUHYHUVHIOXVK
Ɣ,WLVDGYLVHGWRWDS'UDLQ!NH\WRDYRLGVSLOORYHURIWHVWOLTXLGGXULQJUHYHUVHIOXVK
)LJ
3ODWHEROW&UHVFHQWSODWH)XHOGLVWULEXWRUVWRSSHU5HYHUVHDGDSWRU,QMHFWRU.QXUOHGQXW
$GMXVWDEOHVFUHZ5LIIOHVFUHZ2ULQJ)XHOGLVWULEXWRU2ULQJ&RXSOHUV
Leakage Test
Leakage test is to inspect the sealing conditions of the injector needle valve under system pressure and
to find out if the injector is dribbling.
Procedures (For installation refer to Uniformity/Sprayability Test):
Ɣ%HIRUHGRLQJOHDNDJHWHVWSOHDVHSUHVV>'UDLQ@EXWWRQWRGUDLQWKHUXGLPHQWDOUHVLGXDOWHVWOLTXLG
from the measuring cup.
Ɣ6HOHFW/HDNDJHWHVW!LFRQRQWKHPDLQVFUHHQWDS5XQ!NH\WKHPDFKLQHZLOOZRUN$WWKLVWLPH
the system pressure can be adjusted to observe dribbling from the injector, the pressure is adjusted
SUHIHUDEO\KLJKHUWKDQPDQXIDFWXUHU¶VVSHFLILFDWLRQV
Ɣ:KHQWKHWHVWLVRYHUWKHHTXLSPHQWZLOODXWRPDWLFDOO\VWRS
1RWH,QJHQHUDOWKHGULSRIWKHLQMHFWRUVKRXOGEHOHVVWKDQGURSZLWKLQPLQXWHRULQDFFRUGDQFHZLWK
WKHVSHFLILFDWLRQV7KHGHIDXOWWLPHRIWKHV\VWHPLVPLQXWH
EN
9

No. of cylinders
DERXWaPO
Amount
F\OLQGHU F\OLQGHU
DERXWPO
EN
Injecting Flow Test
,QMHFWLQJIORZWHVWLVWRFKHFNLIWKHLQMHFWLQJIORZLQVHFRQGVPHHWVWKHVSHFLILFDWLRQVIRULQMHFWLQJ
amount. The deviation reflects the wear or clogging in the injector, instead of electrical parameter
variation.
Procedures (For installation refer to Uniformity/Sprayability Test):
Ɣ%HIRUHWKLVWHVWWDS'UDLQ!EXWWRQWRGUDLQWKHWHVWOLTXLGIURPWKHPHDVXULQJWXEHLIWKHUHLVDQ\
ƔTap <Injecting flow test> icon on the main screen, and tap <Run> button to start the test. Adjust the
fuel pressure according to the injector specification.
Ɣ:KHQWKHWHVWLVRYHU,QMHFWRU&OHDQHU7HVWHUZLOOVWRS
Automatic Test
$XWRPDWLF7HVWFRQWDLQVDOODERYHPHQWLRQHGWHVWVVHFRQGLQMHFWLQJWHVWLGOHVSHHGPLGGOHVSHHG
high speed, varying acceleration, varying deceleration, changing pulse width test). This function can test
more comprehensive performance of injectors by simulating the various engine working conditions.
Procedures (For installation refer to Uniformity/Sprayability Test):
Ɣ%HIRUHWKHWHVWWDS'UDLQ!EXWWRQWRGUDLQDOOWKHWHVWOLTXLGLQWKHPHDVXULQJFXSVLIWKHUHLVDQ\
Ɣ7DS$XWRPDWLF7HVW!PRGHRQWKH0DLQ6FUHHQDQGVHWXSWKHSUHVVXUHYDOXHDFFRUGLQJWRWKH
LQMHFWRUVSHFLILFDWLRQVVHOHFWWKHWHVWPRGHPRGHRUDUHDOODYDLODEOHDQGWKHQWDS5XQ!
button to start the test.
ƔAdjust the fuel pressure when testin.
Ɣ:KHQWKHWHVWLVRYHU,QMHFWRU&OHDQHU7HVWHUZLOOVWRS
Note: Please refer to the Control Panel section for Mode explanation.
On-Vehicle Cleaning
ƔPlease check if there is test liquid or detergent inside the fuel tank before on-vehicle cleaning. If
test liquid is in the tank, replace it with detergent. The detailed procedure to be followed: remove the
level indicator on the left of the main unit, and drain the test liquid inside fuel tank into a container. If the
drained test liquid contains lots of impurities and can not be reused, please dispose it in the proper way
and fill with new test liquid. If the drained test liquid is clean, please store it for later using.
Ɣ%OHQGWKHGHWHUJHQWZLWKWKHIXHODWDFHUWDLQUDWLRDQGILOOWKHPL[WXUHLQWRWKHIXHOWDQN&RQVXOWWKH
user’s manual of detergent for blending ratio.) Refer to the following table for filling amount, as shown in
the following table:
ƔThe connection of engine fuel pipes has been shown in “Connecting” below.
ƔTap <On-vehicle cleaning> icon on the control panel, and set the time and tap <Run> button to start
the test, and then start the engine with park gear applies.
ƔRefer to specifications required by various vehicle types to adjust system pressure.
)LJ
)XHOUHWXUQFRQQHFWRU)XHOUHWXUQKRVHIURPHQJLQH)XHOLnlet hose to engine.
10

Connecting
7KHKRVHOLQHFRQQHFWLRQRIWKHHQJLQHZLWKUHWXUQKRVHLVVKRZQDVLQ)LJ
ƔDisconnect the connections of fuel supply hoses (C、D) and fuel return hoses (A、%RIWKHHQJLQH
fuel system (wrap the connector with towel when disconnecting the connector). Choose proper connec-
WRUVDQGFRQQHFWWKHPWRWKH%HQGDQG&HQGVHSDUDWHO\DQGWKHQFRQQHFWWKHRWKHUHQGVWRFRUUH-
VSRQGLQJUHWXUQKRVHDQGRXWOHWKRVHRIWKHXQLW6HH)LJ
ƔConnect the disconnected other ends (A、D) with proper hose, or remove the fuel pump fuse, or
disconnect the power cable of engine fuel pump.
)LJ
,QMHFWRU&OHDQHU7HVWHU(QJLQH)XHOUHWXUQKRVHIURPHQJLQH)XHOLQOHWKRVHWRHQJLQH
$XWRILOWHU(QJLQHIXHOVXSSO\KRVH(QJLQHIXHOUHWXUQKRVH$XWRIXHOSXPS$XWRWDQN.
Without return hose connecting:
7KHKRVHOLQHFRQQHFWLRQRIWKHHQJLQHZLWKRXWUHWXUQKRVHLVVKRZQDVLQ)LJ
ƔDisconnect the fuel supply hoses (E, F) of engine fuel system (wrap the connector when discon-
necting the connector), and then choose a proper connector and connect it to the E end. Reconnect the
IXHORXWOHWKRVHRIWKHXQLWZHOODQGPDNHWKHIXHOUHWXUQKRVHKDQJLQJ6HH)LJ
Ɣ6WRSWKHRWKHUHQGRIWKHGLVFRQQHFWHGHQG)ZLWKDSURSHUVWRSSHUXVHZKHQWKHIXHOSXPSKDV
the fuel return function only) or remove the fuse of fuel pump or disconnect the power cable of fuel
pump.
)LJ
,QMHFWRU&OHDQHU7HVWHU(QJLQHVWRSSHU)XHOLQOHWKRVHWRHQJLQH$XWRWDQN$XWRILOWHU
(QJLQHIXHOVXSSO\KRVH$XWRIXHOSXPS
Note:
:KHQFOHDQLQJFDUHPXVWEHWDNHQDVWKHGHWHUJHQWLVLQIODPPDEOH3UHSDUHIRUDILUHH[WLQJXLVKHU
%HVXUHWKDWDOOKRVHOLQHVDUHZHOOFRQQHFWHGDQGWKHUHLVQROHDNDJHRQWKHKRVHOLQHVEHIRUH
performing cleaning.
EN
11

Appendix 1: Pressure Gauge of Injection System
TOYOTA
TOYOTA 3.0 0.284
PREVIA 0.27—0.33
LEXUS 300 400 0.265—0.304
CAMRY 3.0 0.265—0.304
LAND CRUISER 0.30
COROLLA 0.27—0.31
HONDA
ACCORD 2.0 2.2 0.285
CIVIC 1.5L 0.255—0.285
LEGEND 3.2L 0.27—0.304
NISSAN
BLUE BIRD 0.25
MAXIMA 0.25
300EX 0.206—0.255
MITSUBISHI V63000 0.35
MAZDA
323 0.20—0.22
626 0.25—0.29
929 0.25—0.29
BMW 528 0.27—0.29
GM
BUICK CENTURY 0.29—0.33
BUICK PARK AVENUE 0.29—0.33
CADILLAC 5.7 0.29—0.33
LUMINA 0.23—0.30
CORSICA 0.25—0.30
FORD
TEMPO 2.3L 0.28
LINCOLN TOWN 0.206—0.308
CHRYSLER
CHEROKEE 213 0.273
DODGE 3.3L
DODGE CARAVAN 0.337
HYUNDAI SONATA 0.265—0.275
DAEWOO DAEWOO 0.28—0.30
AUDI
6 CYLINDER 0.24—0.27
5, 4 CYLINDER 0.45—0.50
VOLKSWAGEN JETTA 0.27—0.29
VOLVO VOLVO 0.23—0.30
EN
COMPANY MODEL 6<67(035(6685(03D
12
Table of contents
Other AU Tool Test Equipment manuals
AU Tool
AU Tool CT500 User manual
AU Tool
AU Tool LM708 User manual
AU Tool
AU Tool BST-100 User manual
AU Tool
AU Tool BT160 User manual
AU Tool
AU Tool BT 260 User manual
AU Tool
AU Tool BT760 User manual
AU Tool
AU Tool BT70 User manual
AU Tool
AU Tool BST-100 User manual
AU Tool
AU Tool BT460 User manual
AU Tool
AU Tool SPT101 User manual
