manuals.online logo
Brands
  1. Home
  2. •
  3. Brands
  4. •
  5. Auber Instruments
  6. •
  7. Controllers
  8. •
  9. Auber Instruments SYL-53 2P Series User manual

Auber Instruments SYL-53 2P Series User manual

AUBER INSTRUMENTS WWW.AUBERINS.COM
2020.10 P1/2
SYL-53X2P(A) USB PID Controller Quick Guide
Version 1.5 (Oct, 2020)
Caution
•This controller is intended to control equipment under normal operating
conditions. Failure or malfunction of the controller may lead to abnormal
operating conditions, which result in personal injury or damage to the
equipment or other property. Devices (limit or safety controls) or systems
(alarm or supervisory) intended to warn of or protect against failure or
malfunction of the controller must be incorporated into and maintained as part
of the control system.
•This controller carries a 90-day warranty. This warranty is limited to the
controller only.
1. Terminal wiring
1
2
3
13 14 6
7
8
9
10
4
5
AL2
AC
85~240V
SSR
+
-
R
R
W
TC
-
+
11 12
RTD
RS485
A+ B-
AL1
SYL-
5352PA
1
2
3
13 14 6
7
8
9
10
4
5
AL2
AC
85~240V
R
R
W
TC
-
+
11 12
RTD
RS485
A+ B-
AL1
SYL-
5342P
Out
Figure 1. Wiring terminals of SYL-5352PA & SYL-5342PA.
2. USB adapter wiring (IMPORTANT!)
Locate the pin A and B on the back of the USB adapter.
Use the included 2-lead cable to connect terminal 11 (A) on the PID to A mark
on USB adapter, and connect terminal 12 (B) on the PID to B mark on USB
adapter. Recommend to use yellow wire to connect between two A pins, and
use silver wire to connect between two B pins.
Please note, USB cable on terminal 11 & 12 must be secured and isolated
from the power input cable on terminal 9 & 10. Otherwise high voltage AC
power from the power input cable may damage your USB adapter and/or
your computer.
3. Operation tips:
Program Start/Resume: Press and hold UP key for 2s, A-M indicator will be
solid ON.
Program HOLD: Press and hold UP key for 2s, display will flash HOLD and A-
M indicator will be flashing.
Program STOP: Press and hold SET and A/M key together for 3s, you will see
SEC on the top. Press SET key 4 times momentarily, and you will see RUN on
the top. Use UP and DOWN keys to change its value to 1. Press SET key again
to confirm. Leave the PID for couple seconds and it will exit automatically.
Program STOP and go back to step 1 (SYL-5342PA & SYL-5352PA or newer
models): Press and hold DOWN arrow key for about 3s, the lower display
window will show “stop”. The program is stopped and jumped back to step 1.
Program STOP and go back to step 1: Press and hold SET and A/M key
together for 3s, to enter menu, then change both RUN and Pro back to 1.
4. Recommended settings:
This controller has two layers of menus. One menu is for parameters, another
menu for step programming and step control parameters.
Press and hold SET key for 3s to enter parameter setting menu. Then press SET
key momentarily to confirm and go to next parameter. See all its parameters in
its complete manual below. Here are recommended changes on the setting:
P = 100: By default, P=0 for ON/OFF mode (like thermostat). For PID mode,
please change P parameter to 100 (recommended value). If you don’t have good
control result, please run auto-tune.
T = 2 or 20: T is output cycle time. For SSR output controller (SYL-5352PA),
please change T to 2s. For relay output (SYL-5342PA), please change T to 20s.
dP = 0: dP is for display decimal point. If you don’t need 0.1 degree accuracy,
change dP to 0 and it will show integral number only.
CF = F: Change temperature display unit to Fahrenheit. Default is Celsius.
PuH = 2500: PuH decides the maximum display temp. Default is 1300 degree,
may not good for high temp application like kiln.
Press and hold SET key and A/M key together for 3s to enter step programming
setting. Here are recommended changes on the setting:
Instruction Manual
AUBER INSTRUMENTS WWW.AUBERINS.COM
2020.10 P2/2
LOOP = 0: By default, program looping is enabled. To disable program looping,
change LOOP to 0.
RUN = 3: By default, this controller is under single step mode. To use ramp soak
feature, set RUN to 3.
5. Wiring and programming example: powder coating/heat treatment oven
An oven needs to heat up to 375° F from ambient in 5 minutes. Then hold the
temperature for 20 minutes. After that, pull in the AL2 relay for 2 minutes. If the
temperature is higher than 450° F, trigger the AL1 relay. This application needs
a controller, a relay/SSR, a thermocouple and a two buzzers with a 12V DC
power source.
a. Wiring
L2
TC
+
-
113 14 6
2
3
4
5
7
8
9
10
L1
240V AC
Heater
SYL-
5352PA
Alarm1
12V
DC
Alarm2
SSR
+
SYL-5352PA with Solid State Relay solution
L2
Contactor
TC
+
-
113 14 6
2
3
4
5
7
8
9
10
L1
240V AC
Heater
Alarm1
12V
DC
Alarm2
SYL-5342PA
SYL-5342PA with 40A contactor solution
b. Parameter setting and program
SSb = 5. Safety start band is set to 5 degree.
LOOP = 0. Program automatically looping is disabled.
ALP = 1. Alarm 1 is set to absolute high alarm.
AL1 = 450. Alarm 1 will be activated when reading temperature is over 450
AL2 = 120. Program ending alarm is set to 120s. Once all the steps have been
executed, alarm 2 will be activated for 120s.
T = 2 or 20. Set cycle time to 2s for SYL-5352PA, and set 20s for SYL-5342PA.
The program:
r01 = 2000, t01 = 0, C01 = 80. Initial step. r01 must be 2000. C01(80F) is ambient
temperature.
r02 = 5, t02 = 20, C02 = 375. Ramp up from 80 to 375 in 5 minutes, then soak
at 375 for 20 minutes.
r03 = 0, t03 = 0, C03 = 0. End of the program. Change all three parameters to 0.
Quick explanation: Cxx is end temperature of that step. rxx is the ramp step timer,
txx is the soak step timer. Every step, controller will run ramp up step at first,
then run soak step.
6. Windows Communication software notes:
1). Default login password is: admin
2). After you login, for first timer user, please click “Auto Select” on the right top of the
screen. Click “Detect” button on the right, then this software will automatically scan your
connected PID controller. Once finished, you will see SYL-53X2P-S is detected (if you PID
model is SYL-5342P-S/SYL-5342PA/SYL-5352P-S/SYL-5352PA). Then click “Apply”
button. If your software cannot detect this PID, please confirm your computer has the
correct driver for this USB adapter (see note in the software zip file) and check the
continuity between your adapter and your PID by using a multimeter.
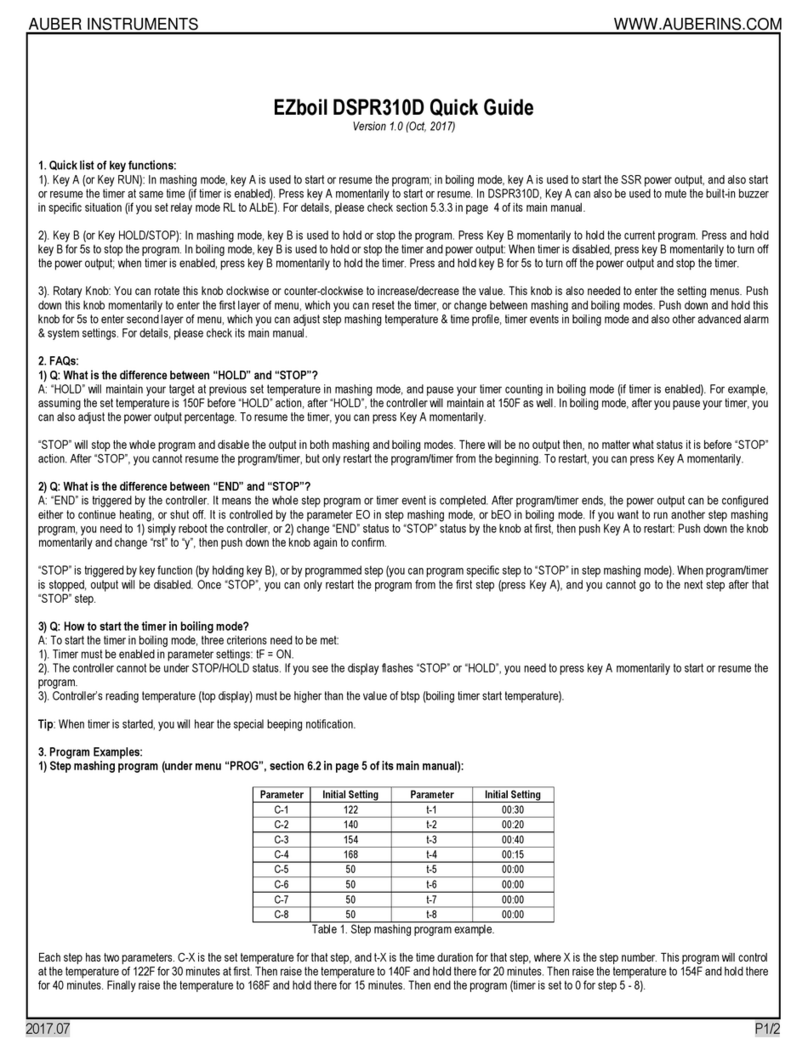
3). You will see the screenshot information above under “Panel View” on the left top. Click
SET button and you can change all the parameters. If you want to change multiple
parameters, please click “Tab View” button on the top. Then right click the number showing
on the right.
4). Click “Start monitor” on the top and you will see temperature chart under “Graph View”.
5). Click “Record” on the top and you can use “Report” or “Backup” / ”Restore” functions
later.
6). To edit ramp soak profiles, click “Program” button on the right top.
7. Manual & Download
Operation Manual (Full Version):
SYL-5352PA:
https://bit.ly/5352pmanual
Or scan the following QR code by
your smartphone:
Operation Manual (Full Version):
SYL-5342PA:
https://bit.ly/5342pmanual
Or scan the following QR code by
your smartphone:
Win Software Download Link:
https://bit.ly/AuberPIDWin
Or scan the following QR code by
your smartphone:
Auber Instruments
5755 North Point Parkway, Suite 99
Alpharetta, GA 30022
www.auberins.com
Email: [email protected]
Tech Support: 770-569-8420
Copyright 2007-2020, Auber Instruments Inc.
All Rights Reserved.
No part of this manual shall be copied,
reproduced, or transmitted in any way without
the prior, written consent of Auber
Instruments. Auber Instruments retains the
exclusive rights to all information included in
this document.

This manual suits for next models

3

Other Auber Instruments Controllers manuals

Auber Instruments EZboil DSPR120 User manual

Auber Instruments

Auber Instruments EZboil DSPR120 User manual

Auber Instruments HD330 User manual

Auber Instruments

Auber Instruments HD330 User manual

Auber Instruments Auberins KIT-GGP User manual

Auber Instruments

Auber Instruments Auberins KIT-GGP User manual

Auber Instruments EZboil DSPR310D User manual

Auber Instruments

Auber Instruments EZboil DSPR310D User manual

Auber Instruments EZboil DSPR320 User manual

Auber Instruments

Auber Instruments EZboil DSPR320 User manual

Auber Instruments AUB6500 User manual

Auber Instruments

Auber Instruments AUB6500 User manual

Auber Instruments KIT-Cube5E User manual

Auber Instruments

Auber Instruments KIT-Cube5E User manual

Auber Instruments WS-1500EPM Administrator Guide

Auber Instruments

Auber Instruments WS-1500EPM Administrator Guide

Auber Instruments HD220 User manual

Auber Instruments

Auber Instruments HD220 User manual

Auber Instruments SYL-2381-SSR User manual

Auber Instruments

Auber Instruments SYL-2381-SSR User manual

Auber Instruments EZboil DSPR310D User manual

Auber Instruments

Auber Instruments EZboil DSPR310D User manual

Auber Instruments SYL-2362B User manual

Auber Instruments

Auber Instruments SYL-2362B User manual

Auber Instruments WS-1500A Administrator Guide

Auber Instruments

Auber Instruments WS-1500A Administrator Guide

Auber Instruments SYL-3615 User manual

Auber Instruments

Auber Instruments SYL-3615 User manual

Auber Instruments AW-SYL-2352 User manual

Auber Instruments

Auber Instruments AW-SYL-2352 User manual

Auber Instruments DSPR400 User manual

Auber Instruments

Auber Instruments DSPR400 User manual

Auber Instruments DSPR300 User manual

Auber Instruments

Auber Instruments DSPR300 User manual

Auber Instruments HD220-W Instructions and recipes

Auber Instruments

Auber Instruments HD220-W Instructions and recipes

Auber Instruments SYL-2615 User manual

Auber Instruments

Auber Instruments SYL-2615 User manual

Auber Instruments EZboil DSPR310 User manual

Auber Instruments

Auber Instruments EZboil DSPR310 User manual

Auber Instruments KIT-CUBE2S User manual

Auber Instruments

Auber Instruments KIT-CUBE2S User manual

Auber Instruments TH220A User manual

Auber Instruments

Auber Instruments TH220A User manual

Auber Instruments Cube 5E User manual

Auber Instruments

Auber Instruments Cube 5E User manual

Auber Instruments KIT-RSPb User manual

Auber Instruments

Auber Instruments KIT-RSPb User manual

Popular Controllers manuals by other brands

ATEN PE4104AJ user manual

ATEN

ATEN PE4104AJ user manual

Allen-Bradley Micro800 installation instructions

Allen-Bradley

Allen-Bradley Micro800 installation instructions

ATTACK SQ-1 installation instructions

ATTACK

ATTACK SQ-1 installation instructions

Vacon 100X series marine installation guide

Vacon

Vacon 100X series marine installation guide

YOKOGAWA UT321 user manual

YOKOGAWA

YOKOGAWA UT321 user manual

TECSYSTEM NT935 instruction manual

TECSYSTEM

TECSYSTEM NT935 instruction manual

Baldor NextMove ES installation manual

Baldor

Baldor NextMove ES installation manual

BFT SP 3500 NSTALLATION AND USER'S MANUAL

BFT

BFT SP 3500 NSTALLATION AND USER'S MANUAL

Cascade TFC owner's manual

Cascade

Cascade TFC owner's manual

Salus EP310 installation manual

Salus

Salus EP310 installation manual

AUMA SQ 05.2 Operation instructions

AUMA

AUMA SQ 05.2 Operation instructions

Kohler APM303 user manual

Kohler

Kohler APM303 user manual

SGM TLD-612A user manual

SGM

SGM TLD-612A user manual

Vicon RS-232 instruction manual

Vicon

Vicon RS-232 instruction manual

MR TAPCON 250 Supplement

MR

MR TAPCON 250 Supplement

Reefe RPC22HM Operation Guide & Instruction Manual

Reefe

Reefe RPC22HM Operation Guide & Instruction Manual

Samson 3275 Mounting and operating instructions

Samson

Samson 3275 Mounting and operating instructions

Jetter JCM-501-E01 user manual

Jetter

Jetter JCM-501-E01 user manual

manuals.online logo
manuals.online logoBrands
  • About & Mission
  • Contact us
  • Privacy Policy
  • Terms and Conditions

Copyright 2025 Manuals.Online. All Rights Reserved.