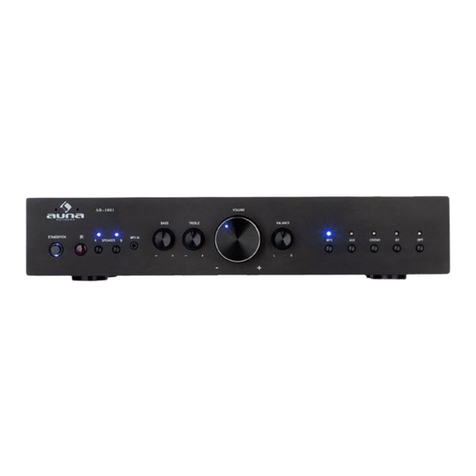
auna Amp 3 USB User manual

www.auna-multimedia.com
Amp 3 USB
Verstärker
Ampier
10032155


3
DE
TECHNISCHE DATEN
Artikelnummer 10032155
Stromversorgung 230 V~ 50 Hz
Ausgangsleistung im 2-Kanal-Betrieb
bei 4 Ohm, 1 kHz, 1 % Klirrfaktor 2 x 5 W
bei 4 Ohm, 1 kHz, 10 % Klirrfaktor 2 x 6,5 W
Leistungsaufnahme 25 W
Klirrfaktor (bei 1 kHz) 0,3 %
Eingangsempndlichkeit bei 1 kHz, 4 Ohm
AUX1 230 mV
AUX2 230 mV
AUX3 230 mV
MIC 3,2 mV
Frequenzgang 20 Hz - 20 kHz
Signal-Rauschabstand bei 1 kHz, 4 Ohm
AUX1 72 dB
AUX2 72 db
AUX3 72 dB
MIC 65 dB
Tonregler
Bass ±10 dB, 100 Hz
Höhen ±10 dB, 100 Hz

4
DE
SICHERHEITSHINWEISE
Erklärung der Symbole auf dem Gerät
CAUTION
RISK OF ELECTRIC SHOCK
DO NOT OPEN
WARNUNG: UM DIE GEFAHR EINES STROMSCHLAGS UND EINER
PERSONENVERLETZUNG ZU VERRINGERN, DAS GEHÄUSE NICHT ÖFFNEN. KEINE FÜR
DEN BENUTZER ZU WARTENDEN TEILE IM GERÄT. WENDEN SIE SICH IM FALLE EINER
REPARATUR NUR AN QUALIFIZIERTES PERSONAL.
Das Blitzsymbol mit dem Dreieck macht Sie auf gefährliche elektrische
Spannung in diesem Gerät aufmerksam, die hoch genug ist, um eine
Stromschlaggefahr darzustellen. Das Gehäuse nicht önen!
Das Ausrufezeichen mit dem Dreieck macht Sie darauf aufmerksam,
dass in der Dokumentation für das Gerät wichtige Bedienungs- und
Wartungshinweise enthalten sind.
Pege
• Halten Sie den Verstärker trocken. Falls er nass wird, wischen Sie ihn
sofort trocken.
• Verwenden Sie den Verstärker ausschließlich in Umgebungen mit einer
guten Luftzirkulation.
• Schützen Sie den Verstärker vor Staub und Schmutz.
• Gelegentlich mit einem feuchten Tuch wischen, und das Gerät sieht aus
wie neu.
• Verwenden Sie keine scharfen chemischen Reinigungsmittel oder
Lösungsmittel.

5
DE
EIGENSCHAFTEN UND BEDIENELEMENTE
AUX2
L
PHONES
R
AUX IN
MAX
BALANCE
MIN
MIC VOLUME
POWER
AUX1USB
-12
TREBLE
BASS
+12
LED
MIN
MP3 PL AYE R
MAX
VOLUME
AUX3
STEREO POWER AMPLIFIER
USB
2
4
1
3 8 95 6 7
INPUT
REC
OUT
AUX2AUX1
PAGERMIXING
SPEAKER
AUX3
L
+
MIC IN
+
AC 230V/50Hz
R
L
R
10 11 12 13 14 15 1
6

6
DE
1 EIN/AUS-Schalter mit Betriebsleuchte
Die Betriebsleuchte zeigt an, ob der Verstärker eingeschaltet ist.
2 USB 2.0-Eingang mit LED-Anzeige
Bedienung von USB-Medien: Die Taste drücken, um den letzten
Titel zu wiederholen. Mit zum nächsten Titel vorspringen. Mit
die
Wiedergabe anhalten und wieder fortsetzen. Wenn die Wiedergabe
angehalten wurde, merkt das Gerät sich die Wiederaufnahme der Stelle,
wenn Sie den Verstärker wieder einschalten oder USB erneut als Quelle
auswählen.
3 AUX-Eingang
LINE IN. AUX/CD IN.
Anschluss von externen Abspielgeräten wie MP3-Playern, PC, CD-
Playern und verschiedenen Mobilgeräten.
4 6,3-mm-Kopfhörer-Eingang
5 MIC-Lautstärkeregler
Einstellung der Lautstärke am Mikrofoneingang
6 BALANCE-Regler
Einstellen der Balance zwischen rechtem und linkem Kanal.
7 Bass- und Höhenregler
Anheben und Dämpfen von Bass und Höhen.
8 AUX1/AUX2/AUX3/USB-Eingang-Wahlschalter
Hier schalten Sie zu der gewünschten Quelle um. Wenn eine Quelle
während der USB-Wiedergabe angewählt ist, wird sich die USB-
Wiedergabe fort, das Signal wird aber nicht mehr an den Ausgang
gesendet.
9 Gesamtlautstärke (MASTER)
Hier wird die Gesamtlautstärke geregelt. Die Mikrofonlautstärke ist
nicht betroffen.
10 Schalter Mikrofondurchsage (PAGER)/ Mikrofonmixer (MIXING)
PAGER: Das Signal von AUX1/AUX2/CD wird um -12 dB gedämpft und
das MIC-Signal übersteuert das Signal (Auto-Talkover). Dies eignet sich
gut für Durchsagen.
MIXING: Die Signale von AUX1/AUX2/CD und das MIC-Signale werden
gleichzeitig ausgegeben. Diese Einstellung eignet sich gut für Karaoke.
11 Mikrofonanschluss (6,3 mm)
Anschluss für ein Mikrofon mit 3,5-mm-Klinkenstecker
12 AUX1/AUX2/AUX-Cinch-Anschlüsse
Anschluss von hochpegeligen Audionquellen
13 Aufnahme-Ausgang (Cinch)
Möglichkeit, den Verstärker zur Aufnahme an ein Kassettendeck oder

7
DE
anderes Geät anzuschließen.
14 Drahtklemmen für Lautsprecherkabel
Leichtes direktes Anschließen von Lautsprechkabeln am Verstärker.
15 Ersatzsicherung
Der Verstärker verwendet eine Sicherung zum Schutz vor
Spannungsschwankungen und Kurzschlüssen. Wenn der Verstärker sich
plötzlich nicht mehr einschalten lässt, überprüfen Sie die Sicherung und
ersetzen Sie diese, falls notwendig mit einer inken Schmelzsicherung
(5x20 mm, nicht im Lieferumfang enthalten).
16 Netzkabel
Anschluss an eine Stromversorgung von 230 V~ / 50 Hz.
WARTUNG
Austausch der Sicherung
Der Verstärker benötigt eine Sicherung mit dem korrekten Sicherungswert,
um das Gerät vor Spannungsschwankungen und Kurzschlüssen zu schützen.
Wenn der Verstärker sich plötzlich abschaltet und nicht wieder einschalten
lässt, ist die Gerätesicherung durchgebrannt.
• Lassen Sie den Verstärker
abkühlen und versuchen, ihn
neu zu starten, bevor Sie die
Sicherung austauschen wollen.
• Ziehen Sie den Netzstecker aus
der Steckdose.
• Drehen Sie die Fassung der
Sicherung und ziehen Sie die
Fassung heraus.
• Nehmen Sie die Sicherung heraus
und ersetzen sie durch eine
Sicherung desselben Typs:
1 A, 250 V, ink, 5x20 mm
Vorsicht: Verwenden Sie nie eine Sicherung mit einem höheren
Sicherungswert.
Sicherung

8
DE
FEHLERBEHEBUNG
Fehler Grund Lösung
Kein Strom
Die Sicherung ist evtl.
durchgebrannt.
Überprüfen Sie die
Gerätesicherung und
ersetzen Sie sie, falls
notwendig.
Kein Ton
Die Audioquelle oder die
Lautsprecher sind nicht
richtig angeschlossen.
Überprüfen Sie die
Verkabelung.
Die Gesamtlautstärke ist
auf Min. eingestellt.
Regeln Sie die Lautstärke
auf eine höhere
Einstellung.
Die Lautsprecherkabel
haben die falsche
Impedanz.
Überprüfen Sie, dass die
Lautsprecherkabel die
richtige Impedanz haben.
Der Verstärker hat sich
abgeschaltet.
Schalten Sie den
Verstärker aus und
lassen ihn abkühlen.
Gewährleisten Sie eine
gute Luftzirkulation und
schalten das Gerät dann
wieder ein.
Rückkopplung
Das Mikrofon und die
Lautsprecher sind zu dicht
beieinander.
Positionieren Sie das
Mikrofon und die
Lautsprecher neu.

9
DE
HINWEISE ZUR ENTSORGUNG
Bendet sich die linke Abbildung (durchgestrichene
Mülltonne auf Rädern) auf dem Produkt, gilt die Europäische
Richtlinie 2012/19/EU. Diese Produkte dürfen nicht mit dem
normalen Hausmüll entsorgt werden. Informieren Sie sich
über die örtlichen Regelungen zur getrennten Sammlung
elektrischer und elektronischer Gerätschaften. Richten Sie
sich nach den örtlichen Regelungen und entsorgen Sie
Altgeräte nicht über den Hausmüll. Durch die regelkonforme
Entsorgung der Altgeräte werden Umwelt und die
Gesundheit Ihrer Mitmenschen vor möglichen negativen
Konsequenzen geschützt. Materialrecycling hilft, den
Verbrauch von Rohstoen zu verringern.
Konformitätserklärung
Hersteller: Chal-Tec GmbH, Wallstraße 16, 10179 Berlin.
Dieses Produkt entspricht den folgenden Europäischen
Richtlinien:
2011/65/EU (RoHS)
2014/30/EU (EMV)
2014/35/EU (LVD)

10
EN
TECHNICAL DATA
Item number 10032155
Power supply 230 V~ 50 Hz
Output Power, 2 channels driven
4-Ohm, 1 kHz, 1% THD 2 x 5 W
4-Ohm, 1 kHz, 10% THD 2 x 6,5 W
Power Consumption 25 W
Total Harmonic Distortion, 1 kHz 0,3 %
Input Sensitivity, 1 kHz, 4-Ohm Rated Power
AUX1 230 mV
AUX2 230 mV
AUX3 230 mV
MIC 3,2 mV
Frequency Response 20 Hz - 20 kHz
Signal to Noise Ratio 1 kHz, 4-Ohm Rated Power
AUX1 72 dB
AUX2 72 db
AUX3 72 dB
MIC 65 dB
Tone Controls
Bass ±10 dB, 100 Hz
Treble ±10 dB, 100 Hz

11
EN
SAFETY INSTRUCTIONS
Explanation of the symbols on the appliance
CAUTION
RISK OF ELECTRIC SHOCK
DO NOT OPEN
WARNING: TO REDUCE THE RISK OF ELECTRIC SHOCK; DO NOT REMOVE THE COVER
OR BACK. NO USER-SERVICEABLE PARTS INSIDE: REFER SERVICING TO QUALIFIED
PERSONNEL.
The lightning symbol is intended to alert you to the presence of
uninsulated, dangerous voltage within this product‘s enclosure that
might be of suicient magnitude to constitute a risk of electric shock.
Do not open the product case.
The exclamation symbol is intended to inform you that important
operating and maintenance instructions are included in the literature
accompanying this product.
Care
• Keep the amplier dry. If it gets wet, wipe immediately.
• Use the amplier only in well-ventilated installations.
• Handle the amplier away from dust and dirt.
• Wipe occasionally with a damp cloth to keep it looking new.
• Do not use harsh chemical, solvents or detergents

12
EN
FEATURES AND CONTROLS
AUX2
L
PHONES
R
AUX IN
MAX
BALANCE
MIN
MIC VOLUME
POWER
AUX1USB
-12
TREBLE
BASS
+12
LED
MIN
MP3 PL AYE R
MAX
VOLUME
AUX3
STEREO POWER AMPLIFIER
USB
2
4
1
3 8 95 6 7
INPUT
REC
OUT
AUX2AUX1
PAGERMIXING
SPEAKER
AUX3
L
+
MIC IN
+
AC 230V/50Hz
R
L
R
10 11 12 13 14 15 1
6

13
EN
1 Power On/O and LED Indicator
Main power switch, the indicator lights when the amplier is turned on.
2 USB 2.0 Input Interface with LED Indicator
Press to play the last song backward, press to play the next song
forward, and press
to playand/or pause the song. When the
song is ceased from playing, it will be memorized to resume
once the amplifier is reactivated and/or the USB input is
selected again.
3 AUX input
Line Input. AUX/ CD IN -Lets you easily connect the computerized MP3
Device ( player) sources, such as PC( CD ROM) , laptop, walkman, iPod,
and cell phone.
4 1/4" headphone jack
5 MIC Volume Control
Lets you adjust the volume of connected MIC to the proper setting.
6 BALANCE Control
Lets you adjust the sound balance between the left and right of
amplifier outputs.
7 BASS and TREBLE Control
Allows you to boost or attenuate bass and treble for the desired sound.
8 AUX 1/AUX 2/AUX3/ USB Input Selector
Lets you select the desired input music source. When it is switched to
AUXl, AUX2, or CD input while the USB is still on playing, the playing
signal of USB continues, just it is not sent to the amplifier's output.
9 MASTER Volume Control
Lets you control the overall volume level. It doesn't affect the volume of
MIC.
10 Switchable MIC PAGER and MIXING Modes
Set to PAGER, the signal from AUX l/AUX 2/CD will be attenuated BY
-12dB and the signal from MIC will override to page (Auto Talkover), it
is good tor paging system. Set to MIXING, the signals from AUX l/AUX
2/CD and MIG will be existed at the same time, it acts like playing at
KARAOKE event.
11 MIC input jack (1/4")
Lets you connect a microphone with a 3,5-mm plug.
12 AUX1/AUX2/AUX RCA inputs
A12)AUX l/AUX 2/AUX RCA Inputs Lets you connect most high level
audio sources such as CD player, tape deck, tuner, camcorder, or VCR.
13 REC RCA Output
Lets you connect the amplier to a tape deck for recording.

14
EN
14 Push Type Speaker Terminal
Lets you easily connect speaker wires directly to the amplier. The
speaker impedance can be ranged trom 4 t0 8 0hms for the general
stereo output. The total speaker impedance must be at least 4-Ohmper
channel at stereo mode.
15 Replaceable Power Fuse
The amplier uses a fuse for protection against surges and short circuit.
If the amplier suddenly turns oand will not turn on, check the fuse
and if necessary replace it with a l amp, 250-volt, fastacting, 5x20mm
fuse (not supplied).
16 AC IN Power Cord
Connect to AC 230 V/ 50 Hz.
MAINTENANCE
Replacing a fuse
This amplier requires a fuse with the proper rating for protection from
power surges and short circuits. If the amplier suddenly turns o or will
not turn on. the fuse is properly blown.
• Let the amplier cool down and see
if it start again before you assume a
fuse needs to be replaced.
• Unplug the amplier from the AC
outlet.
• Turn the fuse holder cap and pull out
the cap.
• Remove the old fuse and replace it
with an identical one.
CAUTION : Never use a fuse with a higher rating.

15
EN
TROUBLESHOOTING
Problem Possible Reason Solution
No power The fuse might be blown Check the amplier's fuse
and replace it if necessary.
No sound
Sound source or speakers
may not be connected
properly.
Check all connections.
Master volume control
may be set to a minimum.
Adjust the volume control
to a higher setting.
The speaker's wire might
be the wrong impedance.
Make sure that the
speakers that you have
connected to the amp are
matching in impedance.
The amplier is shutting
down or powering o.
Turn the amplier o and
let it cool, make sure that
the amplier is properly
ventilated, and then turn
it back on.
Feedback Microphone and speakers
are to close together.
Reposition the
microphone and speakers.

16
EN
DISPOSAL CONSIDERATIONS
According to the European waste regulation 2012/19/EU this
symbol on the product or on its packaging indicates that this
product may not be treated as household waste. Instead it
should be taken to the appropriate collection point for the
recycling of electrical and electronic equipment. By ensuring
this product is disposed of correctly, you will help prevent
potential negative consequences for the environment
and human health, which could otherwise be caused by
inappropriate waste handling of this product. For more
detailed information about recycling of this product, please
contact your local council or your household waste disposal
service.
Declaration of Conformity
Producer: Chal-Tec GmbH, Wallstraße 16, 10179 Berlin.
Germany
This product is conform to the following European Directives:
2011/65/EU (RoHS)
2014/30/EU (EMC)
2014/35/EU (LVD)


This manual suits for next models
1
Table of contents
Languages:
Other auna Amplifier manuals

auna
auna AMP Pro BT User manual

auna
auna AMP-9200 User manual

auna
auna Amp-218 BT User manual

auna
auna AV2-CD508 User manual

auna
auna AMP-H260 User manual

auna
auna AV1 AMP-EQ User manual

auna
auna AMP-9200 User manual

auna
auna AV2-CD850BT User manual

auna
auna AV2-CD608 BT User manual

auna
auna AV2-CD850BT User manual