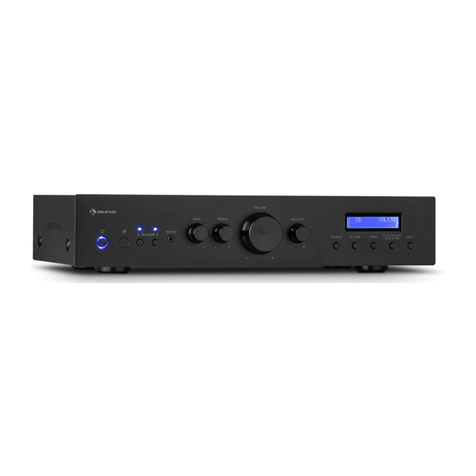
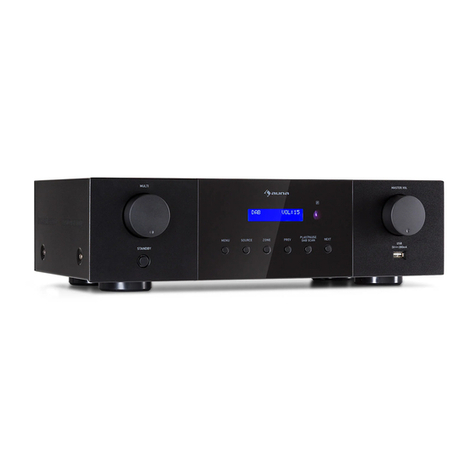
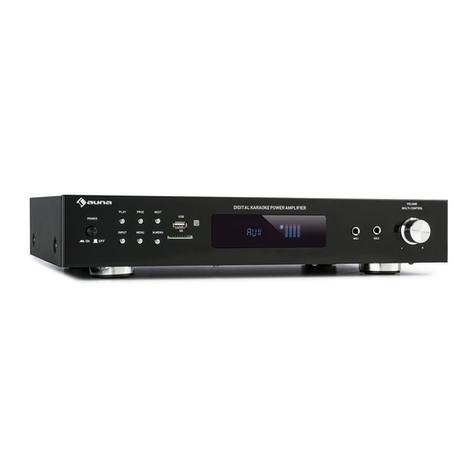
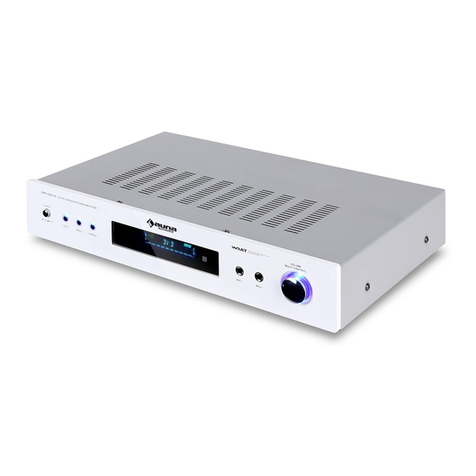
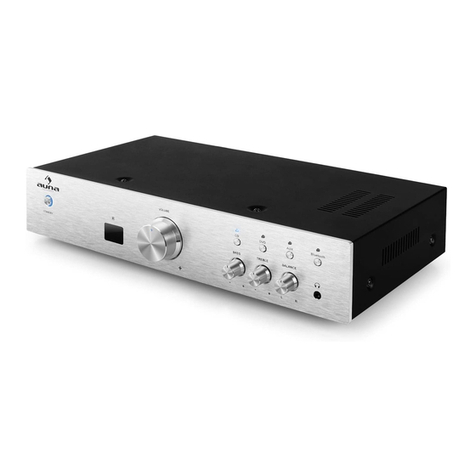
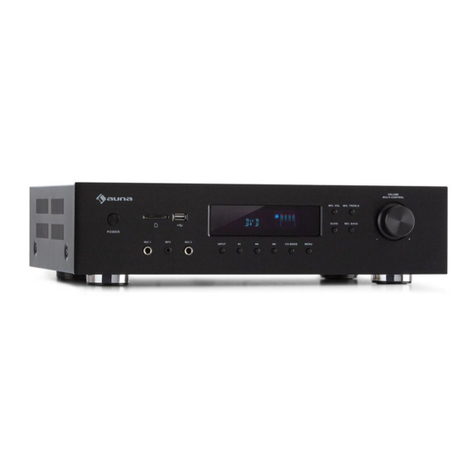
auna AV2-CD608 BT User manual

www.auna-multimedia.com
AV2-CD608 BT
Verstärker
Amplifier
Amplificateur
Amplificador
Amplificatore
10034540 10034541


3
DE
Konformitätserklärung 3
Sicherheitshinweise 4
Hinweise zur Entsorgung 4
Geräteübersicht 5
Inbetriebnahme 8
Funktionen 9
Fehlerbehebung 10
KONFORMITÄTSERKLÄRUNG
Hersteller:
Chal-Tec GmbH, Wallstraße 16, 10179 Berlin,
Deutschland.
Dieses Produkt entspricht den folgenden
Europäischen Richtlinien:
2014/53/EU (RED)
2011/65/EU (RoHS)
Die vollständige Konformitätserklärung des Herstellers nden Sie unter
folgenden Link: use.berlin/10034540
Scannen Sie dazu den QR-Code oben oder geben Sie die URL ein.
Sehr geehrter Kunde,
wir gratulieren Ihnen zum Erwerb Ihres Gerätes.
Lesen Sie die folgenden Hinweise sorgfältig durch
und befolgen Sie diese, um möglichen Schäden
vorzubeugen. Für Schäden, die durch Missachtung der
Hinweise und unsachgemäßen Gebrauch entstehen,
übernehmen wir keine Haftung.
INHALT

4
DE
SICHERHEITSHINWEISE
• Reparaturen am Gerät sollten nur von einer autorisierten Fachwerkstatt
durchgeführt werden.
• Önen Sie in keinem Fall das Gerät.
• Falscher Zusammenbau führt möglicherweise zu Fehlfunktionen oder
dem Totalausfall.
• Das Gerät sollte vor jeglichen Feuchtigkeit und direkter
Sonneneinstrahlung geschützt werden.
• Das Gerät bitte nicht mit Reinigungsmitteln reinigen.
• Verwenden Sie zur Reinigung nur ein trockenes (Mikrofaser) Tuch.
• Schließen Sie das Gerät nur an die dafür vorgesehene Netzspannung.
• Schließen Sie das Gerät in keinem Fall an andere Spannungen als
vorgesehen an.
Hinweis: Die Gewährleistung verfällt bei Fremdeingrien in das Gerät.
HINWEISE ZUR ENTSORGUNG
Bendet sich die linke Abbildung (durchgestrichene
Mülltonne auf Rädern) auf dem Produkt, gilt die
Europäische Richtlinie 2012/19/EU. Diese Produkte
dürfen nicht mit dem normalen Hausmüll entsorgt
werden. Informieren Sie sich über die örtlichen
Regelungen zur getrennten Sammlung elektrischer
und elektronischer Gerätschaften. Richten Sie sich
nach den örtlichen Regelungen und entsorgen
Sie Altgeräte nicht über den Hausmüll. Durch die
regelkonforme Entsorgung der Altgeräte werden
Umwelt und die Gesundheit ihrer Mitmenschen
vor möglichen negativen Konsequenzen geschützt.
Materialrecycling hilft, den Verbrauch von Rohstoen
zu verringern.

5
DE
GERÄTEÜBERSICHT
Vorderseite
1 Ein-/Ausschalter: Diese Taste betätigen, um den Verstärker ein- oder
ausszuschalten
2 IR-Empfänger
3 Speaker A: Wahl des Lautsprechers A.
4 Speaker B: Wahl des Lautsprechers B.
5 MP3-Eingang: Stecken Sie den MP3-Stecker ein.
6 Bass +/- : Mit diesem Regler die Höhen einstellen.
7 Höhen +/- : Schließen Sie hier ein Mikrofon an.
8 Lautstärke: Schließen Sie hier ein zweites Mikrofon an.
9 Balance:Stellen Sie die Balance-Lautstärke der Einheit ein.
10 MP3: Wählen Sie den MP3-Eingangsmodus aus.
11 AUX: Wählen Sie den AUX-Eingangsmodus.
12 CD/DVD: Wählen Sie den CD- oder DVD-Eingangsmodus.
13 BT: Wählen Sie den BT-Eingangsmodus aus.
14 Optisch: Wählen Sie den optischen Eingangsmodus aus

6
DE
Rückseite
1 Anschluss für Frontlautsprecher (B): Anschluss an den Frontlautsprecher
(B), wobei die Impedanz gleich oder größer als 6-16 OHM ist.
2 Anschluss für Frontlautsprecher (A): Schließen Sie den Frontlautsprecher
(A) an, wobei die Impedanz gleich oder größer als 6-16 OHM ist.
3 Optisch: Anschluss an den optischen Audioausgang.
4 REC-Audioausgangsbuchse: Anschluss an die REC-Signaleingangsbuchse.
5 DVD-Audio-Eingangsbuchse. Anschluss an die DVD-
Signalausgangsbuchse.
6 CD-Audioeingangsbuchse. Anschluss an die CD-Signalausgangsbuchse.
7 AUX Audio-Eingangsbuchse.AnschlussandieAUX-Signalausgangsbuchse.
8 Netzschalter: Schalten Sie den Netzschalter des Geräts ein und aus.
9 AC-Eingang (230V....., 50 Hz)

7
DE
Fernbedienung
Tasten für die Verwendung des
CD-Player
1 STANDBY
2 Quelle
3 Önen/schließen
4 Zahlentasten
5 Stereo/Mono
6 Kanal +
7 Zurück/tuning-
8 Stopp
9 USB
10 Kanal-
11 Zurück
16 Nächste
17. Auto
18. Vorwärts/tuning+
19. A-b
20. Speicher
21. Wiederholen
22. 22. PLAY/PAUSE
Tasten für die Verwendung der
Verstärker
1. Standby
12. Lautstärke +
13. Eingang
14. Lautstärke -
15. Stumm

8
DE
INBETRIEBNAHME
Systemverbindung
1. Die Lautsprecherimpedanz muss korrekt sein, da sonst dieses Gerät
oder dieser Lautsprecher beschädigt werden könnte.
2. Lassen Sie nicht zu, dass die freien Lautsprecherkabel einander oder
andere Metallteile berühren, da dies das Gerät oder die Lautsprecher
beschädigen könnte.
3. Vergewissern Sie sich, dass die Polarität der Lautsprecherkabel korrekt
ist, "+" mit "+" und "-" mit "-", wenn diese Kabel falsch angeschlossen
sind, ist der Klang unnatürlich.
Anschluss-Schema
Lautsprecheranschluss

9
DE
FUNKTIONEN
1. Wählen Sie die Audioquelle aus, indem Sie die Taste INPUT auf der
Fernbedienung oder die Tasten Mp3, AUX, CD/DVD, BT, OPTICAL auf
der Frontplatte drücken.
2. Stellen Sie den Knopf LAUTSTÄRKE auf der Frontplatte oder die
Taste VOL+1 auf der Fernbedienung ein, um die Einstellung des
Hauptlautstärkereglers auf Ihren Hörpegel einzustellen.
3. Drücken Sie die Taste SPEAKER AIB auf der Gerätevorderseite, um
den Lautsprecher A-Modus auszuwählen. Drücken Sie die Taste
SPEAKER AIB auf der Gerätevorderseite, um den Lautsprecher B-Modus
auszuwählen. Drücken Sie die Taste SPEAKER AIB auf der Frontplatte,
um den Lautsprecher AB-Modus auszuwählen.
4. Stellen Sie den Knopf TREBLE auf der Frontplatte ein, um den Höhen-
Eekt zu erhöhen oder zu verringern. Stellen Sie den Regler BASS auf
der Frontplatte ein, um den Eekt des Musikbasses zu erhöhen oder zu
verringern. Stellen Sie den Knopf BALANCE auf der Frontplatte ein, um
den Eekt der Musikbalance zu erhöhen oder zu verringern.
5. Drücken Sie die Taste MUTE auf der Fernbedienung, um die
Stummschaltung zu aktivieren, und drücken Sie sie erneut, um sie
wieder zurückzusetzen.
BT Kopplung und Verbindung
1. Schalten Sie alle Bluetooth-Geräte aus, die zuvor mit diesem Gerät
gekoppelt (verlinkt) waren.
2. Schalten Sie die Bluetooth-Funktionen auf Ihrem Handy oder Musikplayer
ein.
3. Schalten Sie dieses Gerät ein und stellen Sie es auf den Bluetooth-Modus
ein. Der blinkende blaue Buchstabe BT auf der LED-Anzeige zeigt an, dass
sich das Gerät im Kopplungsmodus bendet.
4. Kongurieren Sie Ihr Handy oder Ihren Musikplayer so, dass er nach
Bluetooth-Geräten sucht.
5. Wählen Sie "AV2-CD608BT" aus den Suchergebnissen Ihres Telefons oder
Musikplayers.
6. Wählen Sie OK oder JA, um dieses Gerät mit Ihrem Handy oder
Musikplayer zu verbinden.
7. Wenn das Gerät vor dem Zugriff geschützt ist, geben Sie 0000 als
Passwort ein. Ein konstantes blaues Licht zeigt eine erfolgreiche
Verbindung an.

10
DE
FEHLERBEHEBUNG
Problem Mögliche Ursache Lösungsvorschlag
Die Anzeige leuchtet
nicht und es gibt
keinen Ausgangston.
Netzkabel nicht richtig
eingesteckt.
Überprüfen Sie das
Netzkabel und die
Steckerverbindung
Das Display leuchtet,
aber es gibt keinen
Ton.
Lautsprecheranschlüsse
nicht richtig verbunden.
Lautstärkeregler auf
Minimum eingestellt
Verbinden Sie die
Lausprecheranschlüsse
korrekt.
Lautstärke erhöhen.
Kein Ton vom Center-
Kanal
Lautsprecheranschlüsse
nicht richtig verbunden.
Mittlere Kanallautstärke
ist auf Minimum
eingestellt
Verbinden Sie die
Lausprecheranschlüsse
korrekt.
Stellen Sie die Lautstärke
des mittleren Kanals ein.
Ton nur von einem
Kanal
Lautsprecheranschlüsse
nicht richtig
vorgenommen.
Ein-/Ausgangsanschlüsse
Links/Rechts-Balance
ausgeschaltet.
Verbinden Sie die
Lausprecheranschlüsse
korrekt.
Stellen Sie die Balance-
Regelung ein.
Es gibt keinen Ton vom
Tonkanal.
Lautsprecheranschlüsse
nicht richtig
vorgenommen.
Die Lautstärke des
Surround-Kanals ist auf
Minimum eingestellt.
Verbinden Sie die
Lausprecheranschlüsse
korrekt.
Stellen Sie den
Lautstärkeregler für den
Surround-Kanal ein.
Instrumentenklang bei
Stereowiedergabe ist
umgekehrt
Falsche
Lautsprecherpolarität
Falsche Eingangspolarität.
Vergewissern Sie sich, dass
die + und - Anschlüsse
verbunden sind.

11
EN
Dear Customer,
Congratulations on purchasing this equipment.
Please read this manual carefully and take care of
the following hints to avoid damages. Any failure
caused by ignoring the mentioned items and cautions
mentioned in the instruction manual are not covered
by our warranty and any liability.
CONTENTS
DECLARATION OF CONFORMITY
Producer:
Chal-Tec GmbH, Wallstraße 16, 10179 Berlin, Germany.
This product is conform to the following European
Directives:
2014/53/EU (RED)
2011/65/EU (RoHS)
The complete declaration of conformity of the manufacturer can be found at
the following link: use.berlin/10034540
Scan the QR code above or enter the URL.
Declaration of Conformity 11
Safety Instructions 12
Hints on Disposal 12
Overview 13
Preparation 16
Functions 17
Troubleshooting 18

12
EN
SAFETY INSTRUCTIONS
• Repairs to the unit should only be carried out by an authorised specialist
workshop.
• Never attempt to open the device.
• Incorrect assembly may result in malfunction or total failure.
• The device should be protected from all moisture and direct sunlight.
• Please do not clean the device with cleaning agents.
• Use only a dry (micro bre) cloth for cleaning.
• Only connect the device to the intended mains voltage.
• Never connect the device to voltages other than those specied.
Note: The warranty will be forfeited in the case of external intervention
in the device.
HINTS ON DISPOSAL
According to the European waste regulation 2012/19/EU
this symbol on the product or on its packaging indicates
that this product may not be treated as household
waste. Instead it should be taken to the appropriate
collection point for the recycling of electrical and
electronic equipment. By ensuring this product is
disposed of correctly, you will help prevent potential
negative consequences for the environment and
human health, which could otherwise be caused by
inappropriate waste handling of this product. For more
detailed information about recycling of this product,
please contact your local council or your household
waste disposal service.

13
EN
OVERVIEW
Front view
1 Standy/ON Switch: Press this switch to turn the unit on or off remote
sensor.
2 IR receiver signal head
3 Speaker A Selector: Press this switch to select speaker A.
4 Speaker B Selector: Press this switch to select speaker B.
5 MP3 INPUT: Insert MP3 plug.
6 Bass+/-: Adjust the unit bass volume level.
7 Treble+/-: Adjust the unit treble volume level.
8 Volume: Adjust the unit volume level.
9 Balance: Adjust the unit balance volume level.
10 MP3: Select MP3 input mode.
11 AUX: Select AUX input mode.
12 CD/DVD: Select CD or DVD input mode.
13 BT: Select BT input mode.
14 OPTICAL: Select OPTICAL input mode.

14
EN
Rear panel
1 FRONT SPEAKER (B) TERMINAL: Connect to front speaker(B), the
impedance equal or more than 6-16 OHM.
2 FRONT SPEAKER (A) TERMINAL: Connect to front speaker(A), the
impedance equal or more than 6-16 OHM.
3 OPTICAL: Connect to the optical audio output
4 REC AUDIO OUTPUT JACK: Connect to REC signal input jack.
5 DVD AUDIO INPUT JACK: Connect to DVD signal output jack.
6 CD AUDIO INPUT JACK: Connect to CD signal output jack.
7 AUX AUDIO INPUT JACK: Connect to AUX signal output jack.
8 POWER SWITCH: Turn on and off the unit power switch.
9 AC INPUT (230V. ... ,50Hz)

15
EN
Remote control
Buttons for CD-Player use
1 STANDBY
2 SOURCE
3 0PEN/CLOSE
4 NUMBER BUTTON
5 STEREO/MONO
6 CHANNEL+
7 B.WARD/TUNING-
8 STOP
9 USB
10 CHANNEL-
11 PREVI OUS
16 NEXT
17 AUTO
18 F.WARD/TUNING+
19 A-B
20 MENORY
21 REPEAT
22 PLAY/PAUSE
Buttons for Amplier Use
l.STANDBY
12.VOLUME+
13.INPUT
14.VOLUME-
15.MUTE

16
EN
PREPARATION
System connection
1. The speaker impedance should be correct (read ,,Speaker Choice"),or
this unit or speakers could be damaged.
2. Do not let the bare speaker wires touch each other or any other metal
parts as this could damage this unit or speakers.
3. Make sure the polarity of speaker wires is correct, ,+'to ,+' , and ,-'to ,-', if
these wires are incorrectly connected, the sound will be unnatural.
Scheme of input connection
Speaker connection

17
EN
FUNCTIONS
1. Select audio source by pressing the INPUT key on the remote control or
the Mp3,AUX,CD/DVD,BT, OPTICAL on the front panel.
2. Adjust the knob VOLUME on the front panel or the key VOL+l- on the
remote control to adjust the setting of the main volume control to your
listening level.
3. Press the SPEAKER AIB key on the front panel to choose the speaker
A mode. Press the SPEAKER AIB key on the front panel to choose the
speaker B mode. Press the SPEAKER AIB key on the front panel to
choose the speaker AB mode.
4. Adjust the knob TREBLE on the front panel to increase or decrease
music treble eect.
Adjust the knob BASS on the front panel to increase or decrease music
bass eect.
Adjust the knob BALANCE on the front panel to increase or decrease
music balance eect.
5. Press the MUTE key on the remote control to mute, press it again to
reset.
BT Pair and Connect
1. Turn off any Bluetooth devices previously paired (Linked) with this unit.
2. Turn on the Bluetooth features on your phone or music player.
3. Turn on and set this unit to Bluetooth mode. The ashing blue Letter BT on
LED display indicates the unit inpairing mode.
4. Set your phone or music player to search for Bluetooth devices.
5. Select "AV2-CD608BT" from search results on your phone or music player.
6. Select OK or YES to pair this unit with your phone or music player.
7. If protected, enter 0000 for passkey steady blue Light indicates successful
connection. .

TROUBLESHOOTING
Problem Possible Cause Suggested Solution
The display does not light
and there is no output
sound.
Power cord not plugged
in securely.
Check power cord &
is no output sound plug
connection.
Display lights but sound is
not produced.
Speaker connections not
secure Volume control at
minimum level.
Connect securely.
Turn volume up.
No sound from Centre
channel.
Speaker connections not
secure Centre channel
volume set to minimum.
Connect securely Adjust
Centre channel volume
control.
Sound from one channel
only.
Speaker connections
Input/Output connections
Left/Right balance o.
Connect securely Connect
securely.
Adjust balance control.
Sound channel no sound. Speaker connections Sur-
round channel volume set
to minimum.
Connect securely
Adjust Surround channel
volume control.
Instrument sound re-
versed in stereo playback.
Incorrect speaker polarity
Incorrect input polarity.
Ensure+ and- connections
are connections Ensure+
and- connections are con-
nections.

19
FR
Déclaration de conformité 19
Consignes de sécurité 20
Informations sur le recyclage 20
Aperçu de l‘appareil 21
Mise en marche 24
Fonctions 25
Résolution des problèmes 26
DÉCLARATION DE CONFORMITÉ
Fabricant :
Chal-Tec GmbH, Wallstraße 16, 10179 Berlin,
Allemagne.
Ce produit est conforme aux directives européennes
suivantes :
2014/53/UE (RED)
2011/65/UE (RoHS)
La déclaration complète de conformité du fabricant est accessible par le
lien suivant: use.berlin/10034540
Scannez ce code QR ou entrez l'URL.
Chère cliente, cher client,
Toutes nos félicitations pour l’acquisition de ce nouvel
appareil. Veuillez lire attentivement et respecter
les instructions de ce mode d’emploi an d’éviter
d’éventuels dommages. Nous ne saurions être tenus
pour responsables des dommages dus au non-respect
des consignes et à la mauvaise utilisation de l’appareil.
Scannez le QR-Code pour obtenir la dernière
version du mode d'emploi et des informations
supplémentaires concernant le produit :.
SOMMAIRE

20
FR
CONSIGNES DE SÉCURITÉ
• Les réparations sur l'appareil ne peuvent être eectuées que par un
professionnel autorisé.
• N'ouvrez en aucun cas l'appareil.
• Un assemblage incorrect peut provoquer des dysfonctionnements ou
une panne dénitive de l'appareil.
• L'appareil doit être protégé de toute humidité et de l'ensoleillement
direct.
• N'utilisez pas de produit de nettoyage pour nettoyer l'appareil.
• Utilisez un chion sec (microbre) pour le nettoyage.
• Ne branchez l'appareil que sur une prise dont la tension est adaptée.
• Ne branchez en aucun cas l'appareil sur des prises dont la tension est
diérente de celle qui est prévue.
Remarque : la garantie est annulée en cas d‘intervention étrangère sur
l‘appareil.
INFORMATIONS SUR LE RECYCLAGE
Vous trouverez sur le produit l’image ci-contre
(une poubelle sur roues, barrée d‘une croix), ce qui
indique que le produit se trouve soumis à la directive
européenne 2012/19/UE. Renseignez-vous sur les
dispositions en vigueur dans votre région concernant
la collecte séparée des appareils électriques et
électroniques. Respectez-les et ne jetez pas les
appareils usagés avec les ordures ménagères. La
mise en rebut correcte du produit usagé permet de
préserver l’environnement et la santé. Le recyclage
des matériaux contribue à la préservation des
ressources naturelles.
Table of contents
Languages:
Other auna Amplifier manuals

auna
auna AMP-H260 User manual

auna
auna 10003555 User manual

auna
auna AV2-CD850BT User manual

auna
auna Amp-2 DG User manual

auna
auna Amp-3800 USB User manual

auna
auna AMP-CD608 User manual

auna
auna Amp-5 BT User manual

auna
auna AMP-4000 DAB User manual

auna
auna Amp4 BT SE User manual

auna
auna Intelligence Amp User manual
Popular Amplifier manuals by other brands

Orion
Orion XTR1500.1D owner's manual

Extron electronics
Extron electronics VersaTools MDA 3V Dual Specification sheet

Russound
Russound XZone70V installation manual

Mark Levinson
Mark Levinson ?585 quick start guide

Harman Kardon
Harman Kardon HK640 Technical manual

Audio Analogue
Audio Analogue primo CENTO VT owner's manual