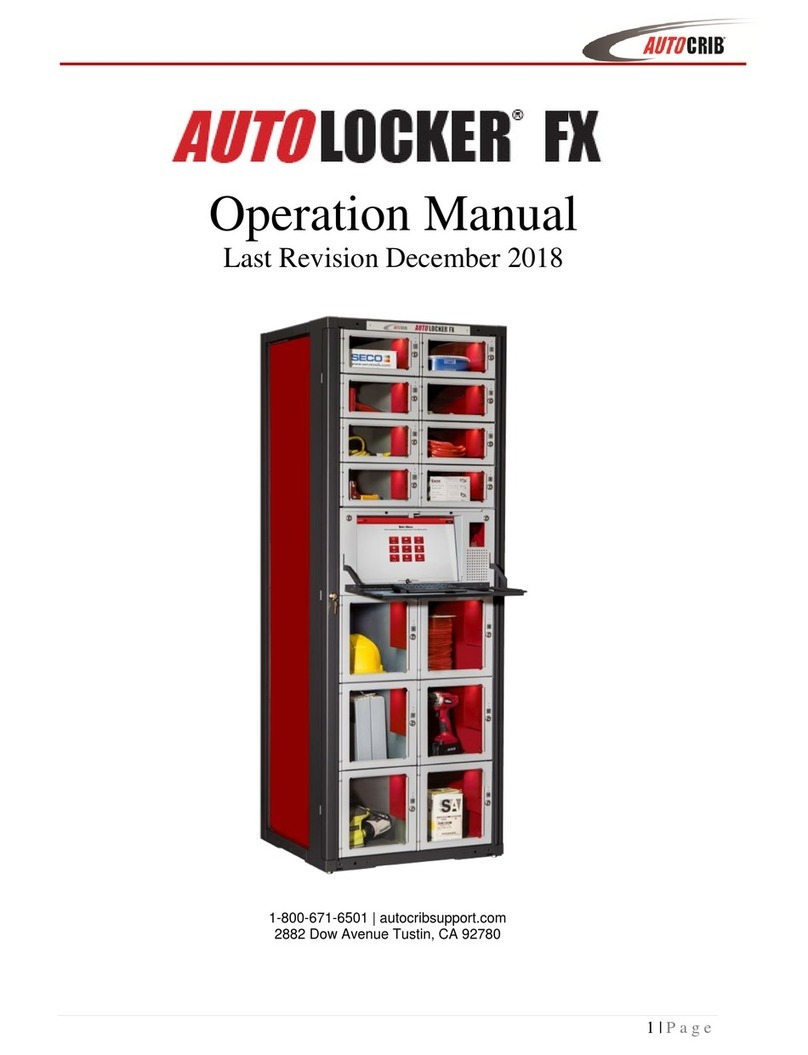
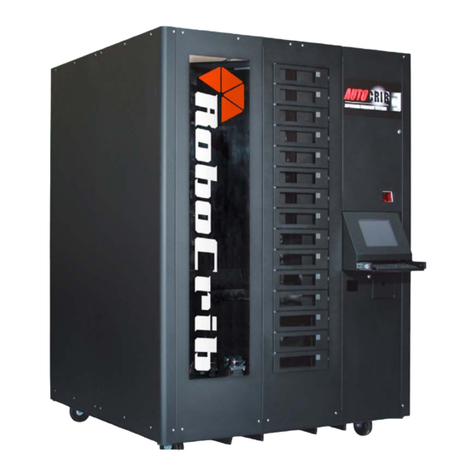
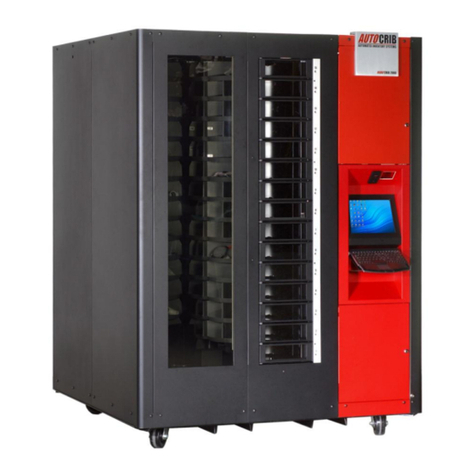
AutoCrib ROBOCRIB TX750 User manual

Page 1 | 90
ROBOCRIB TX750
Operations Manual
Last Revision December 2018
1-800-671-6501 | www.autocribsupport.com

Page 2 | 90
Table of Contents
Dispensing Machine Limited Warranty .................................. 4
Equipment Supplied................................................ 7
Machine General Description and Features............................... 8
Repair Parts List ................................................. 10
Cautions ....................................................... 12
RoboCrib TX750 Preparation ........................................ 15
Installation...................................................... 17
Routing Power & Network Connection.................................. 18
Network Connection .............................................. 19
Establish Power.................................................. 20
RoboCrib TX750 In-Service Testing ................................... 22
Setup Computer ................................................. 23
Restore the Database ............................................. 26
RoboCrib TX750 Software Configuration................................ 33
Create a Purchase Order and Tag .................................... 35
Stock RoboCrib TX750 (Automatic Stock by Tag) ......................... 37
Issue.......................................................... 38
Manual Stock ................................................... 40
Physical by Bin .................................................. 41
Physical All Bins ................................................. 42
Return......................................................... 43
Locate......................................................... 44
Maintain Module (Config Bin) –Assigning Bins ........................... 45
Removing Center walls for XL Bins.................................... 50
Categorization................................................... 51
Create Categories .............................................. 51
Create Families ................................................ 52
Create Types.................................................. 53
Associating a Family to a Category .................................. 54

Machine Limited Warranty
Page 3 | 90
Associating a Type to a Family ..................................... 55
Associating an Item to a Type ...................................... 56
Using Categorization at the RoboCrib TX750............................. 57
Grid View..................................................... 57
Image View ................................................... 58
Issuing Items using Category, Family, and Type......................... 59
Using Category to Issue .......................................... 59
Commonly Performed Procedures .................................... 60
Exiting RoboCrib TX750 software to access the Microsoft Windows desktop..... 60
Perform a Calibration Sequence .................................... 60
Proper Loading Procedure ........................................ 61
Console Mode ................................................. 62
Manually Fetch Bins and Open Doors using Putty ....................... 63
RoboCrib Controller Commands...................................... 65
Stall Settings.................................................... 67
Explanation of Errors on the TX750 ................................... 68
Calibration Errors ............................................... 68
Stall Errors.................................................... 70
Care and Maintenance............................................. 78
Repairs ...................................................... 78
Cleaning ..................................................... 78
Safety Inspection ............................................... 78
Preventative Maintenance .......................................... 79
Cleaning Exterior Surfaces ........................................ 79
Hardware –After 30 Days......................................... 80
Hardware –After 1 year and every year thereafter ....................... 81
RoboCrib TX750 Technical Specifications............................... 82

Machine Limited Warranty
Page 4 | 90
Instructions supplied with the machine are in English. Manufacturer will translate instructions as
necessary. English instructions are considered the original instructions.
Dispensing Machine Limited Warranty
AutoCrib incorporated warrants that its hardware products (see separate warranty agreement for software
products) are free of defects in material and workmanship in accordance with the terms and conditions
stated below. AutoCrib will repair or replace any machine, sub system or component part that fails during
the warranty period.
Standard Warranty Period
For a period of 12 months, following after the actual ship date from AutoCrib to the first purchaser of use.
The warranty period covers all components, sub systems, and complete machines subject to the
limitations and exclusions below.
Software and Technical Support
The standard AutoCrib warranty covers all software systems required for operation of your AutoCrib
equipment including software and firmware embedded, hosted through a client server network, or hosted
on via AutoCrib.Net web based hosting system for a period of 12 months, following the actual ship date
from AutoCrib. Included in the warranty is access to our 24-hour technical support staff and entitles buyer
to any and all software upgrades during that time. Annual software support can be purchased at the
current rate after the initial warranty period expires. You are not required to purchase extended hardware
maintenance to purchase extended software support.
Extended Warranty Period
For a period of X months as defined in the extended warranty contract, following the actual ship date from
AutoCrib to the first purchaser of use. The warranty period covers all components, sub systems, and
complete machines subject to the limitations and exclusions below.
Any parts or services replaced or serviced pursuant to this warranty are warranted only for the balance of
the remaining warranty period. AutoCrib will dispatch an AutoCrib technician, authorized AutoCrib dealer
technician, or a certified third party technician to your facility to perform any necessary troubleshooting
tasks. It is your responsibility to provide an internet connection with proper permissions to allow AutoCrib
technical support associates to access the controlling computer as well as the individual machines. If you
do not provide this, you will be charged an hourly rate at then current hourly rate for onsite
troubleshooting services. Any defective parts must be returned to AutoCrib within 30 days at your
expense. You must indicate the RMA number on the box(es) that will contain any and all defective parts
to be returned. If you do not provide the RMA number or fail to send the defective part back to AutoCrib
you be charged for the defective part.
Further, no authorized AutoCrib dealer/distributor is authorized to waive, modify, or change any terms,
conditions, or limitations of this warranty. This warranty is a part of the invoice which the warranted
machine or hardware relates.
Machines and Systems purchase through an authorized AutoCrib Distributor
All AutoCrib systems purchased through an authorized AutoCrib Distributor may contact their distributor
or AutoCrib directly. AutoCrib technical support will make every effort to correctly troubleshoot the
machine/system and determine the defective part and the correct course of action to repair said machine
or system.

Machine Limited Warranty
Page 5 | 90
AutoCrib provides depot level warranty coverage, which is defined as:
Depot level warranty means a new part/subsystem/machine will be shipped overnight to you or your
authorized distributor and billed to you or your distributor at the then current price. Your distributor is
required to ship the defective part/subsystem/machine back to AutoCrib within 30 days from the ship date
of the replacement part. You agree to contact AutoCrib customer service and get an “RMA” (return
material authorization) number before you ship the defective part back. Upon receiving the defective part,
AutoCrib will issue an offsetting credit to your company or authorized distributor per your instruction.
Limitations and Exclusions:
This warranty shall not cover or include any of the following and AutoCrib shall have no liability with
respect to:
Defects or damages which result from accident, misuse, abuse, lack of recommended or reasonable
maintenance, improper repairs or parts replacements, use of replacement parts not conforming to
AutoCrib standards, unauthorized modifications or general neglect including electrical spikes, surges and
sags caused by poor power management, thunderstorms or acts of God or lack of normal power
conditioning for electronic manufacturing equipment.
Damage caused by exposure to liquid spills, collision, fire, theft, freezing, vandalism, riot, war, explosion
or objects striking the machine such as fork trucks or exposure to abnormally corrosive conditions or entry
by insect or vermin or foreign objects or miss-packaged or misplaced product inside the machine.
Routine replacement made of consumable parts such as but not limited to light bulbs, plastic breakable
lock boxes, batteries, RFID tags, printer paper rolls, printer cartridges etc.
Routine maintenance services such as lubrications of drive trains or actuation solenoids. (See
appropriate AutoCrib manual for details)
Subsystems and attachments to the hardware/machine not manufactured by AutoCrib that are subject to
warranties of the manufacturers of such items.
Example: Uninterruptible power supplies, surge protectors etc.
Modifications and Upgrades:
AutoCrib reserves the right to make certain changes in designs or changes and improvements in its
products at any time without obligation to make such changes or improvements in its products previously
manufactured.
Limitation of Liability:
AutoCrib makes no warranty with respect to automated dispensing equipment sold by it, express
or implied except as expressly set forth herein. AutoCrib’s liability whether in contract or tort, or
any legal theory, arising out of warranties, representation, instructions or warnings, (or any lack
or inadequacy thereof), deficiencies, failures or defects on any kind, or from any cause shall be
limited solely to repairing or replacing defective parts (during normal business hours) pursuant
and subject to the foregoing provisions. Regardless of whether the buyer’s limited remedy has
failed of its essential purpose, AutoCrib shall not be liable in any event for any special, indirect,
incidental or consequential damages, including but not limited to lost profits, nor shall any claim
or recovery of any kind exceed the purchase price of the machine or system to which such claim
or recovery is made.

Machine Limited Warranty
Page 6 | 90
The foregoing warranty is in lieu of all other warranties, express or implied, and AutoCrib
disclaims any warranties of merchantability and fitness for use or a particular purpose. This
warranty is effective with AutoCrib installations beginning January 1, 2009.
AutoCrib Corporate Headquarters:
Address: 2882 Dow Avenue Tustin, CA 92780
Phone: Tool Free 1-(800) 671-6501, Local/International 1-(714) 274-0400
Email: sales@autocrib.com
Website: http://www.autocrib.com | http://www.autocribsupport.com
AutoCrib Authorized Representative:
AutoCrib EMEA:
Address: Am Güterbahnhof 7 a, 21035 Hamburg Germany
Phone: +49 40 716 655 900
Email: info@autocrib-emea.com | support@autocrib-emea.com
Website: www.autocrib-emea.com | www.support.autocrib-emea.com

Features
Page 7 | 90
Equipment Supplied
•Complete RoboCrib TX750
•Battery Backup (Installed in units shipped within North America, Canada, and Mexico)
•Adjustment Foot Set
•Door Keys (4x)
•Network Hub
•CAT5 Cable, 25 feet
•CAT5 Cable, 10 feet
•CAT5 Cable, 3 feet
•Shelf Kit - 30 wall segments, 100 large shelves, 150 small shelves, 160 corner shelves, 90 filler
shelves (45 Left, 45 Right)
•Product retainers
•Operating Instructions (this manual)
RoboCrib TX750 Specifications
AutoCrib
Specifications
Domestic Ambient
Export Ambient
Height
83”
83”
Width
62”
62”
Depth
62”
62”
Voltage (AC)
120V
230V
Running Amperes
5 Amps Max
2.5 Amps Max
Shipping Weight
2404 lb
2404 lb

Features
Page 8 | 90
Machine General Description and Features
Incredible Bin Density
The system in its most dense (smallest) bin size configuration provides for up to 987 bins in roughly the
same footprint as our other equivalent RoboCrib® machines or other competing vending machines. Our
patented plastic bin shelf system, mated with the incredibly flexible tambour style door, gives the machine
the ability to virtually eliminate vertical bin “height” waste that is common with fixed door machines.
Dramatically Reduce Maintenance Costs
AutoCrib’s vast experience has found that reducing the number of moving parts significantly reduces
maintenance. Utilizing a dual tambour eliminates over 15 separate sub-systems and greatly reduces
maintenance costs.
Dispense Square Packages or Boxes
The RoboCrib® TX750 is the first machine that was specifically designed to dispense square or
rectangular boxes or packages. This practically eliminates the need for repackaging items to fit in helix
coil machines or carousels that use pie shaped bins. The dual tambour approach coupled with a machine
that utilizes square bins allows for an incredible amount of flexibility in bin sizes from 2” (5cm) height to
60” (152cm) height.
Quickly Configure at the Customer Site The simple user interface takes maximum advantage of the bin
density and flexibility by simply sliding shelves into a rack. The machine walks you through a bin
assignment process that is quick and easy. You can set up the machine with little to no prep work as you
perform the initial stock or load.
Specifications
•Patented plastic trays for easy reconfiguration of shelves
•High-resolution 19” (48cm) touch display
•Configurations: Up to 987 SKUs (Unique Products) at 2” (5cm) bin height.
•Weight Capacity: 1,200 lbs. (544kg)
•Onboard PC: Intel Core i5 Processor
•Enclosure Dimensions: -34.1” W (86.6cm) x 79.4”H (201.7cm) x 41.4” D (105.2cm) -Requires just 9.8
square feet (0.9m2) of floor space!
•Built-in slots for forklift (Optional: Heavy Duty Swivel Caster Wheels)
•Power: 100-240VAC–50/60HZ, 5A/2.5A MAX • UPS Backup Battery
Features
•24-7 availability with accountability
•No repackaging required
•Quickly configure on-site
•Dispense square or rectangular boxes or packages
•No bulk stocking required. Use 100% of the machine’s space! Stock as many or as few SKUs as you
want.
•Issue delicate items without dropping
•Fast issue time 10 seconds or less!
•Automated purchase orders
•Control reconditioned items and force regrinds first
•Universal search - Find any item plant-wide!
•Gauge Management - Deny access to a gauge that has fallen out of calibration
•User Access: Fingerprint, proximity cards, key fobs, mag-stripe cards, barcodes, keypad/PINs. You
can use your existing employee badges!
•Optional: Caster wheels make it easy to relocate your machines where you want them

Features
Page 9 | 90
How it works
1. Login –Sign in using your employee badge or employee number. For additional security, require
fingerprint validation.
2. Select Item –Select the item you want
3. 3. Dispense –The machine automatically finds the right item, opens the dual-tambour to dispense the
product, and unlocks the outside security door.
Optional: You may also track costing data like Department, Job, Machine, Assembly Line, Cost Center,
Customer Number, Tail Number, etc.… You can customize the field names to match your needs.

Features
Page 10 | 90
Repair Parts List
PART #
DESCRIPTION
170-430
Cable, Slip ring to Stack Motor, RTX
170-431
Cable Slip Ring to Controller, RTX
170-432
Cable Table Motor & Signal, RTX
170-433
Cable, Controller to upper tambour ref board, RTX
170-435
Cable, Controller to Lower Tambour ref board, RTX
170-520
Power Cord Assembly 20 feet with Ground Wire, 110/120VAC
183-001
Strap
201-001
Latch assembly, SOUTHCO - R4-EM 8
216-030-E
Light Curtain with Cable - Emitter
216-030-R
Light Curtain with Cable - Receiver
224-007
Bar Code Reader, Omni directional - includes USB cable
232-401
Magnet Switch Set
232-617
Proximity Sensor, Table Reference
234-300
UPS wired assembly
235-150
Power Supply, 24VDC, 8.4A (HRP-200-24)
252-219
Touch screen - 19"
252-220
Power Supply for ELO 19" Touchscreen
255-151
Adapter USB to 100 Bt Ethernet Network Adapter
255-805
100BT Hub with Power Supply
255-903
USB Power Hub with Power Supply
282-117
Track pad Keyboard
282-127
Clear Cover
312-101
Lock Assembly

Features
Page 11 | 90
PART #
DESCRIPTION
329-916
Logo Panel, RTX750
372-653
Stack Arm Bearings
376-622
Shelf Retainer Bracket
376-631
Toggle Plate
376-669
Lead Screw
376-671
Door Guide Track
376-674
Bearing Block, Support Rod
376-678
Guide Rod
376-775
Plastic Shelf Removal Tool
376-805
Large Rectangle Shelf
376-805-2
Rectangle Retainer
376-806
Short Rectangle
376-807
Triangle
376-807-2
Triangle Retainer
376-808-1L
Filler Left
376-808-2R
Filler Right
376-808-3
Filler Retainer

RoboCrib Setup & Installation
Page 12 | 90
Cautions
The following cautionary information should be reviewed before the machine is installed. Following these
requirements and warnings are required.
CAUTION: This machine is designed for indoor usage only. Any other usage will
void the Manufacturer’s Warranty.
Voltage and Polarity Check
It is important that this machine be hooked up to the proper voltage and polarity
for your country. Use a voltmeter to verify voltage and polarity before connecting
the machine to a wall outlet. For machines located in North America, use the
diagram below to verify correct voltages.
CAUTION: Any procedure marked with the symbol at left requires that the
Machine have the power applied and a shock hazard exists.
CAUTION: Different countries may have unique plug arrangements. Ensure that
the machine is properly grounded before operating.
CAUTION: The machine is a heavy item. Ensure that sufficient personnel are
available for lifting and transporting the machine. Use proper lifting procedures
and equipment.
CAUTION: The system components in this machine utilize static sensitive
components. Precautions for handling sensitive devices should be observed
when handling these items.
Voltage and Polarity Check (for Machines located in North America Only)
It is important that this machine is hooked up to proper voltage and polarity. Using a voltmeter or a
polarity tester, perform the following checks from the illustration below.

RoboCrib Setup & Installation
Page 13 | 90

RoboCrib Setup & Installation
Page 14 | 90
Tools Needed for Installation
▪Outlet Tester (Can be purchased at Radio Shack or comparable electronics store.)
▪Small ladder
▪Forklift with adjustable forks
▪2 9/16”open end wrenches
▪3/4" open end wrench or adjustable wrench for leveling foot pad nuts
▪Spirit level
▪Phillips #2 screwdriver or apex bit for uncrating with cordless drill
▪Heavy duty wire cutters

RoboCrib Setup & Installation
Page 15 | 90
RoboCrib TX750 Preparation
The RoboCrib TX750 unit is assembled and packed so that a minimum amount of time is necessary for
preparation to install it on location. The following steps are recommended to ensure correct unpacking.
1. Shipping Damage
Thoroughly inspect the exterior of the box and/or wrapping for damage, which may have occurred
during shipment.
a. Verify “TipNTell” is intact.
b. Note any damage or irregularities on shipping document.
c. Report any damage to delivering carrier and follow their instructions.
DO NOT SIGN FOR SHIPMENT IF ANY DAMAGE HAS OCCURRED, REFUSE THE SHIPMENT!
2. Uncrate the RoboCrib TX750
a. The RoboCrib TX750 is a self-contained automated vending unit, ready to use right out of
the box with very little set-up. The machine is shipped in specially designed packaging,
and it should stay that way until it is positioned near its final location.
b. Using a cordless drill with a #2 Phillips head bit, remove screws on crate. Carefully
remove plywood and cardboard panels. (retain the screws and crate, in case there is
concealed damage and you need to return the machine.)
c. Use a forklift to place the RoboCrib TX750 and pallet near the final location.
3. Remove RoboCrib TX750 from Pallet
a. Remove ratcheting shipping straps from the RoboCrib TX750 and from under the
shipping pallet. You may need a small ladder to access the release handles.
b. Do not lift on the main platter! Insert forks into lifting points and insure that forks are
completely inserted into the fork channels before lifting.
c. Remove the inner shrink-wrap and bubble packaging from the machine.
d. Move the RoboCrib TX750 to its final location using the casters or a pallet jack.

RoboCrib Setup & Installation
Page 16 | 90
TAKE CARE NOT TO PUSH ON THE FRONT DOOR OR TOUCH SCREEN WHEN
MOVING THE MACHINE. WHENEVER POSSIBLE, USE A PALLET JACK INSERTED
FROM THE FRONT OR BACK TO MOVE THE ROBOCRIB TX750.
Fork Points

RoboCrib Setup & Installation
Page 17 | 90
Installation
1. Place the RoboCrib TX750 in its final location
2. Locate the keys fastened to the front of the RoboCrib TX750.
3. Open the front door panel by turning the key counterclockwise on both locks.
4. Locate the installation kit box (the box will contain a network hub, CAT5 cables, leveling feet and
spare fasteners).
5. LEVEL THE ROBOCRIB TX750 MACHINE –THIS STEP IS VERY IMPORTANT!!!
•To Install the leveling feet:
a. Use a forklift to lift the RoboCrib TX750 off the ground.
b. Install feet into the threaded plates at each corner.
c. Place the RoboCrib TX750 in its final location and adjust the nuts, using a ¾” open-end
wrench, to level the machine.
d. Use a spirit level to make sure the RoboCrib TX750 is level on each side, then lock the
nuts in place.
Front Panel Locks

RoboCrib Setup & Installation
Page 18 | 90
Routing Power & Network Connection
6. Routing Power Cable - The system power cord is coiled and attached to the UPS with a 3-
position detachable connector. The power can be routed through the top or bottom of the
machine depending on where the power outlet is located.
a. Through the top: feed the connector end down through the hole in the top right corner,
routing the cable between the touch screen alcove and the right side wall, then attach to
the Uninterrupted Power Supply (UPS).
b. Through the Bottom: feed the connector end up from the bottom through the hole in the
bottom right corner, then attach to the UPS.

RoboCrib Setup & Installation
Page 19 | 90
Network Connection
7. Run the CAT5 network cable (25ft provided with RoboCrib TX750) through one of the same
routes as described for the power cord –up or down, depending on your preference.
a. Connect the CAT5 cable to the computer’s Ethernet port.
b. Connect the other end of the cable into the network drop.
NOTE: If a peer-to-peer setup will be used instead of the company’s existing network,
connect the end of the CAT5 cable into the hub provided with the RoboCrib TX750 rather
than the network drop.

RoboCrib Setup & Installation
Page 20 | 90
Establish Power
8. Locate the UPS located near the bottom right of the front door panel. Turn the UPS on by
pushing the power button. Verify a green light appears on the UPS and the red building wiring
fault LED on the top is off. If the red LED is lit, contact the facility electrician to repair the power
outlet before proceeding. Note: UPS is only provided with machines shipped within North
America, Canada, and Mexico. For machines shipped to countries outside those areas you will
need to purchase and install a compatible plug.
UPS Reset Button
Building Wiring Fault LED
If RED, turn power off and
contact electrician!
UPS Power Button
UPS Battery Backup
Table of contents
Other AutoCrib Vending Machine manuals
Popular Vending Machine manuals by other brands
Necta Vending Solutions SpA
Necta Vending Solutions SpA StarFood Installation, use and maintenance manual
Dixie Narco
Dixie Narco M036.2 Installation
Westomatic
Westomatic ELEVATE QUARTZ operating instructions

Samsung
Samsung 460I-S user manual

Holtkamp
Holtkamp DUO 8600 XL operating instructions
BIANCHI VENDING
BIANCHI VENDING SIRIO FRESH BREW manual
