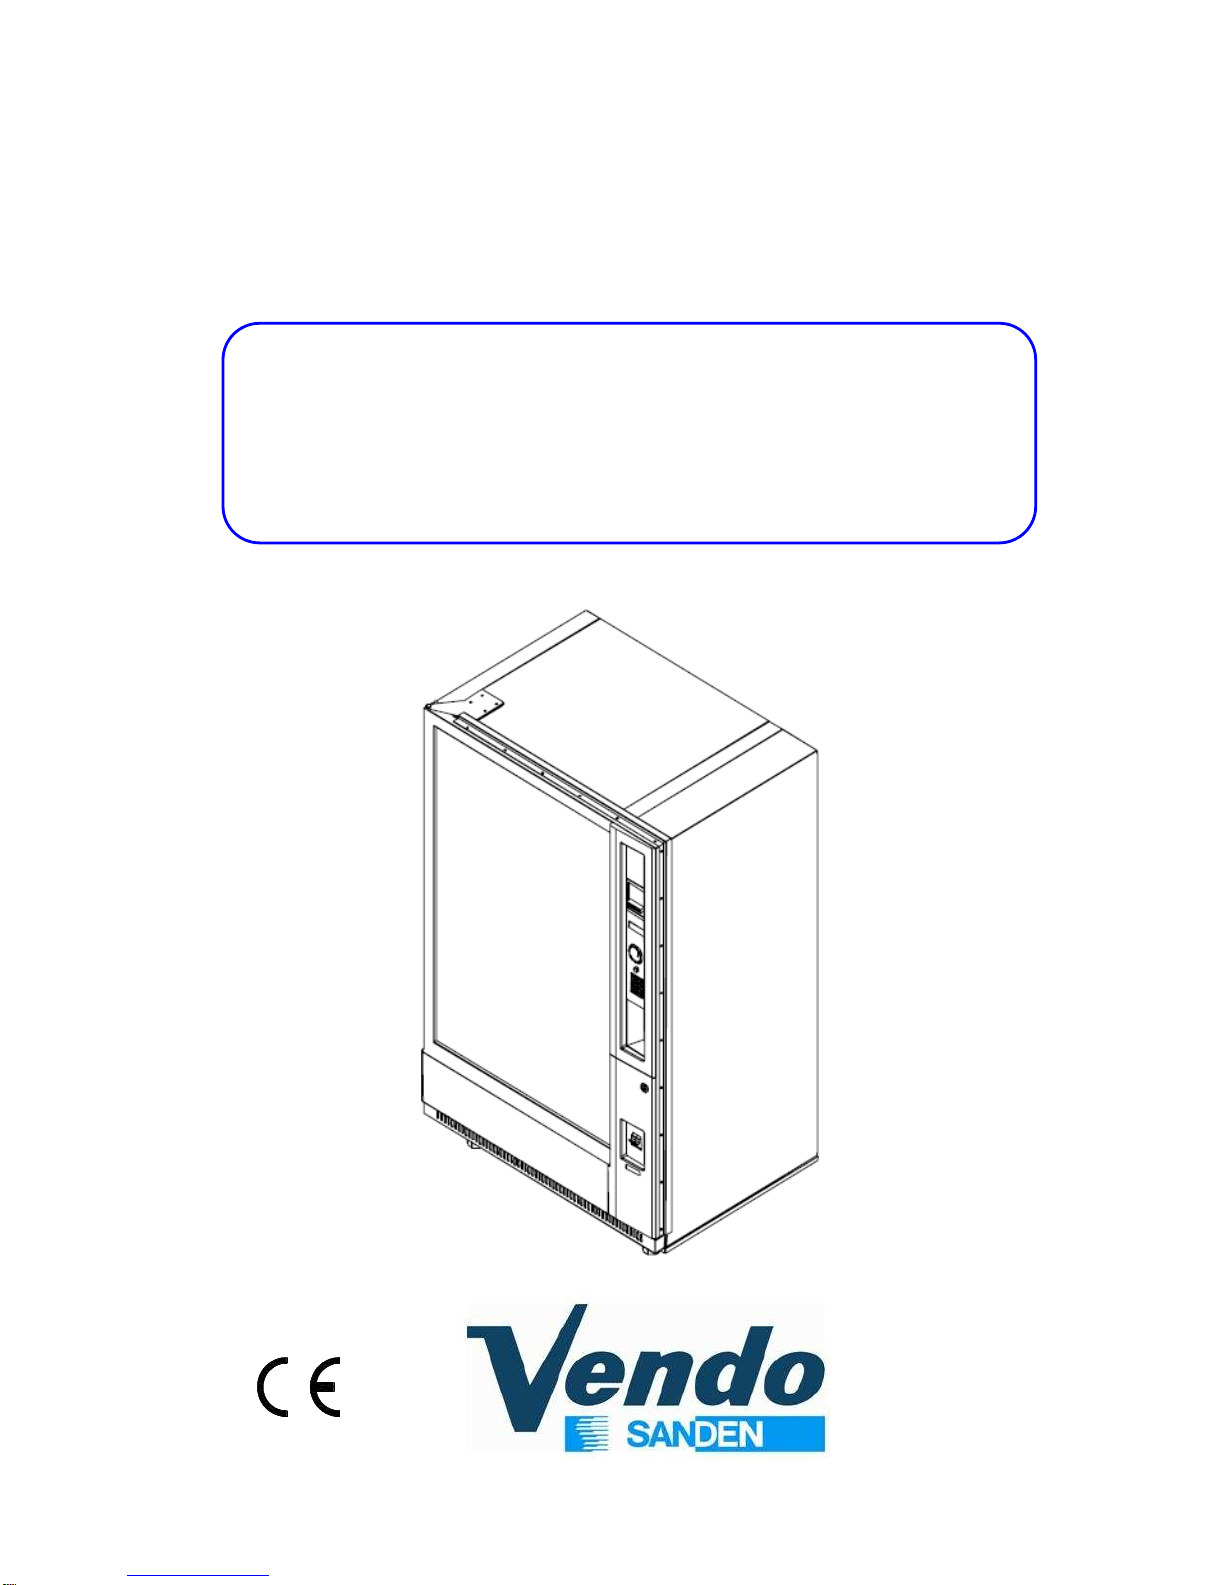
Vendo G-DRINK GF9 Owner's manual

Programming Manual
GLASSFRONT VENDING MACHINES
Rev. 1.7
MODELLS: G-DRINK SVE GF6 / GF9 - DR6 / DR9 Page 0 of 39
GLASSFRONT
VENDING MACHINES
G-DRINK GF6 / GF9 – DR6 / DR9
PROGRAMMING MANUAL

Programming Manual
GLASSFRONT VENDING MACHINES
Rev. 1.12
MODELLS: G-DRINK SVE GF6 / GF9 – DR6 / DR9 Page 1 of 42
INDEX
Chapter Page
1 SPECIFICATION FOR ELECTRONIC BOARD SF01 3
1.1 DESCRIPTION OF FUNCTIONS AND FEATURES 4
2 SERVICE MODE 8
2.1 ERROR ROUTINE 9
2.2 PROGRAMMING 12
2.3 MENU DIAGRAM 30
2.4 EVENT TABLE 36
3 DRUM SENSOR ADJUSTMENT 37
4 TEMPERATURE ADJUSTMENT 38
4.1 COOLING UNIT CONTROL SERETEC 38
4.2 COOLING UNIT CONTROL CAREL 41
REVISIONS OF MANUAL

Programming Manual
GLASSFRONT VENDING MACHINES
Rev. 1.12
MODELLS: G-DRINK SVE GF6 / GF9 – DR6 / DR9 Page 2 of 42
SandenVendo Europe S.p.A.
Regione Cavallino, 2
I – 15030 Coniolo (AL)
Italy
Tel.:+ 39 0142 335111
Fax.:+ 39 0142 562348
e-mail:info@sandenvendo.com
www.sandenvendo.com
SandenVendo GmbH
Spangerstrasse 22
D–40599 Dusseldorf
Germany
Tel.: + 49 (0) 211 740390
Fax: + 49 (0) 211 7488541
e-mail: infosvg@sandenvendo.com
SandenVendo France SAS
4 Avenue de la Baltique
SILIC 506
F-91946 Courtaboeuf Cedex - France
Tel. : +33 (0) 1 69592500
Fax : +33 (0)1 69592505
e-mail: infosvf@sandenvendo.com
SandenVendo Iberia S.A.
Poligono Industrial la Almeda
C/. Sant Ferrán, no. 92
E-08940 Cornella (Barcelona) - Spain
Tel. : +34 (0)93 4741555
Fax : +34 (0)93 4741842
e-mail: infosvs@sandenvendo.com
SandenVendo Benelux S.A.
Avenue A. Van Oss 1
Boîte 21
B- 1120 Bruxelles - Belgium
Tel.: +32 (0)2 2682595
Fax :+32 (0)2 2682862
e-mail: infosvb@sandenvendo.com
SandenVendo (UK) Ltd.
Unit 17
The Basingstoke Enterprise Centre
Westham Lane
Worting Road
United Kingdom
Basingstoke, RG22 6NQ
Tel.: +44 1256 479309
Fax: +44 1256 8444696
e-mail: infosvu@sandenvendo.com

Programming Manual
GLASSFRONT VENDING MACHINES
Rev. 1.12
MODELLS: G-DRINK SVE GF6 / GF9 – DR6 / DR9 Page 3 of 42
1 SPECIFICATION FOR ELECTRONIC BOARD SF01
HARDWARE FEATURE
Power supply: 24 Volt DC
14 motor outputs 24 VDC 1 A
14 motor micro-switches
14 sold-out micro-switches
14 sold-out leds
26 selections switches
1 Door switch
3 Analogics inputs (for temperature control)
1 Real time clock
1 Jack plug for DEX/UCS audit output.
1 Serial TTL output.
The board uses an XA 16bit microcontroller with up to 4096 Kbit of program EPROM and
256 Kbit of EPROM memory used to store Settings and audit.
External slave board (placed on the box transformer) used to control refrigerant system,
fluorescent tube.
External slave board (placed near main board) used to drive 64 vending motor with
current control and limitation.
External slave Optical detector board used to check the product fall down.
External slave fluorescent display 2 lines 20 characters
Master and Slave optically isolated serial link for MDB
SOFTWARE FEATURE
Service Programming routine (standard ENG,ITA,FR,GERM,SPA)
Possible to have Customize programming & vend messages using WinDEX
Credit Accumulation
Coin Mechanism Interface
Consumer Manipulation and Vend process
Multi pricing
Escrow
Correct change Indicator
Manual Payout
Manual Tubes filling
Saved Error listing - Audit
Cooling unit control by separate electronic control unit
MDB 5 different tubes values
Possible to link selections in up to 10 groups
Slave MDB board controlling the lift and bucket part

Programming Manual
GLASSFRONT VENDING MACHINES
Rev. 1.12
MODELLS: G-DRINK SVE GF6 / GF9 – DR6 / DR9 Page 4 of 42
1.1 DESCRIPTION OF FUNCTIONS AND FEATURES
INITIALISATION
Each time the door is open and closed, the lift and catcher system will perform an
initialisation in order to detect the shelves position. In order to avoid not needed
initialisations, if the door is open for less than 60 secondes, the initialisation is not
performed assuming nothing has changed rearding the shelf configuration during this
short time. During initialisation the machine will automatically detect the position and the
number of shelves. Only setting the number of trays (2 or 3 trays) is required.
Selection counting starts at the left side of the upper shelf with number 11 to 16 (or 19),
next shelf starts with 21 to 26 (or 29) and then going to the bottom shelf.
Maximum number of shelves is 7.
2 Trays means 6 columns/selections per shelf
3 Trays means 9 columns/selections per shelf
From version software V1.29, at power ON the lift will proceed first to the delivery bucket
in order to download remaining product in the hand bucket.
LOADING FACILITY
In order to allow easier loading of the bottom shelf, pushing the delivery flap will move the
bucket to the right side, pushing the flap again will move the bucket to the left side.
DRUM FEATURE
When a product is detected inside the drum, the LED light is switched on in the drum, and
the drum is unlock and goes in position open. If the product is not removed after 2 minutes
the light is switched off, while the message “REMOVE THE PRODUCT“alternatively with
arrows pointing in downwards is displayed. When the product is removed, the lights will
blink a short time before closing the drum
SOLD-OUT FEATURE
A magnetic sensor included in the delivery door flap allows the detection of the product
falling down the drum, if a selection is done with no product inside the columns, the
machine will put this selection in soldout until the door is open-close assuming the
selection has been reloaded.
GRAPHIC DISPLAY
During standby, in normal condition the machine will scroll a message in graphic 16x8 bits
higher character alternatively with correct change status message if any.
Also when the product have been detected the display will scroll the message “REMOVE
THE PRODUCT“ alternatively with arrows pointing in downwards.

Programming Manual
GLASSFRONT VENDING MACHINES
Rev. 1.12
MODELLS: G-DRINK SVE GF6 / GF9 – DR6 / DR9 Page 5 of 42
SPACE TO SALE FACILLITY
It is possible to group selections of the same product to one group.
•Up to 10 Groups of 63 selections
•Price per Group to avoid mistakes
•Copy function for quick setting
DOOR SWITCHES
For security purpose 2 Door switches are included in the machine, 1 for the slave lift
control board and cooling unit and 1 to main board. If one of the door switches is not in
closed position nothing in the lift side is allowed to move. Also the cooling unit is stopped.
VEND CONDITIONS MODE
Conditions are:
-Doors switches are closed
-Delivery flap is closed
-Drum is in closed position with not product inside and no errors reported
-Initialisation of the slave memory and shelves report has been properly done
-No error in the lift and bucket are reported (see Lift error list). If an error is
continuosly reported by the slave controller, any movement or initialisation will be
performed by the master until no error is reported. (see ERROR ROUTINE)
-MDB communication is working correctly
VEND DETECTION PROCESS
The product is detected when crossing the delivey inner flap by a magnetic sensor which
have the contact open when the door is open for more than 15mm.
This detection will cause the vend price deduction from the established credit, if not the
selection will be in soldout and the credit can be returned or an other selection is possible.
As the product drop in the drum, another infrared sensor will detect the product and opens
the drum. As soon as the product is removed the light will flash and the drum is closing.
IF THE PRODUCT IS NOT DETECTED IN THE DRUM, BUT SEEN CROSSING THE
DELIVERY INNER FLAP DOOR GATE, THE DRUM IS OPENING AND STAYS OPEN
FOR A FIXED TIME (INDEPENDANTLY IF THE PRODUCT IS REMOVED). IF THE
PRODUCT IS DETECTED WHILE THE DRUM IS TURNING OR DURING THE
PRODUCT IS REMOVED THE PREVIOUS MODE FUNCTION IS CANCELLED AND
TIMER IS RESET.
TO IMPROVE THE DETECTION LEVEL, ON THE TOP OF THE INFRARED SENSOR
PUSH THE BUTTON FOR 1 SECOND AND RELEASE IT WHEN THE LED IS BLINKING
QUICKLY IN THAT WAY THE MAXIMUM THRESHOLD IS SET TO THE MAXIMUM.

Programming Manual
GLASSFRONT VENDING MACHINES
Rev. 1.12
MODELLS: G-DRINK SVE GF6 / GF9 – DR6 / DR9 Page 6 of 42
DIP
-
Sw
itch
MDB
/ EXE
For EXE and MDB set
to position MDB.
DIP
-
Switch
DEX/UCS / JACK
For Executive set to
position DEX/UCS-

Programming Manual
GLASSFRONT VENDING MACHINES
Rev. 1.12
MODELLS: G-DRINK SVE GF6 / GF9 – DR6 / DR9 Page 7 of 42
FUNCTION OF SELECTION BUTTONS IN THE SERVICE MODE
Selection Nr.: 1
O
back
⌫
⌫⌫
⌫
Abort or escape a programming
point
Selection Nr.: 2
O
up
Increase or next programming point
by pushing selection button2
Selection Nr.: 3
O
down
Decrease or previous programming
point by pushing selection button 3
Selection Nr.: 4
O
Enter / Store
Call or store a programming point
by pushing selection button 4
Selection Nr.: 0
O
Price set to zero
Selection Nr.: 5
O
Fast up Fast increase of price or column
Selection Nr.: 6
O
Fast down Fast decrease of price or column
Selection Nr.: #
O
Copy function Copy price on next column
Password 4
-
2
-
3
-
1
-
4
Entry by selection button
4 = key 4
2 = key 2
3 = key 3
1 = key 1
4 = key 4

Programming Manual
GLASSFRONT VENDING MACHINES
Rev. 1.12
MODELLS: G-DRINK SVE GF6 / GF9 – DR6 / DR9 Page 8 of 42
2 SERVICE MODE
In the service mode, information such as sales by selection, total sales, total cash flow
through the machine, and diagnostic error codes can be accessed by using the selection
buttons and the electronic display. In addition, storage column assignments and vend
pricing can be set in this mode using the same techniques. The service mode can only be
entered when the vendor door is open and when the service mode switch is activated
(placed in the middle of the electronic board).
To step through the various programming functions each of the selection switches is given
a specific function (see previous page)
After entry into the service mode the operator can select one of several routines to read
data registers or to program machine configuration information. This level is called the
code level. Each of these paths is identified by a service code. The codes for the various
paths are as follows.
ERROR ROUTINE Error routine
TUBES PAYOUT Coin Payout Routine (work only MDB)
TUBES FILLING Tube Fill Routine (work only MDB)
VEND TEST Test Vend Routine
PASS Password required to access the protected menues
CASH COUNTER Cash counter routine
SALE COUNTER Sales counter routine
CASH PRICES SETTING Prices setting routine
KEY PRICES SETTING Prices setting cashless MDB (from V 0.21)
SPACE TO SALE Spaces to sales setting routine
OPTION SETTING Machine configuration setting routine
MDB SETTING MDB related setting
LANGUAGE SETTING Language selection
TIME SETTING Time and data routine
LIGHT SETTING Light control routine
REFRIGERATION Refrigeration control routine (not used)
PAYMENT SETTING Payment system
VEND INHIBITION Daily vending inhibit period
AGE CONTROL Daily age control period
RETURN TO VEND Return to unprotected menu
The password is the sequence of selection 4-2-3-1. (followed by 4). The purpose of this
password is to prevent accidental reprogramming by the operator.
PROTECTED MENUES

Programming Manual
GLASSFRONT VENDING MACHINES
Rev. 1.12
MODELLS: G-DRINK SVE GF6 / GF9 – DR6 / DR9 Page 9 of 42
2.1 ERROR ROUTINE
If the ENTER button is activated at the "ERROR" prompt the VMC will enter in the error
routine. If no errors have occurred since the last error reset the display will show a
"NONE" message. If an error has been detected since the last error reset the display will
show the first summary level error code that has occurred, such as "LIFT", which would
indicate a lift jam error. Using the UP or DOWN buttons will cycle through the various
summary level error. On the appendix A (Map of internal menu) you find all the error that
the machine can generate.
Activation of the HOME button while summary level error code is displayed will return the
VMC to the "ERROR" prompt.
Activation of the HOME button at "ERROR" prompt returns the VMC to the normal mode
door open state.
LIFT ERROR ROUTINE
If the ENTER button is activated at the "LIFT" prompt the VMC will display a "ERRxx"
message where XX indicates the kind of error that have been detected as being jammed.
Using the UP and DOWN buttons will cycle through all jammed columns. If the ENTER
button is pressed and held for two seconds during the display of any error code, that code
will be cleared.
After clearing, VMC will display the next existing column jam error, or "NONE" if no other
error.
Activation of HOME button will return the VMC to the code level at the "ERROR" message.
LIFT ERROR LIST
ERR01 Jamming or speed error on the Y vertical motor
ERR02 Home switch Y not found or connected
ERR03 Optical Y sensor doesn’t found shelves position
ERR04 Jamming or speed error on the X horizontal motor
ERR05 Home switch X not found or connected
ERR06 Optical X sensor doesn’t found columns position
ERR07 Slave unit error or initialisation missing
ERR08 Slave unit Memory error or initialisation corrupted
ERR09 Vend error
ERR10 Initialisation error or wrong shelves setting
ERR11 Bucket jammimg or missing signal
ERR12 Lock error ,missing contact on the slave board
ERR13 Slave door switch contact missing
ERR14 Hopper switch error contact missing
ERR15 Slave error power supply 24Vdc
ERR16 Delivery Flap door remaining open or switch missing
ERR17 Wrong shelves number detected
These potential errors will be automatically cleared at the door closing, then a new
initialisation will be performed to check if the failure (error) is remaining.

Programming Manual
GLASSFRONT VENDING MACHINES
Rev. 1.12
MODELLS: G-DRINK SVE GF6 / GF9 – DR6 / DR9 Page 10 of 42
DRUM ERROR LIST
OPEN Open position missing,motor or switch close position missing
CLOSE Close position missing,motor or switch close position missing
LOCK locking error ,motor or detection switch missing
UNLOC Unlocking error ,motor or detect switch missing
DETEC Product detection error
These potential errors will be NOT automatically cleared at the door closing,
manual clearing is required.
DOOR SWITCH ERROR ROUTINE
If the ENTER button is activated at the "DOOR" prompt the VMC will display a "DS"
message indicating a door switch error was detected (door open for more than one hour).
If the ENTER button is pressed and held for two seconds during the display of any error
code, that code will be cleared.
After clearing VMC will display the next existing error or "NONE" if no other error.
Activation of HOME button will return the VMC to the code level at the "ERROR"
message.
Be careful if door switch doesn’t work the cooling system is disabled!
SELECTION SWITCH ERROR ROUTINE
If the ENTER button is activated at the "SEL" prompt the VMC will display a "SLXX"
message where "XX" indicates the first selection switch error (switch always close).
Using the UP and DOWN buttons will cycle through all selection switch error. If the
ENTER button is pressed and held for two seconds during the display of any error code ,
that code will be cleared.
After clearing VMC will display the next existing error, or "NONE" if no other error.
Activation of HOME button will return the VMC to the code level at the "ERROR"
message.
CHANGER ERROR ROUTINE
If the ENTER button is activated at the "CHAR" prompt the VMC will display a "CC"
message indicating a changer communication error a "TS" message indicating a tube
sensor error, an "IC" message indicating an Inlet chute blocked error (no coins sensed in
the acceptor for a supplier pre-determined number of hours, a "TJ" message indicating a
tube jam error, or a "CRCH" message indicating a changer ROM checksum error. Using
the UP and DOWN buttons will cycle through all changer error. If the ENTER button is
pressed and held for two seconds during the display of any error code, that code will be
cleared.
After clearing VMC will display the next existing error, or "NONE" if no other error.
Activation of HOME button will return the VMC to the code level at the "ERROR" message.

Programming Manual
GLASSFRONT VENDING MACHINES
Rev. 1.12
MODELLS: G-DRINK SVE GF6 / GF9 – DR6 / DR9 Page 11 of 42
ACCEPTOR ERROR ROUTINE
If the ENTER button is activated at the "ACCE" prompt the VMC will display a "EE"
message indicating excessive escrow attempts (escrow to vends greater than a pre-
determined supplier standard), and "NJ" message indicating a coin jam (sensed and
reported by coin mechanism), or a "LA" message indicating a low acceptance rate. Using
the UP or DOWN buttons will cycle through all acceptor errors. If the ENTER button is
pressed and held for two seconds during the display of any error code , that code will be
cleared.
After clearing VMC will display the next existing error, or "NONE" if no other error.
Activation of HOME button will return the VMC to the code level at the "ERROR" message.
BILL VALIDATOR ERROR ROUTINE
If the ENTER button is activated at the "BVAL" prompt the VMC will display a "BC"
message indicating a bill validator communication error, a "BFUL" message indicating
that the bill stacker is full, a "BILL" message indicating a defective motor, a "BJ"
message indicating that there is a bill jammed in the bill validator, a "BRCH" message
indicating a checksum error, a "BOPN" message indicating an open cash box, or a "BS"
message indicating a bill sensor error. The first column that has been detected with a
home sense error. Using the UP or DOWN buttons will cycle through all bill validators
errors. If the ENTER button is pressed and held for two seconds during the display of any
error code that code will be cleared.
After clearing VMC will display the next existing error, or "NONE" if no other error.
Activation of HOME button will return the VMC to the code level at the "ERROR" message.
INDEPENDENT COOLING UNIT SETTING
The cooling unit is managed by an independent control unit, including LED display
and buttons.
If a different temperature is required inside the refrigerated cell, it is sufficient to change
the set-point on the electronic control unit, always keeping present the small variation of
temperature caused by the starting and stop cycles.
Example:
If an average product temperature of 8°C is needed,
program the “set-point” at 7°C
Please refer to the instruction at the end of this manual.

Programming Manual
GLASSFRONT VENDING MACHINES
Rev. 1.12
MODELLS: G-DRINK SVE GF6 / GF9 – DR6 / DR9 Page 12 of 42
2.2 PROGRAMMING
COIN PAYOUT ROUTINE (ONLY IN MDB)
If the ENTER button is activated at the "CPO" prompt the VMC will enter the coin payout
routine. Upon entry into this routine the display will show the lowest coin value
dispensable. Pressing the UP button will increase the display to the next highest coin
value, the DOWN will decrease to the next lowest coin values. When the changer has only
3 tubes, the fourth value will display to 0, means don 't exist the fourth tube.
Push button number 5 to the corresponding coin value and the display will show
the number of coins in the tube reported by the changer .
Pressing the ENTER button will pay out the displayed coin type. Activation of the HOME
button while a coin value is displayed will return the VMC to the "CPO" prompt.
Activation of the HOME button at the "CPO" prompt returns the VMC to the " normal
mode door open state.
TUBE FILL ROUTINE (ONLY IN MDB)
If the ENTER button is activated at the "TUFL" prompt the VMC will enter the tube fill
routine.
The purpose of this routine is to allow the operator to fill the tubes by entering them
through the acceptor and thus have total coin accountability, if they so choose.
Upon entry into this routine the VMC will enable acceptance of any coin type that will be
routed to an inventory tube and disable all others.
The VMC will count and display all inventoried coins and will not disable the acceptor from
taking coins when the highest price setting is reached.
Activation of HOME button while a coin inventory is displayed will return the VMC to the
“TUFL" prompt. Activation of the HOME button at the "TUFL" prompt returns the VMC to
the normal mode door open state

Programming Manual
GLASSFRONT VENDING MACHINES
Rev. 1.12
MODELLS: G-DRINK SVE GF6 / GF9 – DR6 / DR9 Page 13 of 42
TEST VEND ROUTINE
If ENTER button is pressed at the "TEST" prompt the VMC will enter the test routine.
Upon entry into this routine the display will show the first test "SELE" the description of the
test routines available are the follows:
”SELE” to test selection switch
“DRUM“ delivery drum test
“POWER” Power on off time &date
"VEND" Test vends
“FAIL” Historical of jamming
”SELE”
Activation of the ENTER button (at the” SELE” routine) will show the last selection button
pressed “SEY” where Yis the number of the selection. Use this routine to test all the
selection switch. From software version 0.08 there is the possibility to test the delivery
eyelet switch, when you open the delivery flap the display show “DELIV”. To come back to
the “TEST” menu, keep pressed the first selection for two seconds.
“DRUM”
Drum test allows to test and drive separatefunctions
"LOCK" Put the drum in lock postion
"UNLOCK" Put the drum in unlock postion
"OPEN" Put the drum in open postion
(Be careful to proceed the unlock position before using open and close test )
"CLOSE" Put the drum in locked position
(Be careful to proceed the unlock position before using open and close test
“POWER” Show the power-on / off and date&time of the vendor
"VEND"
This parameter is used to set the number of test vends (1 to 255) to be performed
after the door is closed. Test vends are not recorded.
“FAIL”
Displays the historical data of the lift failures during vend process.
Press ENTER button to display the last 10 failures - Snn Hour / Minute/ Day
Press UP button to visualize the next failure
Press button 5 to clear all failures
(Failure clearing must be performed after installation of new software from version 1.35d)
Press escape button to come back to the “TEST” menu.

Programming Manual
GLASSFRONT VENDING MACHINES
Rev. 1.12
MODELLS: G-DRINK SVE GF6 / GF9 – DR6 / DR9 Page 14 of 42
PASS ROUTINE
This routine is used to access at the protected menues.
At the “PASS” prompt press enter button, the display will be blank, press the follow
sequence of selection button 4-2-3-1 (password must be entered in 10 seconds) press
enter to confirm (selection 4) now you can see the first protected menu “CASH” (use up
and down button to cycle on the available menu).
CASH COUNTER & MONEY COUNTER ROUTINE (protected menue)
If the ENTER button is activated at the "CASH" prompt the VMC will enter the cash
counter routine. It is possible to display MONEY COUNTER and CASH COUNTER
MONEY COUNTER
If the ENTER button is activated at the "MONEY" prompt, the VMC will enter the money
counter routine.
Upon entry into this routine the display will show a "C BOX" / "XXXX" / "XXXX" message
where "XXXX" characters are the total money entered into the cashbox. Use up button to
see the money counter submenu:
-"C BOX" / "XXXX" "XXXX" total money to cashbox
-"C TUB" / "XXXX" "XXXX" total money to the coinage tube
-"C RET" / "XXXX" "XXXX" total money returned as change.
-"C MAN" / "XXXX" "XXXX" total money returned via manual payout submenu.
-"C CAR" / "XXXX" "XXXX" money paid using a card.
-"C BIL" / "XXXX" "XXXX" total money introduced in bill validator
Money counters can be reset in the same way as MIS counters (see C5 in Menue
Configuration).
CASH COUNTER
Upon entry into this routine the display will show a "CASH" / "XXXX" / "XXXX" message
where "XXXX" characters are the historical total cash counters due to vends that have
been recorded by the VMC.
The first quartet "XXXX" is the highest digits and the 2th "XXXX-" is the lowest.
Using the UP and DOWN button at this point will change the display to "CA n" / "-XXXX" /
"XXXX-" where nis a selection number and "XXXX" are the cash counter for that
selection. Use the UP and DOWN buttons to display the individualselection cash counters.
Activation of the HOME button while a selection counter is displayed will return the VMC
to the "CASH" prompt. Activation of the HOME button at the "CASH" prompt will return
the VMC to the unprotected area.

Programming Manual
GLASSFRONT VENDING MACHINES
Rev. 1.12
MODELLS: G-DRINK SVE GF6 / GF9 – DR6 / DR9 Page 15 of 42
SALES COUNTER ROUTINE (protected menue)
If the ENTER button is activated at the "SALE" prompt the VMC will enter the sales
counter routine.
Upon entry into this routine the display will show a "SALE" "-XXXX", "XXXX-" message
where "XXXX" characters is the historical total sales counter.
The 1th "XXXX" are the highest digits and the 2th "XXXX-" are the lowest.
Using the UP and DOWN button at this point will change the display to "SL n" / "-XXXX" /
"XXXX-" where nis a selection number and "XXXX" are the sales counter for that
selection.
Use the UP and DOWN buttons to display the individual selection sales counters.
Activation of the HOME button while a selection counter is displayed will return the VMC
to the "SALE" prompt.
Activation of the HOME button at the "SALE" prompt will return the VMC to the
unprotected area.
PRICE SETTING ROUTINE FOR CASH PAYMENTS (protected menue)
CASH PRICE ROUTINE PER SELECTION AND GROUPS.
If the ENTER button is activated at the "PRIC" prompt the VMC will enter the price setting
routine. The display will show a "Pr 11” price on upper left column. Up to GRP10
An “*” symbol near the column means that this one is not installed.
In multi-price mode you can choose different price for each selection; using UP and
DOWN buttons will cycle through available column (11 – 79) or “ALL”, “ALL” is used to
change the price for all selection (excluding group 1 to 10 ). Activation of the ENTER
button will show the actual price using UP and DOWN button will increase or decrease the
price by one lowest coin value respectively.
On this menu the buttons 5 and 6 (fast up, fast down) are active to increase or decrease
selections by 8 positions (change tray) and to to fast increase or decrease price value.
Is possible to copy current price to next selection pressing “#” button.
To clear price (set price = 0) press selection “0”.
Activation of the ENTER button while the desired price is displayed will save that price.
Activation of the HOME button while a selection price is displayed, without doing an
ENTER before will return the VMC to the selection display without saving the displayed
selection price.
Activation of the HOME button while a selection is displayed will return the VMC to the
"PRIC" prompt. Activation of the HOME button returns the VMC to unprotected area.
From software version 0.10 if the VMC is working on Executive price holding (with
menu C2=2 see below), the price menu is used to program the line of price holding.

Programming Manual
GLASSFRONT VENDING MACHINES
Rev. 1.12
MODELLS: G-DRINK SVE GF6 / GF9 – DR6 / DR9 Page 16 of 42
NOTE FOR CASH & CASHLESS PRICE SETTING
Price setting includes a price setting for Group1 to Group10, if a selection is
connected to a group, the selection price is disregarded, but the price set in the
corresponding group is used
PRICE SETTING ROUTINE FOR CASHLESS SYSTEMS (only in MDB)
This menu allows to set different vend prices for payments via cashless systems.
If the ENTER button is activated at the "KEY PRIC" prompt the VMC will enter the
cashless vend price setting routine.
From version 1.40 three price lists for cashless vend prices are available.
The method to program cashless prices is the some as for cash price setting routine.
SPACE TO SALES SETTING ROUTINE (protected menu)
TRAY & GROUP CONFIGURATION
TRAY
This menue is used to set the configuration of the machine, you have to do it only when
you change the control board.
Choice available is 2 Trays or 3 Trays
GF6 = 2 trays per shelf (6 columns/selections)
GF9 = 3 trays per shelf (9 columns/selections)
GROUP
The Group menue allows to assign selections to groups of selections (purpose is to
dispense the same products placed in different shelves first in first out to prevent fro
ageing).
Sel xx will let to choose the selection number 11 to 79 to be connected to one of the 10
groups using the up and down button (NO means no connection to group) and GRP1 to
GRP10 means connection to Group 1 to Group10.
When selections are connected to a group, these selections are dispensing alternatively,
independent from the selected selection number.
If a selection is assigned to a group, the vend price is not the selection price but the price
set for the group (see group price setting )
V-POS
Parameter to adjust the bucket height (product delivery position) at the delivery flap.
V-pos value can be set in steps of 1mm from 0 to 5mm

Programming Manual
GLASSFRONT VENDING MACHINES
Rev. 1.12
MODELLS: G-DRINK SVE GF6 / GF9 – DR6 / DR9 Page 17 of 42
MACHINE CONFIGURATION SETTING ROUTINE (protected menue)
If the ENTER button is activated at the "CON" prompt the VMC will enter the machine
configuration setting routine. The display will show a "C1" message where the "1"
indicates configuration setting number 1. Using UP and DOWN button will cycle through
the available configuration setting numbers. Activation of the ENTER button while a
configuration setting number is displayed will allow access to the current setting number of
the displayed configuration setting.
Activation of the ENTER button will save the displayed configuration.
Activation of the HOME button while configuration is displayed, without doing an ENTER
before, will return the VMC to the "CON" display without saving the displayed
configuration. Activation of the HOME button returns to unprotected area.
C1 RESERVED FOR FUTURE USE
C2 SLAVE UNIT ENABLE
(Only with Master & Snack Slave software)
This parameter enables or disables the slave unit and related programming menu:
C2 = 0 Slave machine not installed, normal menu.
C2 = 1 Slave machine installed, extended menu aktiv.
C3 EXTRA ROTATION FOR SNACK SLAVE UNIT
(Only with Master & Snack Slave software)
This parameter is used to activate an extra rotation of the spiral if the product is not
detected by the optical barrier:
C3 = 0 Extra rotation disable.
C3 = 1 Extra rotation enable.
C4 OPEN DOOR DISPLAY MODE
This parameter is used to change the MIS data information that you can read when the
door of VMC is open:
C4 = 0 Display only the Existing Error or nonE
C4 = 1 Display total Sales, total Cash and Existing Error or none (default).

Programming Manual
GLASSFRONT VENDING MACHINES
Rev. 1.12
MODELLS: G-DRINK SVE GF6 / GF9 – DR6 / DR9 Page 18 of 42
C5 RESET COUNTER MODE
This parameter determines the MIS internal counter reset methode:
C5 = 0 All resettable counter will be reset only using a reset command on
MIS communication mode (default).
C5 = 1 All resettable counter will be reset when you open the door, read one
of the resettable counter and close the door.
C5 RESET COUNTER MODE (From Version V 1.40)
C5 = 0 All resettable counter will be reset only using a reset command on
MIS communication mode (default).
C5 = 1 All resettable counters will be reset after each DEX reading.
C6 SOLD-OUT MODE FOR SNACK SLAVE UNIT
This parameter is used to enable sold-out status of a selection when the optical
barrier does not detect a product.
The sold-out status is reset when the door switch of the master is actuated.
C6 = 0 selection always available
C6 = 1 selection inhibited if "empty" was detected by the previous vend
C7 SAVE CREDIT MODE
This parameter determines how the VMC have to manage the credit:
C7 = 0 Clear the credit if nothing happens in the last five minutes (default).
C7 = 1 Keep the credit indefinitely.
C8 FORCED VEND
This parameter is used to prevent the use of the machine as a coin changer. When forced
vend is enabled you can obtain escrow only in the following cases:
- If coins are inserted and a selection is made (full or empty selection is the same).
- If you insert a coin that you can obtained through escrow (coins that go to the tube of
the coinage) and you don’t reach the maximum price.
C8 = 0 Forced vend disabled (default)
C8 = 1 Forced vend enabled.
Note: If a cashless system with reload facility is used Forced Vend is automatically disabled.

Programming Manual
GLASSFRONT VENDING MACHINES
Rev. 1.12
MODELLS: G-DRINK SVE GF6 / GF9 – DR6 / DR9 Page 19 of 42
C8 FORCE VEND (From Version V1.40)
This parameter is used to prevent the use of the machine as a coin changer. When forced
vend is enabled you can obtain escrow only in the following cases:
- If coins are inserted and a selection is made (full or empty selection is the same).
- If you insert a coin that you can obtained through escrow (coins that go to the tube of
the coinage) and you don’t reach the maximum price.
C8 = 0 Forced vend disabled (default).
C8 = 1 Forced vend enabled.
Note: If a cashless system with reload facility is used, Forced vend can be enabled.
C9 MULTI VEND
This parameter enables or disables automatic change process:
C9 = 0 Multi Vend disabled (change dispensed automatically after vend) (default)
If C9 is set to 0, the max coin acceptance = maximum selection price
C9 = 1 Multi Vend enabled (you can use your change to make another selection,
or to press the coin return button to get your change)
If C9 is set to 1, the max. coin acceptance level must be set in
CCOC>>>ACC
C10 BILL ESCROW MODE
This parameters allows the escrow of bill. If enabled and the last bill inserted takes the
credit over the maximum price, the bill be held in the escrow position, and can be returned
as escrow. If the function is disabled, bills go always to the stacker. The valid values are:
C10 = 0 Bill escrow enabled (default)
C10 = 1 Bill escrow disabled.
C11 EVENT REPORTING MODE (From Version V1.40)
C11 = 0 The Events (EA1&EA2) are reported during a normal DEX readout session.
C11 = 1 As an Event occurs, the VMC will send ENQ to advise a new EVENT is
available, the ENQ will be send every second until DL 0 is received or a
DEX readout session has been performed.
Refer to chapter 2.4 Event Table on page 36
C12 RESERVED FOR FUTURE USE
This manual suits for next models
3
Table of contents
Other Vendo Vending Machine manuals

Vendo
Vendo RSC User manual

Vendo
Vendo VUE 30 User manual

Vendo
Vendo SVE DL9 Operating instructions

Vendo
Vendo V-max User guide

Vendo
Vendo VUE 30 User manual

Vendo
Vendo SVE DL6 Owner's manual

Vendo
Vendo V21 Quick start guide

Vendo
Vendo VDI 100 User manual

Vendo
Vendo VARI-PAK 450 User manual

Vendo
Vendo V21 User manual