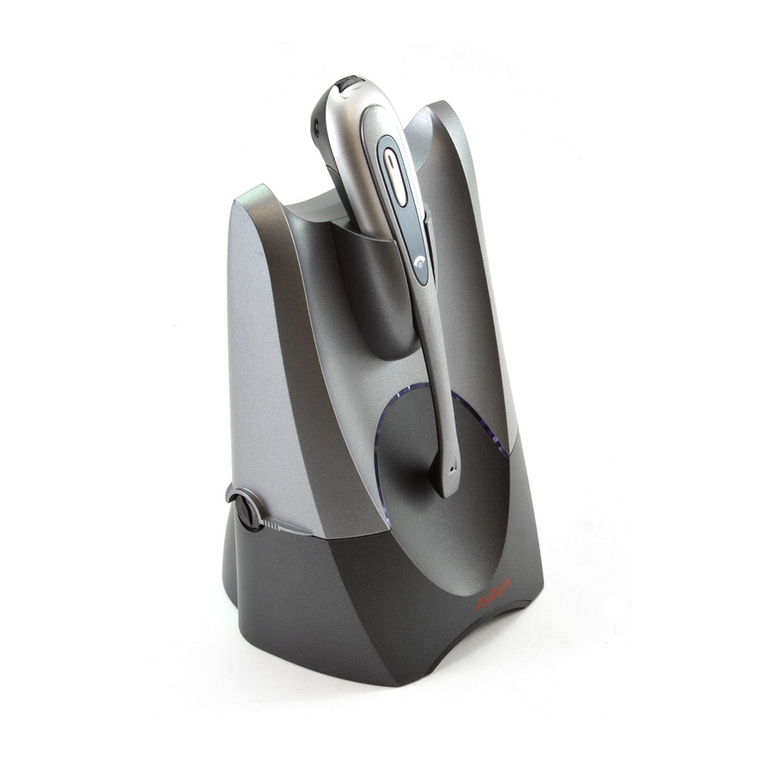
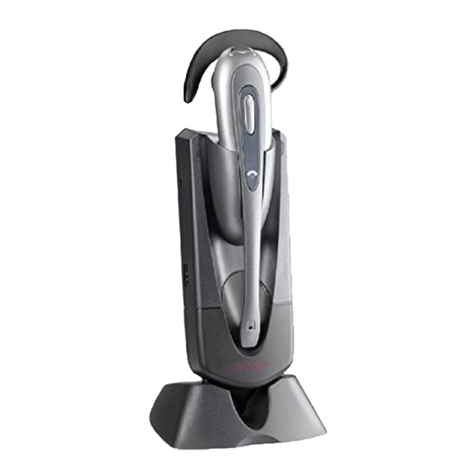
Avaya ABT-35 User manual

0 0 0
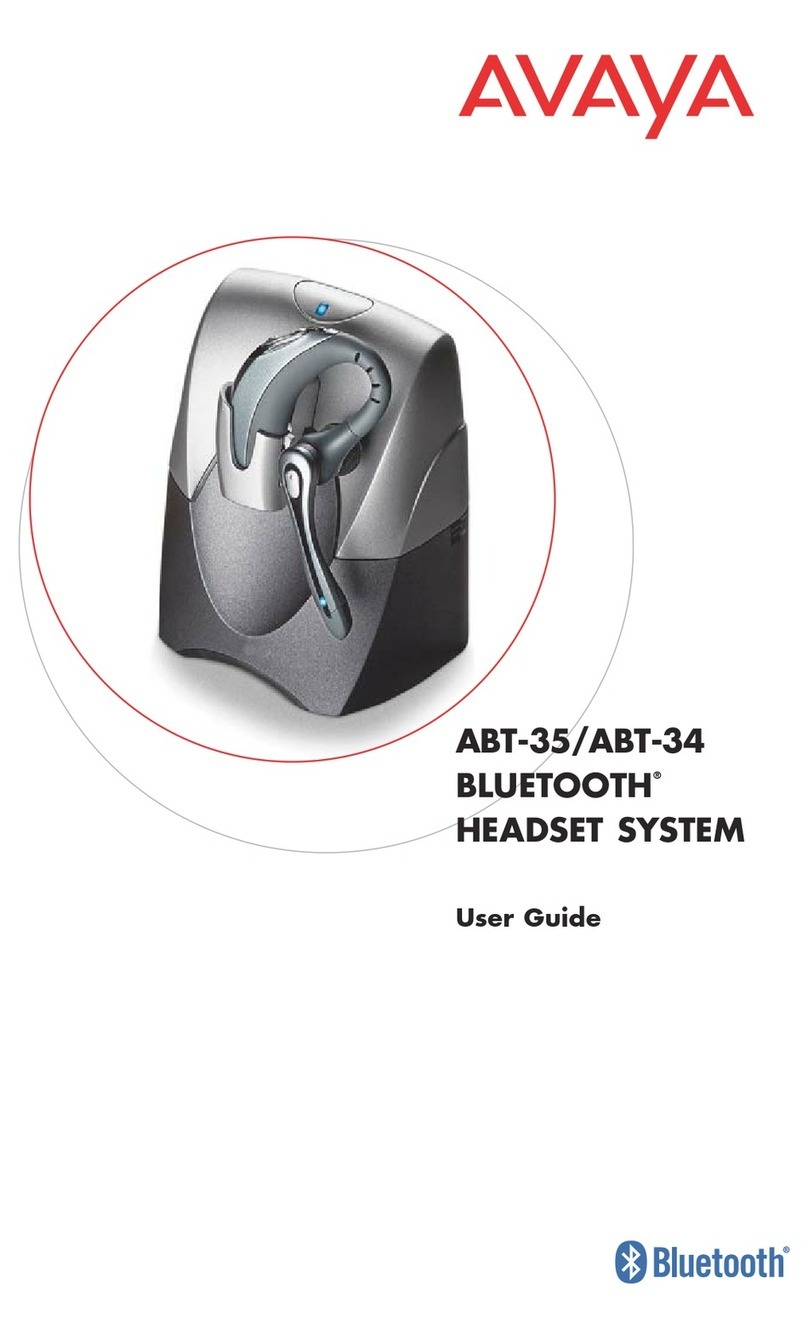
AVAYA ABT35-USB
BLUETOOTH®HEADSET SySTEm
USER GUIDE

3
TABLE OF CONTENTS
PACKAGE CONTENTS
Package Contents 3
Features 4
Charging 5
Powering 6
Pairing 7
Installing PerSonoCall Software 9
Adjusting Fit 10
Using Your Headset 12
Indicator Lights 15
Troubleshooting 16
Technical Assistance 18
Regulatory Notices 18
Headset
ABT35-USB
(front and side view)
PerSonoCall®
Software CD
Charging Stand
Headset AC Charger
Headset USB Charging Cable
USB Bluetooth Adapter
BUA-100
3 Ear Tips
(Small, Medium, Large)
USB Extension Cable (3')
Travel Pouch
WELCOME
This User Guide provides instructions on the setup and usage of the Avaya ABT35-USB
Bluetooth headset system. Before getting started, please review the safety booklet
included in your package. For additional help, service or support information, refer to the
product warranty card or visit www.avayaheadsets.com.

4 5
FEATURES CHARGING
Before using, you must first charge your headset. The indicator light flashes red while
charging and turns solid blue when the headset is fully charged.
20 minutes = minimum charge
3 hours = full charge
NOTE: Do not use headset while charging and do not connect the charger while headset is in use.
Pairing/Connect
Button
Indicator Light
Power/Mute Button
Listen Volume
Adjust Button +/-
Ear Tip
Horizontal Boom
Adjustment
Call Control
Button
Charge
Connection
Noise-Canceling
Microphone with
WindSmart®Technology AC Charging USB Charging
AC Charging
with Charging Stand USB Charging
with Charging Stand

Before using your headset for the first time, you must pair it with your Bluetooth phone or
device. Be sure the headset is fully charged. For set up and pairing instructions with Bluetooth
devices other than mobile phones, please consult your Bluetooth device user guide.
Turn on both devices.
6 7
POWERING PAIRING
Powering Headset
Powering USB Bluetooth Adapter
Pairing Headset with Bluetooth Phone
The USB Bluetooth adapter is automatically powered on upon inserting into the USB port
of the computer. If your USB port on the computer is hard to access, you can use the USB
extension cable.
NOTE: The USB Bluetooth adapter is automatically active with the current paired headset upon
powering on.
Press and hold the power/mute button
for three seconds to turn the headset
on or off.
The indicator light flashes blue when the
headset is on.
The indicator light will flash red when
the battery becomes low.
1. Simultaneously press the listen volume
adjust button marked + (volume up)
and the call control button. Release the
buttons when the indicator light begins
to flash red then blue.
2. While the headset is flashing red and
blue, use the phone menu to search
for Bluetooth devices and select “510
Plantronics”.
3. When prompted for passkey enter
0000. The headset will flash blue when
paired successfully.

8 9
PAIRING
Pairing Headset
with USB Bluetooth Adapter
NOTE: The headset and USB Bluetooth adapter are paired to each other at the factory. However,
if you have purchased a USB Bluetooth adapter separately, or if you wish to use a replacement
headset with your existing adapter,the units must be paired.
Power on the headset. Insert the USB Bluetooth adapter in the USB port of your computer.
1. Simultaneously press the listen volume
adjust button marked + (volume up)
and the call control button. Release
the buttons when the indicator light
begins to flash red then blue.
NOTE: Take caution when manually pairing the USB adapter. Do not press hard. Please “pinch”
with both fingers rather than push on the adapter to avoid damage to the adapter or USB port.
2. Pinch the pairing/connect button
for at least 2 seconds until adapter
flashes red and blue and begin pairing
with your Bluetooth headset.
2 sec.
INSTALLING PERSONOCALL®SOFTWARE
Avaya PerSonoCall®software provides the link between your Bluetooth headset and the
softphone application on your computer. PerSonoCall software provides the ability to
remotely detect and answer/end a call from your softphone application via the headset
call control button.
Check the PerSonoCall compatibility list at www.avayaheadsets.com for the most current
information on softphone compatibility. If your softphone is not currently supported by
PerSonoCall, please refer to page 12.
1. With the CD inserted, go to the PerSonoCall main screen and click on “Install the
PerSonoCall Software.”
2. Your softphone may require you to choose which audio device you wish to use. Please
refer to softphone documentation for details.
NOTE: When the USB Bluetooth adapter is installed, it becomes the default audio device in
your computer. You can set preferences manually in the Windows®operating system through
the Sounds and Audio Devices option in the Control Panel.
NOTE: Once installed we recommend that you set PerSonoCall to launch whenever the
Windows®operating system starts.
System Tray Icons
After installing the software, one of the four system tray icons will appear in the tray bar
at the bottom of your screen showing status of headset communication with PerSonoCall.
: No headset detected
: Headset detected, no radio link to USB Bluetooth adapter
: Headset detected, and radio link to USB Bluetooth adapter active
: Headset detected, and radio link to USB Bluetooth adapter is locked on
Right click on the headset system tray icon and choose “Options”. This will bring up
the PerSonoCall Basic Options and Current Status Screens.
Refer to online application help for explanation details on the PerSonoCall software.
Configuration and status

1110
Replacing the Ear Tip
Rotate the microphone horizontally and vertically as illustrated, to select for left or right
ear wearing. The illustration shows conversion from right to left ear wearing. Reverse the
procedure to convert from left to right ear wearing.
Slide the headset over and behind your ear. Press gently towards your ear for a snug fit.
Adjust the microphone position so that it is directed towards your mouth.
Inserting a New Ear Tip
ADJUSTING FIT
Wearing the Headset

0 0
To make a call, simply dial the number via your softphone application.
To answer or end a call, press the call control button.
When using PerSonoCall, the radio link between the headset and the USB Bluetooth adapter
will only be active during a call. This is the default setting intended to preserve the battery
life of the headset. However, you may wish to have the radio link active when not on a call
so you can listen to other audio sources, such as streaming audio on your PC.
NOTE: Locking the radio link on for extended periods of time will significantly reduce the
standby and talk time of the headset.
For Softphones Not Compatible with PerSonoCall
Check the PerSonoCall compatibility list at www.avayaheadsets.com/personocall for the
most current information on softphone compatibility.
If your softphone is not currently supported by PerSonoCall, remote detection and answer/
end via the headset does not function. Pressing the call control button on the headset
will only open and close the radio link providing audio; you must answer the call from
the softphone.
To answer or end a call, briefly press the call control button.
To make a call, enter number on your phone, press send, and the call is automatically
transferred to headset; no need to press the call control button.
1312
USING YOUR HEADSET
Additional Features
Only with Mobile Phone
Answering/Ending/Making Calls
with PerSonoCall on Softphone
Redialing Last Number
To activate last number redial, double
click the call control button. You will hear
a high tone for each key press. When you
hear a further tone, the last number has
been redialed.
Rejecting a Call
When receiving an incoming call, press
and hold the call control button. You will
hear a tone. When you hear a second
tone, the call has been rejected and you
can release the button.
Using Voice Dialing
With the headset on, press and hold
the call control button for 2 seconds,
until you hear a second tone, to activate
voice dialing.
NOTE: To use voice activated dialing, the
voice dialing feature must be enabled on
your phone. See your Bluetooth phone
manual for instructions.
Switching a Call From Phone to Headset
To switch an active call from your phone
to your headset, briefly press the call
control button.
Switching a Call From Headset to Phone
To switch an active call from your headset
to your phone, press and hold the call
control button until you hear a tone.
When you hear a second tone, the transfer
has been completed and you can release
the button.
Answering/Ending/Making Calls
with Mobile Phone
The ABT35-USB headset has Multipoint Technology which allows you to seamlessly switch
between two audio devices. You can answer a call from either your PC-based softphone
or your mobile phone by pressing the call control button. The headset must be paired to
both devices.
Multipoint Versatility

0 0
INDICATOR LIGHTS
1514
Bluetooth USB Adapter Indicator Lights
Headset Indicator Lights
Headset Status Light
Power Flashes Blue
Charging Flashes Red
Fully Charged Solid Blue
Battery Low Flashes Red
Pairing Flashes Red and Blue
Bluetooth Device
Connected to Headset Flashes Blue
Action Light
Disconnected from the Headset Flashes Purple
Connected to the Headset Solid Blue
Radio Link Active Flashes Blue
Pairing Mode Flashes Red and Blue
USING YOUR HEADSET
During a call, briefly press the power/mute button to mute the microphone. When muted,
the headset will sound two tones every 30 seconds.
To unmute press the button again.
Adjusting Volume
Muting a Call
To increase listening volume, press the upper end (+) of the volume button. To decrease
listening volume, press the lower end (-).
To adjust the listen or speak volume of the softphone, please refer to the softphone
user documentation.
To adjust the listen or speak volume of the audio device on the computer, use the Sound
and Audio Device section on the control panel.

1716
TROUBLESHOOTING FOR ABT35-USB
• Lower the listen volume on your softphone until
the distortion disappears.
• If the distortion is still present, lower the listen
volume control on the computer.
• Adjust volume on headset. See page 14.
• The USB Bluetooth adapter will set itself as the
default audio device in Windows®
. Use the Audio
settings in Windows®under Sounds and Audio
Devices to change the device used for audio.
• Headset battery may be dead, so be sure the
headset is fully charged. See page 5.
• When a PC goes into standby or hibernation, the
USB Bluetooth adapter no longer is powered on.
Be sure your PC is in an active state.
• Battery may be deteriorating. Call your
supplier or Plantronics.
• The headset radio link is locked on. Be sure you
do not lock the radio link on for long periods of
time as it will significantly reduce standby and
talk time of the headset.
• One beep every 10 seconds is caused by a low
battery warning. Recharge battery by returning
headset to the charging stand for one to three
hours until indicator light turns blue.
• One beep is an out of range warning.
Move closer to the USB Bluetooth adapter.
• Two beeps every 30 seconds indicate your mute is
on. Press the mute button once to turn mute off.
Sound in headset is distorted.
I can hear echo in headset.
The other headset I was using to listen
to music does not work any more.
My headset stops responding
to button presses.
Battery talk time or standby time is
significantly degraded even after a
full charge.
I hear beeps in the headset.
• Check compatibility list on www.avayaheadsets.
com to ensure your softphone is compatible for
remote answer and disconnect.
• Headset battery needs to be charged. See page 5.
• Headset is not paired to the USB Bluetooth
adapter. See page 8.
• When a PC goes into standby or hibernation, the
USB Bluetooth adapter no longer is powered on.
Be sure your PC is in an active state.
• Be sure PerSonoCall software is installed
and running. See page 9.
• Headset is not paired to the USB Bluetooth
adapter. See page 8.
• Headset battery needs to be charged. See page 5.
• Headset may be out of range of the USB
Bluetooth adapter. Move closer to adapter until
the headset is within range. Range varies with
office environment.
• When a PC goes into standby or hibernation, the
USB Bluetooth adapter no longer is powered on.
Be sure your PC is in an active state.
• Headset is not paired to the USB Bluetooth
adapter. See page 8.
• Headset is not paired to the USB Bluetooth
adapter. See page 8.
• Headset battery needs to be charged. See page 5.
• The USB Bluetooth adapter is not set as the
default audio device. Use the Audio settings in
Windows®under Sounds and Audio Devices to
select “Plantronics BT Adapter” as the audio
device.
• Listening volume is too low. Press the volume up
button on the headset. See page 14.
• Headset is muted. Press the mute button on
headset to unmute the microphone. See page 14.
• Headset microphone boom aligned incorrectly.
Align the headset boom with your mouth.
• Headset battery needs to be charged. See page 5.
• The USB Bluetooth adapter is not set as the
default voice device. Use the Voice settings in
Windows®under Sounds and Voice Devices
to select “Plantronics BT Adapter” as the voice
device.
My ABT35-USB headset does not work
with the softphone I am using on my
PC. (I cannot answer or disconnect
from the headset call button).
I’ve plugged in the USB Bluetooth
adapter but my headset does not respond
to button presses.
I’ve installed PerSonoCall and the USB
Bluetooth adapter but the system tray icon
shows a red X (denoting no connection).
I cannot hear caller.
Callers cannot hear me.
Problem Solution Problem Solution

74147-01 (11/06)
TECHNICAL ASSISTANCE
The Avaya Headset Helpdesk is ready to assist you! Dial (800) 544-4779, or visit the
support section of our website at www.avayaheadsets.com.
REGULATORY NOTICES
FCC REQUIREMENTS PART 15
This device complies with Part 15 of the FCC Rules. Operation is subject to the following two
conditions:
1. This device may not cause harmful interference, and
2. This device must accept any interference received, including interference that may cause
undesired operation.
This equipment has been tested and found to comply with the limits for a Class B digital device,
pursuant to Part 15 of the FCC Rules. These limits are designed to provide reasonable protection
against harmful interference in a residential installation. This equipment generates, uses,
and can radiate radio frequency energy and, if not installed and used in accordance with the
instructions, may cause harmful interference to radio communications.
However, there is no guarantee that interference will not occur in a particular installation. If
this equipment does cause harmful interference to radio or television reception which can be
determined by turning the radio or television off and on, the user is encouraged to try to correct
interference by one or more of the following measures:
1. Reorient or relocate the receiving antenna.
2. Increase the separation between the equipment and receiver.
3. Connect the equipment into an outlet on another circuit.
4. Consult the dealer or an experienced radio/TV technician for help.
NOTE: Modifications not expressly approved by Plantronics, Inc. could void the user’s authority to
operate the equipment.
FCC REGISTRATION INFORMATION - Part 68
This equipment complies with Part 68 of the FCC rules and the requirements adopted by ACTA.
On the exterior of this equipment is a label that contains a product identifier in the format US:
AAAEQ##TXXXX. If requested, this information must be provided to your telephone company.
A plug and jack used to connect this equipment to the premises wiring and telephone network
must comply with the applicable FCC Part 68 rules and requirements adopted by ACTA. A
compliant telephone cord and modular plug is provided with this product. It is designed to be
connected to a compatible jack that is also compliant. See installation instructions for details.
The REN is useful to determine the quantity of devices you may connect to your telephone line.
Excessive RENs on a telephone line may result in the devices not ringing in response to an
incoming call. In most, but not all areas, the sum of the RENs should not exceed five (5.0). To be
certain of the number of devices you may connect to your line, as determined by the REN, contact
your local telephone company. For product approved after July 23, 2001, the REN for this product
is part of the product identifier that has the format US:AAAEQ##TXXXX. The digits represented
by ### are the REN without the decimal point. (For example, 03 represents a REN of 0.3.) For
earlier producers, the REN is separately shown on the label.
If this telephone equipment causes harm to the telephone network, the telephone company will
notify you in advance that temporary discontinuance of service may be required. But if advance
notice isn’t practical, the telephone company will notify the customer as soon as possible. Also,
you will be advised of your right to file a complaint with the FCC if you believe it is necessary.
The telephone company may make changes in its facilities, equipment, operations, or procedures
that could affect the proper functioning of your equipment. If they do, you will be notified in
advance in order for you to make necessary modifications to maintain uninterrupted service.
If trouble is experienced with this unit, for repair or warranty information, please contact
customer service at (800) 544-4660. If the equipment is causing harm to the network, the
telephone company may request that you disconnect the equipment until the problem is resolved.
DO NOT DISASSEMBLE THIS EQUIPMENT: It does not contain any user serviceable components.
We recommend the installation of an AC surge arrester in the AC outlet to which this equipment
is connected. Telephone companies report that electrical surges, typically lighting transients, are
very destructive to customer terminal equipment connected to AC power sources.
1918
The antenna used for this transmitter must not be co-located or operating in conjunction with
any other antenna or transmitter. End-users and installers must be provided with installation
instructions and transmitter operating conditions for satisfying RF exposure compliance.
EXPOSURE TO RF RADIATION
The internal wireless radio operates within the guidelines found in radio frequency safety
standards and recommendations, which reflect the consensus of the scientific community.
Independent studies have shown that the internal wireless radio is safe for use by consumers.
Visit www.avayaheadsets.com for more information.
INDUSTRY CANADA NOTICE
Radio Equipment
Operation of this device is subject to the following two conditions: (1) this device may not cause
interference, and (2) this device must accept any interference, including interference that may
cause undesired operation of the device.
This product meets the applicable Industry Canada technical specifications of the RSS-213 Issue 2.
The Ringer Equivalence Number is an indication of the maximum number of devices allowed
to be connected to a telephone interface. The termination on an interface may consist of any
combination of devices subject only to the requirement that the sum of all RENs of all of the
devices does not exceed five.
Avaya
Corporate Headquarters
211 Mt Airy Road
Basking Ridge, NJ 07920 USA
www.avaya.com
© 2006 Plantronics, Inc. All rights reserved. Avaya and the Avaya logo are trademarks by Avaya, Inc. and
may be registered in certain jurisdictions. PerSonoCall and WindSmart are trademarks or registered
trademarks of Plantronics, Inc. The Bluetooth name and the Bluetooth trademarks are owned by Bluetooth
SIG, Inc. and are used by Avaya under license. Windows is either a registered trademark or a trademark of
Microsoft Corporation in the United States and/or other countries. All other trademarks are the property
of their respective owners. Patents U.S. 5,210,791; 6,923,688; 7,075,270; D512,984; D519,498; D521,492;
Australia 303054; EM 293964-0004-0006; Taiwan D112594 and Patents Pending.

0 0 0
AVAYA ABT35-USB
BLUETOOTH®HEADSET-SySTEm
BRUGERVEJLEDNING

© 2006 Plantronics, Inc. Alle rettigheder forbeholdes. Avaya og Avaya-logoet er varemærker tilhørende
Avaya, Inc. o ger muligvis registreret i nogle retskredse. PerSonoCall og WindSmart er varemærker eller
registrerede varemærker, der tilhører Plantronics, Inc. Bluetooth-navnet og Bluetooth-varemærkerne ejes
af Bluetooth SIG, Inc. og benyttes af Avaya under licens. Windows er enten et registreret varemærke eller
et varemærke tilhørende Microsoft Corporation i USA og/eller andre lande. Alle andre varemærker er de
respektive ejeres ejendom. Patenter i USA: 5,210,791; 6,923,688; 7,075,270; D512,984; D519,498; D521,492;
Australien 303054; EM 293964-0004-0006; Taiwan D112594 og anmeldte patenter.
74147-02 (11/06)
1918
AUT, BEL, DEU, DNK, ESP,
FRA, GRC, ITA, IRL, LUX,
NLD, PRT, SWE, FIN, CYP,
CZE, EST, HUN, LVA, LTU,
MLT, POL, SVK, SVN.
GBR
Avaya
Virksomhedens hovedkvarter
211 Mt Airy Road
Basking Ridge, NJ 07920 USA
www.avaya.com

0 0 0
AVAYA ABT35-USB
BLUETOOTH®-HEADSET-SySTEm
BENUTZERHANDBUCH

3
INHALTSVERZEICHNIS
PAKETINHALT
Paketinhalt 3
Merkmale 4
Aufladen 5
Ein-/Ausschalten 6
Paarungsvorgang 7
Installieren der PerSonoCall-Software 9
Anpassen des Headsets 10
Verwenden des Headsets 12
Leuchtanzeigen 15
Fehlerbehebung 16
Headset
ABT35-USB
(Vorder- und Seitenansicht)
PerSonoCall®-
Software-CD
Kabel für das
USB-Headset-Ladegerät
USB-Bluetooth-Adapter
BUA-100
3 Ohrhörer
(klein, mittel, groß)
WILLKOMMEN
Dieses Benutzerhandbuch enthält Anweisungen zur Installation und Nutzung des
Bluetooth-Headset-Systems Avaya ABT35-USB. Lesen Sie vor der ersten Inbetriebnahme
die Sicherheitsinformationen in der mitgelieferten Broschüre aufmerksam durch.
Reiseetui
USB-Verlängerungskabel
(ca. 90 cm)
Headset-Ladegerät
Tischladegerät

4 5
MERKMALE AUFLADEN
Laden Sie vor der Verwendung das Headset auf. Die Leuchtanzeige blinkt während
des Ladevorgangs rot auf. Sobald das Headset vollständig aufgeladen ist, leuchtet sie
konstant blau.
20 Minuten = Mindestaufladung
3 Stunden = Vollständige Aufladung
HINWEIS: Verwenden Sie das Headset nicht während des Ladevorgangs und schließen Sie das
Ladegerät nicht an, während das Headset genutzt wird.
Paaren/Verbinden-
Taste
Leuchtanzeige
Ein/Aus- bzw.
Stummschaltungstaste
Hörlautstärke-
regler +/-
Ohrhörer
Horizontale Einstellung
des Mikrofonarms
Gesprächstaste
Ladeverbindung
Noise Cancelling-
Mikrofon mit
WindSmart®-Technologie
Status-Leuchtanzeige
Laden mit Ladegerät Laden über USB
Laden mit Tischladegerät
(über Stromanschluss) Laden mit Tischladegerät
(über USB-Anschluss)

Vor der ersten Inbetriebnahme des Headsets müssen Sie es mit Ihrem Bluetooth-
Telefon oder -Gerät paaren. Stellen Sie sicher, dass der Akku vollständig aufgeladen ist.
Anleitungen zum Einrichten und Paaren mit anderen Bluetooth-Geräten finden Sie im
Handbuch des jeweiligen Bluetooth-Geräts.
Schalten Sie beide Geräte ein.
6 7
EIN-/AUSSCHALTEN PAARUNGSVORGANG
Ein - und Ausschalten des Headsets
Einschalten des USB-Bluetooth-
Adapters
Paaren des Headsets mit einem
Bluetooth-Telefon
Der USB-Bluetooth-Adapter wird beim Einstecken in den USB-Anschluss des Computers
automatisch eingeschaltet. Falls der USB-Anschluss am Computer nur schwer zugänglich
ist, verwenden Sie das USB-Verlängerungskabel.
HINWEIS: Der USB-Bluetooth-Adapter ist beim Einschalten automatisch mit dem aktuell
gepaarten Headset aktiv.
Drücken Sie die Ein/Aus-Stummschal-
tungstaste drei Sekunden lang, um das
Headset ein- oder auszuschalten.
Die Leuchtanzeige blinkt blau, wenn das
Headset eingeschaltet ist.
Bei einem niedrigen Akkustand blinkt die
Leuchtanzeige rot.
1. Drücken Sie gleichzeitig den mit
„+“ markierten Hörlautstärkeregler
(Lauter-Taste) und die
Gesprächstaste. Lassen Sie die Tasten
los, wenn die Leuchtanzeige erst rot
und dann blau aufleuchtet.
2. Während die Statusanzeige rot und
blau aufleuchtet, suchen Sie über
das Telefonmenü nach der Option für
Bluetooth-Geräte und wählen Sie „510
Plantronics“.
3. Wenn Sie nach einem Passkey
gefragt werden, geben Sie „0000“
ein. Das Headset leuchtet bei einer
erfolgreichen Paarung blau auf.

8
PAARUNGSVORGANG
Paaren des Headsets
mit dem USB-Bluetooth-Adapter
HINWEIS: Das Headset und der USB-Bluetooth-Adapter sind werkseitig miteinander gepaart.
Falls Sie jedoch einen USB-Bluetooth-Adapter separat erworben haben oder falls Sie ein
Ersatz-Headset mit dem vorhandenen Adapter verwenden möchten, müssen die Geräte
gepaart werden.
Schalten Sie das Headset ein. Stecken Sie den USB-Bluetooth-Adapter in den USB-
Anschluss am Computer.
1. Drücken Sie gleichzeitig den mit
„+“ markierten Hörlautstärkeregler
des Headsets (Lauter-Taste) und die
Gesprächstaste. Lassen Sie die Tasten los,
wenn die Leuchtanzeige erst rot und
dann blau aufleuchtet.
HINWEIS: Gehen Sie beim manuellen Paaren des USB-Adapters vorsichtig vor. Drücken Sie
nicht zu hart. Um Schäden am Adapter und am USB-Anschluss zu vermeiden, drücken Sie die
Paaren/Verbinden-Taste am Adapter vorsichtig mit der Fingerspitze.
2. Drücken Sie mindestens zwei
Sekunden lang die Paaren/Verbinden-
Taste des USB-Bluetooth-Adapters,
bis der Adapter erst rot und dann
blau aufleuchtet. Damit beginnt die
Paarung mit dem Bluetooth-Headset.
2 sec.
9
INSTALLIEREN DER PERSONOCALL®-SOFTWARE
Die Avaya PerSonoCall®-Software bildet die Verbindung zwischen dem Bluetooth-Headset
und den kompatiblen Softphone-Anwendungen auf dem Computer. Die PerSonoCall-
Software ermöglicht das Annehmen/Beenden eines Softphone-Gesprächs über die
Gesprächstaste am Headset.
Darüber hinaus bietet PerSonoCall einige grundlegende Konfigurations- und
Statusinformationen zum System. Weitere Informationen finden Sie auf Seite 12.
In der PerSonoCall-Kompatibilitätsliste unter www.avayaheadsets.com finden Sie die
neuesten Informationen zur Kompatibilität von Softphones. Falls Ihr Softphone derzeit
nicht durch PerSonoCall unterstützt wird, finden Sie weitere Informationen auf Seite 12.
1. Legen Sie die CD ein, öffnen Sie den PerSonoCall-Hauptbildschirm und klicken Sie auf
„PerSonoCall-Software installieren“.
2. Sie werden ggf. aufgefordert, das zu verwendende Audiogerät auszuwählen. Weitere
Informationen finden Sie im Benutzerhandbuch Ihres Softphones.
HINWEIS: Bei der Installation des USB-Bluetooth-Adapters wird dieser als Standard-
Audiogerät auf dem Computer festgelegt. Sie können in der Systemsteuerung von Windows®
mit der Option „Sounds und Audiogeräte“ die Einstellungen manuell festlegen.
HINWEIS: Nach erfolgter Installation sollten Sie festlegen, dass PerSonoCall bei jedem
Starten des Computers automatisch ebenfalls gestartet wird.
Symbole in der Taskleiste
Nach der Installation der Software wird eines von vier Symbolen in der Taskleiste
unten im Bildschirm angezeigt. Dieses Symbol zeigt den Status der Kommunikation des
Headsets mit PerSonoCall an.
: Kein Headset gefunden
: Headset gefunden, aber keine Funkverbindung zum USB-Bluetooth-Adapter
: Headset gefunden und Funkverbindung zum USB-Bluetooth-Adapter aktiv
: Headset gefunden und Funkverbindung zum USB-Bluetooth-Adapter aktiv lassen
Konfiguration und Status
Klicken Sie mit der rechten Maustaste auf das Headset-Symbol in der Taskleiste und
wählen Sie „Optionen“. Die PerSonoCall-Fenster „Grundoptionen“ und „Aktueller
Status“ werden geöffnet.
Genauere Erläuterungen zur PerSonoCall-Software finden Sie in der Online-
Anwendungshilfe.

1110
Austauschen des Ohrhörers
Drehen Sie das Mikrofon horizontal und vertikal wie in der Abbildung beschrieben, um
das Headset am rechten oder linken Ohr zu tragen. In der Abbildung wird das Wechseln
von der rechten zur linken Tragevariante dargestellt. Für das Wechseln von der linken
zur rechten Tragevariante gehen Sie bitte in umgekehrter Reihenfolge vor.
Schieben Sie das Headset über das Ohr nach hinten. Drücken Sie das Headset vorsichtig
gegen Ihr Ohr, sodass es perfekt sitzt.
Positionieren Sie das Mikrofon so, dass es zu Ihrem Mund zeigt.
Einsetzen eines neuen Ohrhörers
ANPASSEN DES HEADSETS
Tragen des Headsets

0 0
Um einen Anruf zu tätigen, wählen Sie einfach die gewünschte Nummer über die
Softphone-Anwendung.
Um einen Anruf entgegenzunehmen oder zu beenden, drücken Sie die Gesprächstaste.
Bei PerSonoCall ist die Funkverbindung zwischen dem Headset und dem USB-Bluetooth-
Adapter nur während eines Gesprächs aktiv. Dies ist die Standardeinstellung, um
die Nutzungsdauer des Akkus im Headset zu verlängern. Unter Umständen soll die
Funkverbindung jedoch auch außerhalb von Gesprächen aktiv bleiben, damit Sie auch
andere Audioquellen hören können, z. B. Audio-Streaming am PC. Zum Halten der
Funkverbindung stehen zwei Verfahren zur Auswahl:
HINWEIS: Wenn Sie die Funkverbindung über einen längeren Zeitraum hinweg aktiv lassen,
werden die Standby- und Gesprächszeit des Headsets erheblich verkürzt.
Für Softphones, die nicht mit PerSonoCall kompatibel sind
In der PerSonoCall-Kompatibilitätsliste unter www.avayaheadsets.com finden Sie die
neuesten Informationen zur Kompatibilität von Softphones.
Falls Ihr Softphone derzeit nicht durch PerSonoCall unterstützt wird, funktioniert das
Annehmen/Beenden von Gesprächen über das Headset nicht. Durch Drücken der
Gesprächstaste auf dem Headset wird lediglich die Funkverbindung für Audioquellen
geöffnet. Sie müssen den Anruf am Softphone entgegennehmen.
Um einen Anruf entgegenzunehmen oder zu beenden, drücken Sie kurz die Gesprächstaste.
Geben Sie zum Tätigen eines Anrufs die Nummer in Ihr Telefon ein und drücken Sie auf
die Senden-Taste. Der Anruf wird automatisch an das Headset weitergeleitet und die
Gesprächstaste muss nicht gedrückt werden.
1312
VERWENDEN DES HEADSETS
Zusätzliche Funktionen
Nur mit Mobiltelefon
Annehmen/Beenden/Tätigen von
Gesprächen mit PerSonoCall am Softphone
Wahlwiederholung
Drücken Sie zum Wählen der zuletzt
gewählten Nummer zwei Mal auf die
Gesprächstaste. Bei jedem Tastendruck
wird ein hoher Ton wiedergegeben.
Wenn Sie einen weiteren Ton hören,
wurde die letzte gewählte Nummer
erneut gewählt.
Ablehnen eines Anrufs
Drücken Sie beim Eingehen eines Anrufs
die Gesprächstaste und halten Sie diese
Taste gedrückt. Sie hören einen Ton.
Sobald ein zweiter Ton ertönt, wurde
der Anruf erfolgreich abgelehnt und Sie
können die Taste loslassen.
Sprachwahl
Drücken Sie bei aufgesetztem Headset
auf die Gesprächstaste und halten
Sie diese Taste zwei Sekunden lang
gedrückt, um die Sprachwahl zu
aktivieren.
HINWEIS: Um die Sprachwahl verwenden
zu können, muss die Funktion
„Sprachwahl“ von Ihrem Telefon
unterstützt werden. Anweisungen finden
Sie im Benutzerhandbuch zu Ihrem
Bluetooth-Telefon.
Weiterleiten eines Anrufs vom Telefon
auf das Headset
Um einen aktiven Anruf vom Telefon auf
Ihr Headset weiterzuleiten, drücken Sie
kurz auf die Gesprächstaste.
Weiterleiten eines Anrufs vom Headset
auf das Telefon
Um einen aktiven Anruf vom Headset an
Ihr Telefon weiterzuleiten, halten Sie die
Gesprächstaste so lange gedrückt, bis
Sie einen Ton hören. Sobald ein zweiter
Ton ertönt, wurde der Anruf erfolgreich
weitergeleitet und Sie können die Taste
loslassen.
Annehmen/Beenden/Tätigen von
Gesprächen mit einem Mobiltelefon
Das ABT35-USB-Headset basiert auf der MultiPoint-Technologie, mit der Sie mühelos
zwischen zwei Audiogeräten hin- und herwechseln können. Eingehende Anrufe können Sie
durch Drücken der Gesprächstaste wahlweise über das PC-basierte Softphone oder über
das Mobiltelefon annehmen. Das Headset muss mit beiden Geräten gepaart sein.Drücken
Sie zum Erhöhen der Hörlautstärke auf das obere Ende (+) der Lautstärketaste. Drücken
Sie zum Verringern der Hörlautstärke auf das untere Ende (–) der Lautstärketaste.
Zum Einstellen der Hör- und Sprechlautstärke schauen Sie bitte im Benutzerhandbuch
Vielseitigkeit mit MultiPoint

0 0
LEUCHTANZEIGEN
1514
Leuchtanzeigen am Bluetooth-USB-
Adapter
Leuchtanzeigen am Headset
Headset-Status Beleuchtung
Eingeschaltet Blinkt blau
Ladevorgang Blinkt rot
Vollständig aufgeladen Leuchtet blau
Niedriger Akkustand Blinkt rot
Paarungsvorgang läuft Blinkt rot und blau
Bluetooth-Gerät
mit Headset verbunden Blinkt blau
Aktion Beleuchtung
Vom Headset getrennt Blinkt violett
Mit Headset verbunden Leuchtet blau
Funkverbindung aktiv Blinkt blau
Paarungsmodus Blinkt rot und blau
VERWENDEN DES HEADSETS
Drücken Sie während eines Gesprächs kurz die Ein/Aus- bzw. Stummschaltungstaste,
um das Mikrofon stummzuschalten. Im Stummschaltungsmodus sind im Headset alle
30 Sekunden zwei Töne zu hören.
Um die Stummschaltung wieder aufzuheben, drücken Sie die Taste erneut.
Lautstärkeregelung
Stummschalten eines Anrufs
Ihres Softphones nach.
In der Systemsteuerung von Windows™ über die Option „Sound und Audiogeräte“ stellen
Sie die Sprechlautstärke des Audio-Geräts auf dem Computer ein.
Other manuals for ABT-35
1
This manual suits for next models
1
Table of contents
Languages:
Other Avaya Headset manuals

Avaya
Avaya IX L100 Series User manual

Avaya
Avaya AWH65+ User manual

Avaya
Avaya C500 Series Supplement

Avaya
Avaya AWH65+ User manual

Avaya
Avaya Starset User manual

Avaya
Avaya AWH54 User manual

Avaya
Avaya SupraElite User manual

Avaya
Avaya ABT-35 User manual

Avaya
Avaya Ultra Ultra User manual

Avaya
Avaya ABT-35+ User manual

Avaya
Avaya L149 User manual

Avaya
Avaya Supra User manual

Avaya
Avaya AWH75 User manual

Avaya
Avaya AWH-55USB User manual

Avaya
Avaya VXi V100 Supplement

Avaya
Avaya PhoneTech P20USBM Supplement

Avaya
Avaya SupraElite AH460N User manual

Avaya
Avaya C500 Series Supplement

Avaya
Avaya L119 User manual

Avaya
Avaya AWH-55 User manual