Avaya C500 Series Supplement

JAO; Reviewed:
SPOC 6/1/2013
Solution & Interoperability Test Lab Application Notes
©2013 Avaya Inc. All Rights Reserved.
1 of 15
PlantBW500Flare
Avaya Solution & Interoperability Test Lab
Application Notes for Plantronics Blackwire C500 Series
USB Headsets with Avaya Flare® Experience for Windows -
Issue 1.0
Abstract
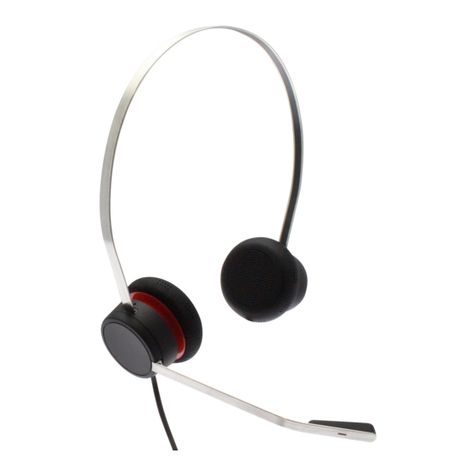
These Application Notes describe the configuration steps required to integrate the Plantronics
Blackwire C500 Series USB Headsets with Avaya Flare® Experience for Windows. The
Blackwire C500 headsets provide two-way audio and allow the audio volume to be adjusted
and the audio to be muted directly from the headset. For this compliance test, the Blackwire
C510 monaural headset and the Blackwire C520 binaural headset were verified. This solution
does not provide call control features directly from the headset, such as call answer, call
terminate, or mute sync.
Information in these Application Notes has been obtained through DevConnect compliance
testing and additional technical discussions. Testing was conducted via the DevConnect
Program at the Avaya Solution and Interoperability Test Lab.

JAO; Reviewed:
SPOC 6/1/2013
Solution & Interoperability Test Lab Application Notes
©2013 Avaya Inc. All Rights Reserved.
2 of 15
PlantBW500Flare
1. Introduction
These Application Notes describe the configuration steps required to integrate the Plantronics
Blackwire C500 Series USB Headsets with Avaya Flare® Experience for Windows. The
Blackwire C500 headsets provide two-way audio and allow the audio volume to be adjusted and
the audio to be muted directly from the headset. For this compliance test, the Blackwire C510
monaural headset and the Blackwire C520 binaural headset were verified.
Refer to the appropriate Plantronics documentation listed in Section 11 for additional product
information.
Note: This solution does not provide call control integration with Flare Experience. That is, a
call cannot be answered or terminated directly from the headset, nor is the mute status on the
headset synchronized with Flare Experience. The Plantronics Spokes Software is not installed as
part of this solution.
2. General Test Approach
Avaya’s formal testing and Declaration of Conformity is provided only on the headsets/handsets
that carry the Avaya brand or logo. Avaya may conduct testing of non-Avaya headset/handset to
determine interoperability with Avaya phones. However, Avaya does not conduct the testing of
non-Avaya headsets/handsets for: Acoustic Pressure, Safety, Hearing Aid Compliance, EMC
regulations, or any other tests to ensure conformity with safety, audio quality, long-term
reliability or any regulation requirements. As a result, Avaya makes no representations whether
a particular non-Avaya headset will work with Avaya’s telephones or with a different generation
of the same Avaya telephone.
Since there is no industry standard for handset interfaces, different manufacturers utilize
different handset/headset interfaces with their telephones. Therefore, any claim made by a
headset vendor that its product is compatible with Avaya telephones does not equate to a
guarantee that the headset will provide adequate safety protection or audio quality.
The interoperability compliance test included feature and serviceability testing. The feature
testing focused on placing calls to and from Flare Experience with the Blackwire C500 Series
USB Headsets and verifying an audio path in both directions. The type of calls made included
calls to voicemail, to local stations, and to the PSTN.
The serviceability testing focused on verifying the usability of the Blackwire C510/C520
headsets after restarting Flare Experience, disconnecting and reconnecting the headset, and
rebooting the PC.
JAO; Reviewed:
SPOC 6/1/2013
Solution & Interoperability Test Lab Application Notes
©2013 Avaya Inc. All Rights Reserved.
3 of 15
PlantBW500Flare
2.1. Interoperability Compliance Testing
All test cases were performed manually. The following features were verified:
Placing calls to the voicemail system. Voice messages were recorded and played back to
verify that the playback volume and recording level were good.
Placing calls to local stations to verify two-way audio.
Placing calls to the PSTN to verify two-way audio.
Answering and ending calls directly from Flare Experience.
Using the volume control buttons on the headset and Flare Experience to adjust the
playback volume.
Using the mute control button on the headset and Flare Experience to mute and un-mute
the audio.
For the serviceability testing, the headsets were disconnected and reconnected to verify proper
operation. Flare Experience application was also restarted for the same purpose. The desktop
PC was also rebooted to verify that Flare Experience and the headsets were operational when the
PC came back into service.
2.2. Test Results
All test cases passed with the following observations:
There is no mute synchronization between the Blackwire C500 headsets and Flare
Experience. If a call is muted through the headset, it is not reflected on Flare Experience,
and the call needs to be un-muted through the headset, and vice versa.
There is no call control support through the headset. Calls need to be answered and
terminated through Flare Experience. The call control button on the headset is not
operational.
2.3. Support
For technical support and information on Plantronics C500 Series USB Headsets, contact
Plantronics at:
Phone: 800-544-4660 (toll free)
+1 831-426-5858 (International)
Website: http://www.plantronics.com/north_america/en_US/support/

JAO; Reviewed:
SPOC 6/1/2013
Solution & Interoperability Test Lab Application Notes
©2013 Avaya Inc. All Rights Reserved.
4 of 15
PlantBW500Flare
3. Reference Configuration
Figure 1 illustrates the test configuration used to verify the Plantronics solution. The
configuration consists of an Avaya S8300 Server running Avaya Aura® Communication
Manager with an Avaya G450 Media Gateway providing connectivity to the PSTN via an ISDN-
PRI trunk (not shown). Avaya Aura® Communication Manager Messaging was used as the
voicemail system. Avaya Flare® Experience for Windows was installed on a desktop PC and
registered to Avaya Aura® Session Manager as a SIP endpoint. The Plantronics Blackwire
C500 Series USB Headsets were connected to the desktop PC via a USB port.
LAN
Avaya Flare® Experience for Windows
with Plantronics Blackwire C500 Series
USB Headsets
Avaya 9600 Series IP Telephones
Avaya Aura® Communication Manager
running on Avaya S8300 Server with
G450 Media Gateway and
Communication Manager Messaging
Avaya Aura® Session Manager
Figure 1: Avaya Flare® Experience for Windows with Plantronics Blackwire C500 Series
USB Headsets

JAO; Reviewed:
SPOC 6/1/2013
Solution & Interoperability Test Lab Application Notes
©2013 Avaya Inc. All Rights Reserved.
5 of 15
PlantBW500Flare
4. Equipment and Software Validated
The following equipment and software were used for the sample configuration provided:
Equipment
Software
Avaya Aura® Communication Manager
running on an Avaya S8300 Server with a
G450 Media Gateway and Communication
Manager Messaging
6.2 SP 5
(R016x.02.0.823.0 with Patch 20396)
Avaya Aura® Session Manager
6.2 (6.2.3.0.623006)
Avaya Flare Experience for Windows on
Microsoft Windows 7
1.1.1.7
Avaya 9600 Series IP Telephone
3.1 SP 5 (H.323)
Plantronics Blackwire C510/C520 USB
Headsets
USB Firmware 123, Base 01.23

JAO; Reviewed:
SPOC 6/1/2013
Solution & Interoperability Test Lab Application Notes
©2013 Avaya Inc. All Rights Reserved.
6 of 15
PlantBW500Flare
5. Configure Avaya Aura® Communication Manager
This section covers the station configuration for Flare Experience. The configuration is
performed via the System Access Terminal (SAT) on Communication Manager.
Use the add station command to add a station for Flare Experience. Use 9621SIP for the
Station Type, provide a descriptive Name,and enable IP Softphone. Use the default values for
the other fields on Page 1. The SIP station can also be configured automatically by System
Manager as described in Section 6.
add station 46010 Page 1 of 6
STATION
Extension: 46010 Lock Messages? n BCC: 0
Type: 9621SIP Security Code: TN: 1
Port: IP Coverage Path 1: COR: 1
Name: Flare, Experience Coverage Path 2: COS: 1
Hunt-to Station:
STATION OPTIONS
Time of Day Lock Table:
Loss Group: 19
Message Lamp Ext: 46010
Display Language: english
Survivable COR: internal
Survivable Trunk Dest? y IP SoftPhone? y
IP Video Softphone? y
Use the change off-pbx-telephone station-mapping command to map the Communication
Manager extensions (e.g., 46010) to the same extension configured in System Manager. Enter
the field values shown. For the sample configuration, the Trunk Selection field is set to aar so
that AAR call routing is used to route calls to Session Manager. AAR call routing configuration
is not shown in these Application Notes. The Configuration Set value can reference a set that
has the default settings.
change off-pbx-telephone station-mapping 46010 Page 1 of 3
STATIONS WITH OFF-PBX TELEPHONE INTEGRATION
Station Application Dial CC Phone Number Trunk Config Dual
Extension Prefix Selection Set Mode
46010 OPS - 46010 aar 1

JAO; Reviewed:
SPOC 6/1/2013
Solution & Interoperability Test Lab Application Notes
©2013 Avaya Inc. All Rights Reserved.
7 of 15
PlantBW500Flare
6. Configure Avaya Aura® Session Manager
This section describes the procedure for configuring a SIP user for Flare Experience as defined
in Section 5. Alternatively, use the option to automatically generate the SIP station on
Communication Manager when adding a new SIP user. It is assumed that the basic installation
and configuration of Session Manager has already been completed.
Configuration is accomplished by accessing the browser-based GUI of Avaya Aura® System
Manager using the URL “https://<ip-address>/SMGR”, where <ip-address> is the IP address of
System Manager. Log in with the appropriate credentials.
From the main webpage, navigate to Users User Management. From the User Management
webpage, click on Manage Users in the left pane, and then click the New button to display the
New User Profile webpage.
Enter values for the following required attributes for a new SIP user in the Identity section of the
new user form.
Last Name: Enter the last name of the user.
First Name: Enter the first name of the user.
Login Name: Enter <extension>@<sip domain> of the
Authentication Type: Select Basic.
Password: Enter the password which will be used to
log into System Manager.
Confirm Password: Re-enter the password from above.
The screen below shows the information when adding a new SIP user.

JAO; Reviewed:
SPOC 6/1/2013
Solution & Interoperability Test Lab Application Notes
©2013 Avaya Inc. All Rights Reserved.
8 of 15
PlantBW500Flare
Select the Communication Profile tab and configure the following fields:
Communication Profile Password: Enter the password which will used by
Flare Experience to log into Session
Manager.
Confirm Password: Re-enter the password from above.

JAO; Reviewed:
SPOC 6/1/2013
Solution & Interoperability Test Lab Application Notes
©2013 Avaya Inc. All Rights Reserved.
9 of 15
PlantBW500Flare
Click New to define a Communication Address for the new SIP user. Enter values for the
following required fields:
Type: Select Avaya SIP.
Fully Qualified Address: Enter extension number and select SIP domain.
The screen below shows the information when adding a new SIP user to the sample
configuration. Click Add.
In the Session Manager Profile section, specify the Session Manager entity and assign the
Application Sequence to both the originating and terminating sequence fields. Set the Home
Location field to the appropriate Location.

JAO; Reviewed:
SPOC 6/1/2013
Solution & Interoperability Test Lab Application Notes
©2013 Avaya Inc. All Rights Reserved.
10 of 15
PlantBW500Flare
In the CM Endpoint Profile section, fill in the following fields:
System: Select the managed element corresponding to
Communication Manager.
Profile Type: Select Endpoint.
Use Existing Stations: If field is not selected, the station will automatically be
added in Communication Manager.
Extension: Enter extension number of SIP user.
Template: Select template for type of SIP phone.
Port: Enter IP.
Delete Ednpoint on
Unassign of Endpoint
From User or on Delete
User: Enable field to automatically delete station when Station
Profile is un-assigned from user.
The screen below shows the information when adding a new SIP user to the sample
configuration. Click Commit to add the SIP user.

JAO; Reviewed:
SPOC 6/1/2013
Solution & Interoperability Test Lab Application Notes
©2013 Avaya Inc. All Rights Reserved.
11 of 15
PlantBW500Flare
Click the Endpoint Editor button, and in the subsequent webpage, navigate to the Feature
Options tab. Enable IP Softphone as shown below. Click Done (not shown) to return to the
previous webpage, and then click Commit.

JAO; Reviewed:
SPOC 6/1/2013
Solution & Interoperability Test Lab Application Notes
©2013 Avaya Inc. All Rights Reserved.
12 of 15
PlantBW500Flare
7. Configure Avaya Flare® Experience for Windows
After logging into Flare Experience, click on and then select the Audio settings as shown
below. The Plantronics Blackwire C500 USB headset is automatically detected in Flare
Experience. Under Audio, set the Microphone and Speaker fields to the appropriate device as
shown below. The example below is configured for the Blackwire C510 headset. Click OK.

JAO; Reviewed:
SPOC 6/1/2013
Solution & Interoperability Test Lab Application Notes
©2013 Avaya Inc. All Rights Reserved.
13 of 15
PlantBW500Flare
For Flare Experience to register successfully with Session Manager, the Server settings must be
configured with the Session Manager IP address, server port, transport type, and domain name as
shown below.
8. Connect Plantronics Blackwire C500 USB Headsets
Simply connect the Blackwire C500 Series Headset to a USB port on the PC running Flare
Experience. Flare Experience will automatically detect it. Refer to [4] for instructions on using
the Plantronics headset.

JAO; Reviewed:
SPOC 6/1/2013
Solution & Interoperability Test Lab Application Notes
©2013 Avaya Inc. All Rights Reserved.
14 of 15
PlantBW500Flare
9. Verification Steps
This section provides the tests that can be performed to verify proper installation and
configuration of the Plantronics C500 USB headsets with Avaya Flare® Experience.
1. Start the Flare Experience application.
2. Place an incoming call to Flare Experience from any local phone.
3. Answer the call from Flare Experience.
4. Verify two-way talk path between the headset and phone.
5. Verify that the audio can be muted and the volume can be adjusted directly from the
headset.
6. Disconnect the call from Flare Experience.
7. Verify that the call is properly disconnected.
10. Conclusion
These Application Notes describe the configuration steps required to integrate the Plantronics
Blackwire C500 Series USB Headsets with Avaya Flare® Experience. All test cases were
completed successfully with observations noted in Section 2.2.
11. Additional References
This section references the Avaya and Plantronics documentation that are relevant to these
Application Notes.
The following Avaya product documentation can be found at http://support.avaya.com.
[1] Administering Avaya Aura® Communication Manager, Release 6.2, Issue 7, December
2012, Document Number 03-300509.
[2] Administering Avaya Aura® Session Manager, July 2012, Issue 3, Release 6.2, Document
Number 03-603324.
[3] Administering Avaya Flare® Experience for Windows, Release 1.1, Issue 2, February 2013,
Document Number 18-604156.
The following Plantronics product documentation can be found at http://www.plantronics.com.
[4] Plantronics Blackwire C510/C520 Headset Quick Start Guide.

JAO; Reviewed:
SPOC 6/1/2013
Solution & Interoperability Test Lab Application Notes
©2013 Avaya Inc. All Rights Reserved.
15 of 15
PlantBW500Flare
©2013 Avaya Inc. All Rights Reserved.
Avaya and the Avaya Logo are trademarks of Avaya Inc. All trademarks identified by ® and
™ are registered trademarks or trademarks, respectively, of Avaya Inc. All other trademarks
are the property of their respective owners. The information provided in these Application
Notes is subject to change without notice. The configurations, technical data, and
recommendations provided in these Application Notes are believed to be accurate and
dependable, but are presented without express or implied warranty. Users are responsible for
their application of any products specified in these Application Notes.
Please e-mail any questions or comments pertaining to these Application Notes along with the
full title name and filename, located in the lower right corner, directly to the Avaya
Other manuals for C500 Series
1
Table of contents
Other Avaya Headset manuals

Avaya
Avaya SupraElite User manual

Avaya
Avaya L159 User manual

Avaya
Avaya AWH-55 User manual

Avaya
Avaya AWH54 User manual

Avaya
Avaya ABT-35 User manual

Avaya
Avaya PhoneTech P20USBM Supplement

Avaya
Avaya Supra User manual

Avaya
Avaya AWH-55USB User manual

Avaya
Avaya Ultra Ultra User manual

Avaya
Avaya SupraElite W450N User manual