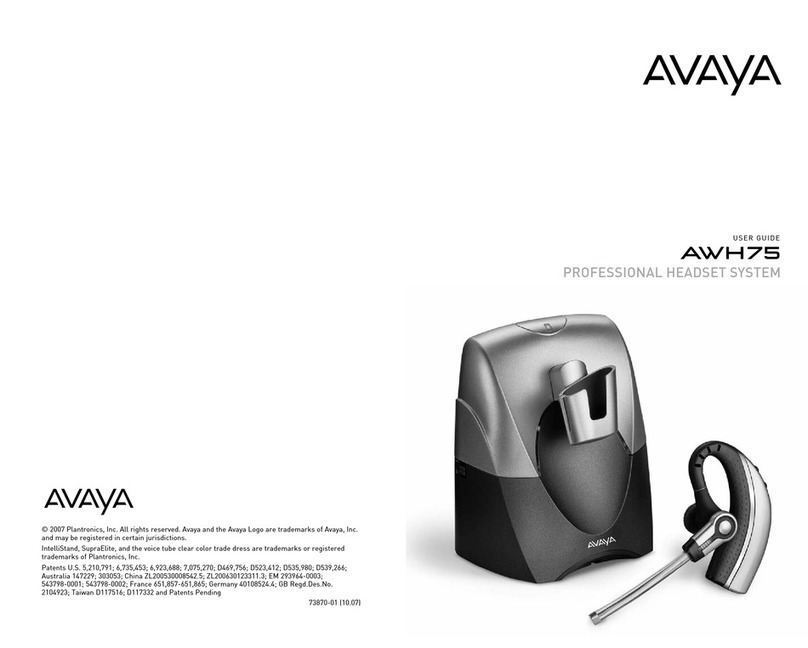
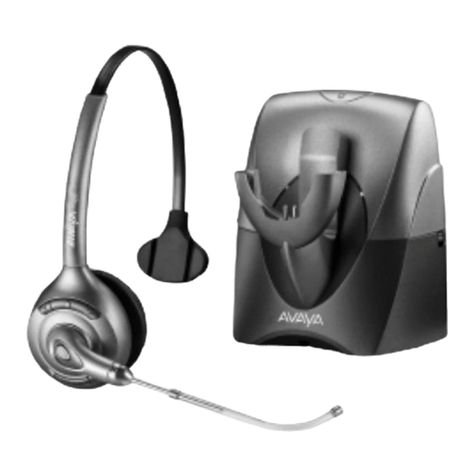
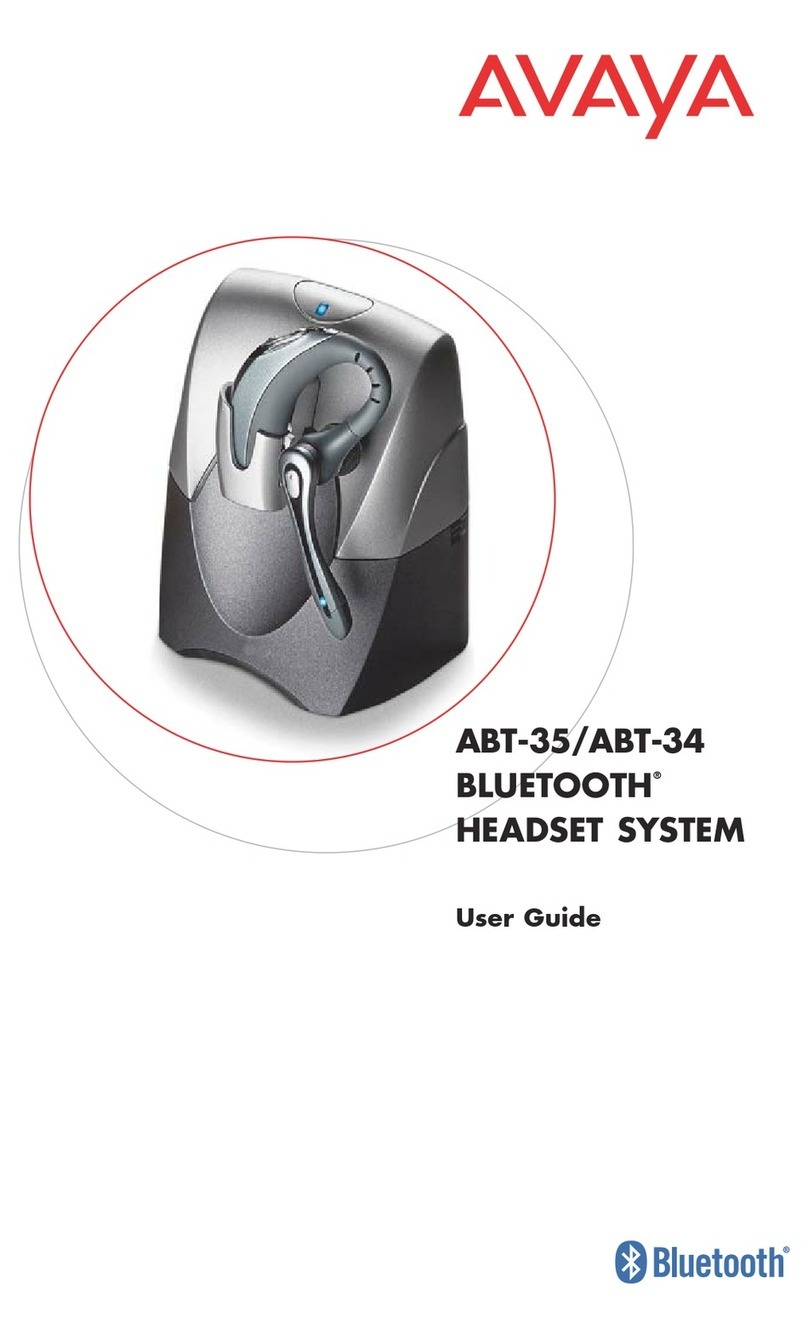
Avaya AWH75 User manual

USER GUIDE
AWH75
PROFESSIONAL HEADSET SYSTEM
©2006 Plantronics, Inc. All rights reserved. Avaya and the Avaya Logo are trademarks of Avaya, Inc.
and may be registered in certain jurisdictions.
IntelliStand, SupraElite, and the voice tube clear color trade dress are trademarks or registered
trademarks of Plantronics, Inc.
Patents U.S. 5,210,791; 6,735,453; D469,756; D505,413; D512, 984; Australia 147229; France 651,857-
651,865; Germany 40108524.4; GB Regd.Des.No. 2104923 and Patents Pending
Printed in China 73870-01 (11.06)

3
2
Components
24/46 Hookswitch
Control Cord
Ring Detector
27 28
D + M Filter Cord
29 31
8400 Hookswitch
Control Cord
30
9600 Hookswitch
Control Cord
Base
25
Telephone Cord
Eartips
Spare Voice Tube
AC Charger
Base
Headset
Table of Contents
Setup 1–5
Positioning
Adjusting Fit
Charging
Checking Compatibility
Components 3
6
11
11
10
13
Making/Answering/Ending Calls
12
Multi-shift Pairing 12
Headset Controls
Volume
18
IntelliStand
16
15
Troubleshooting 20
Base Indicator Lights 19
Subscription 22
22
System Reset
22
Maintenance
VoiceTube Replacement 22
Technical Assistance 25
Battery Replacement 23
24Accessing UCC
Regulatory Notices 25

5
4
Charging Cradle
Front:
IndicatorLights
Talking (Green)
Power (Red)
Charging (Amber)
Telephone
ConfigurationDial
Rear:
Listening Volume
MajorAdjust
Telephone Cord
IntelliStand
On/Off Switch
(to automate
call controlbutton)
Speaking Volume
MinorAdjust
Base - Top View
Components Components
Base - Underside View
Speak Volume
Major Adjust
Handset Jack
Accessory Jack
Ring Detector Jack
AC Power
Adapter Jack
Telephone Base Jack
EU24/ADJ
Listening Volume/Mute
Talk Indicator Light
Call Control Button
VoiceTube
Headset
NOTE: Please refer to the separate Safety Instructions booklet for
important product safety information prior to installation or use of
the product.

7
6
Setup 2Setup 1
with AVAYA 2420, 4610SW, 4620, 4620SW,
4621SW, 4622SW, 4625SW 4630SW, 5420,
5610 and 5620 telephones*
with AVAYA 2410, 4630, 5410, 6416 D+M
and 6424 D+M telephones
7
24
24
28
28
26 5
25
25
1
4
24
27
25
7
2427
29
29
1
4
*24xx and 54xx phones require 4.0 firmware or greater.
46xx and 56xx phones require 1.8 firmware or greater.
Configuration
dial set to 3 Configuration
dial set to 1
See pages 3, 4,
and 5 for callout
of components

9
24
27
430
7
2427
1
8
Setup 3
with AVAYA 8403, 8405, 8410D, 8411D, 8434
and telephones
24
27
4
25
7
2427
31
31
1
Setup 4
with AVAYA 9600 series telephones
Configuration
dial set to 1
Configuration
dial set to 3

11
6“
12”
The minimum recommended separation distance is shown above.
IMPORTANT: Incorrect positioning can cause noise and interference problems.
Charging
2
1
Positioning
1. Slide the headset into the charging
cradle. The earpiece with the micro-
phone goes into the cradle.
2. Gently press down on the the head-
set to ensure that the headset is in
the correct position. The amber
charge indicator light on the base
will flash while charging and will
change to solid amber when fully
charged.
•20 minutes = minimum charge
to continue setup
• 3 hours = full charge
Set the IntelliStand
switch to IntelliStand off
(
–
)if you want to control
the handset lifter with
the call control button
on your headset.
Set the IntelliStand
switch to IntelliStand on
(
=
)if you want the
handset to automatically
pick up when you take
the headset off the
charging cradle.
Setup 5 with other AVAYA telephones
P
L
A
N
T
R
O
N
I
C
S
24
25
7
24
6
P
L
A
N
T
R
O
N
I
C
S
Optional
Lifter
Optional
Lifter
Optional
Lifter
Configuration
Dial
{see page 15}
Be sure to connect
this plug into the
jack wherethe
handset was
connected.
4
1
Caution: It is important for correct and safe operation that the base cord
is installed into the proper jack of your telephone. Follow these instructions
carefully, especially if your telephone has two jacks where the handset was
attached. Be sure to note or mark which jack was used for the handset.
IntelliStand
™
off
IntelliStand
on
IntelliStand™
10

13
12
2 3
1
Adjusting Fit
1. Adjust headband to fit.
2. Rotate voice tube until it is pointed towards your chin.
Making/Answering/Ending Calls
1
2
Setup 1, 2, 3 & 4
Tomake a call, press call control button. Dial tone should sound through headset
(If not, check compatibility—see Setup 1, 2, 3 & 4). Dial using the telephone keypad.
To answer a call, press the call control button on the headset.
To end a call, press the call control button on the headset. If either you or the recipient
have trouble hearing, please check compatibility (Setup 1, 2, 3 & 4).
NOTE: Depending on your preference, you can
replace the pre-installed leatherette ear cushions
with the included alternative foam cushions.
Multi-shift Pairing
2
1
Enable
Disable
OROR
OR
1. To pair another headset to the same base, you must first enable the multi-shit
pairing feature. Long press (5 sec.) the speaking volume minor adjust up button on
back of the base until the power indicator flashes.
2. Place a charged headset in charging cradle. The red indicator light on base will flash
for 2 seconds if the multi-shift pairing feature is enabled.Within 10 of doing so, press
either the “+” or”-” listening volume button for 3 seconds until the green talk indicator
lights toindicatepairing mode and goes out after successful pairing. Repeat steps 1
and 2 if headset and base do not link when call control button is pressed.
NOTE: Only the last paired headset will work with the base. You must NOT be in talk mode (on
a call) to enable or disable this feature.
To disable the multi-shift pairing feature, long press (5 sec.) the speaking volume minor
adjust down button until the power indicator light flashes.

15
14
Checking Compatibility
1
2
3
4
1
2
3
4
Adjust your telephone configuration dial on the base to position 3 for the following tele-
phones: 2420, 4610SW, 4620, 4620SW, 4621SW, 4622SW, 4625SW, 4630SW, 5420, 5610,
5620, 8403, 8405, 8410D, 8411D and 8434.
Adjust the configuration dial to position 1 for the following telephones:
2410, 4630, 5410, 6416D+M, 6424D+M, and 9600 series.
If you cannot hear a dial tone through your headset, use a coin or small screwdriver to
turn the telephone configuration dial until you can. Make sure that a number is aligned
with the position indicator.
1. Place a call to someone you know.
2. While speaking, turn the configuration dial through the four positions.
3. Select the position that provides the best sound quality for both you and the recipient.
NOTE: The compatibility setting of “1” is set at the factory to work with most phones.
However, if you do not hear a dial tone, if either you or the recipient is having trouble hearing,
or if you experience buzzing/hissing, please follow the directions below.
Making/Answering/Ending Calls
Setup 5
with Optional Handset Lifter
2
2
1
1
First, test proper set up of the handset lifter.
1. Press the call control button on headset to activate handset lifter and lift handset
from phone. Dial tone should sound if the handset is raised high enough.
2. If no dial tone, adjust handset lifter height switch or reposition the lifter under the
handset.
Use mounting tape to secure the handset lifter in position.
To make/answer a call:
1. Press the call control button to raise the handset lifter.
2. Use the telephone keypad to dial the number.
Toend a call, press the call control button to lower the handset lifter. The handset will
return to the base.
If either you or the recipient have trouble hearing, please check compatibility (page 15).
17
16
Speaking Volume
Major Adjust
Minor Adjust
Listening Volume
Major Adjust
Minor Adjust
NOTE: Be sure to set your telephone’s volume at the mid range before adjusting
the AWH75 volume.
Headset Mute
Use the speaking volume minor adjust
control on the back of the base for
minor incremental adjustments.
NOTE: You must be in talk mode (i.e. on a
call) to adjust.
Use the speaking volume major adjust
control on the bottom of the base for
large incremental adjustments.
NOTE: Ais the lowest setting.
Bis the most common setting.
Disthe loudest setting.
To mute headset, long press the volume
down button (3 seconds). Press again to
unmute.
Talk indicator light on base will flash
while muted.
You will hear 3 rapid beeps every 30
seconds to indicate that mute is on.
Push on the “+” and “–” buttons to adjust
listening volume in minor incremental
adjustments.
NOTE: You must be in talk mode (i.e. on a
call) to adjust.
Use listening volume major adjust
control on the back of the base for
large incremental adjustments.
NOTE: 1is the loudest setting.
4is the lowest setting.

19
18
Base Indicator LightsHeadset Controls
Indicator Lights
Talking/Muted (Green)
Power (Red)
Charging (Amber)
FullyCharged Solid amber
Charging Flashes amber
Solid green
Power Solid red
Talking
Flashes greenMuted
Action Light
Answering/
ending calls
Ascending/descending
tones, 2tonesat limit
Shortpress call
control button
Long press –key
(3 seconds)
Press +to increase
or –to decrease
Mid tone
Low battery
warning Replace headset in
chargingcradle 1toneevery10
seconds
Mute
Listening volume
minoradjust
Feature Action Tone
Out of range
warning — when
on active call
Move closer to base 2tones
3midtones=Mute
3lowtones=Unmute
NOTE:Tonesrepeat every
30 seconds whenmuted.
Incomingcall
notification* Press call control
button to answer call 3repetitivetones
* For some phone models, this only works when using
either the optional Headset Lifter or the Ring Detector.
N/A
N/A

21
20
TroubleshootingTroubleshooting
Problem Solution Problem Solution
Ipluggedeverything in but
the lights won’t comeon. •Check thatthe AC charger jackis connected to the base unit.
•Check thatthe AC charger is securely connectedto a
working wall outlet.
•Check thatthe AC charger is the model supplied by Avaya.
My headset doesnot work
with the baseunit.•Check thatthe phone is connectedto the baseunit’s phone
cord jackand it is pushed in firmly.(Setup 5 only)
•Check thatthe phone handsetis connected to the base’s
phonehandset jack and it is pushed in firmly.
•Headset may be outof rangeof the base. Movecloser to
base unit until headsetis within range. Range varies with
office environment.
•Headset battery is dead. Recharge the battery by placing
the headsetin the headsetchargingcradle. See page11.
•Listeningvolume too low. Press the volume up buttonon the
headset. If the volume is still too low, select another
listening volume major adjust switchsetting.See page16.
•Incorrect configurationdial setting for yourphone. Try other
phoneconfigurationdial settings on thebase unit. Ensure
the selected number is in linewith thepositionindicator.
See page15.
•Youmay haveto resubscribeyour headsetwith thebase.
See page22.
•Headset is muted. Press themute button on headset to
unmute the microphone. See page16.
•Speak volume is too low.Increasethe speaking volume by
adjusting the speaking volume minor adjust buttons on the
base unit as described on page 17. If thevolume is still too
low, selectanother speaking volume major adjust setting
as described on page17.
•Incorrect configurationdial setting for your phone. Try
otherphoneconfiguration dialsettingson the baseunit.
Ensure the selected number is in linewith theposition
indicator. See page 15.
Ican hearadial tonein
more thanone
configuration position.
Phonewill workin more thanone configurationdial
position. Use thepositionthat soundsbest to youand the
person you call.
Icannot hearadial tonein
any configurationposition. •Check thatthe phone is connectedto the base’s phone
cord jack. See pages 6–10.
•Check thatthe phone handsetis connected to the base’s
phonehandset jack. (Setup 5 only) See page 10.
Icannot hearcaller/dialtone.•Check thatall cords and jacks are connectedcorrectly.
•Check thatthe basehas power (redindicator light) and
the headsetbattery is fully charged.
•Tryotherphoneconfigurationdial settings on thebase
unit.Ensure the selected number is in linewith the
positionindicator. See page15.
•Ensureyou are in headset mode. Press the talk buttonto
select correct mode. The talk indicator light on the base
is green.
Callers cannothear me.
Soundin handset is
distorted/hearecho in
handset.
•Reducespeakingvolume by changing the speaking volume
majoradjust switch setting. See page 17.
•Point microphone towardsyour chin.
•Listeningvolume too high on phone. If your phone has a
handset volumecontrol,lowerthis until thedistortion
disappears.
•If thedistortion is still present, lower the listeningvolume
adjust button on the headset. If the distortion persists,
select anotherlistening volume major adjust switch
setting.See page16.
•Base is too close to computer or phone.See page11 for
proper positioning.
•Systemneeds to be reset.Perform systemresetas
described on page22.
Icanhear too much
background conversation,
noiseor sidetone.
Speakingvolume is too high. Lower thespeakingvolume by
adjusting the speaking volumeminoradjust buttons on the
base.If the volume is still too high, select another speaking
volume major adjust setting. See page17.
People Italk to can hear a
buzz in the background. •AC charger is plugged into apower strip.Plug theAC
charger into the wall directly.
•Picking up anotherradiofrequency. Call the AvayaHeadset
Helpdeskfor an RF filter.
Battery talk timeperformance
is significantly degraded even
afterafull recharge.
Battery is going bad. Replacethe battery withanew
battery pack. See page23.
The call is dropped.(Talk
indicator on the headsetand
base will not be illuminated.)
Headset lost subscription.Try to resetthe system.See
page 22.If this doesnot work, try theresubscription
procedure on page22.
Ihear static that doesnot
allowme to communicate. •Link to headsetis lost. Tryto reestablishalink by pressing
the headsettalk button.
•Unplugthe AC charger from the base for 7 seconds, then
plug back in.
•Reset thewholesystem as described on page 22.
Ihear beeps in the headset. •Onebeep every 10 seconds is caused by a low battery
warning.Rechargebattery by returningit to the base
charge cradle for one to three hours until charge light stays
lit or quits blinking.
•Twobeepsis an out of range warning. Movecloser to the base.
•Three rapid beepsevery30 seconds indicatesyour mute is
on. Press the mute controldial once to turn mute off.
•When an optional lifter is connected, three repetitivebeeps
indicateacall is coming into the headset. Press the talk
button on the headsetto answer the call.
Handset lifteris installed
but doesnot lifthandset.Be sure thehandset lifterpowercord is firmlypushed into
the handsetlifter jackon the base.
My handset lifteroperates
everytime I remove or
replace my headset in the
base unit.
IntelliStand is enabled. To disablethe handsetlifter, move
the IntelliStand switchto position.
Problem Solution Problem Solution
Ipluggedeverything in but
the lights won’t comeon. •Check thatthe AC charger jackis connected to the base unit.
•Check thatthe AC charger is securely connectedto a
working wall outlet.
•Check thatthe AC charger is the model supplied by Avaya.
My headset doesnot work
with the baseunit.•Check thatthe phone is connectedto the baseunit’s phone
cord jackand it is pushed in firmly.
•Check thatthe phone handsetis connected to the base’s
phonehandset jack and it is pushed in firmly.
•Headset may be outof rangeof the base. Movecloser to
base unit until headsetis within range. Range varies with
office environment.
•Headset battery is dead. Recharge the battery by placing
the headsetin the headsetchargingcradle. See page11.
•Listeningvolume too low. Press the volumeup button on the
headset.If the volume is still too low, select another
listening volume major adjust switchsetting.See page16.
•Incorrect configurationdial setting for your phone. Tryother
phoneconfiguration dial settings on thebase unit. Ensure
the selected number is in linewith thepositionindicator.
See page15.
•Youmay haveto resubscribeyour headsetwith thebase.
See page22.
•Headset is muted. Press themute button on headset to
unmute the microphone. See page16.
•Speak volume is too low.Increasethe speaking volume by
adjusting the speaking volume minor adjust buttons on the
base unit as described on page 17. If thevolume is still too
low, selectanother speaking volume major adjust setting
as described on page17.
•Incorrect configurationdial setting for your phone. Try
otherphoneconfiguration dialsettingson the baseunit.
Ensure the selected number is in linewith theposition
indicator. See page 15.
Ican hearadial tonein
more thanone
configuration position.
Phonewill workin more thanone configurationdial
position. Use thepositionthat soundsbest to youand the
person you call.
Icannot hearadial tonein
any configurationposition. •Check thatthe phone is connectedto the base’s phone
cord jack. See pages 6–10.
•Check thatthe phone handsetis connected to the base’s
phonehandset jack. See pages 6–10.
Icannot hearcaller/dialtone.•Check thatall cords and jacks are connectedcorrectly.
•Check thatthe basehas power (redindicator light) and
the headsetbattery is fully charged.
•Tryotherphoneconfigurationdial settings on thebase
unit.Ensure the selected number is in linewith the
positionindicator. See page15.
•Ensureyou are in headset mode. Press the talk buttonto
select correct mode. The talk indicator light on the base
is green.
Callers cannothear me.
Soundin handset is
distorted/hearecho in
handset.
•Reducespeakingvolume by changing the speaking volume
majoradjust switch setting. See page 17.
•Point microphone towardsyour chin.
•Listeningvolume too high on phone. If your phone has a
handset volumecontrol,lowerthis until thedistortion
disappears.
•If thedistortion is still present, lower the listeningvolume
adjust button on the headset. If the distortion persists,
select anotherlistening volume major adjust switch
setting.See page16.
•Base is too close to computer or phone.See page11 for
proper positioning.
•Systemneeds to be reset.Perform systemresetas
described on page22.
Icanhear too much
background conversation,
noiseor sidetone.
Speakingvolume is too high. Lower thespeakingvolume by
adjusting the speaking volumeminoradjust buttons on the
base.If the volume is still too high, select another speaking
volume major adjust setting. See page17.
People Italk to can hear a
buzz in the background. •AC charger is plugged into apower strip.Plug theAC
charger into the wall directly.
•Picking up anotherradiofrequency. Call the AvayaHeadset
Helpdeskfor an RF filter.
Battery talk timeperformance
is significantly degraded even
afterafull recharge.
Battery is going bad. Replacethe battery withanew
battery pack. See page23.
The call is dropped.(Talk
indicator on the headsetand
base will not be illuminated.)
Headset lost subscription.Try to resetthe system.See
page 22.If this doesnot work, try theresubscription
procedure on page22.
Ihear static that doesnot
allowme to communicate. •Link to headsetis lost. Tryto reestablishalink by pressing
the headsettalk button.
•Unplugthe AC charger from the base for 7 seconds, then
plug back in.
•Reset thewholesystem as described on page 22.
Ihear beeps in the headset. •Onebeep every 10 seconds is caused by a low battery
warning.Rechargebattery by returningit to the base
charge cradle for one to three hours until charge light stays
lit or quits blinking.
•Twobeepsis an out of range warning. Movecloser to the base.
•Three rapid beepsevery30 seconds indicatesyour mute is
on. Press the mute controldial once to turn mute off.
•When an optional lifter is connected, three repetitivebeeps
indicateacall is coming into the headset. Press the talk
button on the headsetto answer the call.
Handset lifteris installed
but doesnot lifthandset.Be sure thehandset lifterpowercord is firmlypushed into
the handsetlifter jackon the base.
My handset lifteroperates
everytime I remove or
replace my headset in the
base unit.
IntelliStand is enabled. To disablethe handsetlifter, move
the IntelliStand switchto position.

23
22
Subscription Battery Replacement
The headset and base unit are supplied subscribed to each other. However, if you wish
to use a replacement headset with the base unit, then the units must be re-subscribed.
To do so, please follow the instructions on page 12 for Multi-Shift Pairing.
System Reset
To recover from some fault conditions (refer to the Troubleshooting Section), you may need
to perform a system reset. To perform the system reset, follow this procedure:
4
3
4
2
1
11
1. Simultaneously press the call control button and both the "+"and "–"volume buttons
for 5 seconds. When the talk indicator light on the headset blinks, release all buttons.
2. Press the call control button again. The talk indicator light will again blink briefly to
indicate the headset is back to normal operation mode.
3. Disconnect the AC charger from the AC charging jack for 5 seconds.
4. Reconnect.
The system reset operation is complete.
Maintenance
1.
Replace voice tube every 6–9 months (voice tube models only).
2. Unplug the unit from the telephone and the AC charger from the power source before cleaning.
3. Clean the equipment with a damp (not wet) cloth.
4. Do not use solvents or other cleaning agents.
The custom battery supplied should last 2–3 years. When talk time decreases
significantly, you should replace the battery. Call Plantronics at (800) 544-4660
ext. 5538 for information on sending back to factory to install new battery.

25
24
Regulatory Notices
This device complies with Part 15 of the FCC Rules. Operation is subject to the following two conditions:
1. This device may not cause harmful interference, and
2. This device must accept any interference received, including interference that may cause
undesired operation.
This equipment has been tested and found to comply with the limits for a Class B digital device, pur-
suant to Part 15 of the FCC Rules. These limits are designed to provide reasonable protection against
harmful interference in a residential installation. This equipment generates, uses, and can radiate
radio frequency energy and, if not installed and used in accordance with the instructions, may cause
harmful interference to radio communications. However, there is no guarantee that interference will
not occur in a particular installation. If this equipment does cause harmful interference to radio or
television reception which can be determined by turning the radio or television off and on, the user is
encouraged to try to correct interference by one or more of the following measures:
1. Reorient or relocate the receiving antenna.
2. Increase the separation between the equipment and receiver.
3. Connect the equipment into an outlet on another circuit.
4. Consult the dealer or an experienced radio/TV technician for help.
The internal wireless radio operates within the guidelines found in radio frequency safety standards and
recommendations, which reflect the consensus of the scientific community. Independent studies have
shown that the internal wireless radio is safe for use by consumers. Visit www.avayaheadsets.com for
more information.
NOTE: Modifications not expressly approved by Avaya could void the user's authority to operate the
equipment.
Exposure to RF Radiation
FCC Requirements – Part 15
FCC Requirements – Part 68
The Avaya Headset Helpdesk is ready to assist you! Dial (800) 544-4779, or
visit the support section of our website at www.avayaheadsets.com.
Technical Assistance
This equipment complies with Part 68 of the FCC rules and the requirements adopted by ACTA. On
the exterior of this equipment is a label that contains a product identifier in the format
US:AAAEQ##TXXXX. If requested, this information must be provided to your telephone company.
A plug and jack used to connect this equipment to the premises wiring and telephone network must
comply with the applicable FCC Part 68 rules and requirements adopted by ACTA. A compliant tele-
phone cord and modular plug is provided with this product. It is designed to be connected to a com-
patible jack that is also compliant. See installation instructions for details.
The REN is useful to determine the quantity of devices you may connect to your telephone line.
Excessive RENs on a telephone line may result in the devices not ringing in response to an incoming
call. In most, but not all areas, the sum of the RENs should not exceed five (5.0). To be certain of the
number of devices you may connect to your line, as determined by the REN, contact your local tele-
phone company. For product approved after July 23, 2001, the REN for this product is part of the
product identifier that has the format US:AAAEQ##TXXXX. The digits represented by ### are the
REN without the decimal point. (For example, 03 represents a REN of 0.3.) For earlier producers, the
REN is separately shown on the label.
If this telephone equipment causes harm to the telephone network, the telephone company will noti-
fy you in advance that temporary discontinuance of service may be required. But if advance notice
isn’t practical, the telephone company will notify the customer as soon as possible. Also, you will be
advised of your right to file a complaint with the FCC if you believe it is necessary.
The telephone company may make changes in its facilities, equipment, operations, or procedures
that could affect the proper functioning of your equipment. If they do, you will be notified in advance
in order for you to make necessary modifications to maintain uninterrupted service.
If trouble is experienced with this unit, for repair or warranty information, please contact customer
service at (800) 544-4779. If the equipment is causing harm to the network, the telephone company
may request that you disconnect the equipment until the problem is resolved.
DO NOT DISASSEMBLE THIS EQUIPMENT: it does not contain any user serviceable components.
We recommend the installation of an AC surge arrester in the AC outlet to which this equipment is
connected. Telephone companies report that electrical surges, typically lighting transients, are very
destructive to customer terminal equipment connected to AC power sources.
Accessing the Avaya Unified
Communication Center (UCC)
from the AWH75
1. Connect the AWH75 to the Avaya telephone. Follow the instructions in
this user guide.
2. Ask your switch administrator to configure your telephone for ringdown to the UCC
in your telephone first call appearance.*
* Notes for switch administrators on configuring ringdown for your AVAYA telephones:
• Some phones allow for direct ringdown configuration, i.e. 2500.
• Other phones do not allow for direct ringdown configurations, i.e. 64XX. In order
to configure the ringdown in these phones, the administrator needs to:
• Create a phantom extension setup as a 2500 type.
(No real port has to be assigned.)
• Create a ringdown to the UCC for the phantom extension.
• Bridge the phantom extension to the telephone call appearance 1
(configure it as an “abrdg-appr” and setup the “Auto Select Any Idle Appearance”
to Yes).

AWH75
PROFESSIONAL HEADSET SYSTEM
User guide
Benutzerhandbuch
Brugervejledning
Guía del usuario
Käyttöopas
Guide de l’utilisateur
Guida dell’utente
Gebruikershandleiding
Brukerhåndbok
Manual do Utilizador
Användarhandbok
PROFESSIONELLES HEADSET-SYSTEM
PROFESSIONELT HEADSETSYSTEM
SISTEMA PROFESIONAL DE AURICULARES
AMMATTIKÄYTTÖÖN TARKOITETTU
KUULOKEJÄRJESTELMÄSYSTEME
D’OREILLETTE PROFESSIONNEL
SISTEMA DI CUFFIE PROFESSIONALE
PROFESSIONEEL HEADSETSYSTEEM
PROFESJONELT HODESETTSYSTEM
SISTEMA DE AURICULAR PROFESSIONAL
PROFESSIONELLT HEADSET-SYSTEM

2
3
FI SISÄLLYSLUETTELO
Osat ...............................................................5
Asentaminen 1–5 ........................................10
IntelliStand ..................................................15
Lataaminen .................................................16
Sijoittaminen ...............................................18
Säätäminen .................................................19
Usean laitteen pariliitos .............................21
Soittaminen, vastaaminen ja puhelun
lopettaminen .........................................23
Yhteensopivuuden tarkistaminen ...............31
Äänenvoimakkuus ......................................36
Kevytkuulokkeen ohjaimet .........................43
Tukiaseman merkkivalot ............................46
Vianmääritys ...............................................56
Järjestelmän nollaaminen ..........................70
Liittäminen ..................................................72
Huolto ..........................................................73
Ääniputken vaihtaminen .............................73
Akun vaihtaminen .......................................74
Avaya UCC -ohjelmiston käyttäminen.........76
FR TABLE DES MATIÈRES
Composants ..................................................5
Configurations 1–5 ......................................10
IntelliStand ..................................................15
Chargement ................................................16
Positionnement ...........................................18
Réglage du port de l’appareil .....................19
Couplage .....................................................21
Passer/prendre/terminer des appels .........24
Vérification de la compatibilité ...................31
Volume ........................................................37
Commandes de l’oreillette .........................43
Indicateurs d’appel sur la base ..................46
Dépannage ..................................................58
Réinitialisation du système ........................71
Connexion ...................................................72
Entretien .....................................................73
Remplacement du tube vocal .....................73
Remplacement de la batterie .....................74
Accès à l’UCC Avaya.....................................76
IT SOMMARIO
Componenti ...................................................5
Configurazione 1–5 .....................................10
IntelliStand ..................................................15
Ricarica .......................................................17
Posizionamento ..........................................18
Regolazione ................................................19
Associazione multipla ................................21
Esecuzione/risposta/
termine delle chiamate .........................24
Verifica della compatibilità .........................31
Volume ........................................................37
Comandi della cuffia ...................................44
Indicatori luminosi della base ...................46
Risoluzione dei problemi ............................60
Ripristino del sistema .................................71
Collegamento ..............................................72
Manutenzione ..............................................73
Sostituzione del tubo vocale .......................73
Sostituzione della batteria ..........................74
Accesso all’UCC Avaya ................................76
NL INHOUDSOPGAVE
Onderdelen ....................................................5
Installatie 1–5 .............................................10
IntelliStand ..................................................15
Opladen .......................................................17
Positionering ...............................................18
Pasvorm afstellen .......................................19
Afstemmen bij verwisselen van headset ....21
Oproepen plaatsen/aannemen/beëindigen 24
Compatibiliteit testen .................................31
Volume ........................................................38
Headsetbediening .......................................44
Waarschuwingslampjes basisstation .........46
Problemen oplossen ...................................62
Systeemreset ..............................................71
Koppelen .....................................................72
Onderhoud ..................................................73
Spreekbuisje vervangen .............................73
Batterijen vervangen ..................................74
Toegang tot de Avaya UCC...........................76
GB TABLE OF CONTENTS
Components .................................................5
Setup 1-5......................................................10
IntelliStand ..................................................15
Charging.......................................................16
Positioning ...................................................18
Adjusting Fit.................................................19
Multi-shift Pairing........................................20
Making/Answering/Ending Calls ................23
Checking Compatibility ...............................29
Volume ........................................................33
Headset controls .........................................41
Base indicator lights ...................................46
Troubleshooting ...........................................48
System reset................................................70
Subscription ................................................72
Maintenance ................................................73
Voice tube replacement ..............................73
Battery replacement ...................................74
Accessing the Avaya UCC ............................75
DE INHALTSVERZEICHNIS
Komponenten ...............................................5
Einrichtung 1–5 ...........................................10
IntelliStand ..................................................15
Laden der Batterie ......................................16
Positionierung .............................................18
Anpassen des Kopfbügels ..........................19
Multi-Shift-Paarung ...................................20
Tätigen/Annehmen/Beenden von Anrufen .23
Überprüfen der Kompatibilität ...................29
Lautstärke ...................................................34
Headset-Regler ..........................................41
Leuchtanzeigen an der Basisstation .........46
Fehlerbehebung .........................................50
Zurücksetzen des Systems .........................70
Anmeldung .................................................72
Pflege ..........................................................73
Austauschen des Sprechröhrchens ............73
Austauschen des Akkus .............................74
Kontaktieren des Avaya Unified
Communication Center (UCC).....................75
DK INDHOLDSFORTEGNELSE
Komponenter ...............................................5
Installation 1–5 ...........................................10
IntelliStand ..................................................15
Opladning ....................................................16
Placering .....................................................18
Ændring af pasform ....................................19
Multi-shift-parring ......................................20
Foretage/besvare/afslutte opkald ..............23
Kontrol af kompatibilitet .............................30
Volumenkontrol ...........................................35
Knapper på headset ....................................42
Indikatorlamper på baseenheden ..............46
Fejlfinding ...................................................52
Nulstilling af systemet ................................70
Abonnering ..................................................72
Vedligeholdelse ...........................................73
Udskiftning af stemmerør ..........................73
Udskiftning af batteri .................................74
Adgang til Avaya UCC...................................75
ES ÍNDICE
Componentes ................................................5
Configuración 1–5 .......................................10
IntelliStand ..................................................15
Recarga .......................................................16
Colocación ...................................................18
Ajuste ..........................................................19
Emparejamiento múltiple ..........................20
Realización, respuesta y fin de llamadas ...23
Comprobación de compatibilidad ...............30
Volumen ......................................................35
Controles del auricular ...............................42
Luces indicadoras de la base .....................46
Resolución de problemas ...........................54
Reinicio del sistema ....................................70
Orificio de acceso ........................................72
Mantenimiento ............................................73
Cambio del tubo de voz ...............................73
Cambio de la batería ...................................74
Acceso a Avaya UCC.....................................75
Table of Contents Table of Contents

5
Components
HEADSET
AURICULAR
KEVYTKUULOKE
OREILLETTE
AURICOLARI
HODESETT Ear tips
Ohrhörer
Ørepropper
Extremos del auricular
Korvatyynyt
Embouts
Cuscinetti
Oordopjes
Ørepropper
Almofadas para as orelhas
Öronkuddar
Spare voice tube
Ersatz-Sprechröhrchen
Ekstra stemmerør
Tubo de voz de repuesto
Varaääniputki
Tube vocal de rechange
Tubo vocale di ricambio
Reservespreekbuisje
Reservetalerør
Microfone de substituição
Extra mikrofonarm
BASE
BASISSTATION
BASEENHED
TUKIASEMA
BASISSTATION
BASEENHET
BASENHET
D+M Filter cord
D+M-Filterkabel
Ledning til D+M-filter
Cable de filtro D+M
D+M -suodatinjohto
Cordon filtre D+M
Cavo di filtro D+M
D+M Filtersnoer
D+M Filterledning
Cabo de filtro D+M
D+M Filtersladd
Hookswitch control cord
Kabel zur Hörergabelsteuerung
Ledning til fra/tilkoblingskontrol
Cable de control de conmutador
Ohjausmoduulin johto
Cordon de contrôle du levier décroché du combiné
Cavo del comando di attivazione/disattivazione chiamata
Snoer voor telefoonhoorncontactknop
Ledning for telefonrørkontroll
Cabo de Controlo do Comutador de Gancho
Luromkopplarsladd
Ring detector
Ruferkennung
Registreringsenhed
for opringning
Detector de llamada
Puhelun ilmoitin
Détecteur de sonnerie
Rilevatore di chiamata
Oproepdetector
Ringegjenkjenning
Detector de toque
Samtalsindikator
Telephone cord
Telefonkabel
Telefonledning
Cable del teléfono
Puhelinjohto
Cordon téléphonique
Cavo del telefono
Telefoonsnoer
Telefonledning
Fio telefónico
Telefonsladd
Base
Basisstation
Baseenhed
Tukiasema
Basisstation
Baseenhet
Basenhet
AC charger
Ladegerät
Lysnetoplader
Cargador de CA
Laturi
Chargeur secteur
Caricabatteria CA
Wisselstroomoplader
Vekselstrømslader
Carregador de CA
Laddare
25
27 29 24/46 9600
8400
28 30 31
Table of Contents
NO INNHOLDSFORTEGNELSE
Komponenter ................................................5
Oppsett 1–5 .................................................10
IntelliStand ..................................................15
Lading .........................................................17
Plassering ...................................................18
Justere tilpasningen ...................................19
Flerskift-sammenkobling ...........................22
Ringe/svare på samtaler/avslutte samtaler 24
Kontrollere kompatibiliteten ......................32
Volum ..........................................................39
Hodesettkontroller ......................................45
Lampene på baseenheten ..........................46
Feilsøking ....................................................64
Tilbakestilling av systemet .........................71
Tilknytning ..................................................72
Vedlikehold ..................................................73
Bytte talerør ................................................73
Bytte batteri ................................................74
Få tilgang til Avaya UCC ..............................77
PT ÍNDICE
Componentes ................................................5
Configuração 1–5 ........................................10
IntelliStand ..................................................15
Carregamento .............................................17
Posicionamento ..........................................18
Ajuste ..........................................................19
Emparelhamento múltiplo ..........................22
Efectuar/atender/terminar chamadas .......24
Verificar compatibilidade ............................32
Volume ........................................................39
Controlo do auricular ..................................45
Luzes indicadoras na base .........................46
Resolução de problemas ............................66
Reposição do sistema .................................71
Subscrição ..................................................72
Manutenção ................................................73
Substituição do microfone ..........................73
Substituição da bateria ...............................74
Aceder ao Avaya UCC...................................77
SE INNEHÅLLSFÖRTECKNING
Komponenter ................................................5
Konfiguration 1–5 .......................................10
IntelliStand ..................................................15
Laddning .....................................................17
Placering .....................................................18
Ställa in passform .......................................19
Multi-shift-matchning ................................22
Ringa/besvara/avsluta samtal ....................24
Kontrollera kompatibilitet ..........................32
Volym ...........................................................40
Headsetkontroller .......................................46
Basenhetens indikatorlampor ....................46
Felsökning ...................................................68
Systemåterställning ....................................71
Matchning ...................................................72
Underhåll ....................................................73
Byta ut mikrofonarmen ...............................73
Byte av batteri .............................................74
Åtkomst till Avaya UCC................................77

6
7
4.
5.
6.
7.
GB REAR
4. Speaking volume minor adjust
5. IntelliStandTM on/off switch
(to automate call control button)
6. Listening volume major adjust
7. Telephone cord
DE Rückseite
4. Anpassen der Sprechlautstärke
(geringfügig)
5. IntelliStandTM-Ein/Aus-Schalter
(Automatisierung der Gesprächstaste)
6. Anpassen der Hörlautstärke
(in größeren Schritten)
7. Telefonkabel
DK Bagfra
4. Finindstilling af talevolumen
5. Til/Fra-kontakt til IntelliStandTM
(automatisering af knappen til
opkaldsstyring)
6. Overordnet indstilling af lyttevolumen
7. Telefonledning
ES Parte posterior
4. Ajuste corto del volumen de conversación
5. Interruptor de apagado/encendido de
IntelliStandTM (para automatizar el botón
de control de llamada)
6. Ajuste amplio del volumen de escucha
7. Cable del teléfono
FI Näkymä takaa
4. Puheäänen voimakkuuden pienet säädöt
5. IntelliStandTM-tukiaseman virtakytkin
(puhelunhallintapainikkeen
automatisoimista varten)
6. Kuunteluvoimakkuuden suuret säädöt
7. Puhelinjohto
FR Arrière
4. Réglage secondaire du volume à
l’émission
5. Interrupteur IntelliStandTM ON/OFF (pour
automatiser le bouton de contrôle d’appel)
6. Réglage principal du volume d’écoute
7. Cordon téléphonique
IT Lato posteriore
4. Regolazione secondaria del volume
di conversazione
5. Interruttore di attivazione/disattivazione
IntelliStandTM (per automatizzare il
pulsante di controllo delle chiamate)
6. Regolazione principale del volume di
ascolto
7. Cavo del telefono
NL Achterzijde
4. Fijnafstelling spraakvolume
5. IntelliStandTM Aan-/uitschakelaar
(voor het automatiseren van de
espreksknop)
6. Hoofdregeling luistervolume
7. Telefoonsnoer
NO Baksiden
4. Små justeringer av talevolum
5. Av/på-bryter for IntelliStandTM
(for automatisk drift av
ringekontrollknappen)
6. Store justeringer av lyttevolum
7. Telefonledning
PT Vista traseira
4. Ajuste do Volume de Conversação
(Intervalos Curtos)
5. Interruptor IntelliStandTM On/Off
(ligar/desligar - para automatizar o botão
de conversação)
6. Ajuste do Volume de Audição
(Intervalos Longos)
7. Fio telefónico
SE Baksida
4. Finjustering av talvolym
5. IntelliStandTM-omkopplare (knapp för
automatisk samtalsstyrning)
6. Grundinställning för lyssningsvolym
7. Telefonsladd
Components
GB Front
1. Indicator lights
a. Talking (green)
b. Power (red)
c. Charging (amber)
2. Charging cradle
3. Telephone configuration dial
DE Vorderseite
1. Leuchtanzeigen
a. Gesprächsleuchtanzeige (Grün)
b. Ein/Aus-Anzeige (Rot)
c. Ladeanzeige (Gelb)
2. Ladestation
3. Konfigurationsdrehschalter des Telefons
DK Front
1. Indikatorer
a. Tale (grøn)
b. Strøm (rød)
c. Opladning (gul)
2. Opladningsgaffel
3. Konfigurationsdrejeknap på telefonen
ES Parte frontal
1. Luces indicadoras
a. Conversación (verde)
b. Encendido (rojo)
c. Carga (ámbar)
2. Horquilla de carga
3. Regulador de configuración del teléfono
Components
BASE - TOP VIEW
BASISSTATION – OBERSEITE
BASEENHED - SET FRA OVEN
VISTA SUPERIOR DE LA BASE
TUKIASEMA – NÄKYMÄ YLHÄÄLTÄ
BASE - VUE DE DESSUS
BASE - VISTA DALL’ALTO
BASISSTATION - BOVENAANZICHT
BASEENHET – SETT OVENFRA
BASE - VISTA DO TOPO
BASENHET – OVANIFRÅN
1.
b.
a.
c.
2.
3.
FI Näkymä edestä
1. Merkkivalot
a. Puhe (vihreä)
b. Virta (punainen)
c. Lataus (keltainen)
2. Latausteline
3. Puhelimen asetussäädin
FR Avant
1. Témoins lumineux
a. Appel (vert)
b. Alimentation (rouge)
c. Chargement (orange)
2. Socle chargeur
3. Cadran de configuration du téléphone
IT Lato anteriore
1. Indicatori luminosi
a. Conversazione (verde)
b. Accensione (rosso)
c. Carica (ambra)
2. Supporto di ricarica
3. Selettore di configurazione del telefono
NL Voorkant
1. Waarschuwingslampjes
a. Spreekstand (Groen)
b. Voeding (Rood)
c. Opladen (Oranje)
2. Oplader/houder
3. Configuratieschakelaar voor uw telefoon
NO Forsiden
1. Indikatorlamper
a. Tale (grønn)
b. Strøm (rød)
c. Lader (gul)
2. Ladeholder
3. Konfigurasjonshjul for telefonen
PT Vista frontal
1. Luzes indicadoras
a. A conversar (verde)
b. Ligado (vermelho)
c. A carregar (laranja)
2. Suporte para carregamento
3. Botão de Configuração do Telefone
SE Framsida
1. Indikatorlampa
a. Samtal (grön)
b. Ström (röd)
c. Laddar (gul)
2. Laddningsklyka
3. Konfigurationsväljare

8
9
HEADSET
AURICULAR
KEVYTKUULOKE
OREILLETTE
AURICOLARI
HODESETT
1.
2.
3.
4.
GB HEADSET
1. Listening volume/mute
2. Call control button
3. Talk indicator light
4. Voice tube
DE HEADSET
1. Hörlautstärke-/Stummschaltungstaste
2. Annehmen und Beenden von
Gesprächen
3. Gesprächsleuchtanzeige
4. Sprechröhrchen
DK HEADSET
1. Lyttevolumen/Lydløs
2. Knap til opkaldsstyring
3. Indikatorlampe for tale
4. Stemmerør
ES Auricular
1. Volumen de escucha y función Mute
2. Con varias funciones
3. Luz indicadora de conversación
4. Tubo de voz
Components
GB NOTE: Please refer to the separate Safety
Instructions booklet for important product
safety information prior to installation or use of
the product.
DE HINWEIS; Die Broschüre „Wichtige
Sicherheitshinweise“ enthält wichtige Sicherh
eitsinformationen, die Sie vor der Installation
oder Verwendung des Produkts beachten
sollten.
DK BEMÆRK: Læs den separate brochure med
sikkerhedsinstruktioner for at få vigtige
oplysninger om produktsikkerhed, inden du
installerer eller bruger produktet.
ES NOTA: Consulte el folleto de instrucciones sobre
seguridad que se suministra por separado
para obtener información sobre seguridad del
producto antes de su instalación o uso.
FI HUOMAUTUS: Laitteen mukana toimitetussa
Turvallisuusohjeet-kirjasessa on tärkeitä tietoja
laitteen turvallisesta käytöstä. Lue kirjanen
ennen laitteen asentamista tai käyttöönottoa.
FR REMARQUE : Reportez-vous au livret
d’instructions relatives à la sécurité pour les
informations importantes relatives à la sécurité
avant d’installer ou d’utiliser l’appareil.
IT NOTA : Per informazioni sulla sicurezza del
prodotto, fare riferimento al documento
“Importanti istruzioni sulla sicurezza”, fornito
separatamente, prima dell’installazione e
dell’uso del prodotto.
NL OPMERKING: Raadpleeg voorafgaand aan de
installatie en het gebruik van het product het
boekje met belangrijke veiligheidsinformatie.
NO MERK: Se viktig produktsikkerhetsinformasjon i
det separate heftet om sikkerhetsinstruksjoner
før du installerer eller bruker produktet.
PT NOTA: Antes da instalação ou utilização do
produto, consulte o folheto de Instruções
de Segurança para obter informações de
segurança.
SE OBS! Innan du installerar eller börjar
använda produkten bör du läsa i broschyren
Säkerhetsanvisningar, som innehåller viktig
produktsäkerhetsinformation.
FI Kevytkuuloke
1. Kuunteluvoimakkuus ja mykistys
2. Puhelunhallintapainike
3. Puheen merkkivalo
4. Ääniputki
FR Oreillette
1. Volume d’écoute/Touche secret
2. Bouton de contrôle d’appel
3. Témoin d’appel
4. Tube vocal
IT Auricolari
1. Volume di ascolto/
Esclusione microfono
2. Pulsante di controllo chiamate
3. Indicatore luminoso di conversazione
4. Tubo vocale
NL HEADSET
1. Luistervolume/Mute
2. Gespreksknop
3. Spraakindicatielampje
4. Spreekbuisje
NO Hodesett
1. Lyttevolum/demping
2. Ringekontrollknapp
3. Taleindikatorlampe
4. Talerør
PT Auricular
1. Botão de Volume de audição/Corte de som
2. Botão de conversação
3. Luz indicadora de conversação
4. Microfone
SE HEADSET
1. Lyssningsvolym/sekretess
2. Knapp för samtalskontroll
3. Indikatorlampa för samtal
4. Talrör
Components
BASE - UNDERSIDE VIEW
BASISSTATION – UNTERSEITE
BASEENHED - SET NEDEFRA
BASE: VISTA INFERIOR
TUKIASEMA – NÄKYMÄ POHJASTA
BASE - VUE DE DESSOUS
BASE - VISTA PARTE INFERIORE
BASISSTATION - ONDERAANZICHT
BASEENHET – SETT FRA UNDERSIDEN
BASE - VISTA INFERIOR
BASENHET – UNDERIFRÅN
8.
9.
10.
11.
12.
13.
EU24/ADJ
GB Base - underside view
8. Speak volume major adjust
9. Handset jack
10. AC power adapter jack
11. Accessory jack
12. Ring detector jack
13. Telephone base jack
DE Basisstation – Unterseite
8. Sprechlautstärke anpassen
(in größeren Schritten)
9. Telefonhörerbuchse
10. Buchse für das Netzgerät
11. Zusätzliche Buchse
12. Ruferkennungsbuchse
13. Telefonbuchse
DK Baseenhed - Set nedefra
8. Overordnet indstilling af talevolumen
9. Stik til håndsæt
10. Stik til vekselstrømsadapter
11. Stik til ekstraudstyr
12. Stik til registreringsenhed for opringning
13. Stik til telefonens baseenhed
ES Base: vista inferior
8. Ajuste amplio del volumen de conversación
9. Conector del microteléfono
10. Conector del transformador de CA
11. Conector para accesorios
12. Conector del detector de llamadas
13. Conector para la base del teléfono
FI Tukiasema – näkymä pohjasta
8. Puheäänen voimakkuuden suuret säädöt
9. Luurin liitin
10. Verkkolaiteliitin
11. Liitin (lisävaruste)
12. Puhelun ilmoittimen liitin
13. Puhelimen tukiaseman liitin
FR Base - Vue de dessous
8. Réglage principal du volume à l’émission
9. Fiche du combiné
10. Fiche de l’adaptateur d’alimentation secteur
11. Fiche pour accessoire
12. Fiche du détecteur de sonnerie
13. Fiche de la base du téléphone
IT Base - vista parte inferiore
8. Regolazione principale del volume di
conversazione
9. Presa jack della cornetta
10. Presa jack adattatore CA
11. Presa jack per accessori
12. Presa jack rilevatore di chiamata
13. Presa jack della base del telefono
NL Basisstation - Onderaanzicht
8. Hoofdregeling spraakvolume
9. Aansluiting voor handset
10. Aansluiting voor wisselstroomadapter
11. Accessoireaansluiting
12. Aansluiting voor oproepdetector
13. Aansluiting voor basisstation
NO Baseenhet – sett fra undersiden
8. Store justeringer av talevolum
9. Håndsettkontakt
10. Kontakt for vekselstrømsadapter
11. Kontakt til tilleggsutstyr
12. Kontakt for ringegjenkjenning
13. Kontakt for telefonbaseenhet
PT Base - Vista inferior
8. Ajuste do Volume de Conversação
(Intervalos Longos)
9. Tomada para o auscultador
10. Tomada para o adaptador de corrente CA
11. Tomada extra
12. Tomada para o detector de toques
13. Tomada para a Base do Telefone
SE Basenhet – underifrån
8. Grundinställning för talvolym
9. Luruttag
10. Uttag för nätadapter
11. Tillbehörsuttag
12. Uttag för samtalsindikator
13. Uttag för basenhet

10
11
Setup 2
EINRICHTUNG 2
INSTALLATION 2
CONFIGURACIÓN 2
ASENNUS 2
CONFIGURATION 2
CONFIGURAZIONE 2
INSTALLATIE 2
OPPSETT 2
INSTALAÇÃO 2
KONFIGURATION 2
AVAYA 2410, 4630, 5410, 6416 D+M,
6424 D+M
Configuration dial set to 1
Konfigurationsdrehschalter steht auf 1
Konfigurationsdrejeknap i position 1
Regulador de configuración definido en 1
Puhelimen asetussäädin asennossa 1
Cadran de configuration sur 1
Configuratieschakelaar ingesteld op 1
Konfigurasjonshjulet er satt til 1
Botão de configuração definido para 1
Konfigurationsväljaren ställd på 1
24
27
25
7
2427
29
29
1
4
Setup 3
EINRICHTUNG 3
INSTALLATION 3
CONFIGURACIÓN 3
ASENNUS 3
CONFIGURATION 3
CONFIGURAZIONE 3
INSTALLATIE 3
OPPSETT 3
INSTALAÇÃO 3
KONFIGURATION 3
AVAYA 7403D, 7405D, 7407D, 7406,
8403, 8405, 8410D, 8411D, 8434,
8510ISDN, 7506ISDN
Configuration dial set to 3
Konfigurationsdrehschalter steht auf 3
Konfigurationsdrejeknap i position 3
Regulador de configuración definido en 3
Puhelimen asetussäädin asennossa 3
Cadran de configuration sur 3
Configuratieschakelaar ingesteld op 3
Konfigurasjonshjulet er satt til 3
Botão de configuração definido para 3
Konfigurationsväljaren ställd på 3
24
27
430
7
2427
1
Setup 1
7
24
24
28
28
26 5
25
25
1
4
EINRICHTUNG 1
INSTALLATION 1
CONFIGURACIÓN 1
ASENNUS 1
CONFIGURATION 1
CONFIGURAZIONE 1
INSTALLATIE 1
OPPSETT 1
INSTALAÇÃO 1
KONFIGURATION 1
AVAYA 2420, 4610SW, 4620, 4620SW,
4621SW, 4622SW, 4625SW 4630SW,
5420, 5610, 5620*
GB *24xx and 54xx phones require 4.0 firmware
or greater. 46xx and 56xx phones require 1.8
firmware or greater.
DE *Für Telefone der Serie 24xx und 54xx ist 4.0-
Firmware erforderlich. Für Telefone der Serie
46xx und 56xx ist 1.8-Firmware erforderlich.
DK *24xx- og 54xx-telefoner kræver 4.0-firmware
eller nyere. 46xx- og 56xx-telefoner kræver
1.8-firmware eller nyere.
ES *Los teléfonos de 24xx y 54xx requieren
una versión 4.0 o superior de firmware. Los
teléfonos de 46xx y 56xx requieren una versión
1.8 o superior de firmware.
FI *Puhelimissa 24xx ja 54xx tarvitaan
laiteohjelmistoversio 4.0 tai uudempi.
Puhelimissa 46xx ja 56xx tarvitaan
laiteohjelmistoversio 1.8 tai uudempi
FR *Les téléphones 24xx et 54xx requièrent la
version 4.0 du micrologiciel ou une version
supérieure. Les téléphones 46xx et 56xx
requièrent la version 1.8 du micrologiciel ou
une version supérieure.
IT *I telefoni 24xx e 54xx richiedono firmware 4.0
o versioni successive. I telefoni 46xx e 56xx
richiedono firmware 1.8 o versioni successive.
NL *Voor 24xx- en 54xx-telefoons is firmware 4.0
of hoger vereist. Voor 46xx- en 56xx-telefoons
is firmware 1.8 of hoger vereist.
NO *24xx- og 54xx-telefoner krever 4.0-fastvare
eller senere. 46xx- og 56xx-telefoner krever
1.8-fastvare eller senere.
PT *Os telefones 24xx e 54xx requerem o
firmware 4.0 ou superior. Os telefones 46xx e
56xx requerem o firmware 1.8 ou superior.
SE *24xx- och 54xx-telefoner kräver fast
programvara version 4.0 eller högre.
46xx- och 56xx-telefoner kräver fast
programvara version 1.8 eller högre.
Configuration dial set to 3
Konfigurationsdrehschalter steht auf 3
Konfigurationsdrejeknap i position 3
Regulador de configuración definido en 3
Puhelimen asetussäädin asennossa 3
Cadran de configuration sur 3
Configuratieschakelaar
ingesteld op 3
Konfigurasjonshjulet
er satt til 3
Botão de configuração
definido para 3
Konfigurationsväljaren
ställd på 3
See pages 5-9 for callout of components
Eine Auflistung der Komponenten finden
Sie auf den Seiten 5-9
Der er forklarende tekst til komponenterne
på siderne 5-9
Consulte las páginas 5-9 para obtener
una descripción de los componentes
Lisätietoja osista on sivuilla 5-9
Voir légendes des composants pages 5-9
Zie pagina 5-9 voor een opsomming
van componenten
Se sidene 5-9 for oversikt over komponenter
Consulte as páginas 5-9 para obter o
diagrama dos componentes
Förklaringar av komponenter finns
på sidorna 5-9

12
13
GB CAUTION: It is important for correct and safe
operation that the base cord is installed into
the proper jack of your telephone. Follow
these instructions carefully, especially if your
telephone has two jacks where the handset was
attached. Take care to note or mark which jack
was used for the handset.
DE ACHTUNG: Für einen ordnungsgemäßen
und sicheren Betrieb muss das Kabel der
Basisstation an die richtige Telefonbuchse
angeschlossen werden. Befolgen Sie diese
Anweisungen sorgfältig, vor allem, wenn Ihr
Telefon über zwei Buchsen verfügt, an denen
das Headset angeschlossen war. Kennzeichnen
Sie, an welcher Buchse das Headset
angeschlossen war.
DK ADVARSEL: Af hensyn til korrekt og sikker
betjening af enheden er det vigtigt, at ledningen
til baseenheden er tilsluttet det korrekte stik på
telefonen. Du bør følge denne vejledning nøje,
især hvis der er to stik i telefonen på det sted,
hvor håndsættet var tilsluttet. Sørg for at notere
eller markere, hvilket stik der blev brugt til
håndsættet.
ES PRECAUCIÓN: para garantizar un
funcionamiento correcto y sin riesgos, es
importante que el cable de la base se conecte
al conector correcto del teléfono. Siga estas
instrucciones con cuidado, sobre todo si el
teléfono cuenta con dos conectores para el
microteléfono. Asegúrese de marcar el conector
en el que estaba conectado el microteléfono.
FI VAROITUS: Laitteen moitteettoman ja turvallisen
käytön kannalta on tärkeää, että tukiaseman
johto on liitetty oikeaan liitäntään puhelimessa.
Noudata näitä ohjeita huolellisesti etenkin, jos
puhelimessasi on kaksi luuriliitäntää. Paina
mieleesi tai kirjoita muistiin, mihin liitäntään luuri
oli kytketty.
FR ATTENTION : pour un fonctionnement correct
en toute sécurité, il est important que le cordon
de la base soit connecté sur la fiche adéquate
de votre téléphone. Suivez ces instructions avec
attention, surtout si votre téléphone est équipé
de deux fiches sur lesquelles était connecté le
combiné. Assurez-vous de noter ou de marquer
la fiche qui a été effectivement utilisée pour
brancher l’oreillette.
IT ATTENZIONE: per un funzionamento
corretto e sicuro, inserire il cavo della base
nell’apposita presa jack del telefono. Attenersi
scrupolosamente a queste istruzioni, in
particolar modo se il telefono a cui era
collegata la cornetta dispone di due prese jack.
Assicurarsi di contrassegnare la presa jack
utilizzata per la cornetta o di prenderne nota.
NL WAARSCHUWING: het is belangrijk dat
het snoer van het basisstation op de juiste
ingang van de telefoon is aangesloten, zodat
het apparaat goed en veilig werkt. Volg deze
aanwijzingen zorgvuldig op, vooral als uw
telefoon twee mogelijke ingangen heeft. Maar
een aantekening van welke ingang voor de
handset is gebruikt, of markeer deze.
NO FORSIKTIG: Det er viktig for riktig og sikker
bruk at baseenhetens ledning er satt inn i
riktig kontakt på telefonen. Følg instruksjonene
nøye, særlig hvis telefonen har to støpsler der
håndsettet ble festet. Merk hvilken kontakt som
ble brukt til håndsettet.
PT ATENÇÃO: Para garantir o funcionamento correcto
e seguro, é importante que o fio da base esteja
ligado à tomada adequada do seu telefone. Siga
estas instruções com cuidado, especialmente se
o seu telefone dispõe de duas tomadas. Anote ou
assinale a tomada utilizada com o auricular.
SE OBS! Du måste ansluta basenhetssladden till
rätt uttag på telefonen, annars kommer den
eventuellt inte att fungera på rätt sätt. Följ de
här anvisningarna noggrant, särskilt om det
finns två uttag på telefonen för anslutning av
luren. Anteckna eller markera det uttag som
används för luren.
Setup 5 with other AVAYA telephones
24
27
4
25
7
2427
31
31
1
Setup 4
EINRICHTUNG 4
INSTALLATION 4
CONFIGURACIÓN 4
ASENNUS 4
CONFIGURATION 4
CONFIGURAZIONE 4
INSTALLATIE 4
OPPSETT 4
INSTALAÇÃO 4
KONFIGURATION 4
AVAYA 9600
Configuration dial set to 1
Konfigurationsdrehschalter steht auf 1
Konfigurationsdrejeknap i position 1
Regulador de configuración definido en 1
Puhelimen asetussäädin asennossa 1
Cadran de configuration sur 1
Configuratieschakelaar ingesteld op 1
Konfigurasjonshjulet er satt til 1
Botão de configuração definido para 1
Konfigurationsväljaren ställd på 1
Other manuals for AWH75
1
Table of contents
Other Avaya Headset manuals

Avaya
Avaya LKA10 User manual

Avaya
Avaya Ultra Ultra User manual

Avaya
Avaya H171N User manual

Avaya
Avaya ABT-35+ User manual

Avaya
Avaya AWH75N User manual

Avaya
Avaya AWH54 User manual

Avaya
Avaya Headset CAT132 MX User manual

Avaya
Avaya C500 Series Supplement

Avaya
Avaya AWH65+ User manual

Avaya
Avaya L149 User manual

Avaya
Avaya ABT-35 User manual

Avaya
Avaya SupraElite W450N User manual

Avaya
Avaya AWH-55USB User manual

Avaya
Avaya L119 User manual

Avaya
Avaya AWH65+ User manual

Avaya
Avaya SupraElite AH460N User manual

Avaya
Avaya L129 User manual

Avaya
Avaya PhoneTech P20USBM Supplement

Avaya
Avaya AWH-55 User manual

Avaya
Avaya ABT-35 User manual