manuals.online logo
Brands
  1. Home
  2. •
  3. Brands
  4. •
  5. Avaya
  6. •
  7. IP Phone
  8. •
  9. Avaya one-X 9600 Series User manual

Avaya one-X 9600 Series User manual

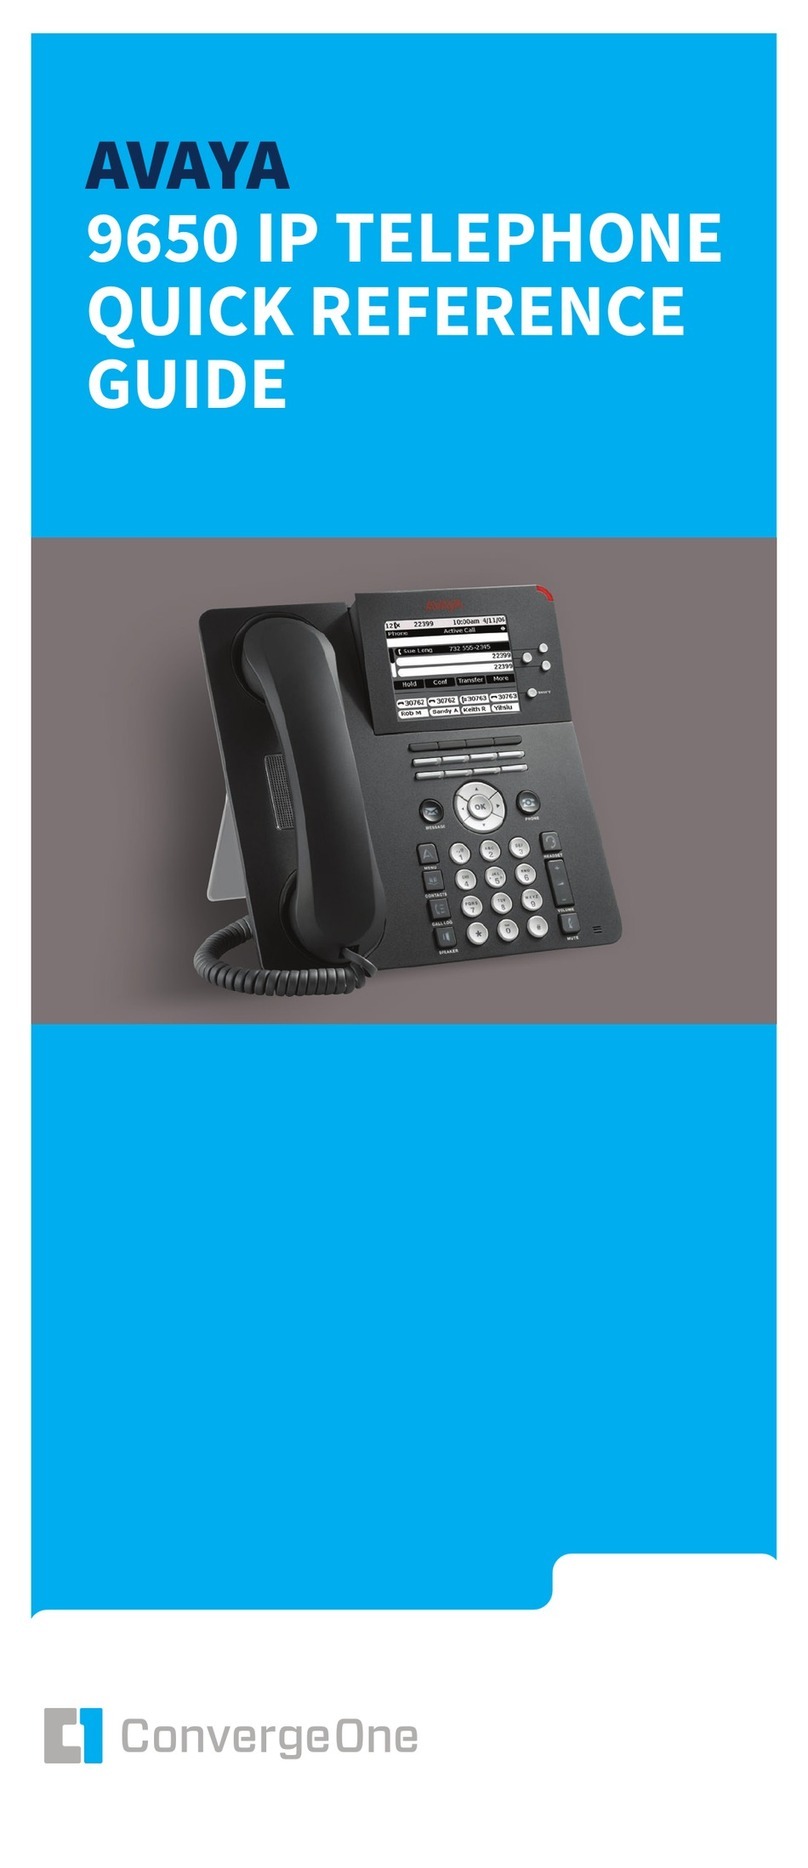
9600 Telephone User Guide
1
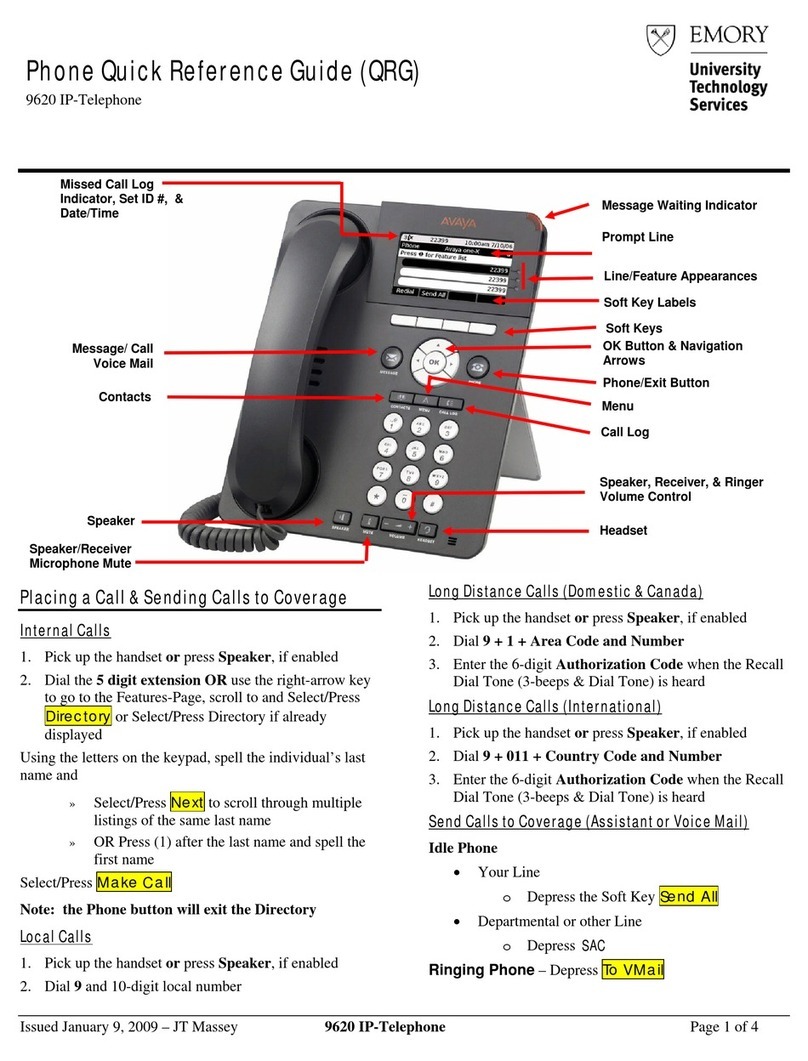
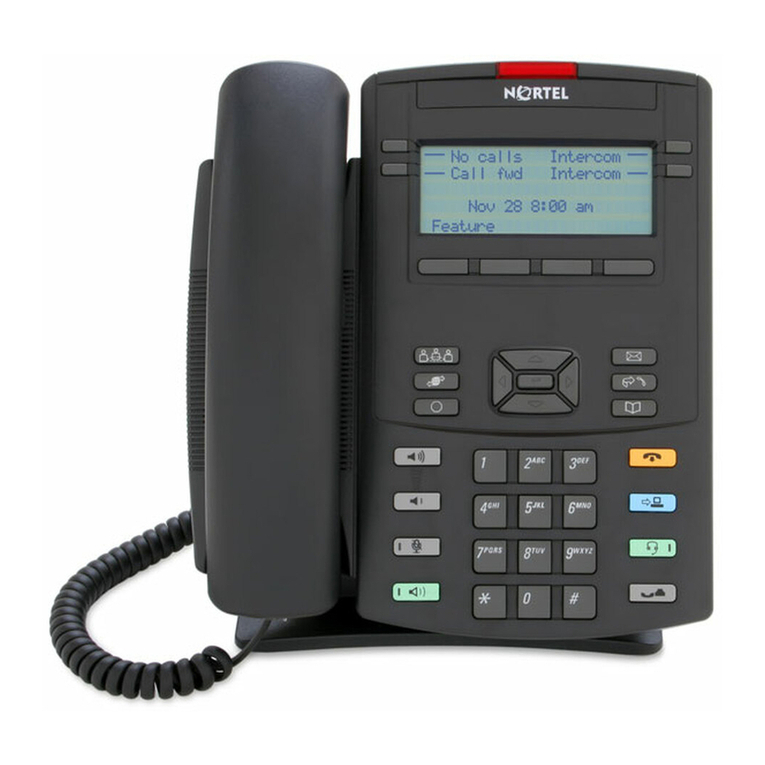
Message Waiting Indicator: An illuminated red light in the upper-
right corner of your phone indicates you have voicemail messages
waiting.
Prompt Line: View the prompt line to see helpful information.
Call Appearances: The number of lines available to make or receive
calls (call appearances) depends on how your system is
administered. Press the line button to initiate or answer a call.
Lines: The line buttons with integrated LEDs show which lines are in
use and correspond to the lines on the display. Press the line button
to select that line.
Softkeys and Softkey Labels: Use the softkeys to act on objects
displayed on the screen. The softkey labels show you the action that
each key produces.
Navigation Arrows: Use the right and left navigation arrows to
navigate between menus or to move the cursor during text input.
Use the up and down navigation arrows to move from one line to
another.
Message: Press to connect directly to your voicemail system.
Phone: Press to view and manage your calls.
Contacts: Press to view the entries in your Contacts list.
History: Press to view the history of your outgoing, incoming, and
missed calls. The icon on the History button is illuminated when you
have missed calls. The top line of the Prompt shows the Missed Call
icon and the number of calls missed.
Home: Press to configure options and settings.
Volume: Press to adjust the volume of the handset, headset,
speaker, and ringer.
Mute: Press to mute a call in progress. To take a call off mute, press
Mute again.
Speaker: Press to use the speakerphone. To take a call off
speakerphone, lift the handset.
Headset: Press to use the headset if it is connected. Only HIS
headset cords are compatible with your phone.
9600 Telephone User Guide
2
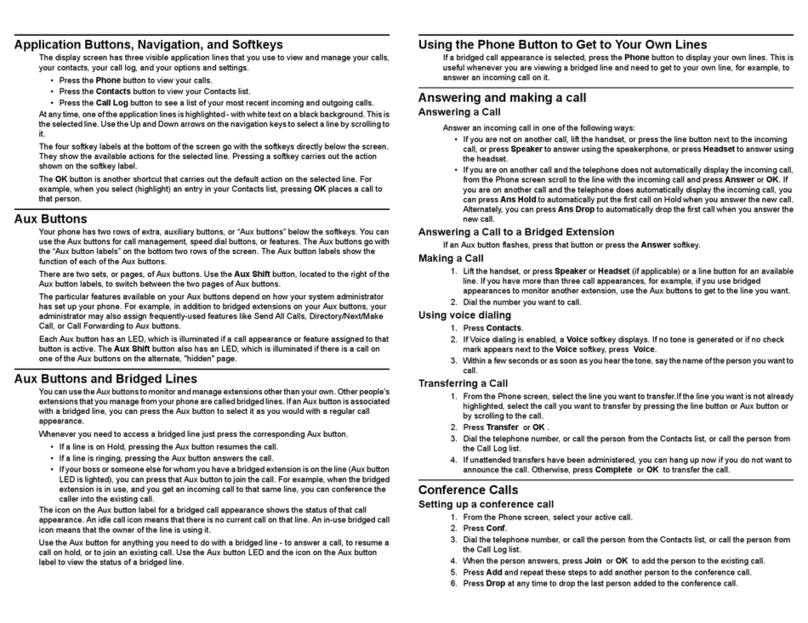
PLACING CALLS: Lift the RECEIVER or press the SPEAKER button.
External Number: Dial “9” followed by the number.
ANSWERING A CALL: When the phone rings, lift the RECEIVER, or
press the SPEAKER button. To answer a second call, simply press the
line associated with the next call; the first call will automatically be
placed on hold.
HOLD: Press the HOLD key to place the current caller on hold. Press
the appropriate call appearance button to return to the held call or
press the RESUME softkey. If you wish to place another call while a
caller is on hold: Select an available call appearance
TRANSFERRING CALLS: With the caller on the line, press the
TRANSFER softkey. Dial the extension number where the call will be
transferred to. Announce the call (optional). Press the COMPLETE
key to complete the transfer, or simply hang up.
NOTE: To dial another number, select the DROP softkey, then dial
the new number.
CONFERENCE CALLING This function enables you to set up a
conference call –up to 6 parties –yourself plus 5 others..
With the first caller on the line, press the CONFERENCE softkey. Dial
the next number (either internal or external), When the 2nd caller
connects, press the JOIN softkey to add the 2nd caller to the call.
Repeat these steps until all parties are added.
SEND ALL CALLS (DND): When activated, all calls immediately cover
to the next point of coverage (generally voicemail).
To Activate: From the phone (home screen), press the softkey
associated with “Send Calls” (while on- hook) –“Send Calls”
illuminates or has a check mark. To De-activate: Press the “Send
Calls” softkey again (while on-hook).
CONTACTS: (Speed Dials) the 9600 series telephones allow you to
store up to 250 names and telephone numbers. Adding a new
contact: Press Contacts Press New Enter the name using the dial
pad –utilize the same convention as when entering in a name on
your cell phone.
HISTORY: Press to view the history of your outgoing, incoming, and
missed calls. The icon on the History button is illuminated when you
have missed calls. The top line of the Prompt shows the Missed Call
icon and the number of calls missed.
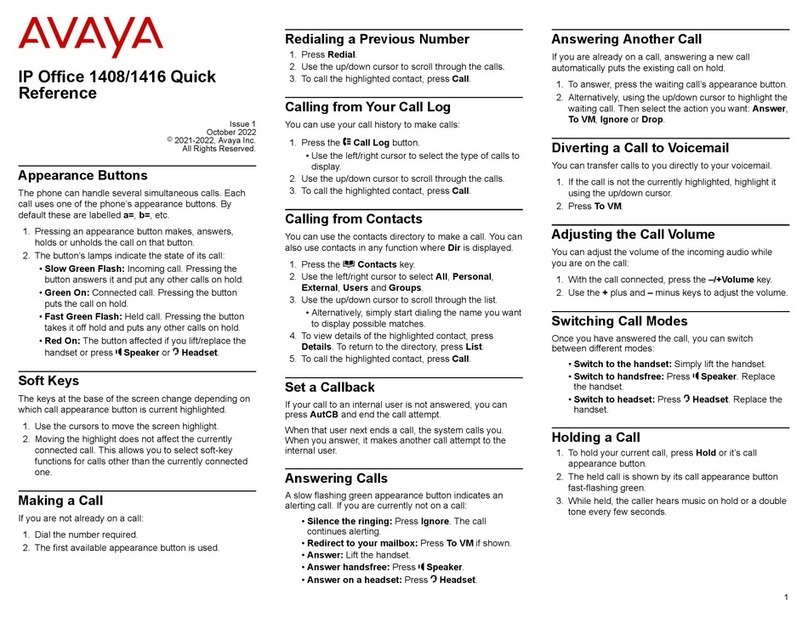
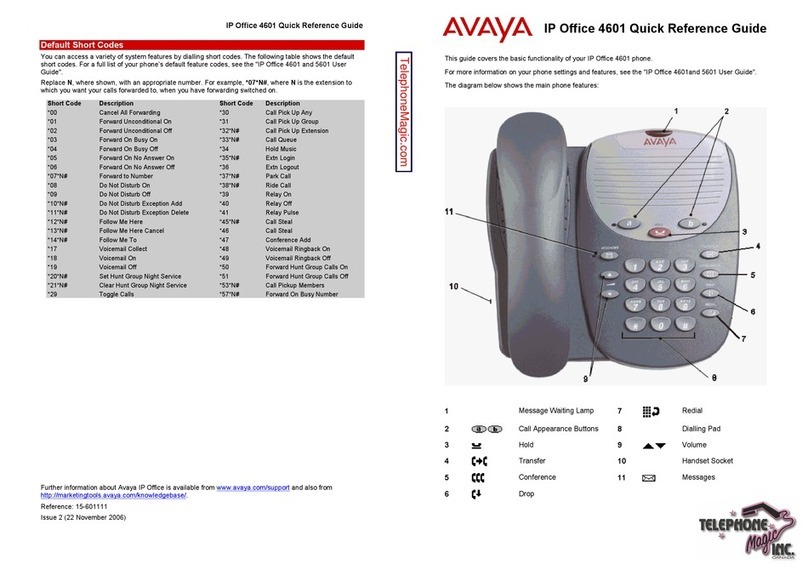
SPEED DIAL: Press “Abr Prog”, select the available SD key to
program. Enter the number, remembering to enter a 9 for outside
numbers.
CALL FORWARD: This allows you to forward your extension to
another extension or an outside number, if allowed.
To Activate: Press the CALL FORWARD button, enter the extension
number that you wish to forward to. (You will hear a confirmation
tone. To De-Activate: While on hook, press the CALL FORWARD
button.
HOME: You can use the HOME button to adjust and customize
options such as:
Ring Pattern: Press “HOME”, Options and Settings, Screen & Sound
Options, then Personalized Ringing.
Personalized Labels: Press “Prog Key”, “Options and Settings”,
Application Settings”, then Personalize Labels. Choose “Edit”, then
using the keypad, enter the letters or numbers, and press save.

Other manuals for one-X 9600 Series

16

Other Avaya IP Phone manuals

Avaya 1140E User manual

Avaya

Avaya 1140E User manual

Avaya 4600 Series Service manual

Avaya

Avaya 4600 Series Service manual

Avaya B189 User manual

Avaya

Avaya B189 User manual

Avaya IP Office 1416 User manual

Avaya

Avaya IP Office 1416 User manual

Avaya 9620 Deskphone Edition User manual

Avaya

Avaya 9620 Deskphone Edition User manual

Avaya IP Office T7100 User manual

Avaya

Avaya IP Office T7100 User manual

Avaya one-X Deskphone Value Edition 1608 User manual

Avaya

Avaya one-X Deskphone Value Edition 1608 User manual

Avaya IP Office 4602 User manual

Avaya

Avaya IP Office 4602 User manual

Avaya IP Office 9620 User manual

Avaya

Avaya IP Office 9620 User manual

Avaya H209 User manual

Avaya

Avaya H209 User manual

Avaya IP Office 4602 User manual

Avaya

Avaya IP Office 4602 User manual

Avaya 1600 Series Supplement

Avaya

Avaya 1600 Series Supplement

Avaya 960 Series User manual

Avaya

Avaya 960 Series User manual

Avaya IP Office 1400 Series User manual

Avaya

Avaya IP Office 1400 Series User manual

Avaya DEFINITY 4606 User manual

Avaya

Avaya DEFINITY 4606 User manual

Avaya IP Office 20DT User manual

Avaya

Avaya IP Office 20DT User manual

Avaya IP OFFICE 2410 Setup guide

Avaya

Avaya IP OFFICE 2410 Setup guide

Avaya 9630 Deskphone Edition User manual

Avaya

Avaya 9630 Deskphone Edition User manual

Avaya IP Office 8.1 Technical specifications

Avaya

Avaya IP Office 8.1 Technical specifications

Avaya IP Office 4601 User manual

Avaya

Avaya IP Office 4601 User manual

Avaya 40DHB0002UKCL User manual

Avaya

Avaya 40DHB0002UKCL User manual

Avaya J100 Series User manual

Avaya

Avaya J100 Series User manual

Avaya IP Office 9621 User manual

Avaya

Avaya IP Office 9621 User manual

Avaya 5601 User manual

Avaya

Avaya 5601 User manual

Popular IP Phone manuals by other brands

UniData Communication Systems WirelessIP3000 user guide

UniData Communication Systems

UniData Communication Systems WirelessIP3000 user guide

Hubbell GAI-Tronics Clean Phone 1193 manual

Hubbell

Hubbell GAI-Tronics Clean Phone 1193 manual

TRENDnet ClearSky TVP-SP1BK Quick installation guide

TRENDnet

TRENDnet ClearSky TVP-SP1BK Quick installation guide

Yealink Telkom W52P Quick start up guide

Yealink

Yealink Telkom W52P Quick start up guide

Talkswitch TS-480i Using Guide

Talkswitch

Talkswitch TS-480i Using Guide

Siemens Gigaset E1 manual

Siemens

Siemens Gigaset E1 manual

Mitel 5207 user guide

Mitel

Mitel 5207 user guide

Polycom Evolve IP 450 quick reference

Polycom

Polycom Evolve IP 450 quick reference

Polycom VVX 201 user guide

Polycom

Polycom VVX 201 user guide

AudioCodes 440HD quick guide

AudioCodes

AudioCodes 440HD quick guide

Grandstream Networks GXP2130 Series Technical specifications

Grandstream Networks

Grandstream Networks GXP2130 Series Technical specifications

Epygi SwissVoice IP10S user guide

Epygi

Epygi SwissVoice IP10S user guide

Fanvil V Series instruction manual

Fanvil

Fanvil V Series instruction manual

Nortel M3820 Quick reference card

Nortel

Nortel M3820 Quick reference card

Yealink Yealink SIP-T48G user guide

Yealink

Yealink Yealink SIP-T48G user guide

Vogtec D312I Quick installation guide

Vogtec

Vogtec D312I Quick installation guide

Yealink SIP-T42U Configuration guide

Yealink

Yealink SIP-T42U Configuration guide

Yealink T4 series Registering and using

Yealink

Yealink T4 series Registering and using

manuals.online logo
manuals.online logoBrands
  • About & Mission
  • Contact us
  • Privacy Policy
  • Terms and Conditions

Copyright 2025 Manuals.Online. All Rights Reserved.