AVerTV Hybrid STB9
ENG-6
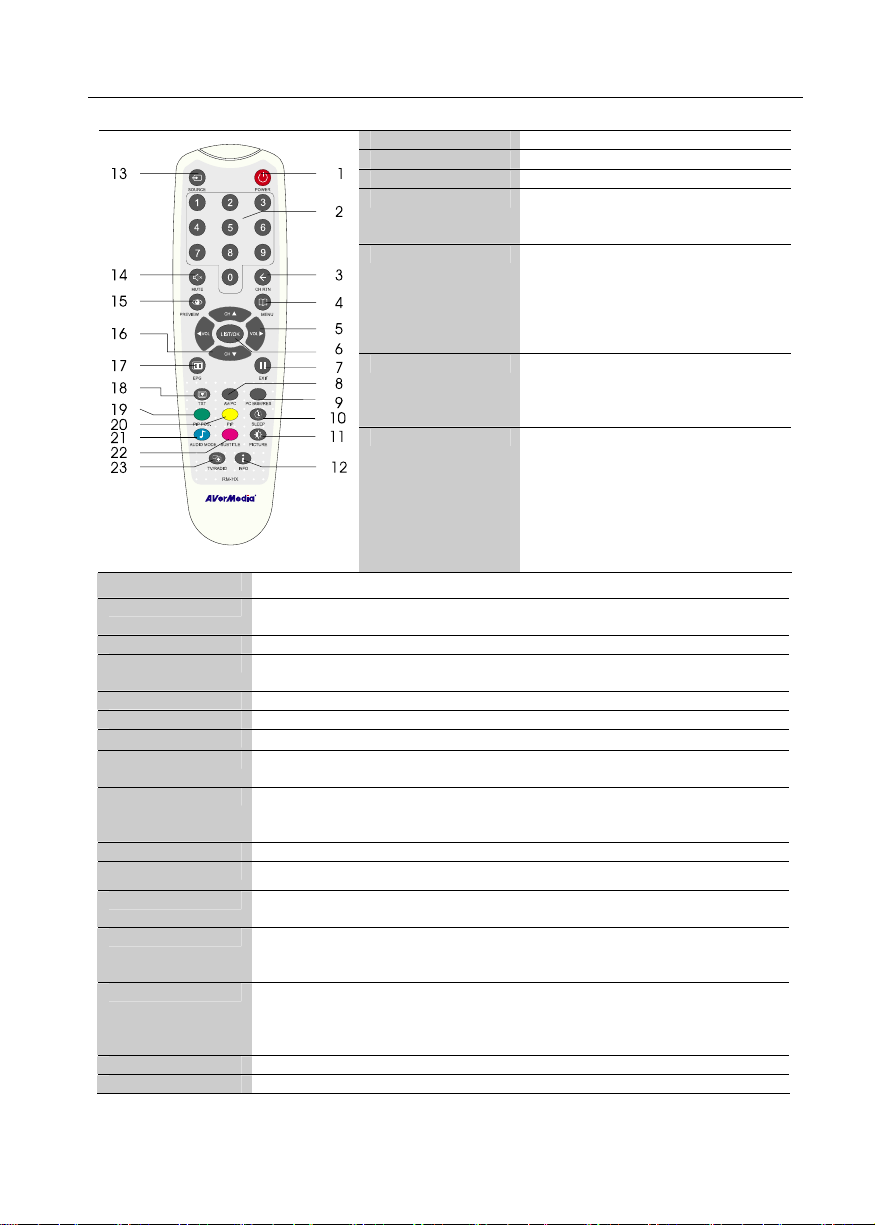
3.2 The Remote Control
The diagram below shows the remote control unit layout.
1. POWER Turn the unit on/off
2. Numberic Buttons To select a TV channel
3. CH RTN Go to the previously selected channel
4. MENU -TV Mode:Enter the OSD menu.
-OSD Menu:Select submenu or
save the setting.
5. VOL ◄/►-TV Mode:Increase / Decrease the
volume
-OSD Menu:Enter or exit the sub
menu.
-PIP Mode:Move the PIP small
screen by using the arrow buttons
6. LIST/OK -OSD Menu:In the menu, press this
button to confirm the selection.
-Digital TV:Bring up the TV
program list
7. /EXIT -TV Mode:To temporarily freeze
the image on the screen. Press
the button again to unfreeze the
image.
-OSD Menu:Exit the current menu,
dialog box, setup page or OSD
menu.
-PIP Mode:Close PIP window.
8. AV/PC To toggle between TV/ Video or PC display
9. PC BGM/ Res. -Switch the audio source when in PC display mode
-Switch display resolution setting to 1024x768 when in TV/Video mode
10. SLEEP To automatically turn off the unit after 30, 60, 90, 120 or 150 minutes.
11. PICTURE To adjust brightness, contrast, color, tint, sharpness.
*The picture adjusting is not supported in S-Video/composite video output mode.
12. INFO Display the current program information. (DTV only)
13. SOURCE Switch between TV, PC or external video sources
14. MUTE To turn off /on the sound
15. PREVIEW -Analog TV:Display 13 consecutive TV channels on-screen
-Digital TV:Display 9 consecutive TV channels on-screen
16. CH▲/▼-TV Mode:Go to next or previous program.
-OSD Menu:Function as the UP and DOWN arrow button.
-PIP Mode:Move the PIP screen by using the arrow buttons
17. EPG View EPG information. (DTV only)
18. TXT (option) Press to view Teletext. (DTV only)
19. PIP Pos. To move the small TV/Video screen using the CH▲, CH ▼, Vol◄, and Vol►buttons
in PIP mode. Press this button again to exit the adjusting mode.
20. PIP TV Mode:Go to PIP mode.
PIP Mode:Set the PIP window size to 1/4, 1/9, 1/16 and no PIP window.
* To watch TV/Video in a small screen on an always on top of the PC display.
21. AUDIO MODE -Analog TV:Switch between BG/DK for sound in Bulgaria and Slovakia.
Switch between different audio mode, mono, stereo, dual language in
France. Other countries do not support this feature.
-Digital TV:Set audio mode and language.
22. SUBTITLE Enable Subtitle feature. (DTV only)
23. TV/RADIO Toggle between live TV and Radio broadcasts. (DTV only)