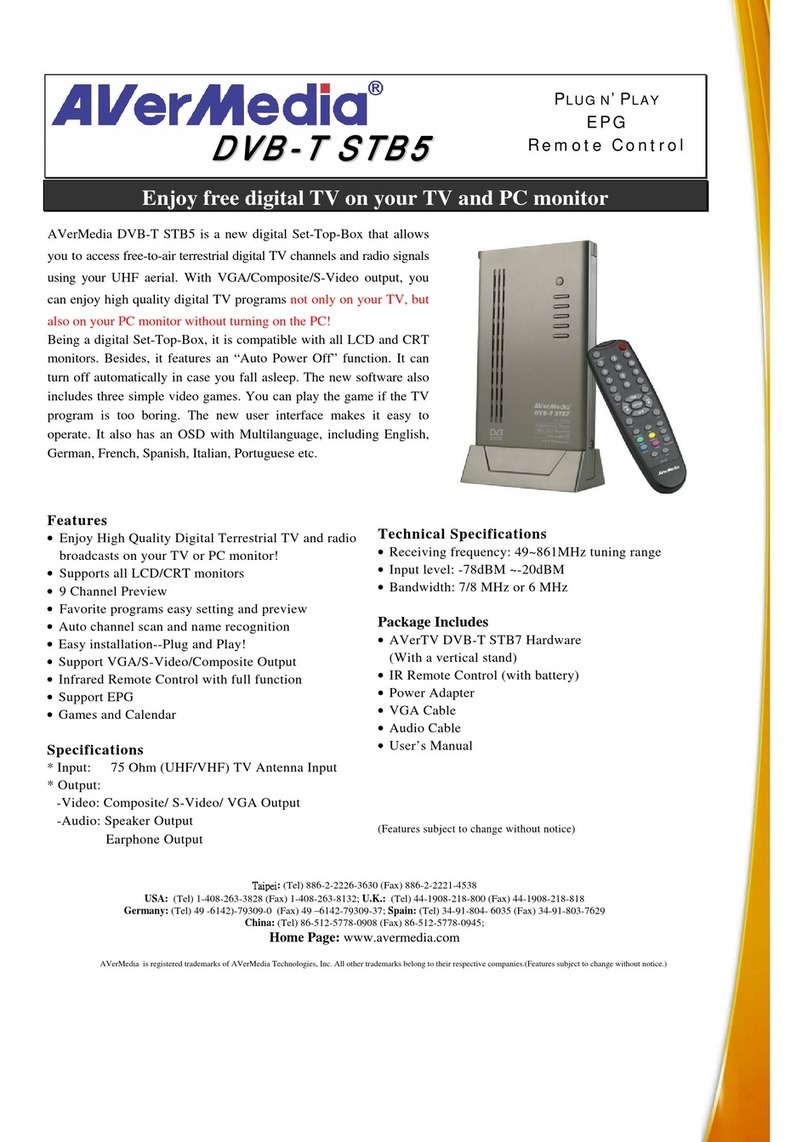
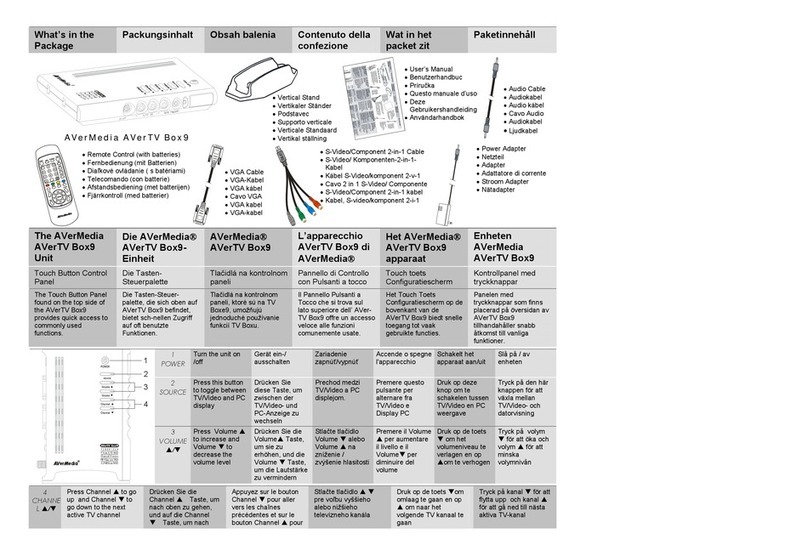
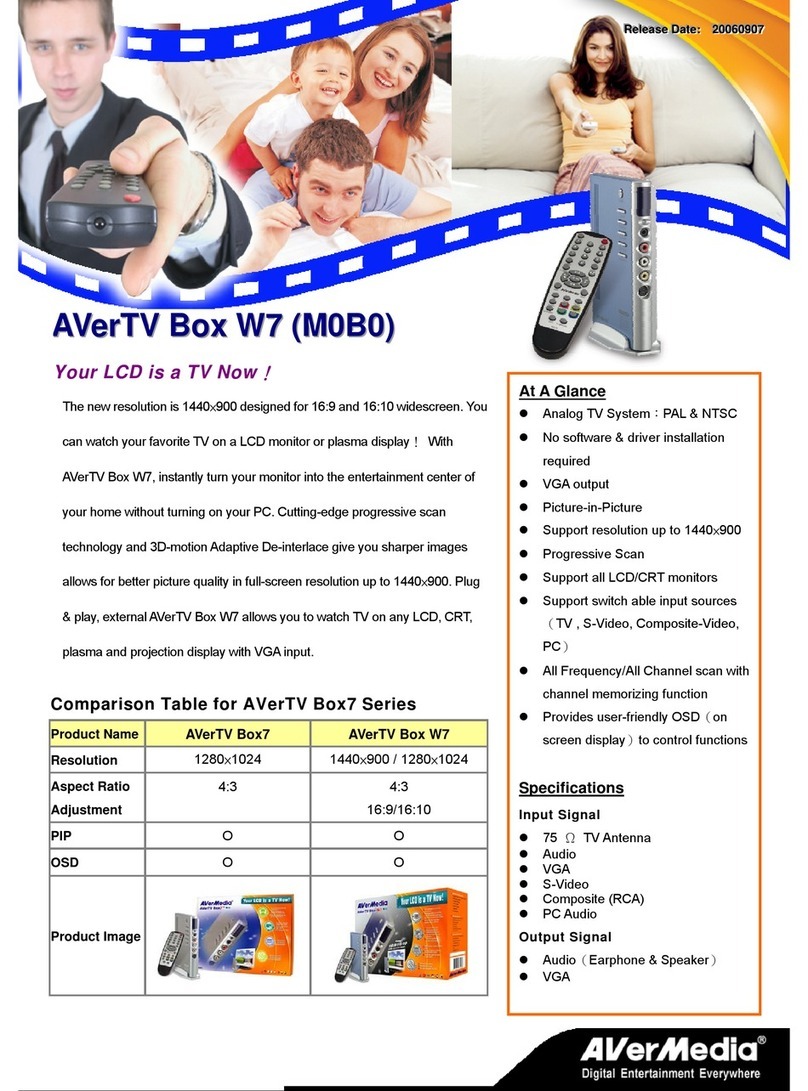
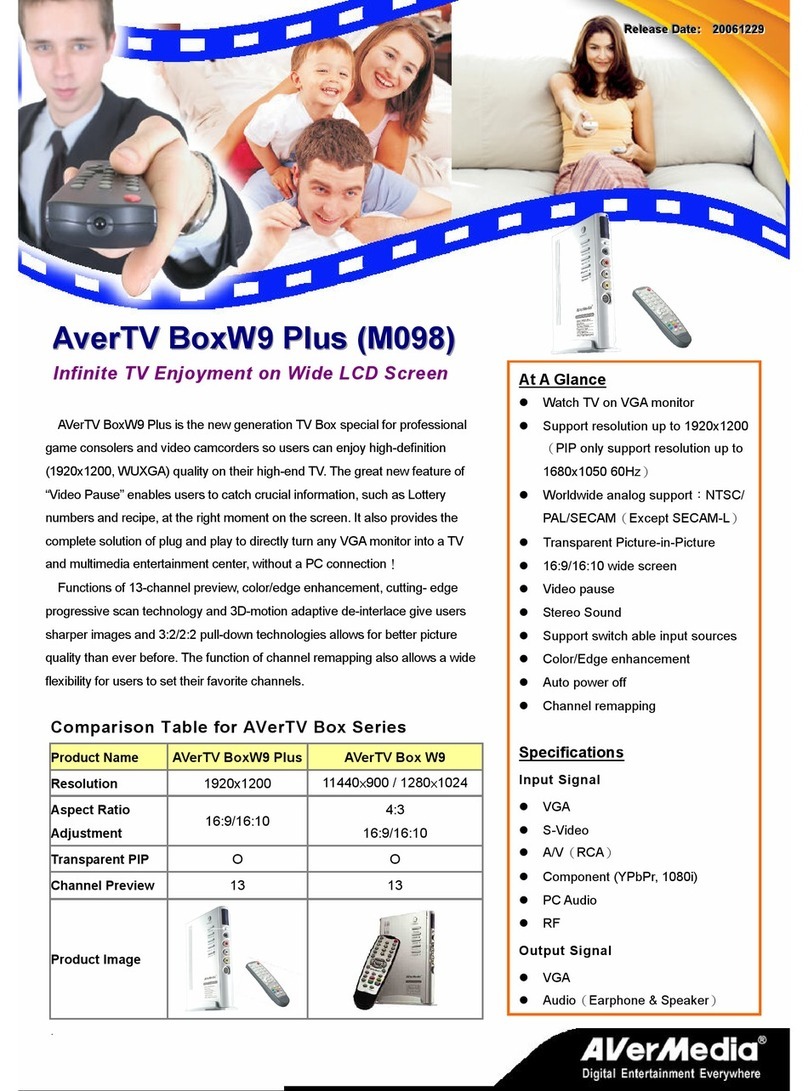
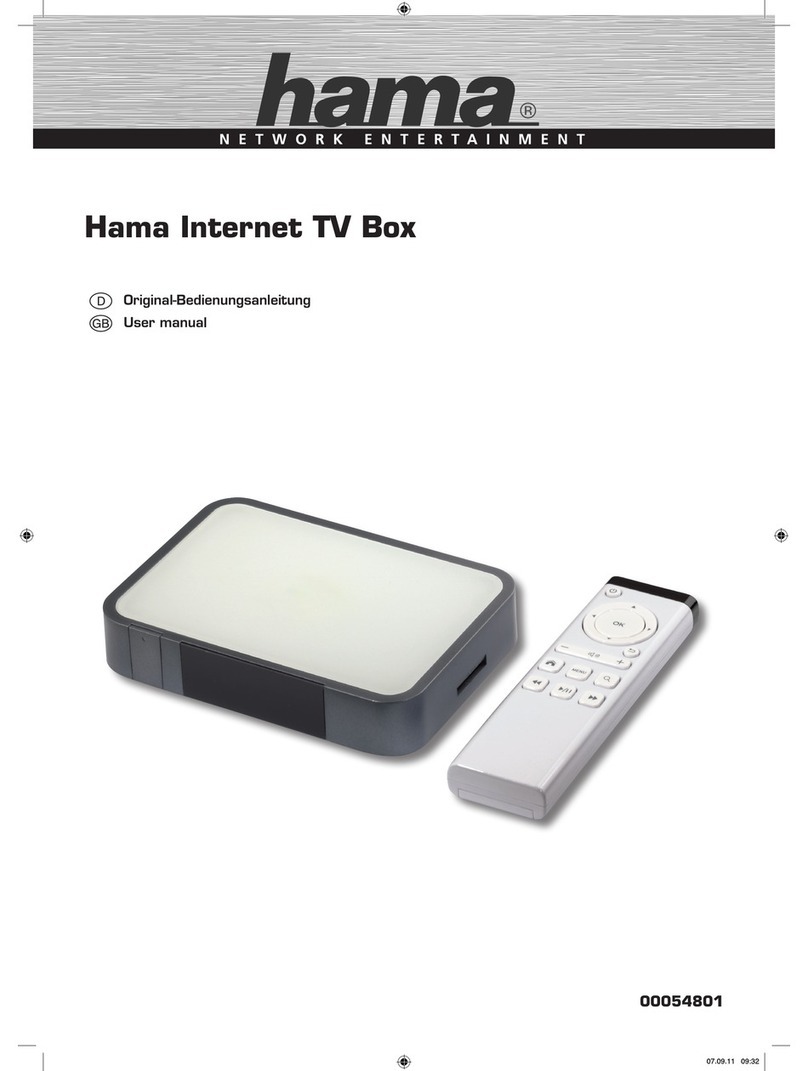
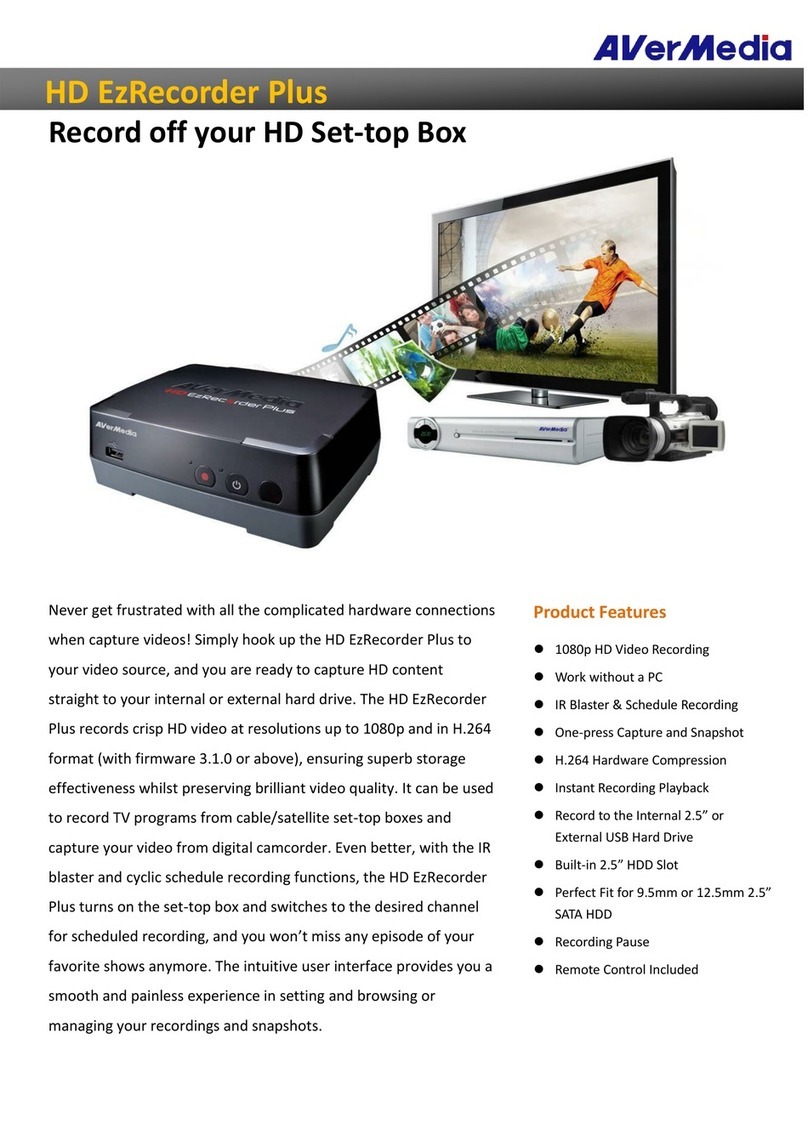
Avermedia AVerTV BoxW7 Plus User manual

AVerTV BoxW7 Plus
AVerTV BoxW9 Plus
User’s Manual
English
Polski
Magyar
Česky
Slovenský
Български
Hrvatski
Slovenščina

FCC NOTICE (Class B)
This device complies with Part 15 of the FCC Rules. Operation is subject to the following two
conditions: (1) this device may not cause harmful interference, and (2) this device must accept
any interference received, including interference that may cause undesired operation.
Federal Communications Commission Statement
NOTE- This equipment has been tested and found to comply with the limits for a Class B digital device,
pursuant to Part 15 of the FCC Rules. These limits are designed to provide reasonable protection against
harmful interference in a residential installation. This equipment generates, uses and can radiate radio
frequency energy and, if not installed and used in accordance with the instructions, may cause harmful
interference to radio communications. However, there is no guarantee that interference will not occur in a
particular installation. If this equipment does cause harmful interference to radio or television reception, which
can be determined by tuning the equipment off and on, the user is encouraged to try to correct the interference
by one or more of the following measures:
‧ Reorient or relocate the receiving antenna.
‧ Increase the separation between the equipment and receiver.
‧ Connect the equipment into an outlet on a circuit different from that to which the receiver is connected.
‧ Consult the dealer or an experienced radio/television technician for help.
CAUTION ON MODIFICATIONS
To comply with the limits for the Class B digital device, pursuant to Part 15 of the FCC Rules, this device must
be installed in computer equipment certified to comply with the Class B limits. All cables used to connect the
computer and peripherals must be shielded and grounded. Operation with non-certified computers or
non-shielded cables may result in interference to radio or television reception.
Changes and modifications not expressly approved by the manufacturer could void the user’s authority to
operate this equipment.
European Community Compliance Statement
Class B
This product is herewith confirmed to comply with the requirements set out in the
Council Directives on the Approximation of the laws of the Member States relating to
Electromagnetic Compatibility Directive 2004/108/EC.
Safety- Low Voltage Directive 2006/95/EC
DISCLAIMER
No warranty or representation, either expressed or implied, is made with respect to the contents of this
documentation, its quality, performance, merchantability, or fitness for a particular purpose. Information
presented in this documentation has been carefully checked for reliability; however, no responsibility is
assumed for inaccuracies. The information contained in this documentation is subject to change without notice.
In no event will AVerMedia be liable for direct, indirect, special, incidental, or consequential damages arising
out of the use or inability to use this product or documentation, even if advised of the possibility of such
damages.
TRADEMARKS
AVerMedia is registered trademarks of AVerMedia TECHNOLOGIES, Inc. IBM PC is a registered trademark of
International Business Machines Corporation. Macintosh is a registered trademark of Apple Computer, Inc.
Microsoft is a registered trademark and Windows is a trademark of Microsoft Corporation. All other products or
corporate names mentioned in this documentation are for identification and explanation purposes only, and
may be trademarks or registered trademarks of their respective owners.
COPYRIGHT
© 2008 by AVerMedia TECHNOLOGIES, Inc. All rights reserved. No part of this publication may be reproduced,
transmitted, transcribed, stored in a retrieval system, or translated into any language in any form by any means
without the written permission of AVerMedia TECHNOLOGIES, Inc.
THE MARK OF CROSSED-OUT WHEELED BIN INDICATES THAT THIS PRODUCT MUST NOT BE
DISPOSED OF WITH YOUR OTHER HOUSEHOLD WASTE. INSTEAD, YOU NEED TO DISPOSE
OF THE WASTE EQUIPMENT BY HANDING IT OVER TO A DESIGNATED COLLECTION POINT
FOR THE RECYCLING OF WASTE ELECTRICAL AND ELECTRONIC EQUIPMENT. FOR MORE
INFORMATION ABOUT WHERE TO DROP OFF YOUR WASTE EQUIPMENT FOR RECYCLING, PLEASE
CONTACT YOUR HOUSEHOLD WASTE DISPOSAL SERVICE OR THE SHOP WHERE YOU PURCHASED
THE PRODUCT.

User’s Manual
ENG-1
EnglishDeutschFrançaisEspañolPortuguêsNederlandsΕλληνική
Table of Content
Chapter 1 What’s in the Package .......................................... ENG-2
Chapter 2 The Unit Parts........................................................ ENG-3
2.1 Touch Button Control Panel.........................................................ENG-3
2.2 Infrared Sensor............................................................................ENG-3
2.3 Connection Ports .........................................................................ENG-3
Chapter 3 Installation and Setup........................................... ENG-4
3.1 Using the AVerTV BoxW7 Plus / AVerTV BoxW9 Plus.................ENG-5
3.2 The Remote Control ....................................................................ENG-5
3.3 Teletext Control Buttons (Optional)..............................................ENG-6
3.4 Customizing the Picture Setting...................................................ENG-7
3.5 Supported Display Setting ...........................................................ENG-7
3.6 Supported Display Setting in PIP Mode.......................................ENG-7
Chapter 4 OSD Menu Settings............................................... ENG-8
4.1 Calling Up a Menu Display ..........................................................ENG-8
4.2 Menu ...........................................................................................ENG-8

AVerMedia AVerTV BoxW7 Plus / AVerMedia AVerTV BoxW9 Plus
ENG-2
Chapter 1 What’s in the Package
AVerMedia AVerTV BoxW7 Plus / AVerMedia AVerTV BoxW9 Plus package contains the following items:
AVerMedia AVerTV BoxW7 Plus / AVerMedia AVerTV BoxW9 Plus
VGA Cable S-Video / Component 2-in-1 Cable
*for AVerTV BoxW9 Plus only
AVerTVBoxW7Plus
AVerTVBoxW9Plus
User’sManual
Englis
h
Deu
tsch
Françai
s
Es
pañol
Portuguê
s
Nederlands
Ελληνική
User’s Manual Remote Control
(with batteries) Vertical Stand
Power Adapter Audio Cable

User’s Manual
ENG-3
EnglishDeutschFrançaisEspañolPortuguêsNederlandsΕλληνική
Chapter 2 The Unit Parts
2.1 Touch Button Control Panel
The Touch Button Panel found on the top side of the unit provides quick access to commonly used functions.
1
Turn the unit on /off.
2Press this button to toggle between
TV/Video and PC display.
3Press Volume to increase and
Vol um e to decrease the volume level.
4Press Channel to go up and
Channel to go down to the next
active TV channel.
2.2 Infrared Sensor
When using the remote control, aim it at the Infrared Sensor which is located at the front panel of the unit.
2.3 Connection Ports
The port connectors allow connection of your TV antenna, PC, VGA monitor or LCD projector, speakers, video, or
s-video source etc.
1 VGA OUTPUT to MONITOR
2 AUDIO INPUT from PC’s
SOUND CARD
3 TV Antenna (75Ω)
4 Speaker Connection
5 VGA INPUT from PC
Back Panel
6 POWER ADAPTER
7 COMPOSITE VIDEO INPUT
8 Left & Right AUDIO INPUT
9 EARPHONE JACK
10 S-VIDEO VIDEO INPUT
Front Panel
11 For AVerTV BoxW9 Plus, it is
equipped with
S-VIDEO/COMPONENT
VIDEO INPUT.
The Installation and Setup section provides more information on cable connections.

AVerMedia AVerTV BoxW7 Plus / AVerMedia AVerTV BoxW9 Plus
ENG-4
Chapter 3 Installation and Setup
The figure below shows the proper cable connections for installing AVerTV BoxW7 Plus / AVerTV BoxW9 Plus and
connecting it to your audio/video equipment.

User’s Manual
ENG-5
EnglishDeutschFrançaisEspañolPortuguêsNederlandsΕλληνική
3.1 Using the AVerTV BoxW7 Plus / AVerTV BoxW9 Plus
Different countries have different TV systems, for example, PAL-BG, PAL-DK, NTSC-J, NTSC-M…etc. AVerTV Box
functions only with the TV system of the country it is manufactured for and originally distributed in.
Each column in the table below corresponds to a different type of TV system. Only one of these TV systems (only
one column) will appear as your SET AREA. Make sure that you select the correct country signal from the menu.
To change the area setting, refer to SET AREA (page 9).
SECAM-DK SECAM-L PAL-I PAL-BG PAL-DK
BULGARIA FRANCE UK AUSTRALIA TURKEY CHINA
PAL-N
PAL-M
NTSC-M UKRAINE HK AUSTRIA ITALY CZECH
ARGENTINA BANGLADESH MALTA MACEDONIA
BRAZIL BELGIUM NETHERLANDS POLAND-1
KOREA CYPRUS NETHERLANDS_1 POLAND-2
PHILIPPINES DENMARK NETHERLANDS_2 POLAND-3
TAIWAN EGYPT NORWAY SLOVAKIA
USA-HRC FINLAND PORTUGAL VIETNAM
USA-IRC GERMANY RUMANIA
USA-STD GREECE SINGAPORE
HUNGARY SLOVENIA
INDIA SPAIN
INDONESIA SWEDEN
IRAN SWITZERLAND
ISRAEL_ZAHAV SYRIA
ISRAEL_MATAV THAILAND
ISRAEL_IDAN UAE
ISRAEL_GVANIM YUGOSLAVIA
To ensure that you can select and watch all active channels, refer to section CH SCAN (page 8) on how to
automatically scan and memorize all active TV channels in your area.
To access various TV controls, open up the menu displays or press on the remote control buttons.
3.2 The Remote Control
The diagram below shows the remote control unit layout.
1.POWER Turn the unit on/off
2.NUMBER BUTTONS To select a TV channel
3.CHANNEL RETURN Go to the previously selected channel
4.MENU To call up the menu display
5.VOL ◄/►- To increase and decrease volume level.
- Use these button to adjust the menu or
picture setting.
- In adjusting the OSD position, use these
buttons to move the menu display to the
left and right of the screen.
6.OK In the menu, press this button to confirm
the selection.
7.To temporarily freeze the image on the
screen. Press the button again to
unfreeze the image.
8.PIP Pos. To move the small TV/Video screen
using the CH▲, CH ▼, Vol◄, and
Vol ►buttons in PIP mode.

AVerMedia AVerTV BoxW7 Plus / AVerMedia AVerTV BoxW9 Plus
ENG-6
9.PIP Switch between PIP*, PIP See-thru** and Full Screen mode
* To watch TV/Video in a small screen on an always on top of the PC display.
** Make the small video screen semi-transparent allowing the image behind the
small screen show through.
10.MTS/ STEREO
(option)
If the channel offers multi-language feature, press this button to toggle between
languages.
*Only AVerTV BoxW9 Plus supports this function.
11.PICTURE To adjust brightness, contrast, color, tint or sharpness
12.PC BGM/ Res. - Switch the audio source from the AVerTV BoxW7 Plus/AVerTV BoxW9 Plus
when in PC display mode
- Switch display resolution setting to 1024x768 when in TV/Video mode
13.SOURCE Switch between TV or external video sources
14.MUTE To turn off /on the sound
15.PREVIEW Display 13 consecutive TV channels on-screen
16.CH▲/▼- Go to the next or pre-vious TV channel line up
- Use these buttons to make the selection in the menu or picture setting
- In adjusting the OSD position, use these buttons to move the menu display up
and down of the screen
17.SLEEP To automatically turn off the unit after 30, 60, 90, 120 or 150 minutes.
18.TELETEXT
(option)
Press to view teletext
* Teletext buttons only present in European model.
** Only AVerTV BoxW9 Plus supports this function.
19.PIP SIZE Set the PIP window size to 1/4, 1/9, or 1/16 of the screen when in PIP mode..
20.4:3/16:10 Press to switch among various display aspect ratios (「4:3」or
「PANORAMA」)
21.AV/PC To toggle between TV/ Video or PC display
3.3 Teletext Control Buttons (Optional)
The figure and descriptions in this section show how to use the teletext function using the remote control.
1. Only AVerTV BoxW9 Plus supports this function.
2. This function is not supported in China and Hong Kong.
1.NUMBER
BUTTONS
To select a teletext page.
2.CH▲/▼Use the CH▲and CH▼buttons to go to the next
upper or lower teletext page.
3.FASTEXT LINK /
VOL►
Jump to the teletext page which the yellow color
corresponds to.
4.FASTEXT LINK Jump to the teletext page which the red color
corresponds to.
5.FASTEXT LINK /
VOL ◄
Jump to the teletext page which the green color
corresponds to.
6.TELETEXT Press to view teletext, and disable teletext.
7.FASTEXT LINK Jump to the teletext page which the blue color
corresponds to.
NOTE

User’s Manual
ENG-7
EnglishDeutschFrançaisEspañolPortuguêsNederlandsΕλληνική
3.4 Customizing the Picture Setting
If you want to adjust the picture quality, press the PICTURE button on the remote. Then, you can use the CH▲or
CH▼buttons to select the items in the PICTURE menu; and the Vol◄or Vol ►buttons to make the adjustment.
To restore the picture default setting, select RESET and then press Vol ►.
3.5 Supported Display Setting
The reference table below lists the monitor display resolution and refresh rate settings that AVerTV BoxW7 Plus /
AVerTV BoxW9 Plus supports.
Resolution 4:3 and PANORAMA support Refresh Rate (Hz)
1024x768 60
1280x768 O 60
1280x1024 60
1360x768 O 60
1440x900 O 60
1600x1200 60
1680x1050 O 60
1920x1200 O 60
3.6 Supported Display Setting in PIP Mode
The reference table below lists the monitor display resolution and refresh rate settings that AVerTV
BoxW7 Plus / AVerTV BoxW9 Plus supports when viewing in PIP mode:
Resolution Refresh Rate (Hz)
1024 x 768 60, 70, 75
1280 x 768 60, 75
1280 x 1024 60, 75
1440 x 900 60, 75
1360 x 768 60
1680 x 1050 60
1600 x1200 60
YPbPr (Only AVerTV BoxW9 Plus supports this function):
SDTV: 480i, 576i
HDTV: 480p@60Hz, 576p@50Hz, 720p@60Hz, 1080i@60Hz.
NOTE

AVerMedia AVerTV BoxW7 Plus / AVerMedia AVerTV BoxW9 Plus
ENG-8
Chapter 4 OSD Menu Settings
4.1 Calling Up a Menu Display
Press the MENU button on the remote control to call up and exit the main menu or submenu display. Then, you can use
the CH▲or CH▼buttons to select the items in the menu list; and the Vol◄or Vol►/OK buttons to adjust or to
make a selection. The table below lists the different functions you will find in the menu. The text appeared in red is the
currently selected setting.
4.2 Menu
On Screen Display Usage
TV SOURCE
Use the CH▲or CH▼buttons to select between antenna TV or cable
TV source, then press Vol►/OK button to make the selection.
CH SCAN
Use CH▲or CH▼buttons to select between CH SCAN or All FREQ
SCAN.Press Vol►/OK button to make the selection. If you want to
interrupt or cancel the scanning process, press any button, but this will
only memorize the scanned channel.
These two types of channel-preset functions enable you to memorize all
active channels in your area.
Use the CH SCAN function first. If there are channels missing after
you perform CH SCAN, use ALL FREQ SCAN function and repeat the
searching process.
ALL FREQ SCAN is a very time consuming process. If
the default frequency table already includes all active TV
channels in your area, then avoid using the ALL FREQ
SCAN.
NOTE

User’s Manual
ENG-9
EnglishDeutschFrançaisEspañolPortuguêsNederlandsΕλληνική
On Screen Display Usage
CH FINE TUNE
If the TV reception is not clear, choose CH FINE TUNE then press
Vol◄and Vol►buttons until the TV picture becomes clear.
33
33
FAVORITE CH
This function enables you to add, remove, reprogram or reassign the TV
channels with channel numbers that are easier to remember.
In the selected USER CH, enter the new channel number you want to assign
or the channel number you want to remove/add to the channel line up. Then, in
the CATV CH or TV CH, enter the channel number you want to remap or the
channel number you want to remove/add.
Use the CH▲or CH▼buttons to select ADD to include or DEL to remove
the channel number in the channel line up and then press Vol►.
Note: To browse through channels while setting the User CH and CATV
number, press the CH▲or CH▼buttons.
RESOLUTION
Use the CH▲or CH▼buttons to choose from display resolution
settings then press Vol►/OK.
Under wide screen (16:9/16:10) mode, you can choose to view in 4:3 or
PANORAMA mode. Press Vol►to enter the sub menu.
DEFAULT
Use the CH▲or CH▼buttons to select “YES” to clear all the preset
channels and to restore the original factory default picture setting or “NO”
to exit. Then press Vol►/OK.
OSD POSITION
Use the CH▲, CH▼, Vol◄, and Vol►buttons to move the frame
where you want to set the position of the MENU, then press MENU.
OSD TRANSPARENCY
Use the CH▲or CH▼buttons to choose from OSD transparency
settings then press Vol►/OK.
SET AREA
Press the MENU button, select MORE, select SET AREA in the
MORE, list items, use the CH▲or CH▼buttons to choose the
appropriate country signal, then press Vol►/OK button to make the
selection.
If your country is not listed, choose another country with the same TV
system as yours.
LANGUAGE
Use the CH▲or CH▼buttons to select from different languages then
press Vol►/OK.

AVerMedia AVerTV BoxW7 Plus / AVerMedia AVerTV BoxW9 Plus
ENG-10
On Screen Display Usage
PIP SIZE
Use the CH▲or CH▼buttons to select from different PIP size then
press Vol►/OK.

Podręcznik użytkownika
PLK-1
EnglishPolskiMagyarČeskySlovenskýБългарскиHrvatskiSlovenščina
Spis treści
Rozdział1 Zawartość pakietu..................................................PLK-2
Rozdział2 Części urządzenia..................................................PLK-3
2.1 Panel sterowania z przyciskami dotykowymi................................PLK-3
2.2 Czujnik podczerwieni....................................................................PLK-3
2.3 Złącza...........................................................................................PLK-3
Rozdział3 Instalacja i konfiguracja ........................................PLK-4
3.1 Korzystanie z urządzenia AVerTV BoxW7 Plus / AVerTV BoxW9 Plus ...
.....................................................................................................PLK-5
3.2 Pilot zdalnego sterowania.............................................................PLK-5
3.3 Przyciski sterowania teletekstem (Opcjonalne) ............................PLK-6
3.4 Dostosowanie ustawieńobrazu ....................................................PLK-7
3.5 Obsługiwane ustawienie wyświetlania..........................................PLK-7
3.6 Obsługiwane ustawienia wyświetlania w trybie PIP ("obraz w obrazie")
.....................................................................................................PLK-7
Rozdział4 Ustawienia menu OSD...........................................PLK-8
4.1 Wywoływanie ekranu menu..........................................................PLK-8
4.2 Menu ............................................................................................PLK-8

AVerMedia AVerTV BoxW7 Plus / AVerMedia AVerTV BoxW9 Plus
PLK-2
Rozdział1 Zawartość pakietu
Opakowanie AVerTV BoxW7 Plus / AVerMedia AVerTV BoxW9 Plus zawiera następujące elementy:
AVerMedia AVerTV BoxW7 Plus / AVerMedia AVerTV BoxW9 Plus
Kabel VGA Kabel 2-w-1 S-Video/Component
*wyłącznie dla AVerTV BoxW9 Plus
AVerTVBoxW7Plus
AVerTVBoxW9Plus
User’sManual
Englis
h
Deu
tsch
Françai
s
Es
pañol
Portuguê
s
Nederlands
Ελληνική
Podręcznik użytkownika Pilot zdalnego sterowania
(z bateriami) Podstawka
Zasilacz Kabel audio

Podręcznik użytkownika
PLK-3
EnglishPolskiMagyarČeskySlovenskýБългарскиHrvatskiSlovenščina
Rozdział2 Części urządzenia
2.1 Panel sterowania z przyciskami dotykowymi
Panel przycisków dotykowych znajdujący sięna urządzeniu zapewnia szybki dostęp do powszechnie
wykorzystywanych funkcji.
1
Włączanie/wyłączanie zespołu
2Naciskanie tego przycisku powoduje
przełączanie pomiędzy obrazem
TV/Wideo i obrazem z komputera
3Nacisnąć przycisk przejścia w dółlub
przycisk przejścia w górędo
następnego kanału telewizyjnego.
4Nacisnąć przejścia w dółlub przycisk
przejścia w górędo następnego kanału
telewizyjnego.
2.2 Czujnik podczerwieni
Podczas stosowania pilota zdalnego sterowania, wyceluj pilotem w sensor podczerwieni, znajdujący sięna panelu
przednim urządzenia.
2.3 Złącza
Złącza umożliwiająpołączenie urządzenia z antenątelewizyjną, komputerem PC, monitorem VGA lub
wyświetlaczem LCD, z głośnikami, magnetowidem lub źródłem sygnału S-video itp.
1Wyjście VGA do monitora
2Wejście Audio z PC Karta
Dźwiękowa
3 Antena TV (75Ω)
4Podłączenie głośników
5Wejście VGA z komputera
Panel tylny
6 Zasilacz
7Wejście Wideo
8Wejście lewego i prawego kanału
Audio
9 Gniazdo słuchawkowe
10 Wejście S-Video
Panel przedni
11 Wersja AVerTV BoxW9 Plus jest
wyposażona w WEJŚCIE
S-VIDEO/COMPONENT
VIDEO.
RozdziałInstalacja i konfiguracja zawiera więcej informacji na temat podłączeńkabli.

AVerMedia AVerTV BoxW7 Plus / AVerMedia AVerTV BoxW9 Plus
PLK-4
Rozdział3 Instalacja i konfiguracja
Poniższy rysunek przedstawia prawidłowe podłączenia kabli do instalacji AVerTV BoxW7 Plus / AVerTV BoxW9
Plus oraz połączenia go z innymi urządzeniami audio/wideo.

Podręcznik użytkownika
PLK-5
EnglishPolskiMagyarČeskySlovenskýБългарскиHrvatskiSlovenščina
3.1 Korzystanie z urządzenia AVerTV BoxW7 Plus / AVerTV BoxW9
Plus
W różnych krajach występująróżne systemy TV, na przykład: PAL-BG, PAL-DK, NTSC-J, NTSC-M, itd. AVerTV
Box współpracuje tylko z systemami TV kraju produkcji lub celowej dystrybucji.
Każda z kolumn poniżej odnosi siędo różnych typów lub systemów TV. Tylko jeden z tych systemów (tylko jedna
kolumna) pojawi sięjako Twoje Ustawienia Lokalne. Upewnij się, że wybrany zostałsygnałwłaściwego kraju z
menu. Aby zmienićustawienia kraju, przejdźdo Ustawienia Lokalne (strona 9).
SECAM-DK SECAM-L PAL-I PAL-BG PAL-DK
BULGARIA FRANCE UK AUSTRALIA TURKEY CHINA
PAL-N
PAL-M
NTSC-M UKRAINE HK AUSTRIA ITALY CZECH
ARGENTINA BANGLADESH MALTA MACEDONIA
BRAZIL BELGIUM NETHERLANDS POLAND-1
KOREA CYPRUS NETHERLANDS_1 POLAND-2
PHILIPPINES DENMARK NETHERLANDS_2 POLAND-3
TAIWAN EGYPT NORWAY SLOVAKIA
USA-HRC FINLAND PORTUGAL VIETNAM
USA-IRC GERMANY RUMANIA
USA-STD GREECE SINGAPORE
HUNGARY SLOVENIA
INDIA SPAIN
INDONESIA SWEDEN
IRAN SWITZERLAND
ISRAEL_ZAHAV SYRIA
ISRAEL_MATAV THAILAND
ISRAEL_IDAN UAE
ISRAEL_GVANIM YUGOSLAVIA
Aby upewnićsię, czy możliwe będzie korzystanie z wszystkich aktywnych kanałów, należy odwołaćsiędo rozdziału
CH SCAN (PRZESZUKIWANIE KANAŁÓW) (strona 8) przedstawiającego, jak automatycznie wyszukiwaći
zapamiętywaćwszystkie aktywne kanały telewizyjne w danym obszarze.
Aby uzyskaćdostęp do różnych elementów sterujących obrazu telewizyjnego, należy otworzyćmenu używając
odpowiednich przycisków na pilocie zdalnego sterowania.
3.2 Pilot zdalnego sterowania
Rysunek poniżej przedstawia układ graficzny (wygląd) pilota zdalnego sterowania.
1.POWER Włączanie/wyłączanie zespołu
2.Przyciski
numeryczne Wybieranie kanałów telewizyjnych
3.CHANNEL
RETURN Przejście do poprzednio wybranego kanału
4.MENU Wywołanie okna menu.
5.VOL ◄/►- Do podgłaszania i ściszania dźwięku
- Do ustawiania w menu lub ustawieńobrazu
- W pozycji OSD do przesuwania ekranu menu w
prawo lub w lewo na ekranie
6.OK W menu, naciśnij przycisk w celu potwierdzenia
wyboru.
7.Tymczasowe zatrzymanie obrazu na ekranie.
Naciśnij ponownie przycisk, aby anulować
zatrzymanie obrazu na ekranie.
8.PIP Pos. Przemieszczanie na ekranie małego okienka
TV/Wideo przy użyciu przycisków CH▲, CH▼,
Vol ◄, i Vol ►podczas pracy w trybie PIP.

AVerMedia AVerTV BoxW7 Plus / AVerMedia AVerTV BoxW9 Plus
PLK-6
9.PIP Przełączanie pomiędzy trybami PIP*, PIP See-thru** oraz Full Screen (Pełny
ekran)
* Oglądanie TV/Video na małym ekranie wyświetlacza komputera przy
włączonej funkcji zawsze na wierzchu.
** Ustawienie półprzezroczystości małego ekranu video, umożliwia widzenie
obrazu znajdującego sięza małym ekranem.
10.MTS/ STEREO
(option)
Jeśli kanałoferuje funkcjęwielu języków, naciśnij ten przycisk, aby przełączyć
pomiędzy językami.
*Funkcjętąobsługuje wyłącznie AVerTV BoxW9 Plus.
11.PICTURE Regulacja jaskrawości, kontrastu, koloru, odcienia i ostrości.
12.PC BGM/ Res. - Przełączenie źródła sygnału audio na AVerTV BoxW7 Plus/AVerTV BoxW9
Plus podczas pracy w trybie obrazu z komputera PC.
- Przełączenie ustawienia rozdzielczości wyświetlania na 1024x768 w trybie
TV/Video
13.SOURCE Przełączanie pomiędzy źródłem sygnału telewizyjnego i zewnętrznymi źródłami obrazu
wideo
14.MUTE Włączenie / wyłączenie dźwięku.
15.PREVIEW Wyświetlanie na ekranie 13 kolejnych kanałów TV.
16.CH▲/▼- Przejdźdo następnego lub poprzedniego kanału telewizyjnego.
- Za pomocątych przycisków dokonaj wyboru ustawienia menu lub obrazu
- Regulując położenie OSD, użyj tych przycisków do przemieszczenia okienka
menu w góręlub w dółekranu.
17.SLEEP Automatyczne wyłączanie urządzenia po 30, 60, 90, 120 lub 150 minutach.
18.TELETEXT
(option)
Wciśnij aby ukazaći ukryćteletext.
* Przyciski teletekstu działająwyłącznie w modelu na rynek europejski.
** Funkcjętąobsługuje wyłącznie AVerTV BoxW9 Plus.
19.PIP SIZE Ustaw rozmiar okna PIP dla trybu PIP na 1/4, 1/9 lub 1/16 ekranu.
20.4:3/16:10 Naciśnij w celu przełączenia pomiędzy różnymi współczynnikami proporcji
wyświetlacza (「4:3」lub 「PANORAMA」)
21.AV/PC Przełączanie pomiędzy wyświetlaniem obrazu z TV/ Wideo lub z komputera PC.
3.3 Przyciski sterowania teletekstem (Opcjonalne)
Rysunek i opisy zamieszczone w tej części pokazująsposób korzystania z funkcji teletekstu poprzez pilota zdalnego
sterowania.
1. Funkcjętąobsługuje wyłącznie AVerTV BoxW9 Plus.
2. Ta funkcja nie jest obsługiwana na terenie Chin i Hong Kongu.
1.Przyciski
numeryczne
Do wyboru strony teletekstu.
2.CH▲/▼Użyj przycisków CH▲i CH▼do przejścia do następnej
lub poprzedniej strony teletextu
3.FASTEXT LINK /
VOL►
Przeskocz do strony teletextu za pomocążółtego
przycisku, który temu odpowiada.
4.FASTEXT LINK Przejście do strony teletekstu, której odpowiada czerwony
kolor.
5.FASTEXT LINK /
VOL ◄
Przejdźdo strony teletekstu, z którąpowiązany jest zielony
kolor.
6.TELETEXT Wciśnij aby ukazaći ukryćteletext.
7.FASTEXT LINK Przejdźdo strony teletekstu, z którąpowiązany jest
niebieski kolor.
UWAGA

Podręcznik użytkownika
PLK-7
EnglishPolskiMagyarČeskySlovenskýБългарскиHrvatskiSlovenščina
3.4 Dostosowanie ustawieńobrazu
przypadku gdy chcemy zmienićjakość wyświetlanego obrazu telewizyjnego albo wideo, należy nacisnąć przycisk
PICTURE (OBRAZ) na pilocie zdalnego sterowania. Wtedy przyciski CH▲lub CH▼służą do wyboru pozycji na
liście menu PICTURE, a przyciski Vol◄lub Vol►do dokonywania regulacji.
Aby przywrócićdomyślne ustawienia obrazu, należy wybraćopcjęRESET (RESETUJ) i zatwierdzićprzyciskiem
Vol►.
3.5 Obsługiwane ustawienie wyświetlania
W zamieszczonej poniżej tabeli odniesienia znajdująsięustawienia rozdzielczości wyświetlania monitora i
częstotliwości odświeżania, obsługiwane przez AVerTV BoxW7 Plus / AVerTV BoxW9 Plus.
Rozdzielczość Obsługa trybu 4:3 i trybu PANORAMA Częstotliwość odświeżania (Hz)
1024x768 60
1280x768 O 60
1280x1024 60
1360x768 O 60
1440x900 O 60
1600x1200 60
1680x1050 O 60
1920x1200 O 60
3.6 Obsługiwane ustawienia wyświetlania w trybie PIP ("obraz w
obrazie")
W poniższej tabeli referencyjnej zostały wymienione ustawienia rozdzielczości i częstotliwości odświeżania obrazu
monitora, które sąobsługiwane przez kartęAVerTV BoxW7 Plus / AVerTV BoxW9 Plus podczas oglądania w trybie
PIP:
Rozdzielczość Częstotliwość odświeżania (Hz)
1024 x 768 60, 70, 75
1280 x 768 60, 75
1280 x 1024 60, 75
1440 x 900 60, 75
1360 x 768 60
1680 x 1050 60
1600 x1200 60
YPbPr (Funkcjętąobsługuje wyłącznie AVerTV BoxW9 Plus):
SDTV: 480i, 576i
HDTV: 480p@60Hz, 576p@50Hz, 720p@60Hz, 1080i@60Hz.
UWAGA

AVerMedia AVerTV BoxW7 Plus / AVerMedia AVerTV BoxW9 Plus
PLK-8
Rozdział4 Ustawienia menu OSD
4.1 Wywoływanie ekranu menu
Aby wywołaćlub zamknąć główne menu lub ekran menu podrzędnego, należy nacisnąć przycisk MENU na pilocie
zdalnego sterowania. Wtedy przyciski CH▲lub CH▼służą do wyboru pozycji na liście menu, a przyciski Vol◄lub
Vol►/ OK do zmiany lub dokonywania wyboru. Czerwony kolor tekstu oznacza aktualnie wybrane ustawienia.
4.2 Menu
Menu ekranowe Sposób użycia
TV SOURCE(ŹRÓDŁO TV)
Przyciski CH▲lub CH▼służą do wyboru między sygnału z anteny lub
telewizji kablowej , a naciśnięcie przycisku Vol►/ OK powoduje
zatwierdzenie wyboru.
CH SCAN(SZUKANIE KANAŁÓW)
Przyciski CH▲lub CH▼służą do wyboru między opcjąCH SCAN lub
ALL FREQ SCAN (PRZESZUKIWANIE WSZYSTKICH
CZĘSTOTL.), a naciśnięcie przycisku Vol►/ OK powoduje
zatwierdzenie wyboru. Aby przerwaćlub anulowaćproces skanowania,
naciśnij dowolny przycisk, ale zapamiętany zostanie wtedy wyłącznie
zeskanowany kanał. Obydwa sposoby przeszukiwania powodują
zapamiętanie wszystkich dostępnych kanałów w danym obszarze.
U Jako pierwszej należy użyćfunkcji CH SCAN. Jeżeli po wykonaniu
funkcji CH SCAN brakowaćbędzie jakichśkanałów, wtedy należy użyć
funkcji ALL FREQ SCAN i powtórzyćoperacjęprzeszukiwania.
Funkcja ALL FREQ SCAN jest procesem bardzo
czasochłonnym. W przypadku gdy domyślna tablica
częstotliwości zawiera jużwszystkie aktywne kanały w
danym obszarze zamieszkania, wtedy należy unikać
używania funkcji ALL FREQ SCAN.
UWAGA
This manual suits for next models
1
Table of contents
Languages:
Other Avermedia Set-top Box manuals

Avermedia
Avermedia DVB-T STB5 User manual

Avermedia
Avermedia EW310 User manual

Avermedia
Avermedia AVerTV Box9 User manual

Avermedia
Avermedia TVBoxTM 5 User manual

Avermedia
Avermedia HD EzRecorder Plus User manual

Avermedia
Avermedia AVerTV BoxW9 Plus User manual

Avermedia
Avermedia AVerTV Hybrid STB9 User manual

Avermedia
Avermedia AVerTV Hybrid STB9 User manual

Avermedia
Avermedia AVerTV BoxW7 Super M079 User manual

Avermedia
Avermedia AVerTV DVI Box 1080i User manual