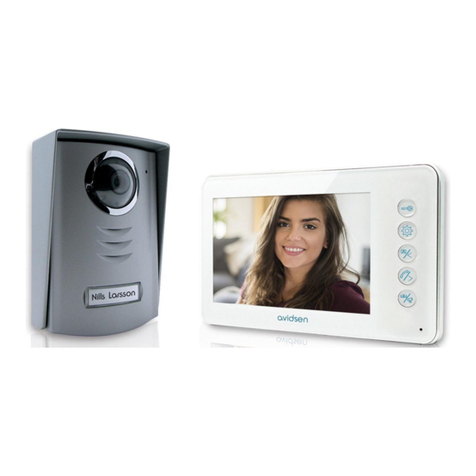
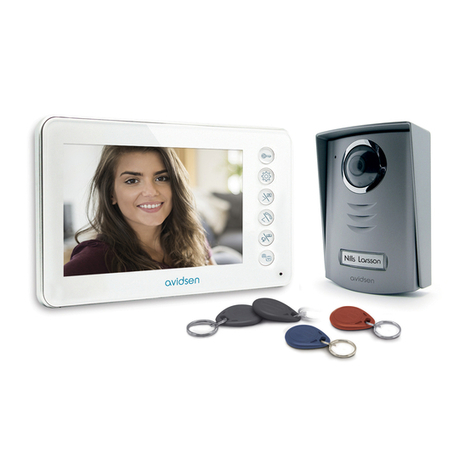
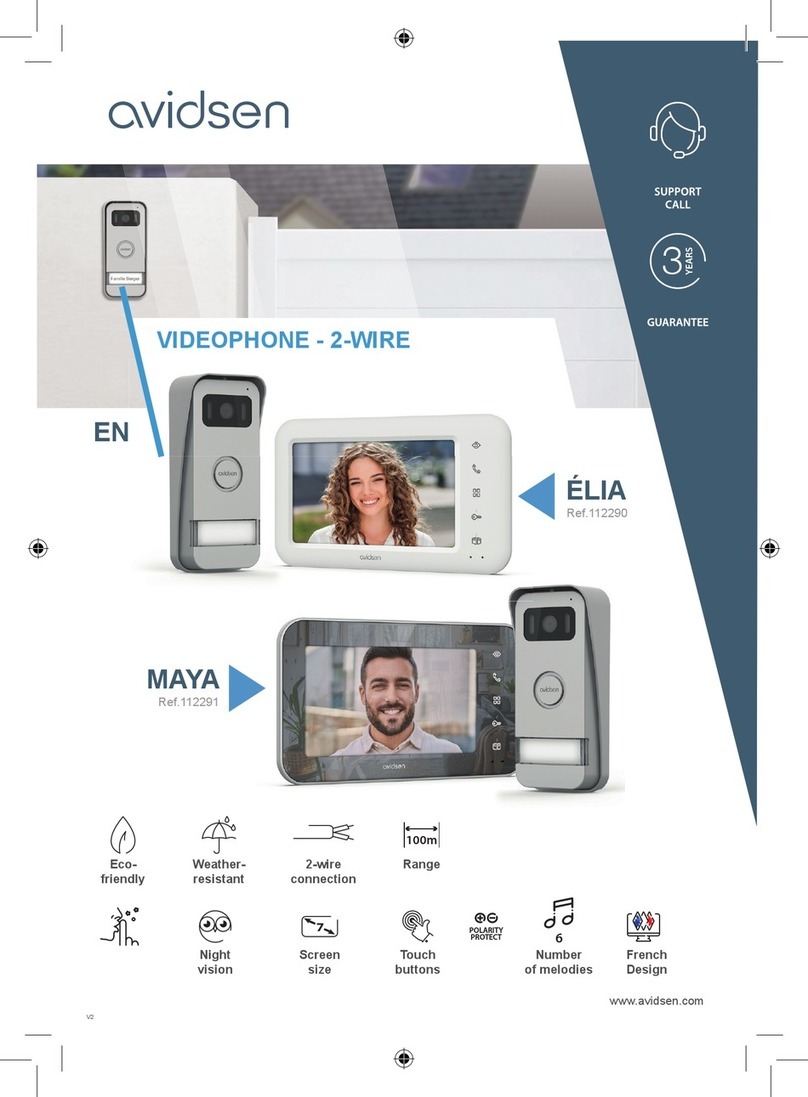
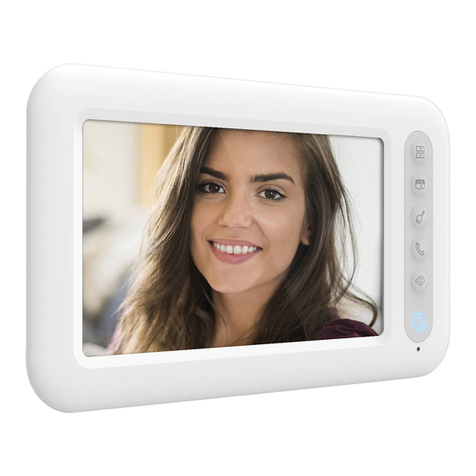
Avidsen 340100 User manual

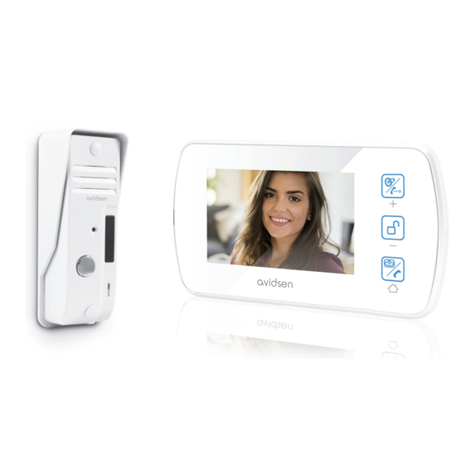
FR Visiophone vidéo couleur 7"
2 ls
réf. 340100
V1
100m
GUARANTIE 3ans
VISION
NOCTURNE
ÉCRAN 7’’ SONNERIES 2 FILS PORTÉE
100M

2
A - CONSIGNES DE SÉCURITÉ
1 - INTRODUCTION
Cet interphone vidéo associe deux modules: un
moniteur récepteur et une platine de rue facile à
installer et à utiliser.
Caractéristiques principales:
• Réception vidéo couleur : lorsqu’un visiteur
appuie sur la touche d’appel de la platine de
rue, ceci transmet immédiatement l’image à
l’écran et un carillon signale sa présence.
• Protection en cas de court-circuit
• Protection en cas d’inversion de polarité
• Réglage automatique de l’exposition : la
caméra vidéo s’ajuste automatiquement aux
conditions d’éclairage ambiant.
• Permet de contrôler deux accès (serrure et
commande automatique).
• La vision infrarouge intégrée dans la caméra
vidéo permet d’identifier les visiteurs sans
besoin d’éclairage supplémentaire.
• Ouverture de la porte et d’une commande: en
appuyant sur les touches du moniteur, vous
pouvez contrôler une serrure électrique et un
contact sec pour la commande automatique
(non fournie).
IMPORTANT : Cette notice doit être lue
attentivement avant l’installation. En cas de
problème, les techniciens de notre Hotline sont à
votre disposition pour tout renseignement.
ATTENTION : toute erreur de branchement
peut causer des dommages à l’appareil et
annuler la garantie.
2 - ENTRETIEN ET NETTOYAGE
Avant d’installer votre interphone, il est important
de vérifier les points suivants :
• Ne pas l’installer en cas d’humidité, de
température, de risque de corrosion ou de
poussière extrêmes.
• Ne pas exposer directement le moniteur à
la lumière du soleil, à la pluie ou à une forte
humidité.
• Ne pas brancher l’appareil à une multiprise ou
à une rallonge.
• Ne pas installer à proximité d’autres appareils
électroniques, comme un ordinateur, une
télévision ou un enregistreur vidéo.
• Ne pas installer à proximité de produits
chimiques acides, d’ammoniaque ou d’une
source d’émission de gaz toxiques.
• Ne pas nettoyer avec un produit abrasif ou
corrosif. Utiliser un chiffon légèrement humide
avec de l’eau savonneuse.
• Débrancher l’appareil s’il n’est pas utilisé
pendant une longue durée.
• Ne pas brancher l’appareil aux installations
nationales de télécommunication.
3 - RECYCLAGE
Ce logo signifie qu’il ne faut pas jeter les
appareils hors d’usage avec les ordures
ménagères.
Les substances dangereuses qu’ils sont
susceptibles de contenir peuvent nuire
à la santé et à l’environnement. Faites
reprendre ces appareils par votre distributeur ou
utilisez les moyens de collecte sélective mis à votre
disposition par votre commune.
Pour en savoir plus :
www.quefairedemesdechets.fr
INTERPHONE VIDÉO COULEUR 7"
FR
3
FRFR
B - DESCRIPTION DU PRODUIT
1 - CONTENU DU KIT
1x 1
5x 5 6x 3 7x 1
2x 1 3x 1 4x 5
INTERPHONE VIDÉO COULEUR 7"
1Moniteur
2Platine de rue
3Support mural pour moniteur
4Chevilles (2 pour le moniteur, 3 pour platine
de rue)
5Vis de fixation (2 pour le moniteur, 3 pour
platine de rue)
6Connecteur platine de rue vers moniteur/
gâche électrique/motorisation de portail
7Adaptateur secteur

4
La hauteur d’installation recommandée est située à environ 160 cm du sol pour la platine de rue et 150 cm
du sol pour l’unité interne.
50cm
160cm 150cm
70°
ATTENTION : Pour des raisons évidentes de sécurité, les branchements ne doivent être effectués qu’après
avoir coupé l’alimentation électrique.
1 - INSTALLATION DE LA PLATINE DE RUE
Fixer la casquette de la platine de rue sur votre pilier à l’aide de vis et chevilles adaptées au support (les vis et
chevilles fournies conviennent pour des murs en matériau plein).
90mm
50mm
ø6mm
Après avoir effectué les branchements de la platine de rue (voir paragraphe connexions), placer celle-ci dans
sa casquette.
FR
C - INSTALLATION
INTERPHONE VIDÉO COULEUR 7"

5
Visser ensuite la platine de rue sur la casquette à l’aide de la vis fournie.
Mettre en place l’étiquette nominative.
FR
C - INSTALLATION
INTERPHONE VIDÉO COULEUR 7"

6
C - INSTALLATION
2 - INSTALLATION DU MONITEUR
Fixer le support mural au mur à l’aide de vis et chevilles adaptées au support (les vis et chevilles fournies
conviennent pour des murs en matériaux plein).
Après avoir effectué les branchements du moniteur (voir paragraphe «connexions»), fixer le moniteur sur son
support.
60mm
ø6 mm
3 - LES CONNEXIONS
• Ne multipliez pas les dominos ou raccords sur le fil de liaison entre la platine de rue et le moniteur
• Eloignez le fil de liaison entre la platine de rue et le moniteur de plus de 50cm de toute perturbation
électromagnétique (câble 230V, appareil WiFi, four à micro-ondes, etc.)
• Vous pouvez connecter et utiliser une gâche électrique (non fournie) avec votre platine de rue, avec ou
sans mémoire mécanique.
INTERPHONE VIDÉO COULEUR 7"
FR

7
C - INSTALLATION
Entre le moniteur et la platine de rue (100m maximum)
Afin de s’assurer d’une bonne qualité audio et vidéo, il est conseillé de ne pas utiliser plus de 100m de câble
entre l’interphone et la platine de rue. Bien raccorder les fils comme suit (une inversion de branchement peut
endommager la platine de rue).
La section du câble à utiliser dépend de sa longueur :
Longueur du câble Section à utiliser
De 0 à 50m 0,75mm2
De 50m à 100m 1,5mm2
Entre la platine de rue et une gâche électrique (non fournie)
Utiliser une gâche 12V/1,1A maximum avec ou sans mémoire mécanique.
Pour la connexion entre la platine de rue et la gâche, utiliser du câble de type :
Longueur du câble Section à utiliser
De 0 à 50m 0,75mm2
Entre la platine de rue et une motorisation de portail (non fournie)
Section à utiliser : 0,75mm2mini
3.1 - BRANCHEMENT ENTRE LE MONITEUR ET LA PLATINE DE RUE
Moniteur
Platine de rue
IMPORTANT : connectez la sortie de commande portail directement au contact d’ouverture/fermeture de
la commande automatique (entrée de commande filaire d’une motorisation de portail).
Votre portier vidéo est équipé de la fonction Polarity protect: le sens de branchement des deux fils du moniteur,
de la gâche électrique ou du portail est sans importance.
INTERPHONE VIDÉO COULEUR 7"
FR

8
D - UTILISATION
1 - IDENTIFIER LE VISITEUR ET LUI PARLER
Le visiteur appuie sur le porte nom de la platine de
rue :
Le carillon se déclenche via le haut-parleur du
moniteur qui active la caméra vidéo de la platine
de rue. Si le visiteur se situe dans le champ de
la caméra, son image apparaîtra sur le moniteur
pendant 30 secondes. À la fin des 30 secondes,
le moniteur repassera en mode veille.
Pour parler au visiteur, appuyez sur la touche .
Pour terminer la conversation et désactiver la platine
de rue, appuyez sur la touche .
2 - ACTIVER LA PLATINE DE RUE DEPUIS
LE MONITEUR
Pour identifier un visiteur sans qu’il sache qu’il est
observé ou pour regarder tout simplement dehors,
appuyez sur la touche : l’image de la platine de
rue apparaît alors à l’écran pendant 60 secondes.
Si vous souhaitez communiquer directement avec
l’extérieur, appuyez sur la touche une fois la
caméra vidéo externe affichée.
Cette fonction particulièrement utile vous permet
d’observer le visiteur, même s’il n’a pas sonné.
3 - OUVERTURE D’UNE SERRURE
ÉLECTRIQUE ET D’UNE COMMANDE
AUTOMATIQUE
Si l’appareil est équipé d’une serrure électrique et/
ou d’une commande automatique (voir paragraphe
«Connexion»), appuyez sur la touche (pour
la serrure) ou sur (pour la commande
automatique) pour laisser entrer le visiteur.
Attention, il est nécessaire que l’écran soit allumé
pour que les commandes contact sec et sortie
alimentée soient opérationnelles. Si l’écran est éteint,
il est nécessaire de l’allumer grâce au bouton
INTERPHONE VIDÉO COULEUR 7"
FR

9
FRFR
D - UTILISATION
4 - PARAMÈTRES SUR LE MONITEUR
Pendant que l’écran est allumé, appuyez sur la
touche pour afficher l’écran suivant :
Naviguez dans les sous-menus en appuyant sur les
touches
BRT
.2
0
18
18
21
05
05
CON .
COL .
CALL .
INCOME .
RING .
• BRT :
Luminosité : appuyez sur les touches et
pour réduire ou augmenter le niveau de luminosité
de l’image.
• CON :
Contraste : appuyez sur les touches et
pour réduire ou augmenter le niveau de contraste
de l’image.
• COL :
Couleur :appuyez sur les touches et
pour réduire ou augmenter le niveau de saturation
de l’image.
• CALL :
Volume microphone :appuyez sur les touches
et pour augmenter ou réduire le volume
du microphone.
• INCOME :
Volume carillon :appuyez sur les touches
et pour réduire ou augmenter le volume de la
sonnerie.
• RING :
Sélectionner le carillon : appuyez sur les
touches et pour sélectionner la sonnerie
souhaitée.
Une fois sur le sous-menu RING, appuyez sur la
touche pour sortir.
INTERPHONE VIDÉO COULEUR 7"

FR
10
1 - CARACTERISTIQUES TECHNIQUES
MONITEUR
Écran Couleur 7 pouces LCD extra plat
Standard vidéo PAL/NTSC
Résolution 800x480
Alimentation Avec adaptateur secteur 230VAC 50Hz/17VDC 1,5A fourni
Protection Protection en cas de court-circuit et en cas d’inversion de polarité
Système de transmission (audio et vidéo) 2 fils
Plage de température de fonctionnement
idéale
-20°C à 50°C
Taux d’humidité max. 85%
Nombre de sonneries 6
Dimension 209 x 144 x 22 cm
PLATINE DE RUE
Caméra vidéo CMOS 420TVL
Objectif Angle de vision horizontal 100°
Alimentation 13VDC fournie par le moniteur
Consommation max. 200 mA
Luminosité min 0 lux
Vision nocturne De 0,5 à 1 m
Dimension 157 x 72 x 27 mm
Indice de protection IP44
E - INFORMATIONS TECHNIQUES ET LÉGALES
INTERPHONE VIDÉO COULEUR 7"
FR
2 - GARANTIE
• Ce produit est garanti 3 ans, pièces et main
d’œuvre, à compter de la date d’achat. Il est
impératif de garder une preuve d’achat durant
toute cette période de garantie.
• La garantie ne couvre pas les dommages
causés par négligence, chocs ou accidents.
• Toute intervention sur l’appareil annulera la
garantie.
• Ne pas sectionner ou rallonger le fil de
l’adaptateur secteur sous peine d’annulation de
la garantie.
3 - ASSISTANCE ET CONSEILS
• Malgré tout le soin que nous avons porté à la
conception de nos produits et à la réalisation de
cette notice, si vous rencontrez des difficultés
lors de l’installation de votre produit ou des
questions, il est fortement conseillé de contacter
nos spécialistes qui sont à votre disposition
pour vous conseiller.
• En cas de problème de fonctionnement
pendant l’installation ou après quelques jours
d’utilisation, il est impératif de nous contacter
devant votre installation afin que l’un de nos
techniciens diagnostique l’origine du problème
car celui-ci provient certainement d’un réglage
non adapté ou d’une installation non conforme.
Contactez les techniciens de notre service après-
vente au :
0,35 €
/ min
0 892 701 369
Du lundi au vendredi de 9H à 12H et de 14H
à 18H.

EN Colour videophone 7"
2-wire
ref. 340100
V1
100m
3-year WARRANTY
NIGHT
VISION
7" SCREEN MELODIES 2-WIRE 100M
RANGE

2
A - SAFETY INSTRUCTIONS
1 - INTRODUCTION
This video intercom system pairs two modules: a
receiver-monitor and an easy-to-install and use
intercom panel.
Key features:
• Colour video reception: when a visitor touches
the intercom panel call button, the panel
immediately transmits the image to the screen
and a chime indicates the visitor’s presence.
• Short-circuit protection
• Reverse polarity protection
• Automatic exposure correction: the video
camera automatically adjusts its exposure to
match the ambient light conditions.
• Enables control over two entrances (lock and
automatic control system).
• Integrated infrared vision enables the video
camera to identify visitors without needing
additional light.
• Opening the door and a control system: by
pressing buttons on the monitor, you can
control an electric lock and a dry contact for an
automatic control system (not included).
IMPORTANT: These instructions should be
read carefully prior to installation. In the case of
any problems, our Hotline technicians are at your
service to provide you with any information you
may need.
WARNING: any connection error may cause
damage to the device and void the warranty.
2 - MAINTENANCE AND CLEANING
Before installing the intercom, it is important to
check the following points:
• Do not install in cases of extreme humidity,
temperatures, corrosion risk or dust.
• Do not expose the monitor to direct sunlight,
rain or high humidity.
• Do not plug the device into a multi-socket plug
adaptor or extension cord.
• Do not install near other electronic devices such
as computers, televisions or video recorders.
• Do not install near acidic chemicals, ammonia
or sources of toxic gases.
• Do not clean with abrasive or corrosive
products. Use a damp cloth with soapy water.
• Unplug the device if it is not being used for an
extended period of time.
• Do not plug the device into national
telecommunications installations.
3 - RECYCLING
This logo denotes that devices no longer
in use should not be disposed of as
household waste.
They are likely to contain hazardous
substances which are dangerous to
both health and the environment. Return
the equipment to your local distributor or use the
recycling collection service provided by your local
council.
Pour en savoir plus :
www.quefairedemesdechets.fr
COLOUR VIDEO INTERCOM 7"
EN

3
ENEN
B - PRODUCT DESCRIPTION
1 - CONTENTS OF THE KIT
1x 1
5x 5 6x 3 7x 1
2x 1 3x 1 4x 5
COLOUR VIDEO INTERCOM 7"
1Monitor
2Intercom panel
3Monitor wall bracket
4Dowels (2 for the monitor, 3 for the intercom
panel)
5Screws (2 for the monitor, 3 for the intercom
panel)
6Intercom panel to monitor/electric strike
plate/automated gate connector
7Mains adaptor

4
The recommended installation height for the intercom panel is about 160 cm from the ground and 150 cm
from the floor for the indoor unit.
50cm
160cm 150cm
70°
NOTE: For obvious safety reasons, the connections must only be made after shutting off the power supply.
1 - INTERCOM PANEL INSTALLATION
Attach the intercom panel hood to your support using the screws and wall plugs suited to the support (the
screws and plugs supplied are suitable for solid walls).
90 mm
50 mm
ø6 mm
After making the connections on the intercom panel (see the connections paragraph), put the intercom panel
into the hood.
EN
C - INSTALLATION
COLOUR VIDEO INTERCOM 7"

5
Then screw the intercom panel to the hood with the screw provided.
Put on the name label.
EN
C - INSTALLATION
COLOUR VIDEO INTERCOM 7"

6
C - INSTALLATION
2 - INSTALLING THE MONITOR
Attach the wall mount to the wall using the screws and wall plugs suited to the support (the screws and plugs
supplied are suitable for solid walls).
After connecting the monitor (refer to the “connections” paragraph), fit the monitor onto its support.
60 mm
ø6 mm
3 - CONNECTIONS
• Do not increase the number of insulating screw joints or connectors on the connecting wire between the
intercom panel and the monitor
• Keep the connecting wire between the intercom panel and the monitor more than 50 cm away from any
electromagnetic
interference (230 V cable, WiFi device, microwave ovens, etc.)
• You can connect and use the electric strike plate (not provided) with your intercom panel, with or
without mechanical memory.
COLOUR VIDEO INTERCOM 7"
EN

7
C - INSTALLATION
Between the monitor and the intercom panel (100m maximum)
To ensure good audio and video quality, it is recommended to not use more than 100m of cable between the
intercom and the intercom panel. Connect the wires as follows (incorrect wiring can damage the intercom
panel).
The cable’s length determines which cable section is to be used:
Cable length Section to use
0 to 50 m 0.75 mm2
50 m to 100 m 1.5 mm2
Between the intercom panel and an electric strike plate (not included)
Use a 12V/1.1A maximum electric latch with or without mechanical memory.
For the connection between the intercom panel and the door release, use a cable of this kind:
Cable length Section to use
0 to 50 m 0.75 mm2
Between the intercom panel and the automated gate (not included)
Section to use: Min. 0.75 mm2
3.1 - CONNECTION BETWEEN THE MONITOR AND THE INTERCOM PANEL
Monitor
Intercom panel
IMPORTANT: connect gate control output directly to the opening/closing contact of the automatic control
system (automated entryway wired control system input).
Your gate video intercom system is equipped with the Polarity Protect feature: you can connect the 2 wires
for the monitor, electric strike plate and gate in any direction.
COLOUR VIDEO INTERCOM 7"
EN

8
D - USING THE PRODUCT
1 - IDENTIFY AND SPEAK TO THE VISITOR
The visitor presses the intercom panel’s name plate:
The chime sounds through the monitor’s speaker
and the intercom panel’s video camera is activated.
If the visitor is positioned within the camera’s field of
vision, their image will appear on the monitor for 30
seconds. After 30 seconds,
the monitor will return to sleep mode.
To speak with the visitor, press the button. To
end the conversation and deactivate the intercom
panel, press the button.
2 - ACTIVATE THE INTERCOM PANEL
FROM THE MONITOR
To identify a visitor without them knowing they are
being observed or to simply look outside, press the
button: the view from the intercom panel will
then appear on the screen for 60 seconds.
If you wish to communicate directly with the outside,
press once on the button when the external
video camera is displayed.
This particularly useful feature allows you to observe
the visitor, even if they haven’t rung.
3 - OPENING AN ELECTRIC LOCK AND AN
AUTOMATIC CONTROL SYSTEM
If the device is equipped with an electric lock and/
or an automatic control system (see “Connection”
paragraph), press the button (for the lock) or
the button (for the automatic control system)
to let a visitor enter.
Warning: the screen must be switched on before
the dry contact and powered output controls can
function. If the screen is off, it must be switched on
using the button
COLOUR VIDEO INTERCOM 7"
EN

9
ENEN
D - USING THE PRODUCT
4 - MONITOR SETTINGS
With the screen is on, press the button to
display the following screen:
Browse the sub-menus by pressing on buttons
BRT
.2
0
18
18
21
05
05
CON .
COL .
CALL .
INCOME .
RING .
• BRT:
Brightness: press the and buttons to
decrease or increase the brightness level of the
image.
•CON:
Contrast: press the and buttons to
decrease or increase the contrast level of the image.
• COL:
Colour: press the and buttons to
decrease or increase the saturation level of the
image.
• CALL:
Microphone volume: press the and
buttons to increase or decrease the microphone
volume.
• INCOME:
Chime volume: press the and buttons
to decrease or increase the ring volume.
• RING:
Choose the chime: press the and
buttons to select the desired tone.
Once in the RING sub-menu, press the button
to exit.
COLOUR VIDEO INTERCOM 7"

EN
10
1 - TECHNICAL CHARACTERISTICS
MONITOR
Screen Ultra-flat 7" colour LCD
Video standard PAL/NTSC
Resolution 800 x 480
Power supply With 230VAC 50Hz/17VDC 1.5A mains adapter (included)
Protection Short circuit and reverse polarity protection
Transmission system (audio and video) 2-wire
Ideal operating temperature range -20°C to 50°C
Max. degree of humidity 85%
Number of doorbell melodies 6
Dimensions 209 x 144 x 22 cm
INTERCOM PANEL
Video camera CMOS 420TVL
Lens 100° horizontal viewing angle
Power supply 13 VDC supplied by the monitor
Max. consumption 200 mA
Brightness min. 0 lux
Night vision 0.5 to 1 m
Dimensions 157 x 72 x 27 mm
Protection rating IP44
E - TECHNICAL AND LEGAL INFORMATION
COLOUR VIDEO INTERCOM 7"
EN
2 - WARRANTY
• This product is guaranteed for parts and labour
for 3 years from the date of purchase. Proof of
purchase must be retained for the duration of
the warranty period.
• The warranty does not cover damage caused
by negligence, knocks or accidents.
• The warranty will be void if the device is
tampered with.
• Do not cut or extend the wire of the mains
adapter or the warranty will be void.
3 - HELP AND SUGGESTIONS
• If, despite the care we have taken in designing
our products and drafting these instructions,
you do encounter difficulties when installing
your product or you have any questions, we
recommend you contact one of our specialists
who will be glad to help.
• If you encounter operating problems during
the installation or a few days afterwards,
it is essential that you are in front of your
installation when contacting us, so that one of
our technicians can diagnose the source of the
problem, as it will probably be the result of a
setting that is incorrect or an installation that is
not to specification.
Contact our after sales service team technicians:
0,35 €
/ min
0 892 701 369
Monday to Friday, 9am to 12pm, and 2pm
to 6pm.
Table of contents
Languages:
Other Avidsen Intercom System manuals

Avidsen
Avidsen YLVA 3+ User manual

Avidsen
Avidsen 112279 User manual

Avidsen
Avidsen 112249 User manual

Avidsen
Avidsen 122132 User manual

Avidsen
Avidsen ELIA User manual

Avidsen
Avidsen YLVA 3+ User manual

Avidsen
Avidsen 642278 User manual

Avidsen
Avidsen LUTA 2+ User manual

Avidsen
Avidsen YLVA 2+ User manual

Avidsen
Avidsen YLVA 3+ User manual