Avidsen YLVA 2+ User manual

YLVA 2+
GB Video color entryphone
2-wire
code.112240
112241
x2
7”
www.avidsen.com
V1


3GB
2-WIRE VIDEO COLOR ENTRYPHONE
A - IMPORTANT
1 - INTRODUCTION
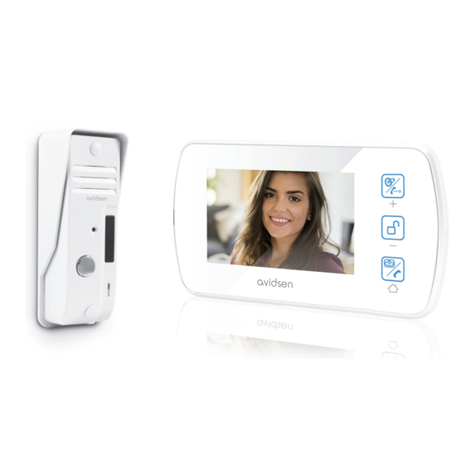
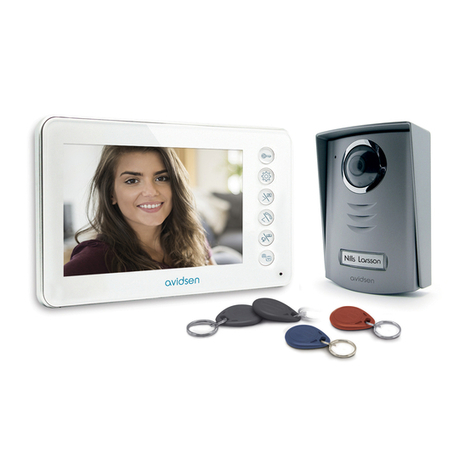
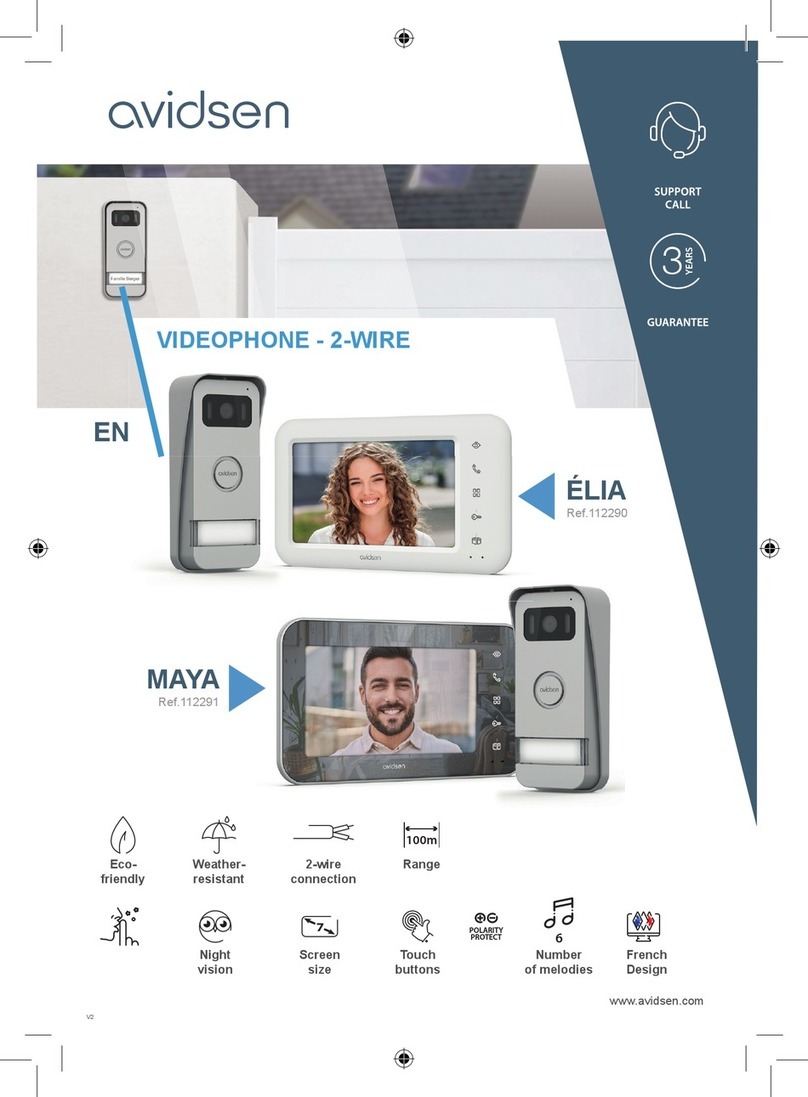
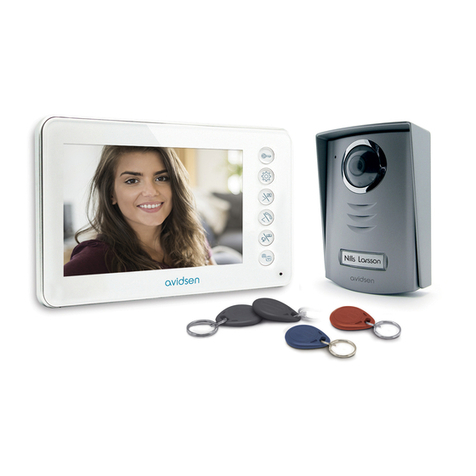
This video entryphone integrates two units: a monitor/
receiver and an outdoor unit easy to install and use.
Main features:
• Video color reception: when a visitor presses the call
button on the outdoor unit, the monitor will imme-
diately display the visitor with a pleasant ring.
• Easy and intuitive installation.
• Protection against short circuits
• Protection against polarity inversion
• Ease of use: at any age users will be happy with its
ease of use.
• High-resolution image: the system relies on the most
advanced technologies to provide excellent image
quality.
• Automatic exposure correction: the videocamera
automatically adjusts to lighting conditions.
• Assists users managing two access points at the
same time with an additional videocamera (not sup-
plied).
• Allows control of two accesses (door lock and auto-
mation at the same time, as an option).
• Possibility to connect a surveillance camera (ref.
112248, not supplied)
• The infrared vision built in the camera allows you to
see visitors without additional lighting.
• Automatic opening of a door or automation: press
the monitor’s buttons to control an electric door lock
and a 12V relay automation system (not supplied).
IMPORTANT: Read this manual carefully beforinstallation.
In case of need, Avidsen technicians will be at your
disposal to oer assistance.
ATTENTION: a wrong connection of wires can severely
damage your entryphone and annul the warranty.
2 - PRECAUTIONS FOR USE
Before installing this product, review the following points:
• Do not install under extreme humidity or temperature
conditions, risk of rusts or dust.
• Do not expose to direct sunlight, rain or excessive
humidity.
• Do not overload extension cords or multiple sockets.
• Do not install near other electronic devices like
computers, televisions or VCR.
• Do not install near chemicals, ammonia, or sources
of toxic gases.
• To clean the product, do not use solvents or abrasive
products. Use a soft cloth slightly moistened with
soap.
• If you do not use this product for a long period of
time, unplug it from the electrical outlet.
• Do not connect this product to the public
telecommunications systems.
3 - INFORMATION FOR USERS
Pursuant to Article 13 of the Legislative
Decree No. 151 dated 25 July 2005,
“Implementation of Directives 2002/95/CE,
2002/96/CE and 2003/108/CE, concerning
reduction of use of dangerous substances in
electric and electronic devices, as well as
disposal of waste”. The symbol of the crossed out
garbage bin found on the device or on its packaging
indicates that the product, at the end of its service life,
must be disposed of separately from other waste. The
user shall bring the equipment at the end of its lifetime in
places dedicated to collect electrical and electronic
waste, where foreseen.
Pour en savoir plus :
www.quefairedemesdechets.fr
GB 4
2-WIRE VIDEO COLOR ENTRYPHONE
B - PRODUCT
1 - CONTENT
2 - MONITOR
1 Screen LCD 7’’
2 Key lock: allows you to open an electric lock
3 MENU key: allows access to the settings of the
monitor
4 Left arrow key/image: allows you to decrease the
values in the monitor menu; view the outdoor unit 1;
end the call
1x 1
5x 5 6x 1 7x 1
2x 1 3x 1 4x 5
1 Monitor
2 Outdoor unit
3 Wall mount bracket
4 Dowels (2 for the monitor, 3 for the
outdoor unit)
5 Fixing screws (2 for the monitor, 3 for the outdoor
unit)
6 Fixing screw of outdoor plate
7 Adapter 230VAC/17VDC (indoor use only)
9
10
11
1
8
5
6
7
4
3
2

5GB
2-WIRE VIDEO COLOR ENTRYPHONE
B - PRODUCT
5 Right Arrow/handset button: to increase the
values in the monitor menu; to communicate
with the visitor
6 Gate/videocamera button: allows you to open
an electric gate; trigger video surveillance
(code 112248, not supplied) or the second
unit (code. 112247, not supplied)
7 Intercom button: allows you to communicate
with a second monitor (code 112244 or code
112246, not supplied)
8 Microphone
9Terminal block for the connection of additional
internal units (code 112244 or code 112246,
not supplied) and additional outdoor unit
(code 112247, not supplied) and/or a
surveillance camera (code 112248, not
supplied)
10 Power input
11 Loudspeaker
3 - OUTDOOR UNIT
SW1
SW2
LK+
LK-
1
2
1
2
8
7
9
3
4
5
6
1 Support with weather shield
2 Lens
3 Microphone
4 Infrared Led for vision in low light conditions
5 Loudspeaker
6 Nameholder pushbutton with light
7 Connection terminals
THE OUTDOOR UNIT IS EQUIPPED WITH TWILIGHT SENSOR TO LIGHT THE NAME-HOLDER BUTTON IN
CASE OF POOR LUMINOSITY.
4 - MONITOR WALL MOUNT
The monitor must be wall mounted. Fixing support and screws are supplied.
5 - POWER SUPPLY FOR THE MONITOR
A 230Vac 50 Hz/13.5Vdc 0.8A power supply is supplied. Do not use a dierent power supply unit: the
equipment may suer irreversible damage, voiding your warranty.

GB 6
2-WIRE VIDEO COLOR ENTRYPHONE
C - INSTALLATION
Recommended installation height is approx. 160 cm above the ground for the outdoor unit, and 150 cm for
indoor unit.
50cm
160cm 150cm
70°
WARNING : For obvious safety reasons, wirings must be made before connecting the product to the power
supply.
1 - OUTDOOR UNIT INSTALLATION
Secure the outdoor unit cover to the wall with screws and scher supplied.
85mm
50mm
ø6mm
After performing videocamera connections (see paragraph connections), place the videocamera under the
protective cover.

7GB
2-WIRE VIDEO COLOR ENTRYPHONE
Then screw and x the videocamera to the protective cover using the screws supplied.
Insert the label inside the name holder.
1LOV/DUVVRQ
2 - MONITOR WALL-MOUNT
Note: Fix the bracket on the wall by means of the screws and the anchors supplied.
59mm
ø6 mm
C - INSTALLATION

GB 8
2-WIRE VIDEO COLOR ENTRYPHONE
3 - CONNECTIONS
Between monitor and outdoor unit (100m max)
For a good audio/video quality the cable between the monitor and the outdoor unit should not exceed 100
meters. Correctly connect the wires as shown in the previous diagrams (an erroneous connection may
damage the equipment). The cable type depends on its length:
Cable length Cable to be used
From 0 to 50m 0,75mm2
From 50 to 100m 1,5mm2(or coaxial cable)
C - INSTALLATION

9GB
2-WIRE VIDEO COLOR ENTRYPHONE
IMPORTANT :
You may encounter issues when making the connections:
- Audio channel disturbances
- Need to cover a section exceeding 50m (max. 100m)
- Monitor that sounds and lights alone.
In the event of disturbance, you must replace connections 1 and 2 with a single coaxial cable min. diameter
3.6mm, the contact 1 must be connected to the central conductor (or center wire), and the contact 2 to the
cable shield of the coaxial cable. For this operation we recommend using cables Avidsen ref. 102238 and
102239.
3.1 - CLASSIC CONNECTION BETWEEN MONITOR AND OUTDOOR UNIT
17VDC power
supply (provided)
Monitor Master
Contacts used to connect an
additional outdoor unit (code
112247) or the video surveillance
camera (code 112248)
Contacts used to connect
the monitor (code 112244 or
code 112246)
3.2 - WITH ELECTRIC LOCK
Contacts used to connect
the monitor (code 112244 or
code 112246)
Monitor Master
12V lock (500mA to 1A)
optional
17VDC
power supply
(provided)
Contacts used to connect an
additional outdoor unit (code 112247)
or the video surveillance camera (code
112248)
C - INSTALLATION

GB 10
2-WIRE VIDEO COLOR ENTRYPHONE
IMPORTANT : If you encounter problems with the door lock, for example due to a large distance between
monitor and external unit, we suggest that you power it separately. If you use a separate power supply, a 12V
relay (not supplied) must be connected to be able to operate from the video entry phone system, as shown.
12 VDC
Relay with 12V coil and NO
contact
230 VAC
13
14
5
9
3.3 - WITH GATE AUTOMATIONS
IMPORTANT : Connect SW1 and SW2 directly to the opening/closing contact of the automation.
Contacts used to connect
the monitor (code 112244
or code 112246)
Contacts used to connect an
additional outdoor unit (code
112247) or the video surveillance
camera (code 112248)
Monitor Master
17VDC
power supply
(provided)
C - INSTALLATION

11 GB
2-WIRE VIDEO COLOR ENTRYPHONE
3.4 - WITH SURVEILLANCE VIDEOCAMERA (REF. 112248 NOT SUPPLIED)
Contacts used to
connect the monitor
(code 112244 or code
112246)
Monitor Master
17VDC power supply
(provided)
Contacts used to connect the
outdoor unit
3.5 - 1 MONITOR SLAVE CONNECTION
IMPORTANT : you can add an optional Slave monitor (series Avidsen Ylva 2+, ref. 112244 or 112246). You
cannot combine a unit with a dierent reference code or video entryphones with dierent brands.
Monitor Master Monitor Slave
Contacts used to
connect the outdoor
unit
Contacts used to connect an
additional outdoor unit (code
112247) or the video surveillance
camera (code 112248)
17VDC power supply
(provided)
17VDC power supply
(provided)
C - INSTALLATION

GB 12
2-WIRE VIDEO COLOR ENTRYPHONE
3.6 - CONNECTION WITH SEVERAL OUTDOOR UNITS (MAX 2)
IMPORTANT : you can add up to two outdoor units (one supplied and one not supplied ref. Avidsen 112247).
Monitor Master
17VDC power
supply (provided)
12V lock (500mA to
1A) optional
12V lock (500mA to
1A) optional
Contacts used to
connect the monitor
(code 112244 or
code 112246)
3.7 -MAXIMUM SYSTEM EXPANDABILITY
O
Monitor Master
Monitor Slave
12V lock (500mA
to 1A) optional
12V lock (500mA
to 1A) optional
17VDC power
supply (provided)
17VDC power
supply (provided)
C - INSTALLATION

13 GB
2-WIRE VIDEO COLOR ENTRYPHONE
D - UTILIZATION
1 - VIEW AND TALK TO THE VISITOR
The visitor presses Nils Larsson on outdoor unit:
1LOV/DUVVRQ
The electronic doorbell sounds through the speaker
and the outdoor unit videocamera activates. If the
visitor is in the visual camera eld, the image will appear
on screen for 120 seconds. When 120 seconds have
elapsed, the monitor will return to stand-by mode
To talk to the visitor press . To nish the
conversation and deactivate the outdoor unit press
.
2 - ACTIVATE OUTDOOR UNIT FROM
MONITOR
To view a visitor without letting him know, or simply
to look outside, press : the picture of outdoor unit
1 appears on the screen for 60 sec. If you want to
communicate with the outside, press the button .
This very convenient function allows you to see
a visitor without him having to press the button
Nils Larsson on the outdoor unit.
N.B. The same system can be connected to the
optional videocamera (not included) code Avidsen
112248 or to another outdoor unit (not included)
code Avidsen 112247. Once connected, the user
can directly display on monitor the image from the
additional unit pressing the button .
3 - OPENING AN ELECTRIC LOCK AND AN
AUTOMATION (OPTIONAL)
Connect an electric lock and an automation (see
paragraph “Electric connection”), press button
(for the lock) or (for the automatism) to let the
visitor in.

GB 14
2-WIRE VIDEO COLOR ENTRYPHONE
D - UTILIZATION
4 - ACTIVATE THE VIDEOSURVEILLANCE
CAMERA (REF. 112248)
After connecting a surveillance videocamera to the
monitor (see paragraph “Electric connection”) press
the monitor button to activate/deactivate the
videosurveillance camera: the image will appear on
the display screen.
5 - INTERCOMMUNICATING FUNCTION
You can use the Intercom function to start an internal
communication with the Slave monitor (if present).
This function can be used with monitors in stand-by
mode: press the Master Monitor button to make
a call to the Slave monitor and vice versa. The user
can answer pressing the button and can talk for
max. 120 sec, afterwards the terminals will return to
a stand-by mode.
Note that with an ongoing communication between
monitor (A) and an outdoor unit (Y), If you start
an intercom call, the communication between
(A) and (Y) will stop in favor of Master and Slave
intercommunication. At the end of the call, you can
resume communication with the outdoor unit as
described in par. “Activating outdoor units from the
monitor”.
6 - SETTING MONITOR’S FUNCTIONS
With monitor in stand-by mode, press the key to
display the following screen:
Press again the button to browse the submenu
(which lights up from time to time when selected).
%57
&21
&2/
&$//
,1&20(
5,1*
• BRT :
Brightness : press the buttons and to increase
or decrease the image brightness
•CON :
Contrast : press the buttons and to increase
or decrease the image contrast.
• COL :
Color :press the buttons and to increase or
decrease the image saturation level.
• CALL :
Microphone volume :press the buttons and
to increase or decrease the microphone volume.
• INCOME :
Ringtone volume :press the buttons and to
increase or decrease the ringtone volume.
• RING :
Ringtone Selection : press the buttons and
to choose the ringtone as desired.
%57
&21
&2/
&$//
,1&20(
5,1*

15 GB
2-WIRE VIDEO COLOR ENTRYPHONE
1 - TECHNICAL FEATURES
MONITOR
Screen
Resolution
Transmission system (audio video)
Standard video
Power supply
Consumption
Power supply
Protection
Ideal operating temperature range
Number of ringtones
Max. tolerated humidity range
Conversation time
color 7’’ LCD ultra thin.
800 x 3 (RGB) x 480
2 wires
PAL/NTSC
DC 17Vdc 1,5A (adapter supplied)
3,5W to 11,5W
with network adapter 230Vac 50Hz/17Vdc 1.5A supplied
Protection against short circuits and polarity inversion
da -10°C a +50°C
9
85 %
automatic switching o after 2 minutes.
Outdoor unit
Videocamera
Fixed focus/angle of view
power supplied by monitor
Max. consumption
Brightness
Dimension
Night vision
Protection rating
CMOS 3003 color.
70°
DC 10-12V
300 ± 50 mA
min 0 lux
130 x 90 x 24,5 mm
0.5 to 1m
IP54
E - USEFUL INFORMATION

GB 16
2-WIRE VIDEO COLOR ENTRYPHONE
E - TECHNICAL AND LEGAL INFORMATION
1 - WARRANTY AND SERVICE
• This product is covered by 2-year legal warranty
of seller for conformity defects as provided for
by articles 128 and subsequent of Legislative
Decree no 206/2005 (Consumer’s Code).
ATTENTION: The warranty is not valid without
receipt or proof of purchase.
• Technical Assistance: Tel: + 33 (0)892 701 369
Monday to Friday, 9 AM to 12 PM and 2 PM to
6 PM.
2 - CLEANING AND MAINTENANCE
• Use a soft cloth slightly moistened with soap
and water.
• Do not spray with aerosol, which could damage
to the product.
• Do not use abrasive liquids that might scratch
the cover of the modules.
• The monitor and camera lens must be sheltered
from dust and grease.
Avidsen France S.A.S - 32, rue Augustin Fresnel
37170 Chambray les Tours - France
Other manuals for YLVA 2+
3
This manual suits for next models
2
Other Avidsen Intercom System manuals

Avidsen
Avidsen 112249 User manual

Avidsen
Avidsen 642278 User manual

Avidsen
Avidsen 122132 User manual

Avidsen
Avidsen ELIA User manual

Avidsen
Avidsen YLVA 3+ User manual

Avidsen
Avidsen 112279 User manual

Avidsen
Avidsen YLVA 2+ User manual

Avidsen
Avidsen 340100 User manual

Avidsen
Avidsen YLVA 2+ User manual

Avidsen
Avidsen YLVA 3+ User manual