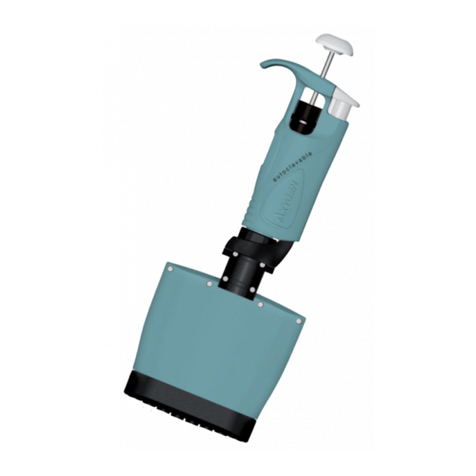
Axygen AXYPET AP-10 User manual

ENGLISH 1 – 18
ESPAπOL 19 – 36
PORTUGS 37 – 54
FRANÇAIS 55 – 72
êìëëäàâ
73 – 90
Axygen Inc.
33210 Central Avenue
Union City, CA 94587, USA
Tel.: 510-494-8900
Fax: 510-494-0700
www.axygen.com

S
Figure / Dibujo / Figura / Dessin / êËÒÛÌÓÍ

CONTENTS
1 - Introduction
2 - Setting The Volume
3 - Aspirating And Dispensing Liquids
4 - Pre-Rinsing
5 - Dense And Viscous Liquids
6 - Axygen Pipette Tips
7 - Recommendations
8 - Recalibration
9 - Troubleshooting
10 - Cleaning And Sterilisation
11 - Pipette Kit And Accesories
12 - Spare Parts
1 - INTRODUCTION
The AXYPET is a volumetric instrument designed to
measure and transfer liquids precisely and safely. It can
accommodate volumes from 0.1 μl to 10,000 μl depending
on the model.
All AXYPETS feature a digital counter which shows the
pipetting volume. The set volume is visible in the window
on the handle. Volumes are set by either turning the
pipetting pushbutton (Fig. 1A2) or the adjustment knob
(Fig. 1B) in the appropriate direction. The pipette design
allows the user to lock the volume setting by sliding the
locking ring upwards (Fig.1S). The symbols printed on
the handle show which position is locked and unlocked.
The volume range for each model is shown on the pipetting
pushbutton (Fig. 1A1).
AXYPETs are produced in 10 models, covering the volume
range from 0.1 μl to 10,000 μl.
1
ENGLISH
Liquids are aspirated into disposable tips attached to the
pipette shaft. Disposable tips ensure maximum safety
and eliminate the possibility of cross-contamination of
the liquid samples.
To protect the user from contaminated tips, the AXYPET
is fitted with a built-in tip ejector, (Fig. 1D).
The ejector length can be adjusted to accommodate
virtually every type of tip available on the market. When
using narrow tubes, it may be necessary to remove the
tip ejector. This is done simply by pulling down.
Adjusting of the Tip Ejector Length
- in 2-1,000 μl pipettes (Fig. 6A).
The "H“ spacers, included with each pipette, allow the
ejector length to be adjusted by +1mm or +2mm.
An ”H0” spacer is fitted as standard. The outside shape
of the spacer identifies the adjustment.
- in 5,000 and 10,000 μl pipettes (Fig. 6B).
The length of tip ejector is adjusted by screwing in or
screwing out the tip ejector stem with a small screwdriver.
Turn the screwdriver counter clockwise to increase the
length of tip ejector, and clockwise to reduce the length
of tip ejector. The ejector can be adjusted by up to 5 mm.
If the ejector adjustment described above is not sufficient
or the diameter of the ejector opening is too large to eject
the tip it will be necessary to put the ejector cap “M” onto
the ejector, (Fig. 6C).
2
AP-2, AP-10
AP-20, AP-50, AP-100,
AP-200, AP-250, AP-1000
AP-5000, AP-10ML
Measurement and transfer of micro-volumes,
DNA sequencing and enzyme-assay applications.
Measurement and transfer of general
aqueous solution, acids and bases
Measurement and transfer of large volumes
.
Model
AP-2
AP-10
AP-20
AP-50
AP-100
AP-200
AP-250
AP-1000
AP-5000
AP-10ML
Volume range [μl]
0.1 - 2
0.5 - 10
2 - 20
5 - 50
10 - 100
20 - 200
50 - 250
100 - 1,000
1,000 - 5,000
1,000 - 10,000

- in 2 and 10 μl pipettes (Fig. 6D)
The 2 μl - 10 μl pipettes may require the use of an ejector
cap "M" to efficiently eject certain brands of pipette tips.
Simply place the cap, supplied with the pipette, on the
bottom of the pipette shaft and slide the cap upwards
until it surrounds the bottom of the tip ejector.
The AXYPET is a high quality instrument which offers
excellent accuracy and precision.
The accuracy and precision (repeatability) of liquid volume
depends on the quality of tips used. The values for accuracy
and precision shown in the table below were obtained
using AXYGEN tips. Only these tips guarantee correct
operation of the pipettes and ensure accuracy and precision
of liquid sampling.
The accuracy and precision are obtained gravimetrically
using AXYGEN tips, performing at least 10 measurements
ENGLISH
3
of distilled water at a temperature of 20±1°C, according
to EN ISO 8655 standard.
The design enables the user to recalibrate the pipette
themselves according to the rules described in section 8.
2 - SETTING THE VOLUME
Setting the volume of the aspirated liquid can be done
either using the pipetting pushbutton (Fig. 1A2) or by the
adjustment knob (Fig. 1B). The volume display
shown by
the counter has three digits. These should be read from
top to bottom. The lowest counter dial shows a scale
which allows volume setting in the minimum
graduation range. Examples of the black and red digits:
Pipettes AP-2
Red figures at the bottom = 1/100 μl
Increment = 0.002 μl
Pipettes AP-10, AP-20
Red figures at the bottom = 1/10 μl
Increment = 0.02 μl
Pipettes AP-50, AP-100,
AP-200, AP-250
Black figures only = 1 μl
Increment = 0.2 μl
Pipettes AP-1000, AP-5000
Red figures at the top - ml
Increment = 2 μl 10 μl
Pipettes AP-10ML
Red figures at the top - ml
Increment = 20 μl
To set the required volume, use the lower section of the
pipetting pushbutton (Fig. 1A2) or the adjustment
knob
(Fig. 1B), to increase or reduce the volume. The volume
adjustment can only be performed when the locking ring is
set in the lower position (Fig.5A).
4
AP-2
AP-20AP-10
AP-5000AP-1000
AP-10ML
AP-200
AP-250
AP-50
AP-100
Model
Volume
[μl]
Accuracy
[%]
Precision
[%]
AP-2
AP-10
AP-20
AP-50
AP-100
AP-200
AP-250
AP-1000
AP-5000
AP-10ML
0.2
1.0
Max 2.0
Min 0.5
5.0
Max 10.0
Min 2
10
Max 20
Min 5
25
Max 50
Min 10
50
Max 100
Min 20
100
Max 200
Min 50
125
Max 250
Min 100
500
Max 1,000
Min 1,000
2,500
Max 5,000
Min 1,000
5,000
Max 10,000
± 12.0
± 2.7
± 1.5
± 4.0
± 1.0
± 0.5
± 3.0
± 1.0
± 0.8
± 2.5
± 1.0
± 0.8
± 1.6
± 0.8
± 0.8
± 1.2
± 0.8
± 0.6
± 1.0
± 0.8
± 0.6
± 1.6
± 0.7
± 0.6
± 0.6
± 0.6
± 0.5
± 2.5
± 0.8
± 0.5
± 6.0
± 1.3
± 0.7
± 2.8
± 0.6
± 0.4
± 1.5
± 0.5
± 0.3
± 2.0
± 0.6
± 0.4
± 0.80
± 0.24
± 0.20
± 0.60
± 0.25
± 0.20
± 0.4
± 0.3
± 0.3
± 0.40
± 0.20
± 0.15
± 0.25
± 0.20
± 0.15
± 0.6
± 0.3
± 0.2

When the desired volume is set, the locking ring should be
moved to the upper position (Fig. 5B). All volume setting
procedures should end in the the reduction of volume
setting from a position just above the desired level to that
level. As further examples:
•When moving from a high volume setting to a lower
value, the pushbutton or adjustment knob should be
rotated at normal speed, clockwise, to take the setting
just above the desired level. It should then be further
rotated very slowly till the desired volume is shown on
the digital volume display.
•In the event that you overshoot the desired setting,
repeat the procedure by increasing the volume to
a position just above the desired volume and then once
again, reduce slowly to the desired level.
•When moving from a low volume setting to a higher
value, the pushbutton or adjustment knob should be
rotated at normal speed, anticlockwise, to take the
setting to a position just above the desired level. Then
reduce the reverse the rotation and slowly adjust back
until the desired volume is shown on the digital display.
•Once again, in the event that you overshoot the desired
setting, repeat the procedure by increasing the volume
to a position just above the desired volume and then
reduce slowly to the desired level.
•Following volume adjustment, move the locking ring to
the upper position, to lock the knob and prevent
accidental volume change.
3 - ASPIRATING AND DISPENSING LIQUIDS
Place a tip on the shaft of the pipette. See Section 6 for
the appropriate tip. Press the tip on firmly using a slight
twisting motion. This will ensure an airtight seal.
Important: Never aspirate liquids into the AXYPET
without a tip attached.
Aspiration
Press the pushbutton to the first positive stop, (Fig. 2A).
Holding the pipette vertically, immerse the tip into the
sample liquid. The depth to which the tip is immersed in
the sample liquid depends on the model.
ENGLISH
5
Release the pushbutton slowly and smoothly to aspirate
the sample, (Fig. 2B). Wait one second and then withdraw
the tip from the liquid. If the pipette tip is not immersed to
the recommended depth or if the pipetting pushbutton is
rapidly released, air may enter the disposable tip.
Avoid touching the orifice of the tip.
Dispensing
•Place the end of the tip against the inside wall of the
vessel at an angle of 10° to 40°.
•
Press the pushbutton smoothly to the first stop, (Fig. 2C).
Wait one second.
•Press the pushbutton to the second stop to expel any
remaining liquid, (Fig. 2D).
•Keeping the pushbutton depressed to the very end,
remove the pipette by drawing the tip against the inside
surface of the receiving vessel.
•
Release the pushbutton to its starting position, (Fig. 2E).
•
Eject the tip by pressing the tip ejector button, (Fig. 2F).
Remember to change the tip whenever a different kind
of liquid is to be sampled.
Filters
A replaceable filter, fitted in a seat in the bottom part of the
shaft, is used in 5,000 μl and 10,000 μl pipettes (Fig. 3L).
This filter prevents the aspirated liquid from entering into
the shaft and thus from contaminating the inside of the
shaft and the piston. Using the filter is particularly important
when aspirating and dispensing large volumes of liquid.
If the filter becomes wet during liquid aspiration it should
be replaced with a new one.
Model
AP-2
AP-10
AP-20, AP-50, AP-100
AP-200, AP-250, AP-1000
AP-5000
AP-10ML
Immersion depth (mm)
≤1
≤1
2 – 3
2 – 4
3 – 6
5 – 7
6

4 - PRE-RINSING
When pipetting liquids of higher viscosity or lower surface
tension than water (e.g. sera or organic solvents), a film of
liquid is formed on the inside wall of the pipette tip. This
film can create an error. As the film remains relatively
constant in successive pipetting operations with the same
tip, this error can be eliminated by forming the film before
transferring the first sample. This is done by aspi
ra
ting
a sample and dispensing it back into the same vessel.
Now, as the film is already formed, all of the following
samples will have better accuracy and repeatability.
This pre-rinsing operation should be repeated when the
volume to be aspirated is changed or when a new tip is
used.
5 - DENSE AND VISCOUS LIQUIDS
AXYPET specifications of accuracy and precision are
based on pipetting distilled water. Handling of liquids
with physical qualities of density, viscosity and surface
tension which differ substantially from water may need
gra
vimetrically checked compensation of the volume
setting.
Normally the degree of error resulting from heavy
or viscous liquids is negligible if pipetting is done slowly
and carefully. It is most important to give the liquids
some time to react to the change of pressure by holding
the pipette tip in its position for at least 2 sec. after the
aspiration and the blow out stroke.
If in extreme cases, this method of operation does not
result in accurate values, a compensation may be
achieved as follows:
Weigh the liquid pipetted when the AXYPET is set to the
nominal value. Then calculate the set-off from the nominal
value:
Corr: val. = 2 x nom. val. -
- weight of the sample
- density of liquid
Check this operation once again and correct if necessary
.
Note the corrected value for further pipetting of the same
kind of liquid.
6 - AXYGEN PIPETTE TIPS
AXYGEN tips are made from high performance
polypropylene and their quality guarantees the precision
m
-
γ
m
γ
ENGLISH
7
and accuracy associated with the AXYPET. Strict control
is maintained throughout the manufacturing process to
ensure the highest quality.
The accuracy and precision figures for the AXYPET are
only guaranteed when AXYGEN tips are used. The use of
inferior quality tips will seriously degrade the performance
of the AXYPET.
Tips 10
These tips are used for volumes between 0.1 μl and 10 μl.
They are used with the AP-2 and the AP-10 models
.
Tips 200
These tips are used for volumes between 2 μl and 200 μl.
They are used with the AP-20, AP-50, AP-100 and the
AP-200 models.
Tips 250
These tips are used for volumes between 50 μl and 250 μl.
They are used with the AP-250 model.
Tips 1,000
These tips are used for volumes between 100 μl and
1,000 μl. They are used with the AP-1000 model.
Tips 5,000
These tips are used for volumes between 1,000 μl and
5,000 μl. They are used with the AP-5000 model.
Tips 10ML
These tips are used for volumes between 1,000 and
10,000 μl. They are used with the AP-10ML model.
7 - RECOMMENDATIONS
Observing the following recommendations will ensure
maximum possible accuracy and precision of liquid
sampling.
•
Make sure to operate the AXYPET slowly and smoothly.
•The depth of immersion in the sample liquid should be
the minimum necessary and should remain constant
during aspiration.
•The AXYPET should be held in a vertical position.
•Change the tip when volume setting is changed or
when a different liquid is to be aspirated.
•Change the tip if a droplet remains on the end of the tip
from the previous pipetting operation.
8

9
•Each new tip should be pre-rinsed with the liquid to be
pipetted.
•
Liquid should never enter the AXYPET shaft. To prevent
this:
- Press and release the pushbutton slowly and smoothly.
- Never turn the pipette upside down.
- Never lay the pipette on its side when there is liquid in
the tip.
•
Never force the volume setting beyond its recommended
limits.
•When pipetting liquids with temperatures different from
the ambient temperature, it is recommended to pre-rinse
the tip several times before use.
•Do not pipette liquids with temperatures above 70°C.
•When pipetting acids or corrosive solutions which emit
vapours, it is recommended to disassemble the shaft
and rinse the piston and seal with distilled water after
finishing the pipetting operation.
8 - RECALIBRATION
AXYPETs Pipettes are calibrated by gravimetrically,
using
AXYGEN tips and distilled water, at a temperature
of 20±1°C, according to EN ISO 8655 standard.
If during pipette operation you find that the accuracy
error (the difference between the real aspirated volume
and the preset volume) exceeds the permissible value
given in the table in section 1, the pipette recalibration
procedure should be carried out.
Before starting the recalibration it is necessary to check
whether the following requirements have been met during
error determination:
•the ambient temperature, and the temperature of the
pipette, tips and water was identical
•the density of the liquid used is close to that of distilled
water
•a balance with appropriate sensitivity has been used.
•mg/μl conversion factor has been taken into account
10
ENGLISH
•the requirements shown in sections 3 and 7 have been
met
If the above conditions are satisfied and the accuracy
error for selected volume given in section 1 exceeds the
permissible value, the pipette recalibration procedure
should be carried out.
The recalibration can be performed within one full turn of
the key to the right or to the left only.
Recalibration conditions:
Ambient temperature, the temperature of the pipette, tips
and liquid should be within the range 20-25°C and
stabilised during weighing within ±0.5°C
•Measurements should be conducted using distilled
water
•Balance sensitivity should be suitable for the volume to
be measured
Recalibration procedure:
•Set the dose volume depending on the pipette volume
according to the following table:
•Perform 5 aspirations, weigh each one and calculate
the average value of the aspirations
•Calculate average aspirated volume in μl multiplying
the average aspiration amount [mg] by the distilled
water density coefficient [μl/mg], which depends on
temperature and pressure according to the following
table:
Model
Range
of the pipette
volumes
[μl]
Preset
volume
[μl]
Permissible
volumes
[μl]
Volume change
ΔV for full turn
of the
calibration key [μl]
(24 increments)
AP-2
AP-10
AP-20
AP-50
AP-100
AP-200
AP-250
AP-1000
AP-5000
AP-10ML
0.1 - 2
0.5 - 10
2 - 20
5 - 50
10 - 100
20 - 200
50 - 250
100 - 1000
1,000 - 5,000
1,000 - 10,000
0.2
0.5
2
5
10
20
50
100
1,000
1,000
0.176 - 0.224
0.48 - 0.52
1.94 - 2.06
4.875 - 5.125
9.84 - 10.16
19.76 - 20.24
49.5 - 50.5
98.4 - 101.6
994 - 1,006
975 - 1,025
0.06
0.33
0.63
2.50
2.50
6.30
6.30
25.00
125.00
250.00
Volume checked [μl] Balance sensitivity [mg]
0.1 - 10 ≤0.001
10 - 100 ≤0.01
> 100 ≤0.1

If the average aspirated volume exceeds the permissible
value, the following should be done:
•Remove the pipetting pushbutton, (Fig. 4A),
Warning: The pipetting pushbutton consists of 2 parts:
the lower volume-setting section (Fig. 1A2) and the
upperbutton (Fig. 1A1). After removal of the pushbutton,
both parts will separate.
•Holding the volume setting knob to protect it against
rotation, insert the calibration key into the cuts of the
calibration screw, (Fig. 4B),
•Turn the key clockwise to reduce the aspirated volume,
or counter-clockwise to increase the volume. One full
turn of the calibration key changes the pipette aspiration
volume by the amount given in the table, (Fig. 4C),
•
Take out the key and fix the pipetting pushbutton (Fig. 4D).
The pipetting pushbutton should be fixed by placing the
lower section on the arbor first (Fig. 1A2) and then the
button
(Fig. 1A1).
Determine the average aspirated volume. The average
volume should be within the permissible range shown in
the table. If the volume exceeds the values stated, the
recalibration procedure should be repeated.
When pipetting liquids with physical properties considerably
different from those of water, follow the rules as
described in section 5.
9 - TROUBLESHOOTING
If you notice an improper pipette operation identify the
cause and eliminate the fault. To do this, follow the
instruction in the sequence provided. Replacement of
parts should be required only occasionally, and should
not occur under normal pipette use.
Droplets of liquid remain in the pipette tip.
Possible problem The tip is emptied too fast.
Temperature [°C] Pressure [kPa]
95.0 101.3 105.0
20
21
22
23
24
25
1.0028
1.0030
1.0032
1.0034
1.0037
1.0039
1.0029
1.0031
1.0033
1.0035
1.0038
1.0040
1.0029
1.0031
1.0033
1.0036
1.0038
1.0040
ENGLISH
11
Action Decrease the speed of pressing the
pipette pushbutton.
Possible problem The tip wettability has increased due
to extensive use.
Action Replace the tip with a new one.
Droplets of air appear in the liquid aspirated into the tip.
Possible problem
The pipette tip immersion is too shallow.
Action Immerse the tip deeper according to
the instructions.
Possible problem The pipette tip is incorrectly pressed
onto the pipette shaft.
Action Press the pipette tip firmly.
Possible problem The tip is damaged or worn out due
to extensive use.
Action Replace the tip with a new one.
The pipette incorrectly aspirates the liquid or liquid
drops out from the tip.
Possible problem The pipette tip is incorrectly pressed
onto the pipette shaft.
Action Press the pipette tip firmly.
Possible problem The shaft nut is loose (Fig. 3F) in the
models AP-2 to AP-1000
Action Tighten the shaft nut.
Possible problem The sealing surface of the shaft is
cracked or scored.
Action Remove the tip ejector. Unscrew the
shaft nut, inspect the shaft and the
piston assembly. Replace the
damaged parts (see Section 12).
When reasembling the pipette, the nut
should be hand tightened.
In the models AP-2, AP-10 and AP-20,
the damage of the shaft may also
cause a damage of the piston assembly.
Replace the damaged parts (see
Section 12).
When reasembling the pipette, the nut
should be hand tightened.
To remove the tip ejector in models
AP-5000 and AP-10ML, remove the
ejector pushbutton (Fig. 3N) and
using a screwdriver unscrew the tip
12

ENGLISH
ejector by turning the screwdriver
counter-clockwise.
Possible problem Damage to the piston or seal due to
prolonged use with the aggressive
liquids.
Action Disassemble the pipette as described
above. Replace the piston, seal and
O-ring (see Section 12). Rinse the
inside of the shaft in distilled water
and dry. Lubricate the seal and O-ring
with the lubricant, that is included
with each pipette. Following piston
replacement, a calibration procedure
is required.
Note: The parts of AP-2 and
AP-10
pipette should be lubricated
evently with a minimum amount of
lubricant.
Possible problem
The pipette is reassemled improperly.
Action Disassemble the pipette and
reassemble it, observing the proper
sequence of steps (Fig. 3).
Possible problem No lubricant on the sealing elements.
Action Remove the tip ejector. Unscrew the
shaft nut, remove the shaft, piston
assembly, seal and O-ring. Rinse the
removed parts in distilled water and
dry thoroughly. Lightly lubricate the
inside surfaces of the seal and the
O-ring with the included lubricant.
Reassemble the pipette in the reverse
order.
Possible problem Contamination of the inside of the
pipette caused by extensive aspiration
of chemically aggressive liquids or
because liquid got inside the pipette.
Action Remove the tip ejector. Unscrew the
nut, remove the shaft, piston assembly
,
seal and O-ring. Rinse the removed
parts with distilled water and dry
thoroughly. Lightly lubricate the
inside surfaces of the seal and the
O-ring with the lubricant. Reassemble
the pipette in the reverse order.
If you find an increase in the pipetting force, which
could happen after repetitive autoclaving of the pipette:
Action Remove the tip ejector. Unscrew the
shaft nut, and then remove the shaft,
piston assembly, seal and O-ring.
Rinse the removed parts in distilled
water and dry. Lubricate the internal
surfaces of the seal and O-ring with
lubricant that has been included with
each pipette. Reassemble the pipette
in opposite order.
Note: All parts of the pipette can
be autoclaved (see Section 10).
The shaft of the AP-5000 and
AP-10ML models should be auto-
claved without the filter.
If the problem continues after carrying out the above
steps, contact your AXYPET representative.
Before returning the pipette, please ensure that the
pipette is completely free of any chemical, radioactive or
microbiological contamination which could pose a threat
during transport and repair. As far as it is possible, clean
the pipette.
10 - CLEANING AND STERILISATION
Cleaning
External surfaces of the pipetting pushbutton, the ejector
pushbutton, the handgrip, the shaft nut and the adjustment
knob may be cleaned using a cloth dampened in
isopropyl alcohol. The remaining parts removed from the
pipette during pipette disassembly may be washed with
distilled water or isopropyl alcohol.
Sterilisation:
The pipette can be sterilised in an autoclave at 121°C for
20 minutes. After sterilisation, the pipette should be dried
and cooled to room temperature
It is recommended:
- to sterilise the pipettes in autoclave with an initial vacuum
and drying cycle,
- prior to sterilisation unscrew the shaft nut slightly in the
AP-2 to AP-1000 pipettes, and unscrew the shaft slightly
in the AP-5000 and AP-10ML. After autoclaving these
parts should be screwed tight again.
13 14

15 16
- to set the locking ring in lower (unlocked) position prior
to sterilisation.
The precision of the results should not alter if the pipetting
process and autoclaving are carried out as described
in this manual. Because a slight change in the accuracy
of the dosage may occur, it is recommended to:
- check the calibration of the pipette after the initial first,
third and fifth autoclaving cycles and then after every 10
autoclaving cycles.
11 - PIPETTE KIT AND ACCESSORIES
Pipette kit:
The pipettes are delivered in the kits including:
•Pipette
•Instruction manual
•Calibration key
•Ejector length adjustment spacers (for pipette models
AP-2 to AP-1000)
•Ejector cap (for pipette models AP-2, AP-10, AP-5000,
AP-10ML)
•Identification labels
•Filters (for pipette models AP-5000, AP-10ML)
•Lubricant
•Color Identification Rings
•Right Hand Ejector Button
Accessories:
AP-2
AP-10
AP-20
AP-50
AP-100
AP-200
AP-250
AP-1000
AP-5000
AP-10ML
T-300-R
T-300-R
TR-222-C-R
TR-222-C-R
TR-222-C-R
TR-222-C-R
TR-333-C-R
T-1000-C-R
T-5000-C*
T-10ML-C*
T-300-R-S
T-300-R-S
TR-222-C-R-S
TR-222-C-R-S
TR-222-C-R-S
TR-222-C-R-S
TR-333-C-R-S
T-1000-C-R-S
TF-300-R-S
TF-300-R-S
TF-20-R-S
TF-50-R-S
TF-100-R-S
TF-200-R-S
TF-350-R-S
TF-1000-R-S
Filtered
Pipet Tips
Sterile
Pipet Tips
Pipet Tips
Axygen
Cat No.
Cat No. Description
AP-ASD Acrylic Stand
AP-CSD Carousel Stand
AP-IDR Color Identification Rings
AP-LHEB Left Hand Ejector Button
* tips in bulk
Axygen Cat No.
Description
Standard
Racked
Standard
Racked, Sterile
Filtered,
Sterile
T-300-R T-300-R-S MicroVolume Tips,
0.2-10 μl, Clear
TF-300-R-S Filtered MicroVolume
Tips, 0.2-10 μl, Clear
TR-222-C-R TR-222-C-R-S Reference Tips,
1-200 μl, Clear
TF-20-R-S Filtered Tips,
1-20 μl, Clear
TF-50-R-S Filtered Tips,
1-50 μl, Clear
TF-100-R-S Filtered Tips,
1-100 μl, Clear
TF-200-R-S Filtered Tips,
1-200 μl, Clear
TF-350-R-S Filtered Tips,
1-300 μl, Clear
TF-1000-R-S Filtered Tips,
100-1000 μl, Clear
TR-333-C-R TR-333-C-R-S Reference Tips,
1-250 μl, Clear
T-1000-C-R T-1000-C-R-S Clear Tips,
100-1000 μl
T-5000-C* MacroVolume Tips,
1-5 ml, Clear
T-10ML-C* MacroVolume Tips,
1-10 ml, Clear
ENGLISH

1817
12 - SPARE PARTS
The spare parts indicated in Fig. 3, 4, 5 and 6 that is:
A: Pipetting pushbutton A1: Pushbutton A2: Knob
B: Adjustment knob
C: Shaft
D: Ejector
F: Shaft nut
G: Piston assembly
H: Spacer
I: O-ring
J: Seal
K: Calibration key
L: Filter
M: Ejector cap
N: Ejector pushbutton
P: Identification ring
S: Locking ring
can be ordered from your AXYPET representative (type
of pipette and name of the part for this pipette should be
specified).
To find your nearest service center and for technical
support, visit http://www.axygen.com/axypet
Warning: The replacement of the piston requires
a calibration procedure to be carried out, as
described in section 8.
ENGLISH
All rights reserved. Product described in this manual is subject to availability
and technical modification. Errors excepted.
AXYGEN reserves the right to improve, enhance or otherwise modify its
products without prior notification.

CONTENIDO
1 - INTRODUCCIÓN
2 - SELECCIÓN DE VOLUMEN
3 - ASPIRACIÓN Y DOSIFICACIÓN DEL LÍQUIDO
4 - PRE-LAVADO
5 - LÍQUIDOS DENSOS Y VISCOSOS
6 - PUNTAS AXYGEN
7 - RECOMENDACIONES
8 - RECALIBRACIÓN
9 - SOLUClÓN DE PROBLEMAS MENORES
10 - LIMPIEZA Y ESTERILIZACIÓN
11 - JUEGO DE PIPETAS Y ACCESORIOS
12 - PIEZAS DE REPUESTO
1 - INTRODUCCIÓN
Las pipetas AXYPET son un instrumento volumétrico
diseñado para medir y transferir líquidos de manera
precisa y segura. Puede medir y transferir, según el
modelo, volúmenes desde 0.1 μI a 10000 μl.
Las pipetas AXYPET vienen con un indicador digital de
volumen. El volumen seleccionado aparece en la
ventanilla de visualización del mango. La selección de
volumen a dispensar puede ajustarse con el tornillo del
botón pulsado (fig. 1A2) o girando el volante del ajuste
de volumen (fig. 1B) hacia la dirección adecuada. La
construcción de la pipeta hace posible el bloqueo del
volumen ajustado. Para este fin debemos desplazar el
manguito del freno hacia arriba (fig.1S). La posición del
anguito señalan los símbolos correspondientes en la
empuñadura. El volumen de cada pipeta está indicado
en el botón pulsador (fig. 1A1).
Hay 10 modelos de pipetas AXYPET cubriendo el rango
desde 0,1 μI hasta 10000 μI.
ESPA¡OL
19
Las pipetas AXYPET utilizan puntas (”tips”) de polipropileno,
de un solo uso, (fig. 1E). El líquido a dispensar es aspirado
dentro de las puntas, las cuales se insertan en el cono
de la pipeta,
Importante: El uso de puntas desechables garantiza la
seguridad y elimina el riesgo de contaminación de la
muestra.
Para protección del usuario con las puntas contaminadas,
las pipetas AXYPET están equipadas con un expulsor de
puntas (fig. 1D).
El expulsor de puntas esta diseñado para que el usuario
pueda desmontar, ajustar la longitud para utilizar diferentes
tipos de puntas disponibles en el mercado. En la
utilización de tubos de diámetro pequeño es necesario
remover el inyector de puntas.
Ajuste de la Longitud del Inyector de puntas.
- En las pipetas de una capacidad de 2 a 1000 μI. (fig. 6A)
Para regular el espaciador “H” y modificar la longitud del
expulsador de puntas de +1 ó +2mm, se coloca un
espaciador estándar “H0” el cual toma la forma del
espaciador a intercambiar.
- En las pipetas de una capacidad de 5000 y 10000 μI.
(fig. 6B)
La longitud del expulsor de punta se regulará atornillando
o desatornillando su vástago. Para alargar el expulsor se
20
AP-2, AP-10
AP-20, AP-50, AP-100,
AP-200, AP-250, AP-1000
AP-5000, AP-10ML
Medida y transferencia de microvolumenes.
Secuencias DNA y aplicación de ensayo de enzima.
Medida y transferancia de soluciones
acuosas generales, ácidos y bases.
Medida y transferancia de grandes volúmenes.
Modelo
AP-2
AP-10
AP-20
AP-50
AP-100
AP-200
AP-250
AP-1000
AP-5000
AP-10ML
Rango de volumen [μl]
0.1 - 2
0.5 - 10
2 - 20
5 - 50
10 - 100
20 - 200
50 - 250
100 - 1,000
1,000 - 5,000
1,000 - 10,000

dará vuelta al destornillador en el sentido contrario al de
las manecillas de un reloj; para reducir su longitud se le
hará girar en el mismo sentido que las manecillas de un
reloj. El intérvalo de esta regulación es de 5 mm.
Si el método descrito más arriba para el ajuste del expulsor
de punta no es suficiente o el diámetro de la abertura del
expulsor es demasiado grande para expulsar la punta, es
preciso poner sobre el expulsor el accesorio "M"
(fig. 6C).
- En las pipetas de una capacidad de 2 a 10 μI. (fig. 6D)
Las pipetas de 2 μI a 10 μI. pueden requerir el uso de
una tapa de expulsores "M" para quitar eficazmente las
puntas de diferentes proveedores que están en el mercado.
La tapa, suministrada con la pipeta, hay que colocarla
sobre el expulsor en el extremo del cuerpo para que la
tapa abrace el expulsor.
Las pipetas AXYPET son un instrumento de alta calidad
con excelente exactitud y precisión. Los valores de
exactitud y precisión se muestran en la siguiente tabla,
han sido determinados utilizando las puntas AXYGEN
y sólo se garantizan con el uso de las mismas.
Modelo Volumen
[μl]
Exactitud
[%]
Precisión
[%]
AP-2
AP-10
AP-20
AP-50
AP-100
AP-200
AP-250
AP-1000
0,2
1,0
Max 2,0
Min 0,5
5,0
Max 10,0
Min 2
10
Max 20
Min 5
25
Max 50
Min 10
50
Max 100
Min 20
100
Max 200
Min 50
125
Max 250
Min 100
500
Max 1000
± 12,0
± 2,7
± 1,5
± 4,0
± 1,0
± 0,5
± 3,0
± 1,0
± 0,8
± 2,5
± 1,0
± 0,8
± 1,6
± 0,8
± 0,8
± 1,2
± 0,8
± 0,6
± 1,0
± 0,8
± 0,6
± 1,6
± 0,7
± 0,6
± 6,0
± 1,3
± 0,7
± 2,8
± 0,6
± 0,4
± 1,5
± 0,5
± 0,3
± 2,0
± 0,6
± 0,4
± 0,80
± 0,24
± 0,20
± 0,60
± 0,25
± 0,20
± 0,4
± 0,3
± 0,3
± 0,40
± 0,20
± 0,15
ESPA¡OL
21
La exactitud y la precisión se obtuvieron por método gravi-
métrico, con agua destilada, a temperatura estabilizada
entre 19 y 21°C y repitiendo como mínimo 10 mediciones.
Dichos valores incluyen todos los componentes de error
resultantes, incluyendo el debido al calor normal de la
mano y al intercambio de puntas. Estas especificaciones
fueron obtenidas utilizando puntas AXYGEN.
Tests de verificación: La verificación volumétrica de las
pipetas AXYPET se basan en los tests gravimétricos
extensivos, de acuerdo a la norma EN ISO 8655.
La pipeta puede ser calibrada por el propio usuario
siguiendo los pasos indicados en la sección 8.
2 - SELECCIÓN DEL VOLUMEN
La selección del volumen para aspiración del liquido
puede realizarse utilizando el tornillo del botón pulsador
(fig. 1A2) o la rueda de graduación del volumen (fig. 1B).
El volumen mostrado en el indicador está compuesto de
tres dígitos que hay que leer de arriba hacia abajo.
Además, en la parte más baja del indicador hay una
escala que permite el ajuste del volumen en el rango de
graduación mínima.
En los modelos AP-2, AP-10, AP-20, AP-50, AP-100,
AP-200, AP-250 los dígitos negros indican microlitros y
los dígitos rojos décimas de microlitro.
DEBAJO FIGURAN EJEMPLOS PARA CADA UNO DE
DICHOS MODELOS
En los modelos AP-1000, AP-5000, AP-10ML los dígitos
rojos indican mililitros y los negros microlitros.
AP-2 AP-20AP-10 AP-200
AP-250
AP-50
AP-100
AP-5000
AP-10ML
Min 1000
2500
Max 5000
Min 1000
5000
Max 10000
± 0,6
± 0,6
± 0,5
± 2,5
± 0,8
± 0,5
± 0,25
± 0,20
± 0,15
± 0,6
± 0,3
± 0,2
22

ESPA¡OL
DEBAJO FIGURAN EJEMPLOS PARA CADA UNO DE
DICHOS MODELOS
A los efectos de incrementar o reducir el volumen elegido,
utilizar la parte inferior del botón
pulsador
(fig. 1A2),
o el
selector del ajuste de volumen (fig. 1B). El cambio del
ajuste del volumen es posible, cuando el manguito del
freno esté en la posición baja (fig. 5A). En el ajuste del
volumen requerido, el manguito del freno debe ser colo-
cado en la posición de arriba (fig. 5B). Todos los procedi-
mientos para fijar un volumen deben realizarse
con una
reducción de volumen, o sea desde un volumen mayor
hacia un volumen menor.
Ejemplos:
•
Para desplazarse desde un volumen mayor a un volumen
menor, se debe rotar el botón pulsador o el volante del
ajuste de volumen, con velocidad normal y en el sentido
de las agujas del reloj, hasta alcanzar la
indicación del
nivel del volumen que se desea establecer.
El ajuste fino
de ese volumen se debe completar continuando la
rotación en forma muy lenta hasta que el valor deseado
aparezca en el indicador digital.
•En el caso de que al efectuar el ajuste, el volumen
alcanzado sea erróneo y menor que el deseado, se
debe aumentar nuevamente el volumen, sobrepasando
el valor deseado, y repetir el procedimiento anterior
para el ajuste fino.
•
Al desplazarse desde un volumen menor para establecer
un volumen mayor, el botón
pulsador
o el
volante del
ajuste de volumen
se debe rotar, a velocidad normal y
en sentido contrario a las agujas del reloj, hasta alcanzar
una posición superior a la del volumen deseado. Luego
de ello, se debe revertir el sentido de giro y muy
lentamente
continuarlo hasta que el volumen deseado
aparezca en el indicador digital.
•Una vez más, en el caso de que el volumen alcanzado
sea erróneo y menor que el deseado, se debe aumentar
nuevamente el volumen y lentamente reducirlo hasta el
nivel deseado.
AP-5000AP-1000 AP-10ML
23
Despu
é
s del ajuste del volumen debemos recolocar el
manguito del freno a la posición de arriba, lo que va
provocar el bloqueo del botón e impedirá un cambio
casual del volumen.
3 - ASPIRACIÓN Y DOSIFICACIÓN DEL LÍQUIDO
Para seleccionar una punta adecuada, ver el apartado 6.
Al insertar la punta en el cuerpo de la pipeta hay que
aplicar una fuerte presión con movimiento giratorio para
asegurar la hermeticidad.
Advertencia: Nunca utilice la pipeta AXYPET con
líquidos sin punta.
Aspiración:
•Apretar el botón pulsador hasta el primer tope (fig. 2A).
•Con la pipeta en posición vertical sumergir la punta en
la muestra. La profundidad a la que se sumerge la
punta en el líquido depende del modelo:
•Liberar el botón pulsador lenta y suavemente para
aspirar la muestra (fig. 2B).
•Esperar un segundo y retirar la punta del líquido.
Limpiar la parte exterior de la punta de las gotas de líquido.
Al sumergir la punta a la profundidad menor que la
recomendada o al librar rápidamente el botón pulsador
puede entrar el aire a la punta.
Evite tocar el orificio de la punta.
Dosificación:
•Colocar la parte inferior de la punta contra la pared
interior del recipiente, con un ángulo entre 10° y 40°.
•Apretar el botón pulsador suavemente hasta el primer
tope (fig. 2C). Esperar un segundo.
•Apretar el botón pulsador hasta el segundo tope, para
vaciar el resto del líquido (fig. 2D).
24
Modelo
AP-2
AP-10
AP-20, AP-50, AP-100
AP-200, AP-250, AP-1000
AP-5000
AP-10ML
Profundidad (mm)
≤1
≤1
2 – 3
2 – 4
3 – 6
5 – 7

•
Manteniendo apretado el botón pulsador en el segundo
tope, retirar la pipeta deslizando la punta por la pared
interior del recipiente. Soltar luego el botón pulsador
(fig. 2E).
•Expulsar la punta apretando el botón del expulsor de
punta (fig. 2F). Es necesario cambiar la punta
solamente en el caso de tomar la muestra de otro líquido
o cuando se cambia el volumen.
Filtros
Las pipetas de 5000 μI. y 10000 μI. llevan un filtro,
insertado en un asiento en la parte inferior del cuerpo de
la pipeta (fig. 3L), para evitar que el líquido penetre
dentro
del cuerpo, ensuciando este y el émbolo.
Se recomienda
el uso del filtro especialmente cuando se
toman grandes cantidades de líquido.
En el caso de mojarse el filtro, debe ser cambiado por
uno nuevo.
4 - PRE-LAVADO
AI pipetear líquidos de alta viscosidad o densidad diferentes
a las del agua, p. ej., disolventes orgánicos, se crea una
capa superficial de líquido en la pared interior de la punta.
Esta capa puede ser causa de error. Dado que dicha
capa se mantiene relativamente constante en operaciones
sucesivas de pipeteado con la misma punta, puede
evitarse el error creando la capa superficial antes del
pipeteado de la primer muestra. Esto se logra aspirando
la muestra y dispensándola nuevamente en el mismo
recipiente. Hecho esto las muestras subsiguientes
tendrán mayor exactitud y repetibilidad. Es conveniente
repetir esta operación de enjuague cada vez que se
modifique
el volumen o se utilice una nueva punta.
5 - LIQUIDOS DENSOS Y VISCOSOS
En el caso de líquidos densos o viscosos, es posible
compensar el error ajustando el volumen por encima del
requerido.
En el caso de líquidos menos densos que el agua,
puede compensarse ajustando el mismo por debajo
delvalor requerido.
Ejemplo: para transferir 10 μI de suero con las pipetas
AXYPET AP-20, se puede ajustar el volumen a 10 μI
y comprobarlo en forma gravimétrica. Si el volumen
ESPA¡OL
25
medido resultara 9,5 μI, podemos aumentar el mismo en
0,5 μI (o sea a 10,5 μI) y medir nuevamente.
Podemos
repetir las mediciones gravimétricas, ajustando el volumen
hacia arriba o hacia abajo hasta obtener el
ajuste exacto
para dicha muestra y el volumen requerido.
De esta
forma queda la pipeta ajustada en forma exacta para las
operaciones sucesivas con dicha muestra.
Cuando se dosifican líquidos densos o viscosos, es
aconsejable esperar uno o dos segundos más en el
primer tope, antes de pipetear el resto del líquido.
6 - PUNTAS AXYGEN
Las puntas AXYGEN son fabricadas en polipropileno de
excelente calidad, bajo un estricto control de producción,
garantizando con su uso la precisión y exactitud de las
pipetas AXYPET.
Es aconsejable la utilización de las puntas AXYGEN con
las pipetas AXYPET, ya que las especificaciones de
exacti
tud y precisión de las mismas ha sido determinada
con dichas puntas. El uso de puntas de calidades
inferiores, pueden dañar el cono de las pipetas AXYPET.
Punta 10:
Puntas usadas para tomar cantidades de líquido de 0,1
a 10 μI. Se utilizan con las pipetas AP-2 y AP-10.
Punta 200:
Puntas usadas para tomar cantidades de líquido de 2
a 200 μI. Se utilizan con las pipetas AP-20,
AP-50, AP-100, AP-200.
Punta 250
Puntas usadas para tomar cantidades de líquido de 50
a 250 μI. Se utilizan con las pipetas AP-250.
Punta 1000:
Puntas usadas para tomar cantidades de líquido de 100
a 1000 μI. Se utilizan con las pipetas AP-1000.
Punta 5000:
Puntas usadas para tomar cantidades de líquido
de 1000 a 5000 μI. Se utilizan con las pipetas AP-5000.
Punta 10ML:
Puntas usadas para tomar cantidades de líquido
de 1000
a 10000 μI. Se utilizan con las pipetas AP-10ML.
26

•La temperatura ambiente, la temperatura de la puntas
de la pipeta y el agua o liquido fueron idénticas.
•La densidad del líquido utilizado debe ser semejante
a la de agua destilada.
•Balanza de precisión para las mediciones:
•Factor de conversión de mg/μI
•Conocimiento de las recomendaciones de los aparta-
dos 3 y 7.
Cumplidos estos requisitos, si el error de Exactitud en un
volumen dado es mayor al indicado en el apartado
1 será necesario proceder a una nueva calibración de la
pipeta.
La llave de calibración puede girar solamente de una
vuelta entera hacia la derecha o la izquierda.
Requisitos para la recalibración:
•La temperatura ambiente, la temperatura de la punta
de la pipeta y el líquido deberán estar entre los 20
y 25°C y permanecer con una exactitud de ±0,5°C
•en las pruebas se usará agua destilada,
•la sensibilidad de la balanza se adecuará al volumen
que se quiera verificar.
Procedimiento de Recalibración:
oseleccionar el rango correspondiente a la capacidad
de la pipeta, conforme lo indicado en la siguiente tabla:
7 - RECOMENDACIONES
Las siguientes recomendaciones facilitan la máxima
exactitud y precisión de sus pipetas AXYPET.
•Operar la pipeta AXYPET de manera lenta y suave.
•Sumergir el mínimo posible la punta de la pipeta en la
muestra y mantener dicha profundidad durante la
aspiración.
•Colocar la pipeta AXYPET en posición vertical.
•Reemplazar la punta cada vez que modifique el ajuste
de volumen o cambie de muestra.
•Reemplazar la punta siempre que ésta quede con
alguna gota de líquido del pipeteado anterior.
•Cada vez que reemplaze la punta, ésta debe ser
enjuagada con el líquido a pipetear.
•El líquido nunca debe entrar dentro del cono de la
pipeta AXYPET. Para ello:
- apretar el botón pulsador lenta y suavemente.
-
nunca gire la pipeta con la parte de arriba hacia abajo.
- nunca coloque la pipeta en forma horizontal cuando
la punta contenga liquido.
•Nunca force la selección de volumen fuera de los
límites recomendados.
•Si la temperatura de los líquidos a pipetear es diferente
de la del ambiente, se recomienda enjuagar la punta
un par de veces antes de usarla.
•No pipetear líquidos con temperatura superior a 70°C.
•Cuando se pipeten ácidos o soluciones corrosivas que
producen vapores, se recomienda desmontar el cono
de la pipeta y enjuagar el pistón y los sellos con agua
destilada al terminar la operación.
8 - RECALIBRACIÓN
La calibración de las pipetas AXYPET se realiza por
gravimetría con el uso de puntas AXYGEN y agua destilada,
en una temperatura de 20± 1°C, de acuerdo a la norma
EN ISO 8655.
Cuando se constate un error de exactitud (diferencia
entre la cantidad real y la nominal) de una pipeta, mayor
al que se indica en el cuadro del capítulo 1, será nece-
sario proceder a una nueva calibración. Antes de recali-
brar deberá comprobarse que al calcular el error se
cumplieron los siguientes requisitos:
ESPA¡OL
27 28
Volumen homologado [μl] Sensibilidad de la balanza [mg]
0.1 - 10 ≤0,001
10 - 100 ≤0,01
> 100 ≤0,1
Model
Range
of the pipette
volumes
[μl]
Preset
volume
[μl]
Permissible
volumes
[μl]
Volume change
ΔV for full turn
of the
calibration key [μl]
(24 increments)
AP-2
AP-10
AP-20
AP-50
AP-100
AP-200
AP-250
AP-1000
AP-5000
AP-10ML
0.1 - 2
0.5 - 10
2 - 20
5 - 50
10 - 100
20 - 200
50 - 250
100 - 1000
1,000 - 5,000
1,000 - 10,000
0.2
0.5
2
5
10
20
50
100
1,000
1,000
0.176 - 0.224
0.48 - 0.52
1.94 - 2.06
4.875 - 5.125
9.84 - 10.16
19.76 - 20.24
49.5 - 50.5
98.4 - 101.6
994 - 1.006
975 - 1.025
0.06
0.33
0.63
2.50
2.50
6.30
6.30
25.00
125.00
250.00

ESPA¡OL
•Realizar cinco tomas, pesando y calcular la media de
cada una
•Calcular la Media del volumen aspirado en μl, multipli-
cando la Media de la cantidad aspirada (mg) por el
coeficiente de densidad del agua destilada (μl/mg),
el cual depende de la temperatura y la presión. Según
la siguiente tabla:
•Cuando la Media del volumen aspirado excede el valor
permitido se procederá como se indica a continuación:
•Desmontar el pulsador de pipeteo, (fig. 4A),
Atención: El botón pulsador se compone de dos
piezas: un tornillo (fig. 1A2) y un botón (fig. 1A1).
Desmontando el botón ambas piezas se separan.
•Introducir la llave de calibración en las muescas del
tornillo de calibración, (fig. 4B), sujetando al mismo
tiempo el botón de graduación del volumen para evitar
que cambie de posición,
•Darle vuelta a la llave - hacia la derecha para reducir el
volumen o hacia la izquierda para aumentarlo. Con una
vuelta completa entera de la llave se aumenta o disrninuye
en la cantidad que se ha indicado en el cuadro,
(fig. 4C),
•
Retirar la llave de calibración y montar el botón
pulsador. (fig. 4D). Para montar el botón pulsador hay
que colocar en el cuerpo primero el tornillo (fig. 1A2)
y luego
el botón (fig. 1A1).
Calcular nuevamente Media de volumen aspirado que
deberá ajustarse a los valores permitidos indicados en la
tabla. Si el volumen excede los valores permitidos, se
repetirán las operaciones de recalibración.
Cuando las propiedades físicas del líquido manipulado con
la pipeta difieren mucho de las del agua se deberáproceder
de acuerdo con las indicaciones del apartado 5.
9 - SOLUClÓN DE PROBLEMAS MENORES
Al constatar el trabajo incorrecto de la pipeta compruebe
la causa y elimine el defecto. Al eliminar un defecto
Siga las siguientes instrucciones en el siguiente orden.
El cambio de algunas partes por unos nuevos solo en
casos extremos, los cuales no debe producirse bajo
condiciones de manejo normales de una pipeta
Si en la punta quedan las gotas del líquido.
Posible problema Demasiado rápido vaciado de la
punta.
Solución Disminuya la velocidad de presión
del botón pulsador.
Posible problema Aumento de humidificación de la
punta causado por su múltiple uso.
Solución Cambie la punta por una nueva.
Si en el líquido tomado con la punta aparecen las bur-
bujas de aire.
Posible problema Poca profundidad de inmersión de la
punta.
Solución
Hunda la punta a una profundidad
mayor, de acuerdo a las instrucciones
Posible problema Débil colocación de la punta en el
cuerpo de la pipeta.
Solución Fíjela mejor.
Posible problema Punta deteriorada o utilizada muchas
veces.
Solucion Cámbiela por una nueva.
La pipeta toma el líquido de una manera incorrecta o
el líquido sale goteando de la punta.
Posible Problema Débil colocación de la punta en el
cuerpo de la pipeta.
Solución Fíjela mejor.
Posible problema Tuerca de conexión floja (fig. 3F). en
los modelos AP-2 al AP-1000
Solución Ajuste la tuerca de conexión.
Posible problema Superficie del cuerpo rota o rayada.
Solución
Retire el expulsor, afloje la tuerca de
conexión, verifique el cuerpo y el pi-
stón de la pipeta. Reemplace los
elementos deteriorados (ver apartado
29 30
Temperatura [°C] Presión [kPa]
95,0 101,3 105,0
20
21
22
23
24
25
1,0028
1,0030
1,0032
1,0034
1,0037
1,0039
1,0029
1,0031
1,0033
1,0035
1,0038
1,0040
1,0029
1,0031
1,0033
1,0036
1,0038
1,0040

ESPA¡OL
12) y vuelva a montar la pipeta ajus-
tando la tuerca de conexión. En las
pipetas AP-2, AP-10 y AP-20, si el
cuerpo está dañado, puede estarlo
también el pistón. Reemplace los
ele-
mentos deteriorados (ver apartado
12) y vuelva a montar la pipeta ajus-
tando la tuerca de conexión. Para
retirar el expulsor en el caso de las
pipetas AP-5000 y AP-10ML hay que
retirar el botón del expulsor
(fig. 3N) y
para desatornillar el expulsor
se dará
vuelta al destornillador en el sentido
contrario al de las manecillas de un
reloj.
Posible daño
Deterioro del pistón o la junta a causa
de la medición prolongada de líquidos
agresivos.
Solución Desmonte la pipeta como fue indica-
do arriba. Reemplace el pistón, la
junta y el O-ring (ver apartado 12).
Lave el interior del cuerpo con agua
destilada.
Engrase la junta y el O-ring con grasa
adjunta a cada pipeta.
El reemplazo del pistón requiere una
recalibración de la pipeta.
NOTA: En las pipetas AP-2,
AP-10 hay que engrasar las piezas
uniformemente y utilizando una
cantidad mínima de la grasa.
Problema La pipeta esta Mal ensamblado.
Solución Desmonte la pipeta y móntela
nuevamente siguiendo el correcto
orden del montaje (fig. 3).
Problema Falta de la grasa en las piezas de
hermeticidad.
Solución Retire el expulsor. Afloje la tuerca de
conexión, retire el cuerpo, el pistón,
la junta y el O-ring. Lave las piezas
sacadas con agua destilada y séquelas.
Engrase un poco las superficies
interiores de la junta y del O-ring con
la grasa adjunta a cada pipeta. Monte
la pipeta en un orden contrario a su
desmontaje.
Problema
Contaminación del interior de la pipeta
causado por una prolongada toma de
los líquidos químicamente agresivos
o bien la humidificación del interior
de la pipeta.
Solución
Retire el expulsor. Afloje la tuerca de
conexión, retire el cuerpo, el pistón, la
junta y el O-ring. Lave las piezas
sacadas con agua destilada y séquelas.
Engrase un poco las superficies
interiores de la junta y del O-ring con
la grasa. Vuelva a montar la pipeta.
Al detectar el aumento de la fuerza de pipeteo, lo que
puede ocurrir después de haber realizado muchas
veces la esterilización en autoclave:
Solución Retire el expulsor. Afloje la tuerca de
conexión, retire el cono, el pistón, la
junta y el O-ring. Lave las piezas
sacadas con agua destilada y séque-
las. Engrase un poco la superficie
interior de la junta y del O-ring con la
grasa que acompaña a cada pipeta.
Monte la pipeta en un orden
contrario a su desmontaje.
NOTA: Todas las piezas de la pipeta
son autoclavables. Ver el apartado
10. Los cuerpos de las pipetas 5000
y 10000 se esterilizarán sin filtro.
Si el procedimiento arriba descrito no eliminase el
funcionamiento incorrecto de la pipeta hay que enviarla
al servicio técnico AXYPET. Antes de enviar la pipeta al
servicio técnico, asegúrese que la misma no esté conta-
minada con sustancias químicas agresivas, radioactivas
o microbiológicas que puedan ser peligrosas durante el
transporte y la reparación. Si es posible, limpie la pipeta.
10 – LIMPIEZA Y ESTERILIZACIÓN
Limpieza:
Las superficies exteriores del botón pulsador, el botón del
expulsor, el mango y el tornillo de calibración pueden
limpiarse con un tapón de algodón empapado de alcohol
31 32

isopropílico. Las demás piezas desmontables pueden ser
lavadas con agua destilada o alcohol isopropílico.
Esterilización:
Podemos esterilizar la pipeta entera en autoclave a la
temperatura de 121°C durante 20 minutos. Después de
esterilizar la pipeta, ésta debe ser secada y enfriada hasta
alcanzar la temperatura de ambiente.
Se recomienda:
- Esterilizar las pipetas en un autoclave con la fase del
vacío preliminar y secado,
- Antes de la esterilización aflojar un poco la tuerca de
conexión en las pipetas AP-2-AP-1000, y en las pipetas
AP-5000 y AP-10ML aflojar un poco el cuerpo. Después
de la esterilización fijar de nuevo estas piezas.
- Antes de la estirilización colocar el mangusto de freno
en la posición baja.
Con la correcta explotación y el adecuado procedimiento
de la esterilización en autoclave no cambia la repetibilidad
de los resultados obtenidos. Sin embargo puede ocurrir
un pequeño cambio de la precisión de la dosificación,
entonces se recomienda:
- verificar la calibración de las pipetas después de la 1er,
3er y 5ta esterilización en autoclave y luego cada 10
ciclos de esterilización durante la explotación de la pipeta.
Atención: Los cuerpos de las pipetas 5000 y 10000 se
esterilizarán sin filtro.
ESPA¡OL
11 - JUEGO DE PIPETAS Y ACCESORIOS
Kit de Pipeta:
Las pipetas están disponibles con Kit Incluido:
•Pipeta
•Manual de usuario
•Llave de calibración
•Espaciador para la regulación del expulsor
(para las pipetas AP-2 y AP-1000)
•Abertura del expulsor
(para las pipetas AP-2, AP-10, AP-5000,
AP-10ML)
•Etiqueta de Identificación
•Filtros (para las pipetas AP-5000, AP-10ML)
•Lubricación
•Anillos de identificación de color
•Botón del expulsor del lado derecho
Accesorios:
Modelo
TF-300-R-S
TF-300-R-S
TF-20-R-S
TF-50-R-S
TF-100-R-S
TF-200-R-S
TF-350-R-S
TF-1000-R-S
T-300-R
T-300-R
TR-222-C-R
TR-222-C-R
TR-222-C-R
TR-222-C-R
TR-333-C-R
T-1000-C-R
T-5000-C*
T-10ML-C*
AP-2
AP-10
AP-20
AP-50
AP-100
AP-200
AP-250
AP-1000
AP-5000
AP-10ML
T-300-R-S
T-300-R-S
TR-222-C-R-S
TR-222-C-R-S
TR-222-C-R-S
TR-222-C-R-S
TR-333-C-R-S
T-1000-C-R-S
Puntas esteriliza-
das en la caja
Núm. de catálogo
Puntas en la caja
Núm. de catálogo
Puntas con filtro
en la caja
Núm. de catálogo
33 34

3635
Núm. de catálogo Descripción
AP-ASD Soporte acrílico
AP-CSD Soporte giratorio
AP-IDR Anillos de identificación de color
AP-LHEB Botón del expulsor del lado izquierdo
* Puntas en bolsas
Puntas Micro,
0.2-10 μl, Incoloras
TF-300-R-S
Puntas Micro con filtro,
0.2-10 μl, Incoloras
Puntas de referencia,
1-200 μl, Incoloras
TF-20-R-S
Puntas con filtro,
1-20 μl, Incoloras
TF-50-R-S
Puntas con filtro,
1-50 μl, Incoloras
TF-100-R-S
Puntas con filtro,
1-100 μl, Incoloras
TF-200-R-S
Puntas con filtro,
1-200 μl, Incoloras
TF-350-R-S
Puntas con filtro,
1-300 μl, Incoloras
TF-1000-R-S
Puntas con filtro,
100-1000 μl, Incoloras
Puntas de referencia,
1-250 μl, Incoloras
Puntas,
100-1000 μl, Incoloras
Puntas Macro,
1-5 ml, Incoloras
Puntas Macro,
1-10 ml, Incoloras
T-300-R T-300-R-S
TR-222-C-R-STR-222-C-R
TR-333-C-R TR-333-C-R-S
T-1000-C-R-ST-1000-C-R
T-5000-C*
T-10ML-C*
Modelo
Puntas en la caja
Núm. de catálogo
Puntas esterili-
zadas en la caja
Núm. de catálogo
Puntas con filtro
en la caja
Núm. de catálogo
Descripción
ESPA¡OL
12 - PIEZAS DE REPUESTO
Ver fig. 3, 4, 5, 6:
A: Botón pulsador A1: Botón A2: Tornillo
B: Volante del ajuste de volumen
C: Cuerpo
D: Expulsor de puntas
F: Tuerca de conexión
G: Pistón
H: Espaciador
I: O-Ring
J: Junta de Teflón
K: Llave de calibración
L: Filtro
M: La abertura del expulsor
N: Botón del expulsor
P: Anillo de identificación de color
S: Manguito del freno
Estos repuestos pueden solicitarse al representante de
AXYPET, detallando el modelo de pipeta y el nombre del
repuesto.
Se puede establecer el contacto
con la oficina local de AXYPET a través de la página web:
www.axygen.com/axypet
Atención: Siempre que se cambie el émbolo se
calibrará la pipeta de acuerdo con lo señalado en
el apartado 8.
Todos los derechos reservados. Los productos mencionados en el pre-
sente manual se hallan disponibles dentro del campo limitado y se
someten a las modificaciones técnicas. Los errores se encuentran per-
misibles.
AXYGEN reserva el derecho a mejorar o modificar sus productos sin
aviso previo.
This manual suits for next models
19
Table of contents
Languages:
Other Axygen Laboratory Equipment manuals
Popular Laboratory Equipment manuals by other brands

Selecta
Selecta GRAS N 2p instruction manual

Lauda
Lauda H 2 P operating instructions

Molecular Devices
Molecular Devices SpectraMax iD3 user guide

GE
GE ImageQuant LAS 4000 Original instructions

Showa Denko
Showa Denko Shodex IC SI-50 4E Operation manual

De La Rosa Research
De La Rosa Research 31202A user guide