Instruction Manual | 5
3.5 Sealing a Plate
Based on the type of seal and plate being used, select the time and temperature using the Mode button and control knob.
Consult the seal manufacturer for recommended settings. If the plate you are using will require an adapter, place it into
the recessed area in the middle of the drawer. This will prevent the adapter from shifting position during sealing.
Next, position your plate on top of the adapter or directly in the drawer. Confirm that the plate is centered and flat. Then,
lay the thermal seal on top of the plate, being sure that it is centered.
NOTE: Make sure the seal is placed with the sealing side down on the plate. If the seal is placed upside down, it will stick
to the hot platen, and this will require cleaning of the platen (see Accessing and Cleaning the Heating Platen).
Once the thermal seal is placed, place the seal frame on top to
prevent the seal from shifting position. Depending on the settings
chosen, the unit may require some time before the heating platen has
reached the desired temperature. After the settings are entered and
the status light is green, the unit is ready for sealing.
Keep hands and fingers clear of the drawer, and press the Seal button.
The drawer will close automatically, the plate will be sealed, and the
drawer will open for removal of the seal frame and plate.
Sealing a Plate
1. Set the Sealing temperature and time.
2. Insert the Adapter (if required).
3. Place the plate in the drawer.
4. Place the seal on top of the plate.
5. Place the sealing frame on top of the seal.
6. Press Seal when the light is green – drawer will close, seal the
plate, and drawer will open automatically.
7. Remove the sealing frame.
8. Remove the sealed plate.
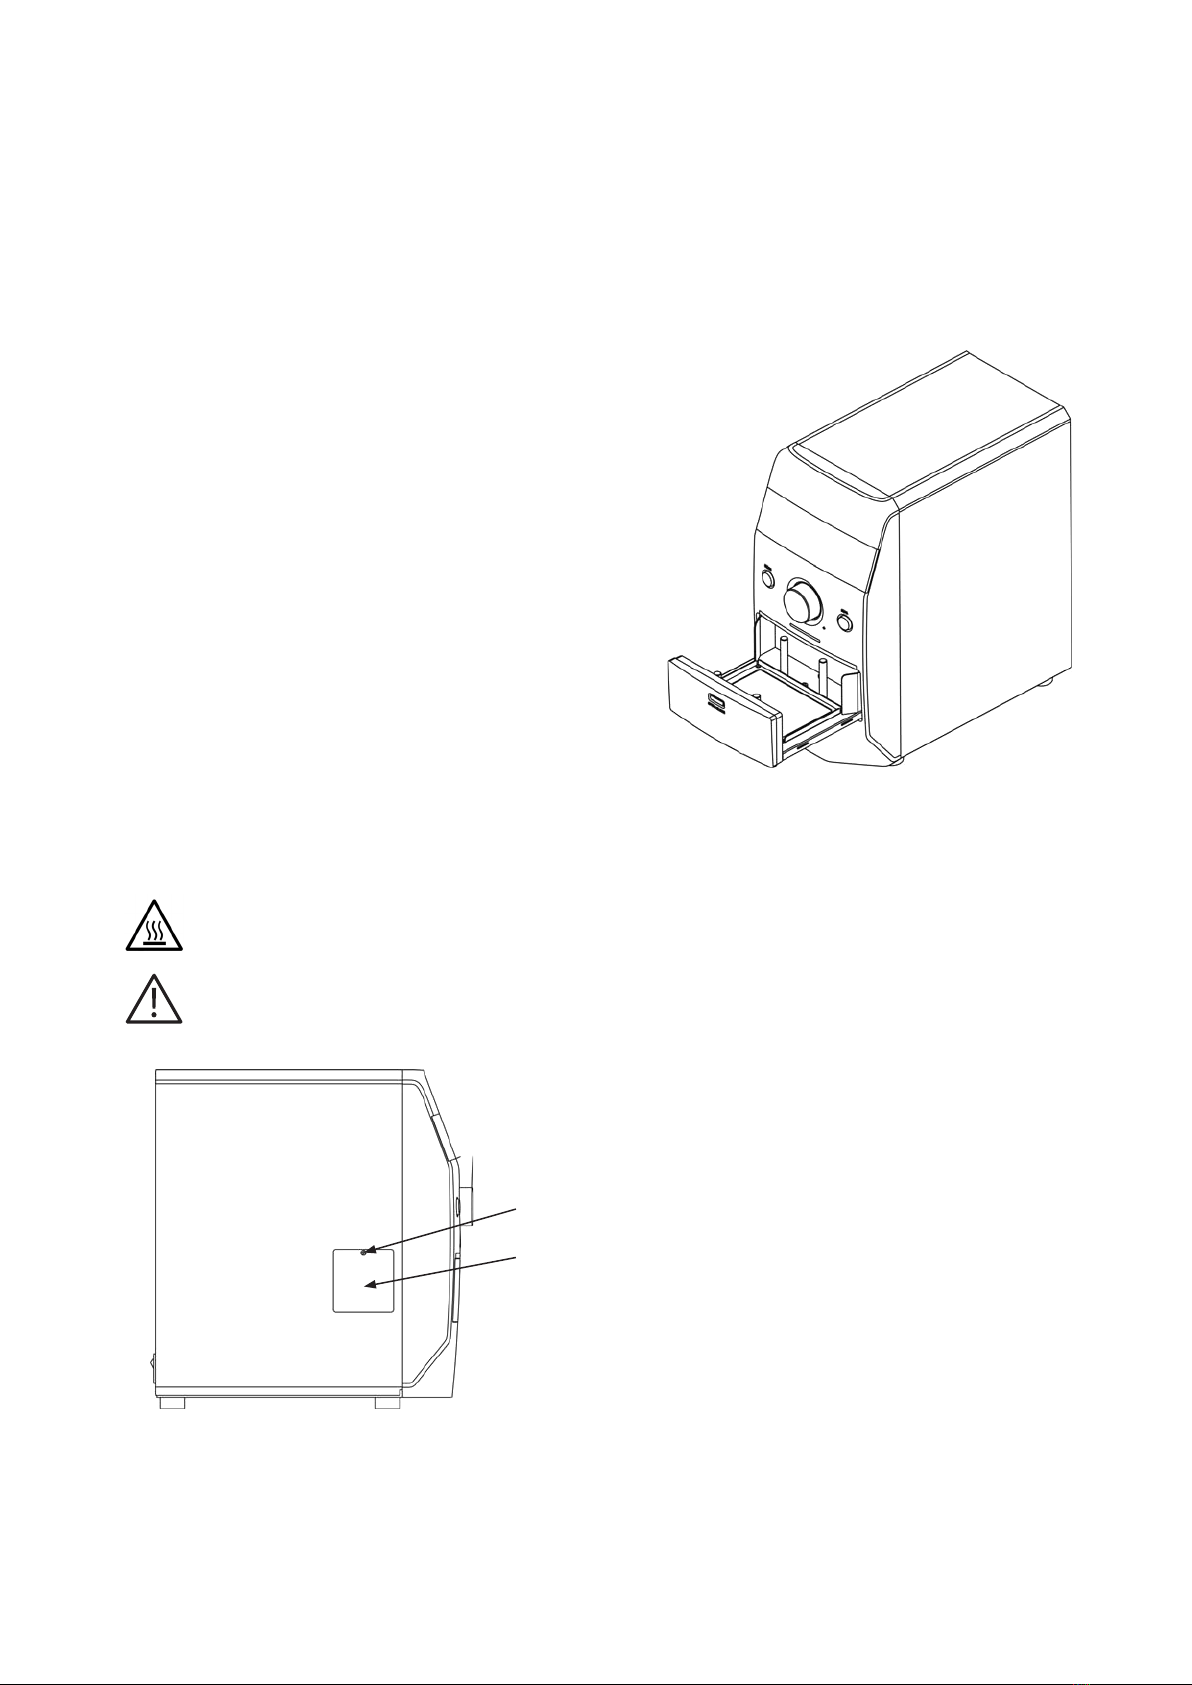
3.6 Accessing and Cleaning the Heating Platen
In the event that a seal becomes stuck to the heating platen, the following steps will allow you to clean the platen.
CAUTION: Be sure to turn the unit Off, and unplug it from the power source before attempting to clean the
platen.
CAUTION: The heating platen can reach temperatures in excess of 190°C. Allow the unit to cool for at least
1 hour before attempting to clean the platen.
Cleaning the Heating Platen
1. Open the drawer of the unit.
2. Power the unit down and unplug it.
3. Allow to cool for at least 1 hour.
4. Using a Phillips head screwdriver, remove the retaining
screw for the access door.
5. Remove the access door.
6. Clean the platen by hand using a plastic putty knife. Alcohol
may be used to remove any residue. NOTE: Do not use a metal
tool (i.e., screwdriver) to scrape the platen as this could gouge
the surface.
7. Replace the access door and screw.