manuals.online logo
Brands
  1. Home
  2. •
  3. Brands
  4. •
  5. Bachmann
  6. •
  7. Toy
  8. •
  9. Bachmann Branchline Class 03 User manual

Bachmann Branchline Class 03 User manual

Class 03 Diesel Shunter
Owner’s Information
Many thanks for purchasing one of our Bachmann Branchline Class 03 Diesel Shunter Locomotives. A lot of care
was taken producing your model and we hope you enjoy it for many years to come.
Although our models are highly
detailed and ready to run straight
from the box we also supply
optional accessories to be tted by
the owner if they wish.
Welcome
1. Accessories
Please note: This model has been designed to run on curves of no less than 2nd Radius (438mm). We recommend
that you don’t use anything smaller as this may result in the model derailing.
g.1
E3136 Instruction Sheet
Buffer Beam Plate (Fig.1)
Remove the Standard Coupling
from its mount and push t the
Buffer Beam Plate into place.
There’s a corresponding part for
the cab end of the locomotive too.
It is necessary that this Locomotive is ‘run-in’ to allow the mechanism and gears to settle. This requires the model
to be run without a load (wagons, coaches, etc.) for 30 minutes in each direction at half speed.
2. Running-in
All Bachmann Branchline Locomotives are supplied ready lubricated and can be used straight from the box.
Over time your locomotive will require some additional lubrication, when will depend on the frequency of use
and storage, so please inspect your model on a regular basis.
All moving parts of the connecting rods will occasionally need oiling. Apply a single drop of oil to the areas
indicated in pink below (g.2) and to the corresponding points on the other side.
3. Lubrication
Please note: A plastic compatible
lubricant is required. Suitable
products from both the Bachmann
Trains & Woodland Scenics ranges
are available from your local
Bachmann retailer.
g.2
Front of
Motor Bearing
E3136 Instruction Sheet 2
The motor bearing comes ready lubricated, however depending on frequency of use over time they may
require further lubrication, To access the motor bearings a small amount of disassembly is required and is shown
below.
1. To remove the body rst remove the Standard
Couplings and the Coupling Mounts. These can be
easily prised out with a small athead screwdriver.
This will reveal the two screws that secure the body
to the chassis (gs.4 & 5).
g.8
E3136 Instruction Sheet
3
Motor Bearing Lubrication
Lubrication - Continued.
Long Screw
Short Screw
Long Screw
Short Screw
g.4
g.5
g.3
2. Remove
the body
shell from the
Chassis taking
care not to
damage any
of the details
(g.6).
3. Prise the Speaker Chamber
from its securing points and move
out of the way. This will reveal
the rear of the Motor Bearing, if
it appears dry apply one drop of
lubricant (g.7).
4. To access the front of the
Motor Bearing remove the three
screws that hold the Worm Gear
& Motor Bearing Cover in place
(g.8).
5. Lift Motor Bearing Cover taking
care not to damage the wires.
This will expose the front of the
Motor Bearing, if it appears dry
apply one drop of lubricant
(g.9).
If the driving wheel axles appear
dry and no lubricant is visible
(where shown pink in g.3), it
would be advisable to lubricate
your model.
Rear of
Motor Bearing
Speaker
Chamber
Securing point
g.6
g.7
g.9
Please note: The screws that
secure the body to the chassis are
different lengths, the short screw is
for the Bonnet end and the long
screw is for the Cab end.
Digital Command Control (DCC) allows for greater functionality and control over the models on your layout:
such as the simultaneous control of speed & direction of multiple Locomotives and enables the use of DCC
controlled track, points and other DCC Decoder tted accessories. DCC also allows the addition of DCC Sound
which brings a whole new level of realism to your model railway.
4. Fitting a DCC Decoder
Next18 DCC
Blanking Plate
Next18 DCC
Decoder or
Sound Decoder
g.10
1. Remove the body shell as
shown previously (gs.4, 5 & 6)
2. Remove the Next18 Blanking
Plate and push t your Next18
DCC Decoder (g.10)
E3136 Instruction Sheet - 1907 4
Selected spare parts are available from the Bachmann Europe Service Department. For further information and
enquiries please contact the Service Department directly by email on [email protected] or by
phone 01455 245575.
6. Spare Parts
7. Warranty
This product has a Warranty for 12 months from the date
of purchase against faulty materials or workmanship
subject to the following conditions. During this period
such defects that occur will be repaired or defective
parts replaced free of charge.
1. This Warranty applies only if the item was purchased
from an authorised retailer of Bachmann Europe plc
(‘Bachmann’) within the United Kingdom, European
Union & European Economic Area. This Warranty does
not confer any rights other than those expressly set out
above and does not cover any claims for consequential
loss or damage. The Warranty is offered as an additional
benet and does not affect your statutory rights as a
consumer.
2. For claims under this Warranty, in the rst instance the
product must be returned to the retailer with evidence
of the purchase date in the form of retailer receipt/
invoice accompanied by a letter or Service Request
form setting out the date and place of purchase, giving
a brief explanation of the problem that has led to the
claim. It is essential that the claim reach the retailer
on or before the last day of this Warranty period. Late
claims will not be considered.
3. This Warranty is only available to the original retail
purchaser of this product and is non-transferable.
4. The Warranty does not extend to cover damage
resulting from misuse or careless handling, accidental
damage, wear and tear, or use on a voltage supply
other than that stamped on the product.
5. The Warranty may be considered void if repairs have
been attempted other than by Bachmann staff.
6. The Warranty is on the original product in its entirety
and does not extend to individual components
removed from the product. In respect of train sets the
warranty applies to motorized units and controllers only.
7. If Bachmann chooses to replace a product it will be
with the nearest appropriate model of its choice.
8. Bachmann reserves the right to decline service to
any model that has been tted with a decoder after
manufacture.
9. Bachmann will not be held responsible for damage
to or loss of an after market decoder tted to a model
submitted for service under the Warranty.
10. The tting of a Bachmann decoder with a current
Warranty shall not be deemed to change the position
regarding a product that is otherwise outside its own
Warranty. It may be necessary to change decoder
settings during service.
11. Bachmann’s liability under this Warranty will in no
case exceed the price paid for the product as originally
manufactured.
Bachmann Europe Plc
Moat Way, Barwell, Leicestershire, LE9 8EY, England.
www.bachmann.co.uk
5. DCC Sound - Installing DCC Sound
The following equipment is required for installing DCC
Sound.
.1 x Next18 DCC Sound Decoder (pre-programmed
with the relevant sound le of your choice).
.1 x Speaker 8 x 12mm.
1. Remove the body shell as shown previously
(gs.4, 5 & 6)
2. Prise the Speaker Chamber from it’s securing
points on Chassis and unclip it from the PCB.
3. If your speaker doesn’t come with a self
adhesive frame then attach it to the mount using a
thin application of PVA glue. Please ensure that the
speaker contacts align to the contact points on the
PCB. (g.7)
4. Clip the Speaker Chamber back onto the small
PCB and t to chassis. (g.7)
8 x 12mm
Speaker Chamber
Securing Points
PCB
PVA Glue
8 x 12mm
Speaker
3.
4.
Speaker
Contact
Points
Speaker
Contacts
g.7
Please note: It’s recommended that the DCC
Decoder and Speaker are both from the same
manufacturer and the speaker specications are
compatible with the decoder. Please consult your
retailer for advice.
Other Bachmann Toy manuals

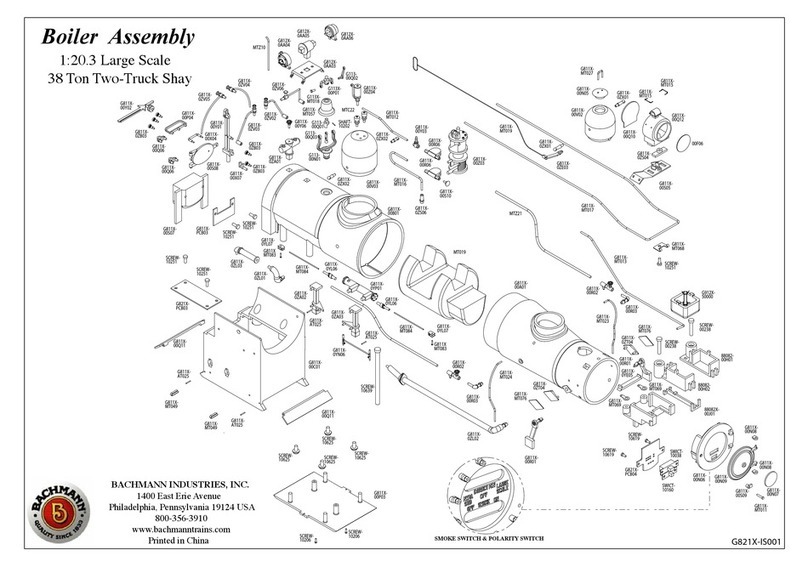
Bachmann 38 Ton Two-Truck Shay User manual

Bachmann

Bachmann 38 Ton Two-Truck Shay User manual

Bachmann Spectrum User manual

Bachmann

Bachmann Spectrum User manual

Bachmann Williams FA-1 User manual

Bachmann

Bachmann Williams FA-1 User manual

Bachmann Williams NW-2 User manual

Bachmann

Bachmann Williams NW-2 User manual

Bachmann Liliput L133940-59 User manual

Bachmann

Bachmann Liliput L133940-59 User manual

Bachmann Williams SD-90 User manual

Bachmann

Bachmann Williams SD-90 User manual

Bachmann MR 1532 (1P) Technical manual

Bachmann

Bachmann MR 1532 (1P) Technical manual

Bachmann NER E1 Technical manual

Bachmann

Bachmann NER E1 Technical manual

Bachmann Streamlined K4 User manual

Bachmann

Bachmann Streamlined K4 User manual

Bachmann Williams EP-5 User manual

Bachmann

Bachmann Williams EP-5 User manual

Bachmann Williams FP-45 User manual

Bachmann

Bachmann Williams FP-45 User manual

Bachmann Williams GENESIS User manual

Bachmann

Bachmann Williams GENESIS User manual

Bachmann Williams CLASSIC GG-1 User manual

Bachmann

Bachmann Williams CLASSIC GG-1 User manual

Bachmann E-Z TRACK User manual

Bachmann

Bachmann E-Z TRACK User manual

Bachmann On30 Davenport Gears Operating instructions

Bachmann

Bachmann On30 Davenport Gears Operating instructions

Bachmann Williams GP-38 User manual

Bachmann

Bachmann Williams GP-38 User manual

Bachmann Williams GS-4 User manual

Bachmann

Bachmann Williams GS-4 User manual

Bachmann Williams E7A User manual

Bachmann

Bachmann Williams E7A User manual

Bachmann Williams J CLASS LOCOMOTIVE & TENDER User manual

Bachmann

Bachmann Williams J CLASS LOCOMOTIVE & TENDER User manual

Bachmann Williams F3-A User manual

Bachmann

Bachmann Williams F3-A User manual

Bachmann Williams O-27 User manual

Bachmann

Bachmann Williams O-27 User manual

Bachmann Williams GP-9 User manual

Bachmann

Bachmann Williams GP-9 User manual

Bachmann Daisy User manual

Bachmann

Bachmann Daisy User manual

Bachmann Williams SD-45 DIESEL LOCOMOTIVE User manual

Bachmann

Bachmann Williams SD-45 DIESEL LOCOMOTIVE User manual

Popular Toy manuals by other brands

Mattel Fisher-Price LIL Laugh & Learn L7336 quick start guide

Mattel

Mattel Fisher-Price LIL Laugh & Learn L7336 quick start guide

Faller Alsfeld manual

Faller

Faller Alsfeld manual

Smyths Toys LITTLE Chef DELUXE 200362 manual

Smyths Toys

Smyths Toys LITTLE Chef DELUXE 200362 manual

MGA Entertainment Moxie Girlz Magic Hair Bendy Braids manual

MGA Entertainment

MGA Entertainment Moxie Girlz Magic Hair Bendy Braids manual

Disney PIXAR DREAM SKETCHER FINDING NEMO Guide

Disney

Disney PIXAR DREAM SKETCHER FINDING NEMO Guide

Little Tikes 172878E3 Assembly guide

Little Tikes

Little Tikes 172878E3 Assembly guide

LEGO Wall-E 21303 manual

LEGO

LEGO Wall-E 21303 manual

Fisher-Price Scooter Bug instructions

Fisher-Price

Fisher-Price Scooter Bug instructions

Trix h0 series manual

Trix

Trix h0 series manual

goliath Doggie Doo CORGI instructions

goliath

goliath Doggie Doo CORGI instructions

WowWee Jeobot user manual

WowWee

WowWee Jeobot user manual

Mega Bloks NEO MACHINES Scout 6392 instructions

Mega Bloks

Mega Bloks NEO MACHINES Scout 6392 instructions

Eduard Sabre F.4 wheels Assembly instructions

Eduard

Eduard Sabre F.4 wheels Assembly instructions

Horizon Hobby Valiant 10cc instruction manual

Horizon Hobby

Horizon Hobby Valiant 10cc instruction manual

Eduard Su 100 manual

Eduard

Eduard Su 100 manual

Mattel T4552 instructions

Mattel

Mattel T4552 instructions

LGB 27631 manual

LGB

LGB 27631 manual

Lionel VISION Line owner's manual

Lionel

Lionel VISION Line owner's manual

manuals.online logo
manuals.online logoBrands
  • About & Mission
  • Contact us
  • Privacy Policy
  • Terms and Conditions

Copyright 2025 Manuals.Online. All Rights Reserved.