2
(EN) DESCRIPTION
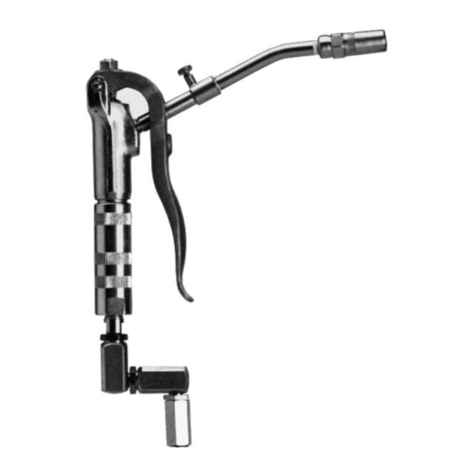
Grease gun for use with all types of greases. The gun is
connected via a hose or a hose reel to a high-pressure
grease line. The gun includes an outlet tube, 4-jaw
hydraulic connector and Z-swivel.
Max. working pressure 7,250 psi (500 bar).
(EN) INSTALLATION AND OPERATION
Connect the hose to the inlet of the gun and fasten it.
To begin to use the grease gun, connect the air to the
pump and maintain the trigger of the gun pressed until
grease comes out of the outlet.
(ES) DESCRIPCIÓN
Pistola de engrase para todo tipo de grasas. La pis-
tola se conecta mediante manguera y/o enrollador de
manguera a una línea de distribución de grasa a alta
presión. La pistola incluye una salida rígida, boquilla
hidráulica de 4 grapas y rótula en Z.
Máxima presión de trabajo 500 bar (7,250 psi).
(ES) INSTALACIÓN Y FUNCIONAMIENTO
Conecte la manguera a la entrada de la pistola y apriételo
bien. Para comenzar a usar la pistola, conecte el aire a la
bomba de grasa y mantenga la pistola con el gatillo presio-
nado hasta que la grasa comience a salir por la boquilla.
(EN) TROUBLESHOOTING
SYMPTOM POSSIBLE CAUSE REMEDY
Grease comes out without pulling the
trigger.
Dirt in the valve or damaged parts in
the valve.
Disassemble and clean the valve,
replace in case of damage.
Grease does not come out when the
trigger is pulled.
The valve does not open because of
a badly adjusted screw (15).
Adjust the screw (15).
(ES) ANOMALÍAS Y SOLUCIONES
SÍNTOMA POSIBLE CAUSA SOLUCIONES
La grasa sale sin tener el gatillo
apretado.
Suciedad en la válvula o válvula
dañada.
Desmonte y limpie la válvula,
reemplace en caso de estar dañada.
No sale grasa al apretar el gatillo. La válvula no se abre debido a un mal
ajuste del tornillo de ajuste (15).
Ajuste el tornillo de ajuste (15).
(EN) SERVICE
ATTENTION: Before starting any kind of maintenance
or repairing of the grease gun, disconnect the
compressed air supply to the pump.
1. Remove the pin (14) that holds the trigger (17), slide
aside the trigger and unscrew the outlet adapter (8).
Remove the opening shaft (12). Unscrew and
remove the inlet adaptor (1) and take out the valve
assembly (3-13).
NOTE: The parts are sealed and tightened by
locking uid and can be quite hard to reassemble.
2. Fasten this assembly in a vise by the upper valve
body (9) and unscrew the lower valve body (3).
ATTENTION: In order to avoid the inside parts falling
out, separate the two parts carefully.
Look for dirt and foreign materials in the valve seat
(5-7). Clean the inner parts carefully and replace if
damaged.
3. When assembling, mount the chamfered side of
the seat (7) against the ball (6). Seal the connection
between the upper (9) and lower valve body (3) and
between the valve assembly (3) and the adapter (1).
(ES) MANTENIMIENTO
ATENCIÓN: Antes de comenzar cualquier tipo de
mantenimiento o reparación de la pistola, desconecte
el aire comprimido de la bomba.
1. Retire el perno (14) que sujeta el gatillo (17), deslice
el gatillo y desenrosque el adaptador de la salida (8).
Retire el eje de apertura (12). Desenrosque y retire
el adaptador de entrada (1) y saque el conjunto de
válvula (3-13).
NOTA: las piezas están selladas con uido sellante por
ello puede resultar trabajoso montar de nuevo el kit.
2. Fije este conjunto mediante tornillo por la parte
superior de la válvula (9) y desenrosque la parte
inferior de la válvula (3). ATENCIÓN: Para evitar que
los componentes internos se caigan, separe las dos
partes cuidadosamente. Busque suciedad o cuerpos
extraños en el asiento de la válvula (5-7). Limpie las
partes internas cuidadosamente y reemplace lo que
pueda estar dañado.
3. Durante el montaje, coloque el lado achaanado del
asiento (7) contra la bola (6). Selle la conexión entre
la parte superior de la válvula (9) y la parte inferior
(3) y entre el conjunto de válvula y el adaptador (1).


