manuals.online logo
Brands
  1. Home
  2. •
  3. Brands
  4. •
  5. barclaycard
  6. •
  7. Payment Terminal
  8. •
  9. barclaycard Fixed User manual

barclaycard Fixed User manual

Fixed
Quick set-up guide and fast facts guide
payment acceptance
This document is available in large print, Braille and audio by calling 0844 811 6666.*
*For BT business customers, calls will cost no more than 5.5p per minute, minimum call charge 6p (current at July 2013). The price on non-BT
phone lines may be dierent. Calls may be monitored and/or recorded.
Barclaycard is a trading name of Barclays Bank PLC. Barclays Bank PLC is authorised by the Prudential Regulation Authority and regulated by
the Financial Conduct Authority and the Prudential Regulation Authority (Financial Services Register Number: 122702) and adhere to the Lending
Code which is monitored and enforced by the Lending Standards Board. Registered in England No: 1026167. Registered Oce: 1 Churchill Place,
London E14 5HP.
BCD114569FCTB03. Created 07/13. 33269BD.
Problems with installation of Fixed
Terminal display prompt
Contacting GEMS Line
Disconnected Check
Telephone Line Press Clear
to Redial
(TELEPHONE CONNECTION METHOD ONLY)
Possible causes
The telephone cable is not
plugged into the socket.
What to do
Connect the telephone cable and then press the yellow
CLEAR button to continue. If the problems persist,
connect your telephone to the socket and check
whether it has a dialling tone. If there is no tone then the
fault might be with your socket and not the terminal.
Press the green ENTER button to select “Yes” and
restart the installation process. After three attempts the
terminal will prompt you to contact the Helpdesk. Do
not select “No” as this will ask for a function code – this
should only be used under direction of the Helpdesk.
Unable to connect (with print out)
Error code 3
(IP CONNECTION METHOD ONLY)
Error code 4
(IP CONNECTION METHOD ONLY)
Error code 24
(IP CONNECTION METHOD ONLY)
81
(IP CONNECTION METHOD ONLY)
Possible causes
Timeout (non-specic)
DNS resolution failure
What to do
– Check to ensure Ethernet cable is connected
correctly into terminal and modem/network router
– Power terminal o and on
– Check to ensure modem/port/network is working
– Ensure you have internet connectivity (e.g. try
checking your emails)
– Ensure DHCP is enabled on your network
– Ensure relevant ports are opened for incoming
and outgoing trac
– Ensure relevant URLs rules are enabled on
your network
Common prompts and troubleshooting
Terminal display prompt
Call Auth Centre
Possible causes/action
Assistance required.
What to do
Call Helpdesk
Faulty Card
Not Authorised
Referral B
Assistance required.
The card is not inserted into the PIN
pad or has been swiped incorrectly.
The card issuer has declined to
authorise the transaction.
Assistance required.
Call the Authorisation Centre on the number displayed
by the terminal. Once you have spoken to the
Authorisation Centre, press the green ENTER button
and follow the prompts displayed by the terminal.
Please contact your Helpdesk on the number
displayed by the terminal.
Insert or swipe the card again. If the problem persists
press the green ENTER button and key the card details
(please refer to the relevant section of the user guide).
Ask the customer to pay by some other means and
press the yellow CLEAR button.
Call the Authorisation Centre on the number displayed
by the terminal. When your call is answered please
quote Referral B.
Another piece of equipment that shares the telephone
line may be in use e.g. fax machine. Check that the
terminal is plugged into the telephone line. Check there
is a dial tone on the telephone line.
Process the card as a Chip and PIN transaction.
Routine Check. Insert Or Swipe
(as seen on the terminal display)
Occasionally the card will require an
additional routine security check.
Installation Failed
Restart Install?
Enter = YES Clear = NO
Key in Function Code and
then press ENTER
There has been a problem with
the installation of your terminal.
Line In Use
(TELEPHONE
CONNECTION
METHOD ONLY)
The terminal cannot detect a
dial tone.
Useful numbers:
Authorisation: 0844 822 2000
Chargebacks: 01604 614012
American Express: 01273 675533
Diners: 0845 850 0195
– Once you have selected an acquirer, the terminal will
print a report detailing the last 20 transactions. If
there are more transactions the terminal will display
the CONTINUE prompt. If you want to continue,
press the green ENTER button again and the terminal
will print the next 20 transactions. (The CONTINUE
prompt may be displayed up to four times to produce
a log of the last 100 transactions.)
– The terminal will now provide you with the option to
print a transaction log for another acquirer. Repeat the
above steps as required.
– The terminal will automatically return to the
READY prompt.
Payment Security Data Security
Standards (PCI-DSS)
The Payment Card Industry Data Security Standards
(PCI-DSS) aect all businesses, from sole traders to
large corporations.
PCI DSS is mandatory and applies to all commercial
operations that store, process or transmit cardholder
data. It applies equally to manual processing and
storage of cardholder information as well as electronic
methods of processing and storage.
The use of a PCI-DSS compliant product or Payment
Service Provider helps reduce the scope of your
compliance obligations; however as a minimum you
or your head oce should complete the appropriate
annual Self Assessment Questionnaire or a Report of
Compliance from a Qualied Security Assessor.
For further information, see:
barclaycard.co.uk/business/accepting-payments/pci-dss
Banking
Banking must be carried out at the end of each
business day. Just follow these simple steps:
– At the READY prompt, press MENU button until the
system menu is displayed.
– Use the arrow button to select the “Totals” option
and when highlighted, press the green ENTER button
to select.
– The “End Of Day Banking” option will now be
highlighted. Press the green ENTER button.
– Swipe the Supervisor Card.
– The terminal will display “End Of Day Banking?” Press
the green ENTER button to select.
– The terminal will now give you two options. The rst
is the option to bank all by pressing the green ENTER
button. The second option is to bank by each acquirer
separately by pressing the yellow CLEAR button.
If you choose to bank by each acquirer you will need
to select “Yes” or “No” as required. Just press either
the green ENTER or the yellow CLEAR button at
each prompt.
– Your terminal may now dial out.
– Your terminal will now print an “End Of Day Banking”
report for your records.
How to print a transaction log
To help with reconciliation or to conrm the status of a
transaction, a log of the last 100 transactions can be
produced. Here’s how:
– At the READY prompt, press the MENU button until
the system menu is displayed.
– Using the button, select the “Select Function”
option and then press the green ENTER button.
–The terminal will prompt you to enter a function code.
Key in “16” and then press the green ENTER button.
– Swipe the Supervisor Card through the terminal.
– The terminal will now display an acquirer. If you wish
to print a transaction log for this acquirer press the
green ENTER button; if not press the yellow CLEAR
button and the next acquirer will be displayed.
Welcome How to install your
Fixed terminal
Your quick guide to the dierent
ways of using your Fixed terminal
Contents
– Fixed terminal.
– Combined reader.
– Power supply unit, specially designed for this
terminal and should not be used with any other
equipment.
– Phone cable, splitter and Ethernet cable.
– Supervisor and training cards.
– Card reader, thermal printer head/terminal
cleaners and paper roll.
– User guide.
Inside this box you will nd everything you need to set
up your Fixed terminal.
IMPORTANT information for IP/broadband users.
Do you have a standard ADSL/router congurations
similar to home broadband?
Yes? Then you should be able to “plug and play”
without needing to amend any network congurations.
Unsure? Then it may be useful to coordinate with your
IT department or Internet Service Provider (ISP) to check
the below:
DHCP (Dynamic Host Conguration Protocol) – DHCP
should be enabled on the router/modem as the terminal
uses dynamic IP and will not work using static IP.
MAC Address Blocking/Filtering – does your router/
modem use MAC address blocking/ltering? This usually
only applies to large/company networks. If MAC address
blocking is used on the network, the terminals’ MAC
address must be “Allowed” onto the network by your
IT Department.
Firewall Settings – if you have Firewall in place then it
may block the terminal from communicating with our
systems. For further information please contact our
Customer Service Team on 0844 811 6666.*
Connecting your equipment
IMPORTANT: Do not switch on the power at the mains
until you have followed the simple steps below:
1. Check that your combined reader has been pre-
connected to your Fixed terminal. If unconnected,
please contact Customer Services.
2. Connect the power cable (which is already connected
to the terminal) to the power supply unit and then to
the plug, both of which are in the box.
3. Put the plug into your power source.
4. Both a standard phone line cable and an Ethernet
cable are connected to your terminal. Please select
relevant cable and plug it into your telephone wall
socket or network router/network point as required.
5. Place the terminal in a clear area where the display
can be read and the keypad and card swipe are easily
accessible for your customers.
If you experience any problems during the installation
process, please contact Customer Services on
0844 811 6666.*
Please be near the terminal when you call and have the
following ready:
– Your Merchant Number as shown on your welcome
letter or on the plate of your manual imprinter
(if the terminal is installed this is shown on your
terminal display). You can keep a record of it here:
– Your Terminal Supervisor Card.
Chip & PIN transactions
– At the READY prompt, key in the amount and
press the green ENTER button.
– Cardholder inserts chip card into the
combined reader.
– The cardholder should enter their PIN number
into the combined reader and conrm by
pressing the green ENTER button.
– The cardholder should NOT remove the card
until prompted to do so or the transaction will
be void.
Follow the terminal prompts to complete
the transaction.
Chip & Signature transactions
– At the READY prompt, key in the amount
and press the green ENTER button.
– Insert cardholder’s chip card into the
card reader.
– When prompted, tear o the merchant
receipt and obtain cardholder signature.
– Remove the customer card from the card
reader and check signature.
Follow the terminal prompts to complete
the transaction.
Mail order/Telephone order
– Press MENU.
– Select the transaction type and press the
green ENTER button.
– Key in amount and press the green ENTER
button.
– Key in the customer’s card number and
press the green ENTER button.
– Key in expiry date and press the green
ENTER button.
Follow the terminal prompts to complete
the transaction.
Contactless transactions
Contactless transactions are currently
allowed only for sales up to £20.
– At the READY prompt, key in the amount and
press the green ENTER button.
– The cardholder should hold their card against
the contactless symbol showing on the
combined reader display (within 4cm).
– The terminal will “BLEEP” to acknowledge the
transaction and the row of LED lights
will ash.
If the card is removed too quickly a message will
appear on the display and the cardholder will be
asked to present the card again.
The terminal will only print a merchant receipt.
Press MENU if a cardholder copy is required.
To print a cardholder receipt, at the READY
prompt press the key and a customer receipt
will be printed. Press ENTER to return to the
READY prompt.
This should take about 5-10 minutes.
Before you start, please make sure you have your Merchant Number to hand. You’ll nd it on your welcome letter
or on the plate on your manual imprinter.
1. Once your terminal is powered up
the Connection Method menu will
be displayed. Using the arrow key,
select “Telephone” if using a standard
telephone line or “Ethernet” to connect
to your broadband router/network
point. Press the green ENTER button.
2. If you selected “Ethernet”, go to
point 5. If you selected “Telephone”,
your terminal will display “Terminal
Installation. Plug in Phone Line”. Make
sure your phone cable is securely
plugged into your phone line and
press the green ENTER button.
3. Your terminal will prompt
“Dial Prex Required”.
Option 1: If your terminal is connected
via a direct line, select “No” by pressing
the yellow CLEAR button.
Option 2: If your terminal is connected
to a switchboard/PABX, select “Yes” by
pressing the green ENTER button. If
you selected this option, key in the
number used to obtain an outside line
(this is usually a 9) followed by the
green ENTER button.
4. Your terminal will prompt: “Does
the Tel. Line have Call Waiting or
1571?” If your telephone line has
either of these services press the
green ENTER button. If not, press
the yellow CLEAR button and go
to point 6.
5. If you selected “Ethernet”, your
terminal will display “Terminal
Installation. Plug in Network Cable”.
Make sure your Ethernet cable is
securely plugged into your network
router/modem. Press the green
ENTER button.
6. Key in your Merchant Number and
press the green ENTER button.
7. Your terminal will now connect to
GEMS and display various
messages.
8. Your terminal will print a receipt
to show that the conguration
is complete.
9. Your terminal will now contact the
card companies for each of the card
types your terminal accepts and will
print another receipt to conrm
card acceptance.
10.Your terminal will then contact GEMS
again and the following message
will be displayed “Hardware Serial
Validation Required press ENTER”.
Press ENTER to continue.
11. Your terminal will then connect to
GEMS again to complete the terminal
installation.
12. Your terminal will now display
READY prompt and is ready for
you to use.
13.The terminal and combined reader
will display the Barclaycard logo. The
indicator on the top of the combined
reader will ash approximately every
5 seconds.
Connection Method
Telephone (PPP)
Local Network.
Terminal Installation
Plug in Phone Line
And press ENTER
Dial Prex Required
ENTER = Yes
CLEAR = No
Key in Number
used to get and
Outside Line
And press ENTER.
Does Tel. Line have
Call Waiting or 1571?
ENTER = Yes
CLEAR = No
Terminal Installation
Plug in Network
Cable
And press ENTER
Terminal Installation
Key in Merchant No
And press ENTER
Terminal Installation
Connecting to GEMS
Terminal Installation
Connecting to
<Aquirer name>
Please wait...
READY
MERCHANT NUMBER:
<Your Merchant No>
Other barclaycard Payment Terminal manuals

barclaycard Mobile User manual

barclaycard

barclaycard Mobile User manual

barclaycard Countertop User manual

barclaycard

barclaycard Countertop User manual

barclaycard 1-2-1 Portable User manual

barclaycard

barclaycard 1-2-1 Portable User manual

barclaycard B2784 User manual

barclaycard

barclaycard B2784 User manual

barclaycard takepayments A920 User manual

barclaycard

barclaycard takepayments A920 User manual

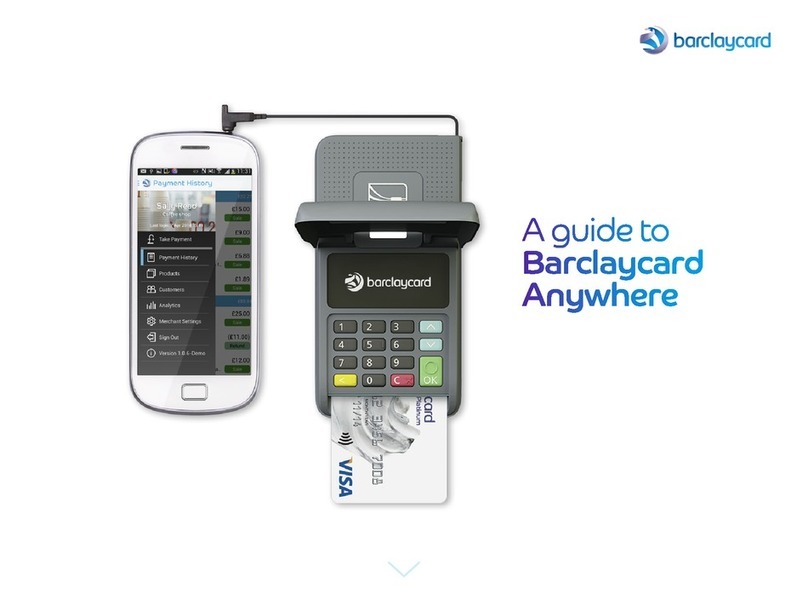
barclaycard Anywhere User manual

barclaycard

barclaycard Anywhere User manual

barclaycard 1-2-1 User manual

barclaycard

barclaycard 1-2-1 User manual

Popular Payment Terminal manuals by other brands

VeriFone V240m user manual

VeriFone

VeriFone V240m user manual

TD Freedom IV Merchant Guide

TD

TD Freedom IV Merchant Guide

Ingenico iCT250E user guide

Ingenico

Ingenico iCT250E user guide

AMOI H7 user manual

AMOI

AMOI H7 user manual

Hobex TELIUM IWL Manual guide

Hobex

Hobex TELIUM IWL Manual guide

Magtek DynaWave Installation and operation

Magtek

Magtek DynaWave Installation and operation

PAX D190 installation manual

PAX

PAX D190 installation manual

Magtek kDynamo Air Quick installation guide

Magtek

Magtek kDynamo Air Quick installation guide

LinkPoint 3000 Quick reference card

LinkPoint

LinkPoint 3000 Quick reference card

NBS Technologies NBS5500 user manual

NBS Technologies

NBS Technologies NBS5500 user manual

Pax Technology D210BT manual

Pax Technology

Pax Technology D210BT manual

dejavoo Z Series Quick reference guide

dejavoo

dejavoo Z Series Quick reference guide

VeriFone T650p user guide

VeriFone

VeriFone T650p user guide

NetPay Pax S900 Quick user guide

NetPay

NetPay Pax S900 Quick user guide

dejavoo Z Series Quick reference guide

dejavoo

dejavoo Z Series Quick reference guide

POSIFLEX FT-7715 user manual

POSIFLEX

POSIFLEX FT-7715 user manual

PAX A930 quick start guide

PAX

PAX A930 quick start guide

HCP TPC 15 user manual

HCP

HCP TPC 15 user manual

manuals.online logo
manuals.online logoBrands
  • About & Mission
  • Contact us
  • Privacy Policy
  • Terms and Conditions

Copyright 2025 Manuals.Online. All Rights Reserved.