manuals.online logo
Brands
  1. Home
  2. •
  3. Brands
  4. •
  5. dejavoo
  6. •
  7. Payment Terminal
  8. •
  9. dejavoo Z Series User manual

dejavoo Z Series User manual

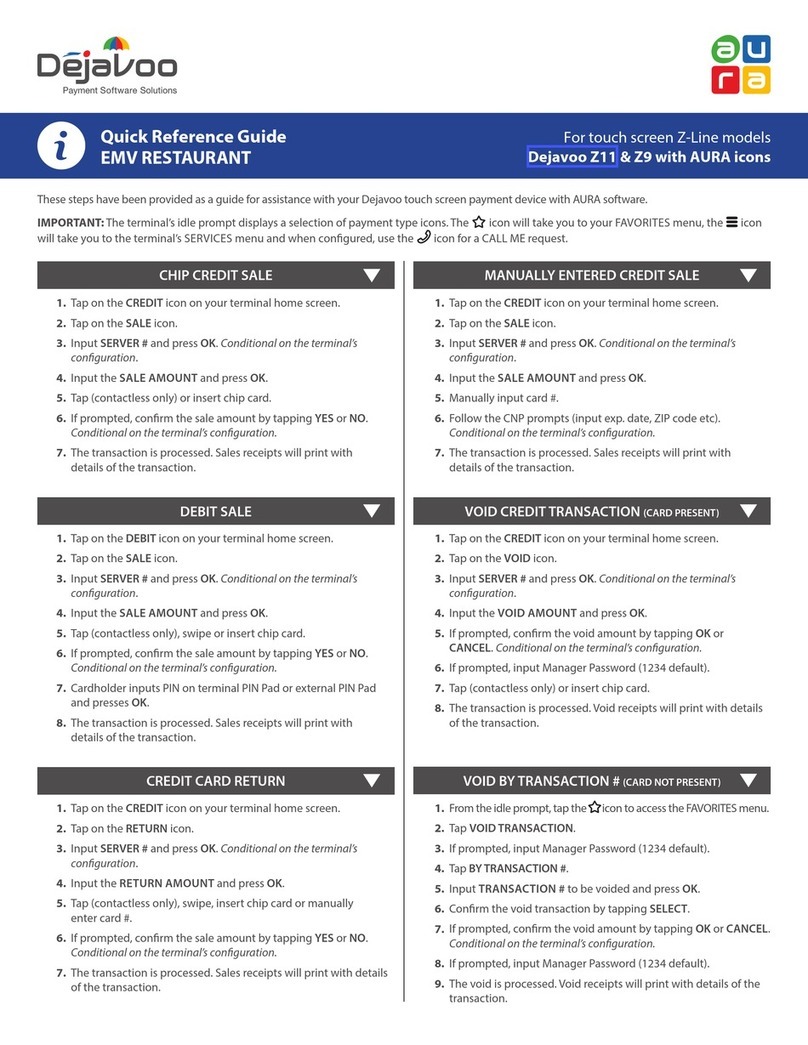
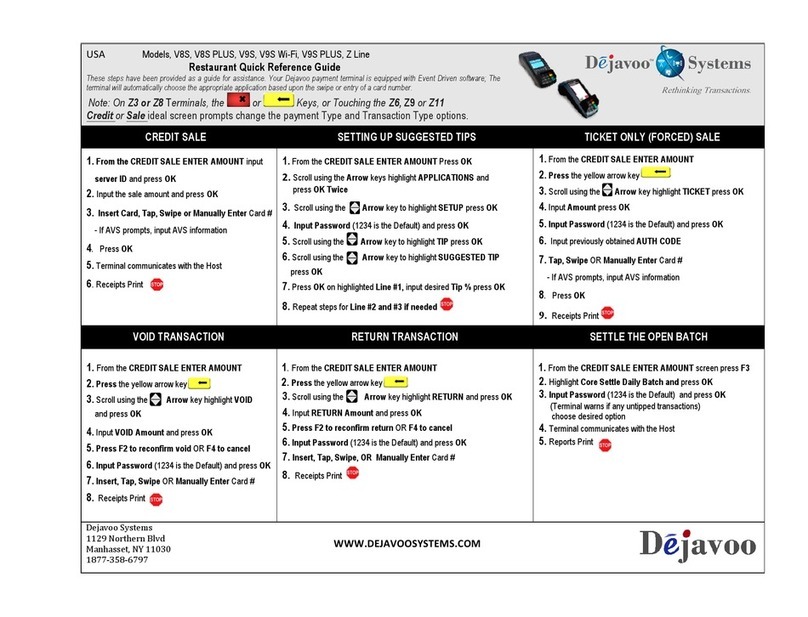
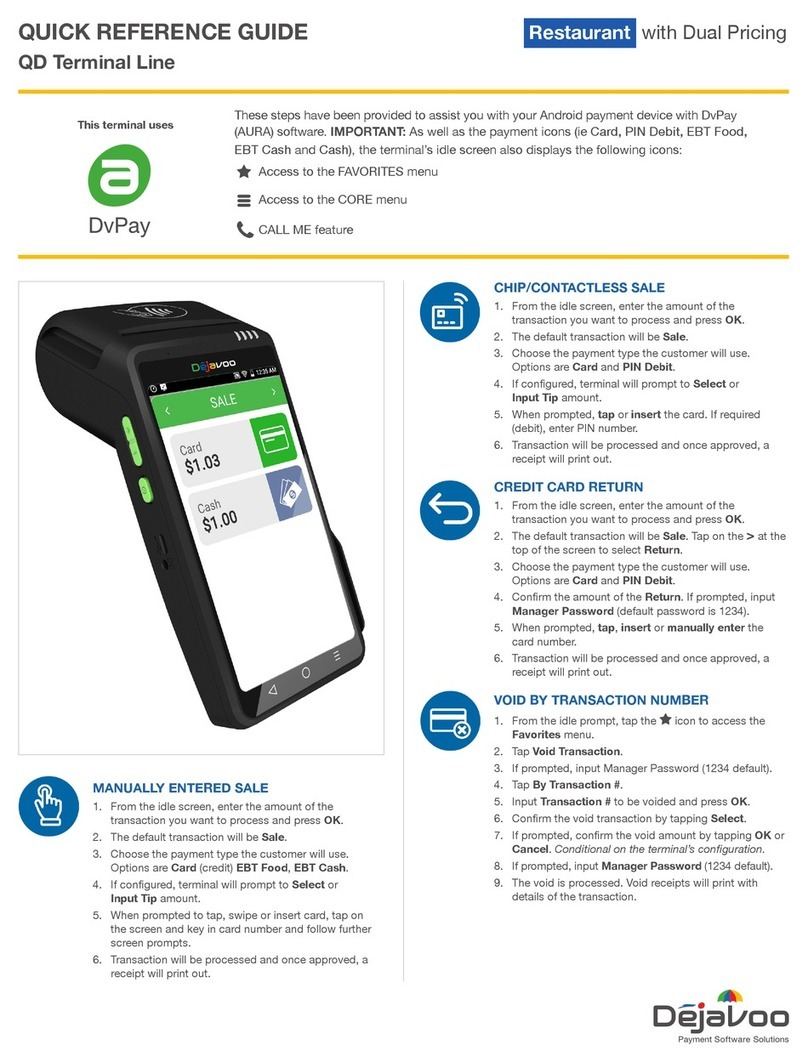
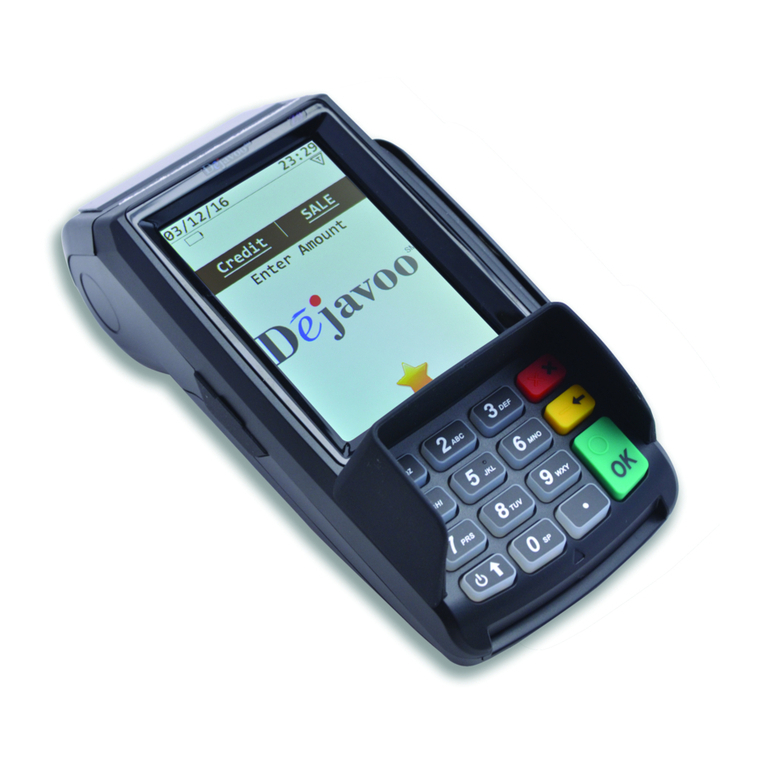
Quick Reference Guide
EMV RESTAURANT
For non-touch screen Z-Line models
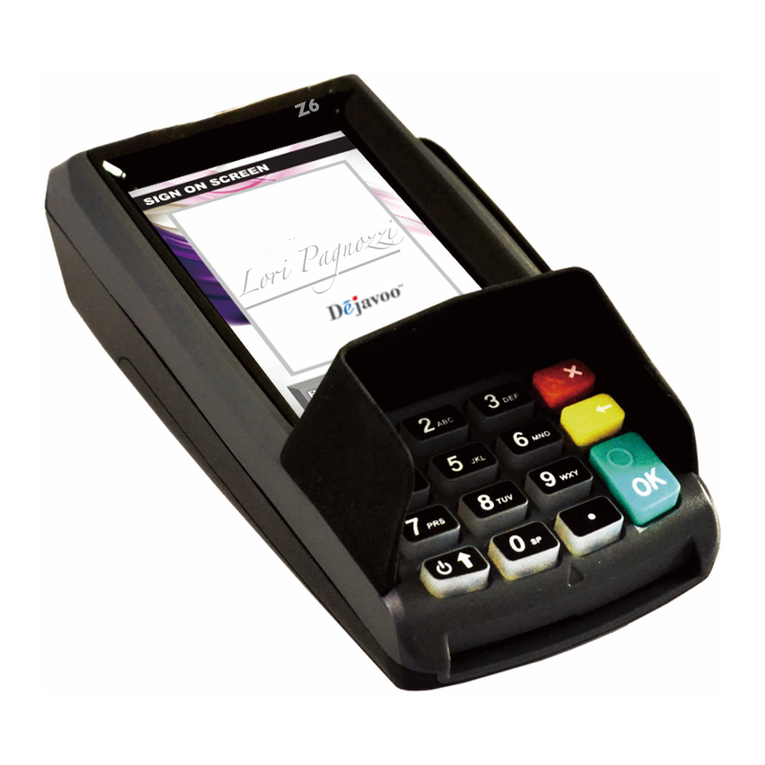
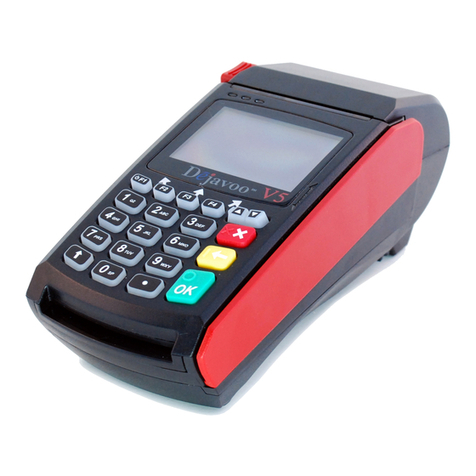
Z8 with AURA
TERMINAL HELP DESK: 877-358-6797 (option 2) E: [email protected]om dejavoosystems.com
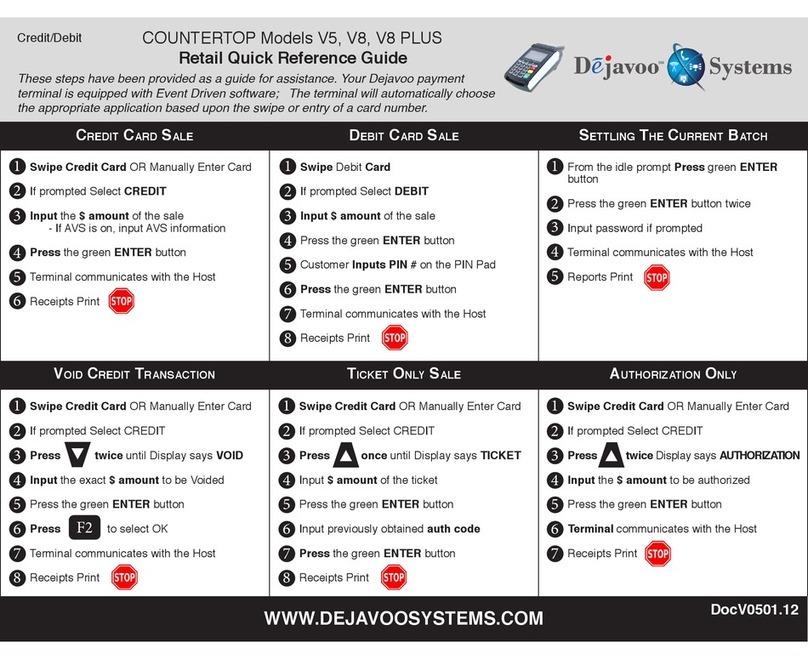
CHIP CREDIT SALE
DEBIT SALE
CREDIT CARD RETURN
MANUALLY ENTERED CREDIT SALE
VOID CREDIT TRANSACTION (CARD PRESENT)
VOID CREDIT TRANSACTION (CARD NOT PRESENT)
1. Input your SERVER ID and press OK.
2. Input the SALE AMOUNT and press OK.
3. If prompted, conrm the SALE AMOUNT by pressing F2 (OK)
or F4 (CANCEL). Conditional on the terminal’s conguration.
4. Tap (contactless only) or insert chip card.
5. The transaction is processed. Sales receipts will print with
details of the transaction.
1. Input your SERVER ID and press OK.
2. From your terminal home screen, use the $arrow key to
highlight DEBIT and press OK.
3. Input the SALE AMOUNT and press OK.
4. If prompted, conrm the SALE AMOUNT by pressing F2 (OK)
or F4 (CANCEL). Conditional on the terminal’s conguration.
5. Tap (contactless only), swipe or insert chip card.
6. Cardholder inputs PIN on terminal PIN Pad or external PIN Pad
and presses OK.
7. The transaction is processed. Sales receipts will print with
details of the transaction.
1. From your terminal home screen, press the key to highlight
RETURN and press OK.
2. Input the RETURN AMOUNT and press OK.
3. Conrm void amount by pressing F2 (OK) or F4 (CANCEL).
4. If prompted input Manager Password (1234 default).
5. Tap (contactless only), insert, swipe or manually enter card #.
. The transaction is processed. Return receipts will print with
details of the transaction.
1. Input your SERVER ID and press OK.
2. Input the SALE AMOUNT and press OK.
3. If prompted, conrm the SALE AMOUNT by pressing F2 (OK)
or F4 (CANCEL). Conditional on the terminal’s conguration.
4. Manually input card #.
5. Follow the CNP prompts (input exp. date, ZIP code etc).
Conditional on the terminal’s conguration.
6. The transaction is processed. Sales receipts will print with
details of the transaction.
1. From your terminal home screen, press the key to
highlight VOID and press OK.
3. Input VOID AMOUNT and press OK.
4. Conrm void amount by pressing F2 (OK) or F4 (CANCEL).
5. If prompted, input Manager Password (1234 default).
6. Tap (contactless only), insert, swipe or manually enter card #.
7. Conrm void amount by pressing F2 (YES) or F4 (NO).
8. The transaction is processed. Void receipts will print with details
of the transaction.
1. From the idle prompt, press F1 to access the SERVICES menu.
2. Use the #$ arrow keys to highlight FAVORITES and press OK.
3. Use the #$ arrow keys to highlight VOID TRANSACTION and press
OK.
4. If prompted, input Manager Password (1234 default).
5. Use the #$ arrow keys to select BY TRANSACTION # and press OK.
6. Input TRANSACTION # to be voided and press OK.
7. Conrm the TRANSACTION details to be voided by pressing OK.
8. If prompted, conrm the VOID AMOUNT by pressing F2 (OK) or
F4 (CANCEL). Conditional on the terminal’s conguration.
9. The transaction is processed. Void receipts will print with details
of the transaction.
These steps have been provided as a guide for assistance with your Dejavoo non-touch screen payment device with AURA software.
IMPORTANT: The terminal’s idle prompt displays CREDIT and SALE options and a prompt to enter the amount.
To change payment type, press the $arrow key to select the payment type you prefer. To change transaction type,
press the key to select the transaction type you prefer.
Quick Reference Guide
EMV RESTAURANT
For non-touch screen Z-Line models
Z8 with AURA
TERMINAL HELP DESK: 877-358-6797 (option 2) E: [email protected]om dejavoosystems.com
REPRINT RECEIPT
1. From the idle prompt, press F1 to access the SERVICES menu.
2. Use the #$ arrow keys to highlight FAVORITES and press OK.
3. Use the #$ arrow keys to highlight REPRINT RECEIPT and
press OK.
4. If prompted, input Manager Password (1234 default).
5. Use the #$ arrow keys to highlight desired option (LAST,
BY TRANSACTION # or BY CARD NUMBER) and press OK.
6. Use the #$ arrow keys to highlight desired copy (MERCHANT
or CUSTOMER) and press OK.
7. Transaction receipt prints.
PRINTING REPORTS
1. From the idle prompt, press F1 to access the SERVICES menu.
2. Use the #$ arrow keys to highlight FAVORITES and press OK.
3. Use the #$ arrow keys to highlight REPORT and press OK.
4. If prompted, input Manager Password (1234 default).
5. Use the #$ arrow keys to highlight desired report type and
press OK.
6. REPORT prints.
CALL ME FEATURE (MUST BE ENABLED)
1. From the idle prompt, press F1 to access the SERVICES menu.
2. Use the #$ arrow keys to highlight MANAGED SERVICES and
press OK.
3. If prompted, input Manager Password (1234 default).
4. Use the #$ arrow keys to highlight CALL ME and press OK.
5. Use the #$ arrow keys to highlight the service you require and
press OK.
6. The terminal sends notication to the help desk and you will
receive a call back from a representative with assistance.
SETTLE DAILY BATCH
1. From the idle prompt, press F1 to access the SERVICES menu.
2. Use the #$ arrow keys to highlight FAVORITES and press OK.
3. Use the #$ arrow keys to highlight SETTLE DAILY BATCH and
press OK.
4. If prompted, input Manager Password (1234 default).
5. Terminal communicates with the host.
6. Settlement report prints.
TURN CLERK PROMPT ON/OFF
1. From the idle prompt, press F1 to access the SERVICES menu.
2. Use the #$ arrow keys to highlight CORE and press OK.
3. Use the #$ arrow keys to highlight APPLICATIONS and press OK.
4. Use the #$ arrow keys to highlight DvCREDITAPP and
press OK.
5. Use the #$ arrow keys to highlight SETUP and press OK.
6. If prompted, input Manager Password (1234 default).
7. Use the #$ arrow keys to highlight TRANS PROMPTS and
press OK.
8. Press OK to select CLERKS.
9. Press OK to select PROMPT.
10. Use the #$ arrow keys to highlight desired option and press OK.
11. To return to the home screen press the key 3 times.
XX
WI-FI ICON INDICATOR (FOR WI-FI ENABLED UNITS)
Wi-Fi connected successfully.
These steps have been provided as a guide for assistance with your Dejavoo non-touch screen payment device with AURA software.
IMPORTANT: The terminal’s idle prompt displays CREDIT and SALE options and a prompt to enter the amount.
To change payment type, press the $arrow key to select the payment type you prefer. To change transaction type,
press the key to select the transaction type you prefer.
XX
EDIT TIPS BY TRANSACTION #
1. From the idle prompt, press F1 to access the SERVICES menu.
2. Use the #$ arrow keys to highlight FAVORITES and press OK.
3. Use the #$ arrow keys to highlight TRANSACTION # and
press OK.
4. Input TRANSACTION # and press OK.
5. Transaction will display, enter TIP AMOUNT and press OK.
6. Repeat Steps 3 and 4 as needed.
7. Press the key after all desired tips have been adjusted.

Other manuals for Z Series

8

This manual suits for next models

1

Other dejavoo Payment Terminal manuals

dejavoo Z8 User manual

dejavoo

dejavoo Z8 User manual

dejavoo Z Series User manual

dejavoo

dejavoo Z Series User manual

dejavoo QD Terminal Line User manual

dejavoo

dejavoo QD Terminal Line User manual

dejavoo Z Series User manual

dejavoo

dejavoo Z Series User manual

dejavoo QD Terminal Line User manual

dejavoo

dejavoo QD Terminal Line User manual

dejavoo Z Series User manual

dejavoo

dejavoo Z Series User manual

dejavoo Z9 User manual

dejavoo

dejavoo Z9 User manual

dejavoo Z3 User manual

dejavoo

dejavoo Z3 User manual

dejavoo Z9 User manual

dejavoo

dejavoo Z9 User manual

dejavoo QD Terminal Line User manual

dejavoo

dejavoo QD Terminal Line User manual

dejavoo V9 User manual

dejavoo

dejavoo V9 User manual

dejavoo Z Series User manual

dejavoo

dejavoo Z Series User manual

dejavoo Z8 User manual

dejavoo

dejavoo Z8 User manual

dejavoo P1 User manual

dejavoo

dejavoo P1 User manual

dejavoo QD Terminal Line User manual

dejavoo

dejavoo QD Terminal Line User manual

dejavoo Z9 User manual

dejavoo

dejavoo Z9 User manual

dejavoo Z11 User manual

dejavoo

dejavoo Z11 User manual

dejavoo Z Series User manual

dejavoo

dejavoo Z Series User manual

dejavoo Z9 User manual

dejavoo

dejavoo Z9 User manual

dejavoo Z9 User manual

dejavoo

dejavoo Z9 User manual

dejavoo Z Series Product information sheet

dejavoo

dejavoo Z Series Product information sheet

dejavoo V5 User manual

dejavoo

dejavoo V5 User manual

dejavoo Z8 User manual

dejavoo

dejavoo Z8 User manual

dejavoo V series User manual

dejavoo

dejavoo V series User manual

Popular Payment Terminal manuals by other brands

Loomis Pay-Mobile A920 manual

Loomis

Loomis Pay-Mobile A920 manual

VeriFone VX 520 Series Quick reference guide

VeriFone

VeriFone VX 520 Series Quick reference guide

PayFacto PAX A80 Installation and configuration guide

PayFacto

PayFacto PAX A80 Installation and configuration guide

ezidebit EFTPOS D210E quick start guide

ezidebit

ezidebit EFTPOS D210E quick start guide

Ingenico group EVO Move 3500 Wi-Fi Setup guide

Ingenico group

Ingenico group EVO Move 3500 Wi-Fi Setup guide

VeriFone VX 820 Duet installation instructions

VeriFone

VeriFone VX 820 Duet installation instructions

VeriFone VX 520 Series Quick reference guide

VeriFone

VeriFone VX 520 Series Quick reference guide

Ingenico iCT220, iCT250 user guide

Ingenico

Ingenico iCT220, iCT250 user guide

nbs NBS5 Series user manual

nbs

nbs NBS5 Series user manual

Fundtech Mobilescape VX quick start guide

Fundtech

Fundtech Mobilescape VX quick start guide

Nets iCT250 Guide

Nets

Nets iCT250 Guide

PAX S300 Quick reference guide

PAX

PAX S300 Quick reference guide

BS VX680 Quick operation guide

BS

BS VX680 Quick operation guide

Nab EFTPOS Terminal Guide

Nab

Nab EFTPOS Terminal Guide

Ingenico iWL250 WIFI quick start guide

Ingenico

Ingenico iWL250 WIFI quick start guide

GRAVITY iWL255 User quick reference guide

GRAVITY

GRAVITY iWL255 User quick reference guide

myPOS Combo user manual

myPOS

myPOS Combo user manual

USA Technologies ePort G10-S quick start guide

USA Technologies

USA Technologies ePort G10-S quick start guide

manuals.online logo
manuals.online logoBrands
  • About & Mission
  • Contact us
  • Privacy Policy
  • Terms and Conditions

Copyright 2025 Manuals.Online. All Rights Reserved.