manuals.online logo
Brands
  1. Home
  2. •
  3. Brands
  4. •
  5. Barska
  6. •
  7. Safe
  8. •
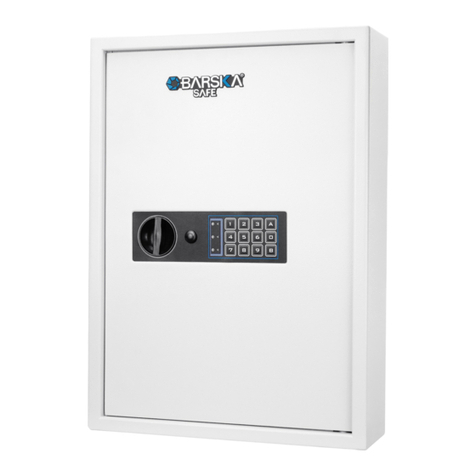
  9. Barska AX12672 User manual

Barska AX12672 User manual

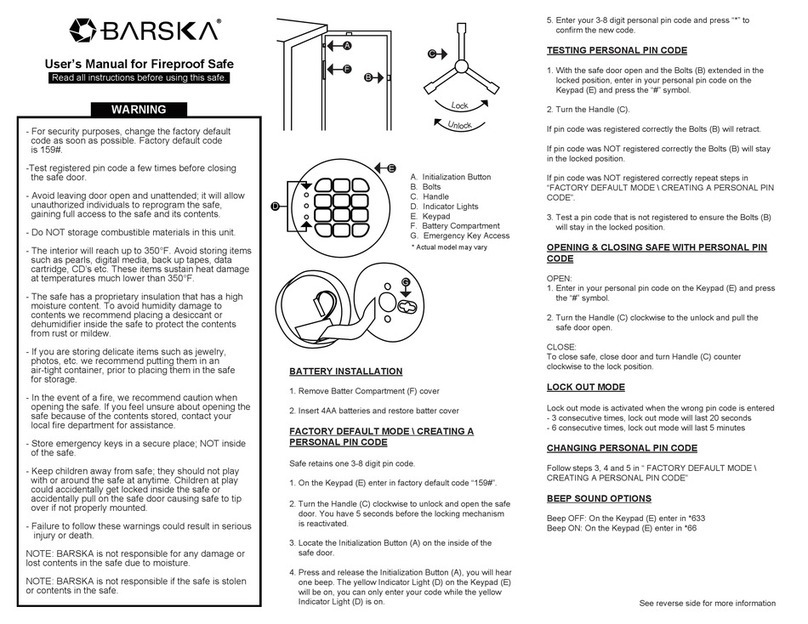
User’s Manual for
1.91/2.75 Cubic Ft White Keypad Fireproof
Jewelry Safe
WARNING
Read all instructions before using this safe.
- For security purposes, change the factory default code
as soon as possible. Factory default code
is 123456.
- Test registered pin code a few times before closing
the safe door.
- Avoid leaving door open and unattended; it will allow
unauthorized individuals to reprogram the safe, gaining
full access to the safe and its contents.
- Do NOT store combustible materials in this unit.
- In the event of a fire, we recommend caution when
opening the safe. If you feel unsure about opening the
safe because of the contents stored, contact your local
fire department for assistance.
-Test the emergency keys and store then in a secure
place; NOT inside of the safe.
-Test and make sure the safe works properly before
mounting.
-Mount the safe before use, the safe may tip forward if
not properly mounted.
- Keep children away from safe; they should not play
with or around the safe at anytime. Children at play
could accidentally get locked inside the safe or
accidentally pull on the safe door causing safe to tip
over if not properly mounted.
- Failure to follow these warnings could result in serious
injury or death.
NOTE: BARSKA is not responsible for any damage or
lost contents in the safe due to moisture.
NOTE: BARSKA is not responsible if the safe and its
contents gets lost or stolen.
See reverse side for more information
L
o
c
k
U
n
l
o
c
k
D
BATTERY & KEY ACCESS
*To operate the safe, please install one 9V Alkaline battery (not
included).
Push down on button
located under the key pad
and turn keypad cover
counter clockwise.
DO NOT pull on the wires or touch
the electronic components.
Install Battery
Insert one new 9V alkaline battery into the battery compartment and
restore keypad cover.
Key Access
Turn the key clockwise and the handle the unlock position to open
the safe. The key slot is located behind the keypad.
**Test the Emergency Keys and store them in a secure place; NOT
inside the safe.
MOTION SENSOR LIGHT
1. Motion Sensor Light has Velcro and magnet bar at rear, so it
can attach on the carpeted interior or metal surface of the safe.
Before you start to use the safe, please remove the light from
the safe and install with 4 AAA batteries (not included).
PARTS OF THE SAFE
5/20
BC642
© 2020 BARSKA®
855 Towne Center Drive | Pomona, CA 91767
(t) 888.666.6769 | (f) 909.445.8169 | www.barska.com
A. Bolts
B. Key Hook
C. Reset Button
D. Motion Sensor
Light
E. Jewelry Drawer
F. Keypad and Keypad Cover
-turn keypad counter clock
wise to expose Battery
Compartment and
Emergency Key Access
G. Indicator Lights
H. Handle
2. Motion Sensor Light should be automatically activated when
the safe door is opened each time. If not, please wave your
hand to activate the light. Light should turn off within a delay
time after the safe door is closed.
PIN CODE REGISTRATION
Safe retains 1pin code (3 to 8
digits) Safe Factory Default PIN
Code :123456
Changing PIN Code
1. Insert original PIN code (for 1st time use, the original
PIN code is default PIN code)and press "#". Then,
the green light will turn on.
2. During the duration of green light on, press "*" and
then the yellow light will turn on as well. You can
change to your desired PIN code now.
NOTE: If you don't take any action after 8 seconds,
the safe will be back to standby mode.
3. Enter your desired PIN code and press "*". You will
hear two beeps and the yellow light will turn off. This
means you have registered your PIN code
successfully.
NOTE: If you hear 4 beeps, it means you didn't
register your PIN code successfully. Please, repeat
the above steps again.
D
E
B
A
C
H
F
G
OPENING AND CLOSING SAFE WITH PIN CODE
1. Enter the registered PIN Code and press “ # ” to
confirm.
2. When the green light is on, turn the handle clockwise
to the unlocked position and pull safe door open.
Close
Close the safe door and turn the handle counter-
clockwise to the locked position.
If a red light turns on while accessing and using the safe, this
indicates that the batteries are low, please replace battery as
soon as possible.
The safe may be mounted down to the floor. Beware of the load
bearing. Failure to do so can result in personal injury and/or
damage to property. Use appropriate tools when performing
work and always use eye protection.
Floor Mounting
−Use proper drill tools depending on the type of floor you are
mounting the safe (wood, tile, concrete).
−Measure the location of the pre-set drill holes; mark their
exact position onto the floor.
−Drill the appropriate size holes for the anchors you are using.
−Carefully press the anchors into the holes at this time.
−Mount the safe by running screws from the inside of the safe
and securing to anchors; ensure the safe is mounted
securely.
BC371 11/19
1 YEAR LIMITED WARRANTY
FIRE SAFE VAULTS
BARSKA warrants this new safe to be free of original defects
in material and/or workmanship under normal use for a
period of twelve (12) months from the date product is
received by purchaser. This warranty does not include
damage caused by improper installation or maintenance.
Damage from misuse, abuse, accident (such as dropping),
fire, flood, or acts of nature. Damage from service or repairs
other than those performed by BARSKA. Labor, cost and
shipping charges for the removal and replacement of
defective parts beyond the initial twelve-month warranty
period. All transportation and shipping charges. Removing or
altering the seal under any circumstances will automatically
void the warranty.
This warranty is limited to original purchaser and is not
transferable. This warranty applies only to products
purchased in the United States.
Please email [email protected] or call 1.888.666.6769 for
Return Merchandise Number (RMA#) before any returns. The
RMA number must appear on the outside of the shipping
package. Product must be packed carefully and sturdily in its
original packaging to prevent damage in transit and returned
freight pre-paid to:
BARSKAOPTICS
Repair Department
855 Towne Center Drive
Pomona, CA91767
Please include all of the following when returning BARSKA
products for service and/or replacement:
1. Please write your complete details (Name, Address,
Telephone #, E-mail address, RMA#, etc.)
2. Purchase receipt or Proof of Purchase. (Original/Copy)
3. A brief explanation of the defect.
*Please allow 6-8 weeks for delivery.
BARSKA will examine and test returned product and repair or
replace defective part(s) or units with new part(s) or a new
unit if necessary within the warranty period.
If repair is required after warranty period expiration,
purchaser will be charged for replacement parts and return
shipping.
BARSKA® Optics shall not be liable for any consequential,
incidental and/or contingent damages whatsoever. We will
not pay shipping, insurance or transportation charges from
you to us, or any import fees, duties and or taxes. This
warranty supersedes all previous BARSKA®
warranties.
-CARE AND MAINTENANCE
-Keep liquids away from the control panel. Spills on the
control panel will cause damage and possibly electric shock.
-Secure safe in a proper area to prevent from falling and
causing damage or injury.
-DO NOT disassemble the product. For all repairs and
maintenance, contact BARSKA Customer Service.
-DO NOT use chemicals or cleaning agents to clean the safe.
LOW BATTERY WARNING
MOUNTING INSTRUCTIONS
RESET TO FACTORY DEFAULT MODE
LOCK OUT MODE
Press hold the reset button until one beep and yellow light
turns on.
The safe is in factory default mode after reset; Factory PIN
Code: 123456.
After 3 consecutive incorrect PIN Code attempts, safe will
be in lock-out mode with beeping sound for 20 seconds.
You can enter the correct PIN Code after the lock-out
mode.
Open

Other Barska Safe manuals

Barska AX13104 User manual

Barska

Barska AX13104 User manual

Barska AX12218 User manual

Barska

Barska AX12218 User manual

Barska AX11898 User manual

Barska

Barska AX11898 User manual

Barska AX12476 User manual

Barska

Barska AX12476 User manual

Barska AX11652 User manual

Barska

Barska AX11652 User manual

Barska AX13262 User manual

Barska

Barska AX13262 User manual

Barska AX12404 User manual

Barska

Barska AX12404 User manual

Barska AX11644 User manual

Barska

Barska AX11644 User manual

Barska AX11556 User manual

Barska

Barska AX11556 User manual

Barska BAR-AX13094 User manual

Barska

Barska BAR-AX13094 User manual

Barska AX11970 User manual

Barska

Barska AX11970 User manual

Barska AX11934 User manual

Barska

Barska AX11934 User manual

Barska AX11968 User manual

Barska

Barska AX11968 User manual

Barska AX11648 User manual

Barska

Barska AX11648 User manual

Barska AX11224 User manual

Barska

Barska AX11224 User manual

Barska AX13308 User manual

Barska

Barska AX13308 User manual

Barska DX Series User manual

Barska

Barska DX Series User manual

Barska AX13500 User manual

Barska

Barska AX13500 User manual

Barska Digital Keypad Safe User manual

Barska

Barska Digital Keypad Safe User manual

Barska Biometric Safe User manual

Barska

Barska Biometric Safe User manual

Barska AX11970 User manual

Barska

Barska AX11970 User manual

Barska Biometric Safe User manual

Barska

Barska Biometric Safe User manual

Popular Safe manuals by other brands

LockState LS-WS1415 operating instructions

LockState

LockState LS-WS1415 operating instructions

Honeywell 5911 user guide

Honeywell

Honeywell 5911 user guide

First Alert 2025F Operations & installation guide
First Alert

First Alert 2025F Operations & installation guide

Filex security SB user manual

Filex security

Filex security SB user manual

Chubbsafes DuoForce T2 M-65 Quick user guide

Chubbsafes

Chubbsafes DuoForce T2 M-65 Quick user guide

Opitec 105.026 manual

Opitec

Opitec 105.026 manual

Chubbsafes Mekanno user guide

Chubbsafes

Chubbsafes Mekanno user guide

Perel SSE025TP user manual

Perel

Perel SSE025TP user manual

Ivation IVAQA8X10SF user guide

Ivation

Ivation IVAQA8X10SF user guide

ExecutiveSafe ACS-2 instruction manual

ExecutiveSafe

ExecutiveSafe ACS-2 instruction manual

BASETech 1486098 operating instructions

BASETech

BASETech 1486098 operating instructions

BOLERO CF129 instruction manual

BOLERO

BOLERO CF129 instruction manual

JVD GUARDIAN Original instructions

JVD

JVD GUARDIAN Original instructions

Perel BG90014 user manual

Perel

Perel BG90014 user manual

Hornady RAPID 2600KP owner's manual

Hornady

Hornady RAPID 2600KP owner's manual

Stack-On QAS-450 instructions

Stack-On

Stack-On QAS-450 instructions

Clarke Strong-Arm CS250D quick guide

Clarke

Clarke Strong-Arm CS250D quick guide

Phoenix KS0002C User instructions

Phoenix

Phoenix KS0002C User instructions

manuals.online logo
manuals.online logoBrands
  • About & Mission
  • Contact us
  • Privacy Policy
  • Terms and Conditions

Copyright 2025 Manuals.Online. All Rights Reserved.