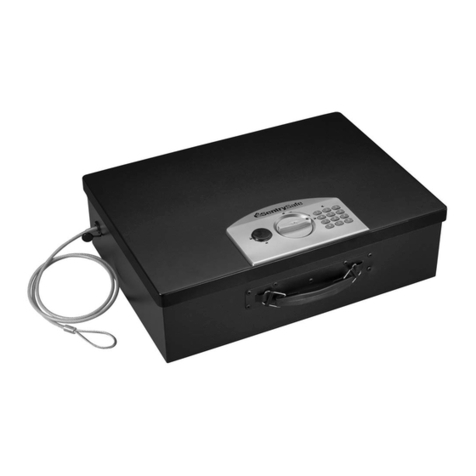
Barska AX11970 User manual

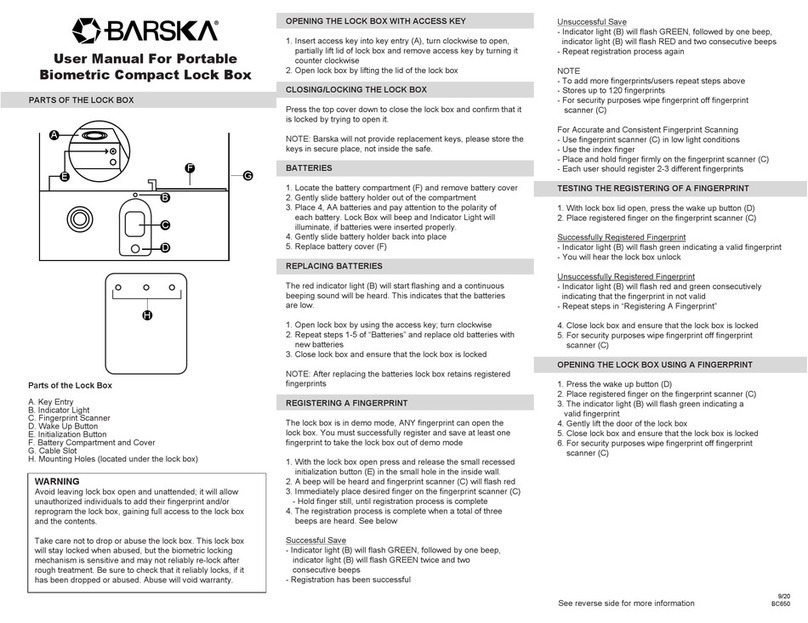
PARTS OF THE LOCK BOX
Parts of the Safe
A. Key Entry
B. Indicator Light
C. Fingerprint Scanner
D. Wake Up Button
E. Initialization Button
F. Battery Compartment
and Cover
G. Cable Slot
H. Mounting Holes
(located under the safe)
See reverse side for more information
A
B
C
D
FG
E
9/14
BC346
H
OPENING THE LOCK BOX WITH ACCESS KEY
1. Insert access key into key entry, turn clockwise to open,
partially lift lid of lock box and remove access key by turning it
counter clockwise
2. Open lock box by lifting the lid of the lock box
NOTE
Store access keys in a secure place. NOT inside of lock box
When calling for replacement or additional access keys have
the access key code number ready. The access key code is
etched in the key entry and on the access keys.
BATTERIES
1. Locate the battery compartment and remove battery cover
2. Gently slide battery holder out of the compartment
3. Place 4, AA batteries and pay attention to the polarity of
each battery
4. Gently slide battery holder back into place
5. Replace battery cover
REPLACING BATTERIES
The red indicator light will start flashing and a continuous
beeping sound will be heard. This indicates that the batteries
are low.
1. Open lock box by using the access key; turn clockwise
2. Repeat steps 1-5 of “Batteries” and replace old batteries with
new batteries
3. Close lock box and ensure that the lock box is locked
NOTE
After replacing the batteries lock box retains registered fingerprints
REGISTERING A FINGERPRINT
The lock box is in demo mode, ANY fingerprint can open the lock box
1. With the lock box open press and release the initialization button
2. A beep will be heard and scanner will flash red
3. Immediately place desired finger on the scanner
- Hold finger still, until registration process is complete
4. Registration process is complete when a total three beeps
are heard. See below
Successful Save
- Indicator light will flash green, followed by one beep,
indicator light will flash green twice and two
consecutive beeps
- Registration has been successful
Unsuccessful Save
- Indicator light will flash green, followed by one beep,
indicator light will flash red and two consecutive beeps
- Repeat registration process again
NOTE
- To add more fingerprints/users repeat steps above
- Stores up to 120 fingerprints
- For security purposes wipe fingerprint off scanner
For Accurate and Consistent Fingerprint Scanning
- Use scanner in low light conditions
- Use the index finger
- Place and hold finger firmly on the scanner
- Each user should register 2-3 different fingerprints
TESTING A REGISTERING A FINGERPRINT
1. With lock box lid open, press the wake up button
2. Place registered finger on the scanner
Successfully Saved Fingerprint
- Indicator light will flash green indicating a valid fingerprint
- You will hear the lock box unlock
Unsuccessful Fingerprint
- Indicator light will flash red and green consecutively
indicating that the fingerprint in not valid
- Repeat steps in “Registering A Fingerprint”
4. Close lock box and ensure that the lock box is locked
5. For security purposes wipe fingerprint off scanner
OPENING THE LOCK BOX USING A FINGERPRINT
1. Press the wake up button
2. Place registered finger on the scanner
3. The indicator light will flash green indicating a valid fingerprint
4. Gently lift the door of the lock box
5. Close lock box and ensure that the safe is locked
6. For security purposes wipe fingerprint off scanner
DELETING ALL FINGERPRINTS
1. With the lock box open locate the battery compartment and
remove battery cover
2. Gently slide battery holder of out of the compartment
3. Remove all 4, AA batteries from battery holder
4. Press wake up button a few times to release remaining
electronic power
5. Re-insert 3, AA batteries and pay attention to the polarity of
each battery
6. Press and hold down the initialization button
7. Re-insert the last AA battery you will hear 2 beeps, release
initialization button
8. Gently slide battery holder back into place and replace
battery cover
WARNING
Avoid leaving lock box open and unattended; it will allow
unauthorized individuals to add their fingerprint and/or
reprogram the lock box, gaining full access to the lock box
and the contents.
User Manual For Portable
Biometric Compact Lock Box

© 2014 BARSKA®
855 Towne Center Drive Pomona, CA 91767
(t) 888.666.6769 | (f) 909.445.8169 | www.barska.com
BARSKA warrants this new lock box to be free of original defects in
material and/or workmanship under normal use for a period of twelve
(12) months from the date product is received by purchaser. This
warranty does not include damage caused by improper installation or
maintenance. Damage from misuse, abuse, accident (such as
dropping), normal wear and tear, fire, flood, or acts of nature. Damage
from service or repairs other than those performed by BARSKA.
Labor, cost and shipping charges for the removal and replacement of
defective parts beyond the initial twelve-month warranty period. All
transportation and shipping charges. Removing or altering the seal
under any circumstances will automatically void the warranty.
This warranty is limited to original purchaser and is not transferable.
This warranty applies only to products purchased in the United States.
Merchandise Number (RMA#) before any returns. The RMA number
must appear on the outside of the shipping package. Product must be
packed carefully and sturdily in its original packaging to prevent
damage in transit and returned freight pre-paid to:
BARSKA OPTICS
Repair Department
855 Towne Center Drive
Pomona, CA 91767
Please include all of the following when returning BARSKA products
for service and/or replacement:
1. Please write your complete details (Name, Address, Telephone #,
E-mail address, RMA#, etc.)
2. Purchase receipt or Proof of Purchase. (Original/Copy)
3. A brief explanation of the defect.
4. A Check/Money Order of $20.00 to cover inspection, shipping
and handling.
*Please allow 6-8 weeks for delivery.
BARSKA will examine and test returned product and repair or replace
defective part(s) or units with new part(s) or a new unit if necessary
within the warranty period. Purchaser is required to remit $20.00 to
BARSKA for return shipping and handling at time product is returned.
If repair is required after warranty period expiration, purchaser will be
charged for replacement parts and return shipping.
BARSKA® Optics shall not be liable for any consequential, incidental
and/or contingent damages whatsoever. We will not pay shipping,
insurance or transportation charges from you to us, or any import
fees, duties and or taxes. This warranty supersedes all previous
BARSKA® Optics warranties.
COMPACT LOCK BOX
1 YEAR LIMITED WARRANTY
Replacement Keys: When calling for replacement or additional
access keys have the access key code number ready. The access
key code is etched in the key entry AND on the access keys.
DELETING ALL FINGERPRINTS continued
9. All fingerprints stored in the lock box have been deleted.
10. The lock box is in demo mode, ANY fingerprint can open
the lock box
INSTALLING THE CABLE
Included with the lock box is a steel cable that may be attached to
any stationary item for increased security. The cable hole is
located on the side of the lock box.
Installing the Cable
1. Locate the stationary item
you would like the safe to be
attached to and wrap the
cable around the
stationary item
2. Thread one end of the cable
through the other loop of the
cable. The loop that was just
created in this step should be
wrapped around the
stationary item
3. Open lock box by using the
personal pin code or
access key
4. Locate the cable slot
5. Place the unused loop of the steel cable with the with the
metal stopper portion in the lock box through the cable slot
6. Close lock box and ensure that the lock box is locked
7. Slightly tug on the cable to ensure that the cable is securely
attached to the lock box
Removing the Cable
1. Open lock box by using a registered fingerprint or access key
2. Lift steel cable out of the cable slot
3. Pull the one end of the cable through the other loop of
the cable
4. Store cable in a safe place
MOUNTING
The lock box may be mounted to a wall or to the floor. The three
pre-drilled mounting holes are located under the lock box and can
be exposed by gently removing the rubber pads out of it’s place.
NOTE On Wall Mounting:
When mounting to a wall, be aware of the load bearing to
ensure safety of lock box and contents. Failure to do so could result
in the lock box falling and damaging property and/or people.
When mounting to a wall check the wall or cabinet for structural
soundness
1. Check location for concealed items such as wires, pipes etc
2. Get the appropriate anchors for the type of floor or wall you
will be mounting the lock box to (wood, tile, concrete etc)
3. Mark the surface to drill holes for the anchors you will
be using
4. Drill the appropriate size hole for the anchors you will
be using
5. Once mounted, test the strength to make sure the lock box is
securely mounted
CARE AND MAINTENANCE
- For security purposes wipe fingerprint off scanner when
opening and/or closing the lock box
- If necessary use a damp cloth to clean the lock box. DO NOT use
chemicals or cleaning agents
- Keep liquids away from the control panel. Spills on the control
panel will cause damage and possibly electric shock
- Secure lock box in a proper area to prevent it from falling and
causing damage or injury
- DO NOT over stuff the contents of the lock box, it can damage the
motor mechanism or the contents
- DO NOT disassemble the product. For all repairs and
maintenance, contact authorized service centers or distributor
BARSKA Customer Service
- DO NOT place emergency keys inside of lock box BC300 9/14
User Manual For Portable
Biometric Compact Lock Box
DO NOT mount lock box without anchoring to the wall behind
the lock box!
Other Barska Safe manuals
Barska
Barska AX12672 User manual
Barska
Barska AX12218 User manual
Barska
Barska AX11648 User manual

Barska
Barska AX11898 User manual
Barska
Barska Biometric Safe User manual
Barska
Barska AX12404 User manual

Barska
Barska AX11934 User manual
Barska
Barska AX11652 User manual
Barska
Barska AX13308 User manual
Barska
Barska AX11556 User manual
Barska
Barska AX12476 User manual

Barska
Barska Biometric Safe User manual

Barska
Barska DX Series User manual
Barska
Barska AX13262 User manual
Barska
Barska AX11644 User manual

Barska
Barska AX13500 User manual
Barska
Barska AX13104 User manual
Barska
Barska AX11968 User manual
Barska
Barska AX11970 User manual
Barska
Barska BAR-AX13094 User manual
