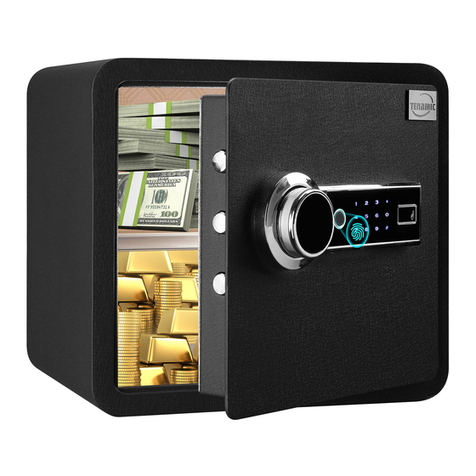
Barska AX11970 User manual

User Manual For Portable
Biometric Compact Lock Box
Parts of the Lock Box
A. Key Entry
B. Indicator Light
C. Fingerprint Scanner
D. Wake Up Button
E. Initialization Button
F. Battery Compartment and Cover
G. Cable Slot
H. Mounting Holes (located under the lock box)
WARNING
Avoid leaving lock box open and unattended; it will allow
unauthorized individuals to add their fingerprint and/or
reprogram the lock box, gaining full access to the lock box
and the contents.
Take care not to drop or abuse the lock box. This lock box
will stay locked when abused, but the biometric locking
mechanism is sensitive and may not reliably re-lock after
rough treatment. Be sure to check that it reliably locks, if it
has been dropped or abused. Abuse will void warranty.
OPENING THE LOCK BOX WITH ACCESS KEY
1. Insert access key into key entry (A), turn clockwise to open,
partially lift lid of lock box and remove access key by turning it
counter clockwise
2. Open lock box by lifting the lid of the lock box
CLOSING/LOCKING THE LOCK BOX
Press the top cover down to close the lock box and confirm that it
is locked by trying to open it.
NOTE: Barska will not provide replacement keys, please store the
keys in secure place, not inside the safe.
BATTERIES
1. Locate the battery compartment (F) and remove battery cover
2. Gently slide battery holder out of the compartment
3. Place 4, AA batteries and pay attention to the polarity of
each battery. Lock Box will beep and Indicator Light will
illuminate, if batteries were inserted properly.
4. Gently slide battery holder back into place
5. Replace battery cover (F)
REPLACING BATTERIES
The red indicator light (B) will start flashing and a continuous
beeping sound will be heard. This indicates that the batteries
are low.
1. Open lock box by using the access key; turn clockwise
2. Repeat steps 1-5 of “Batteries” and replace old batteries with
new batteries
3. Close lock box and ensure that the lock box is locked
NOTE: After replacing the batteries lock box retains registered
fingerprints
REGISTERING A FINGERPRINT
The lock box is in demo mode, ANY fingerprint can open the
lock box. You must successfully register and save at least one
fingerprint to take the lock box out of demo mode
1. With the lock box open press and release the small recessed
initialization button (E) in the small hole in the inside wall.
2. A beep will be heard and fingerprint scanner (C) will flash red
3. Immediately place desired finger on the fingerprint scanner (C)
- Hold finger still, until registration process is complete
4. The registration process is complete when a total of three
beeps are heard. See below
Successful Save
- Indicator light (B) will flash GREEN, followed by one beep,
indicator light (B) will flash GREEN twice and two
consecutive beeps
- Registration has been successful
Unsuccessful Save
- Indicator light (B) will flash GREEN, followed by one beep,
indicator light (B) will flash RED and two consecutive beeps
- Repeat registration process again
NOTE
- To add more fingerprints/users repeat steps above
- Stores up to 120 fingerprints
- For security purposes wipe fingerprint off fingerprint
scanner (C)
For Accurate and Consistent Fingerprint Scanning
- Use fingerprint scanner (C) in low light conditions
- Use the index finger
- Place and hold finger firmly on the fingerprint scanner (C)
- Each user should register 2-3 different fingerprints
TESTING THE REGISTERING OF A FINGERPRINT
1. With lock box lid open, press the wake up button (D)
2. Place registered finger on the fingerprint scanner (C)
Successfully Registered Fingerprint
- Indicator light (B) will flash green indicating a valid fingerprint
- You will hear the lock box unlock
Unsuccessfully Registered Fingerprint
- Indicator light (B) will flash red and green consecutively
indicating that the fingerprint in not valid
- Repeat steps in “Registering A Fingerprint”
4. Close lock box and ensure that the lock box is locked
5. For security purposes wipe fingerprint off fingerprint
scanner (C)
OPENING THE LOCK BOX USING A FINGERPRINT
1. Press the wake up button (D)
2. Place registered finger on the fingerprint scanner (C)
3. The indicator light (B) will flash green indicating a
valid fingerprint
4. Gently lift the door of the lock box
5. Close lock box and ensure that the lock box is locked
6. For security purposes wipe fingerprint off fingerprint
scanner (C)
See reverse side for more information 9/20
BC650
A
B
C
D
FG
E
H
PARTS OF THE LOCK BOX

DELETING ALL FINGERPRINTS
1. With the lock box open locate the battery compartment (F) and
remove battery cover
2. Gently slide battery holder of out of the compartment
3. Remove one AA battery from battery holder
4. Press wake up button (D) 8-12 times to release remaining
electronic power to fully complete the deletion process
5. While still holding down the small Initialization Button (E), reinsert
the battery. You will hear one beep when the battery is inserted, a
pause, and then 2 beeps. You can now release the
initialization button.
6. Gently slide battery holder back into place and replace
battery cover (F)
7. All fingerprints stored in the lock box have been deleted.
8. The lock box is in demo mode, ANY fingerprint can open
the lock box. Confirm you have been successful by testing that
any fingerprint can open the lock box.
INSTALLING THE CABLE
Included with the lock box is a steel cable that may be attached to
any stationary item for increased security. The cable slot (G) is
located on the side of the lock box.
Installing the Cable
1. Locate the stationary item you
would like the lock box to be
attached to and wrap the
cable around the stationary item
2. Thread one end of the cable
through the other loop of the
cable. The loop that was just
created in this step should be
wrapped around the
stationary item
3. Open lock box by using the
registered fingerprint or
access key
4. Locate the cable slot (G)
5. Place the unused loop of the
steel cable with the metal stopper
portion in the lock box through the cable slot (G)
6. Close lock box and ensure that the lock box is locked
7. Slightly tug on the cable to ensure that the cable is securely
attached to the lock box
Removing the Cable
1. Open lock box by using a registered fingerprint or access key
2. Lift steel cable out of the cable slot (G)
3. Pull the one end of the cable through the other loop of the cable
4. Store cable in a safe place
MOUNTING
The lock box may be mounted. The three pre-drilled mounting
holes (H) are located under the lock box and can be exposed by
gently removing the rubber pads out of it’s place. Mounting
hardware not included.
1. Check location for concealed items such as wires, pipes etc
2. Get the appropriate anchors for the type of surface you will be
mounting the lock box to (wood, tile, concrete etc)
3. Mark the surface to drill holes for the anchors you will be using
4. Drill the appropriate size hole for the anchors you will be using
5. Once mounted, test the strength to make sure the lock box is
securely mounted
CARE AND MAINTENANCE
- For security purposes wipe fingerprint off fingerprint scanner (C)
when opening and/or closing the lock box
- If necessary use a damp cloth to clean the lock box. DO NOT
use chemicals or cleaning agents
- Keep liquids away from the control panel. Spills on the control
panel will cause damage and possibly electric shock
- Secure lock box in a proper area to prevent it from falling and
causing damage or injury
- DO NOT over stuff the contents of the lock box, it can damage
the motor mechanism or the contents
- DO NOT place emergency keys inside of lock box
- Barska will NOT provide replacement keys
LOCK BOX
90 DAY LIMITED WARRANTY
BC649 10/20
© 2020 BARSKA®
855 Towne Center Drive Pomona, CA 91767
(t) 888.666.6769 | (f) 909.445.8169 | www.barska.com
BARSKA®, as manufacturer, warrants this new lock box to be
free of original defects in materials and/or workmanship for the
length of time specified in this warranty. This warranty does not
cover damage caused by abuse improper handling, installation,
maintenance, normal wear-and-tear, fire flood, or acts of nature,
unauthorized repairs or modifications and tampering in any way.
Removing or altering the seal under any circumstances will
automatically void this warranty.
This warranty is limited to the original purchaser and is not
transferable. This warranty applies only to products purchased
in the United States of America.
In the event of a defect within 30 days, the consumer must return
the defective unit to the BARSKA® dealer (the place of
purchase) at his/her own expense.
Beyond 30 days, please visit www.barska.com to submit the
request for Return Merchandise Number (RMA#) before any
returns. If you cannot obtain the RMA# by visiting Barska.com,
you may call 1-888-666-6769.
NOTE: All merchandise received without a valid RMA# will be
returned to the shipper at his/her own expense.
Please include all of the following when returning BARSKA®
products for service and/or replacement:
1. A legible writing including your Name, Address, Telephone
number, email address, and the RMA#.
2. Purchase receipt or Proof of Purchase.
3. A brief explanation of the defect.
4. A Check/Money Order of $30.00 to cover inspection,
shipping and handling.
BARSKA® products should be sent to the following address for
warranty repairs. Products must be packed carefully and sturdily
to prevent damage in transit, and return freight prepared to:
BARSKA
Repair Department
855 Towne Center Drive
Pomona, CA 91767
For additional and updated information
please visit our website at www.barska.com
*Please allow 6-8 weeks for delivery.
On confirmation that this product has a covered defect, it will
either be replaced or repaired at the discretion of the warrantor.
If it is a discontinued item, we will try to replace the product with
an equivalent product. Should the repair not be covered by this
warranty, an estimate will be sent for your approval.
Non-warranty repairs or refurbishing, if feasible, of our products
are always provide at a reasonable cost.
We will not pay shipping, insurance or transportation charges
from you to us or any import fees, duties and/or taxes. The
warranty supersedes all previous BARSKA® warranties.
This warranty also expressly excludes all incidental or
consequential damages. Some states do not allow the exclusion
or limitation of incidental or consequential damages, so the
foregoing limitation or exclusion may not apply to you. This
warranty gives you specific legal rights, and you may also have
other rights, which vary from state to state.
Other Barska Safe manuals

Barska
Barska AX13500 User manual
Barska
Barska AX11224 User manual
Barska
Barska AX12404 User manual
Barska
Barska AX12476 User manual
Barska
Barska AX11652 User manual

Barska
Barska AX11970 User manual
Barska
Barska Biometric Safe User manual
Barska
Barska AX13104 User manual
Barska
Barska AX11644 User manual

Barska
Barska DX Series User manual
Barska
Barska AX11556 User manual
Barska
Barska Digital Keypad Safe User manual
Barska
Barska AX13308 User manual
Barska
Barska AX12218 User manual
Barska
Barska AX11648 User manual

Barska
Barska Biometric Safe User manual
Barska
Barska BAR-AX13094 User manual

Barska
Barska AX11934 User manual
Barska
Barska AX13262 User manual
Barska
Barska AX11968 User manual
