Befaco NOISE PLETHORA V1 User manual

NOISE PLETHORA V1- ASSEMBLY GUIDE – Rev. Feb 2022
THANKS FOR CHOOSING ONE OF OUR KITS!
!
"#
$$
!%
&'(&'')*#
$'$
'+,-.+)/+0()+1 -
HAVE FUN!
BAG A
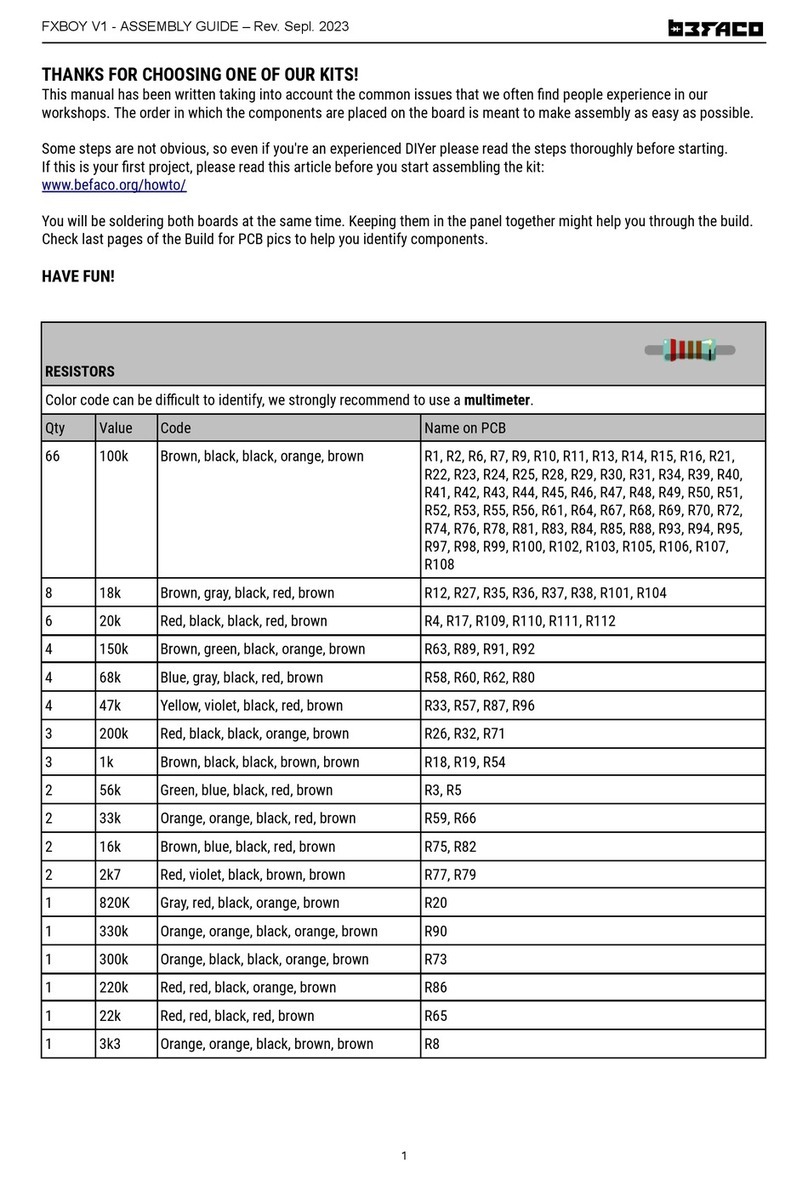
RESISTORS
&2multimeter
3 1 & 4(&'
55 677 ' .8.9.65.6:.6;.<<.<=.55.5;.5>.:<.:5
.:=.:9.;6.;5.;:.;;.;>.;9.>;.87.8=
.8:.88.89.677.675.67=.67:.67;.67>
.666
6= 6 ' .6.5.<7.<6.<;.<>.=5.==.=>.>7.>:
.679.667.66<
9 =>7 ! .8<.97.96.9<.95.9:.9;.98.99
8 96 , .=.66.<9.5<.=;.=8.:7.;7
8 557 ) .6<.6=.5=.5:.=9.:6.:8.;<
> 55 ) .>5.86.85.8;.8>.676.67<
= <<7 . .6>.58.::.;=
= 6<7 ' .:.57.;8.>>
5 5*5 ) .69.=7.:>
5 667 ' .>.<5.=<
5 => ! .;.<:.=:
5 59 ) .68.59.:;
5 6< ' .<.<8.=6
< <77 . .9=.9>
< <= . .67.56
< 67 ' .>6.><
< 6: ' .>=.678
6 :; ? .>9
6 <> . .>8
1
NOISE PLETHORA V1- ASSEMBLY GUIDE – Rev. Feb 2022
DIODE
observin their polarity
(&'
3 1 4(&'
5 64=6=8 6<:
< 64:86>@A 5=
FERRITE
/
3 4(&'
< /6/<
OPEN ICs FOAM
ICs
Place the sockets@B &
A
3 1 4(&'
: C8 &< &= &> &9 &6<
< C6= &8 &67
= C68 &6 &5 &: &;
BAG B
CAPACITORS
D&
##$$$.EE&
3 1 & 4(&'
69 677 67= &6&<&=&65&6=&6:&69&<6&<5&57&5:&5;&59&=7&=6&=<
&=:&=8&:5
8 <>7 <>6 &5&9&6<&68&<7&<<&<>&<8
; 6 6% &=5&==&=;&=>&=9&:7
= :; :; &8&6>&<=&5<
6 6:7 6:7@.A &5=
6DO NOT PLACE! &:6
2

NOISE PLETHORA V1- ASSEMBLY GUIDE – Rev. Feb 2022
ELECTROLYTIC CAPACITORS
1*@@FAA
3 1 & 4(&'
> 67/ 67/ &;&67&<;&56&5>&58&:<
; << << &:&>&66&6;&<:&<9
6 =>/ =>/ &55
REGULATORS
'G(&'
H
3 1 4(&'
6 C*=7=7 .+?E6
6 -*.E>87: :1I.+?
POWER CONNECTOR
J(),+.K(&'
ICs
( &B &
3 1 4(&'
= C7>< &< &= &> &9
6 C7>= &8
= -55<7 &6 &5 &: &;
6 *&(;7<< &6<
6 *&(;7<= &67
Now it’s a ood moment to split the boards apart. We will consider “Control Board”
the PCB with mechanical components and “Main board” the one with the power
connector.
3

NOISE PLETHORA V1- ASSEMBLY GUIDE – Rev. Feb 2022
BAG C
PIN HEADERS
((L@ A
3 ( 4 4(&'
< << &)46&)45
< <: &)4<&)4=
6 <8 &)4:
SOCKET CONNECTORS
(
3 ( 4 4(&'
< << M&)46M&)45
< <: M&)4<M&)4=
6 <8 M&)4:
PREPARING TEENSY AND CODEC
4Make sure orientation and placement is ood before solderin .
SOCKET CONNECTORS
(&'((&'Nbut do
not solder them.
3 N ((&'
< 68 &66
< 606= C
(
(Teensy@USB facin upAcodec@Befaco name facin upA
ently.
Double check they all are perfectly strai ht, )proceed to solder
them all, both at PCB and teensy, Pushin down the teensy and codec ently.
CHECK OUR VIDEO TUTORIAL IF YOU HAVE FURTHER DOUBTS.-- > Follow the QR -->
4

NOISE PLETHORA V1- ASSEMBLY GUIDE – Rev. Feb 2022
POGO PIN HEADER
.(((&'
Double check they all are perfectly strai htand solder them. If not they mi ht move and cause trouble!
3 N ((&'
6 <0: '66=
3 POSITION SWITCHES
( G(&'
Double check they all are perfectly strai ht and solder them.
3 4(&'
5 *<5 ,6,<,5
SPACERs
&)4.)C(&'@A
You’re nearly at the end, but the next part is critical and takes a ood bit of concentration. If you’re
feelin a bit strained, a break would de9nitely help. Reply to those unread messa es or prove
someone wron in Internet, for example. Mechanical parts are really delicate and will need your full
attention.
FRONT PANEL COMPONENTS MOUNTING TIPS:
4&. &-C(
* NOT (&'OOO
(
#
•'
•2
MINI-JACKS
(E"(&'"
%
D
Gand solder them all!"
G
5

NOISE PLETHORA V1- ASSEMBLY GUIDE – Rev. Feb 2022
OPEN POTS BAG
'("
POTENTIOMETERS
4(&'don't solder them yet! Before oin ahead, take this in
consideration:
* Check pot holes 9rst. If some are too ti ht, make them bi er with thin tweezers.
* Pots are really ti ht. Be SUPER CAREFUL when solderin , as its easy to burn headers or short with close by pins and
exposed vias. Pay special attention when solderin F_ATEN_1, POT_A2 or POT_A1
*POT_A1, POT_A2, and CUTOFF_1 need one of the location lu s to be cut, check silkscreen for details.
3 4(&'
6: @5A'677 ()I-6()I-<&P)//I6/I-+4I6.+I6()I'6()I'<
&P)//I</I-+4I<.+I<?. I3!.+I5&P)//I5/I-+45
SWITCH
(don't solder them yet!
3 4(&'
6 *)<
ENCODER
G(&'
Don't solder it yet.
LED
(C+(&'don't solder it
3 4(&'
6 .C+< C+I6
7 SEGMENT DISPLAY
(@ &Amindin that dot will face down (Se ment dot) but don't solder them yet.
FRONT PANEL
(plastic windows.
both sides.P
- front panel"-N
6

NOISE PLETHORA V1- ASSEMBLY GUIDE – Rev. Feb 2022
FINISH YOUR BUILD!
E#-A Mini-jacks 'A Pots and encoder.
E&
E+G(&'
9nally solder O
E/C+
E/C+G(
E( knobs
E&
E& power ribbon cable#@E6<1A
(&'-@JE6<KA
IMPORTANT INFORMATION:
&DIY P'
#
E6& unplu
4(with the teensy alone
EG
E<Alwaysunplu +P'
7

NOISE PLETHORA V1- ASSEMBLY GUIDE – Rev. Feb 2022
8

NOISE PLETHORA V1- ASSEMBLY GUIDE – Rev. Feb 2022
9

NOISE PLETHORA V1- ASSEMBLY GUIDE – Rev. Feb 2022
10
Table of contents
Other Befaco Recording Equipment manuals

Befaco
Befaco MEX V1 User manual

Befaco
Befaco STEREO STRIP User manual

Befaco
Befaco VCMC 1.1 User manual

Befaco
Befaco ST AMP User manual

Befaco
Befaco MIDI THING User manual

Befaco
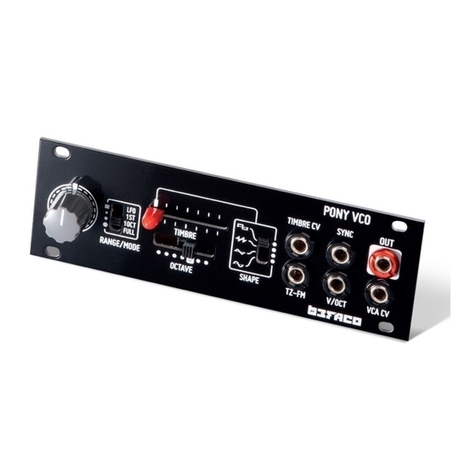
Befaco PONY VCO User manual

Befaco
Befaco VCMC User manual

Befaco
Befaco FX BOY User manual

Befaco
Befaco VCMC User manual

Befaco
Befaco STAmp 1U User manual