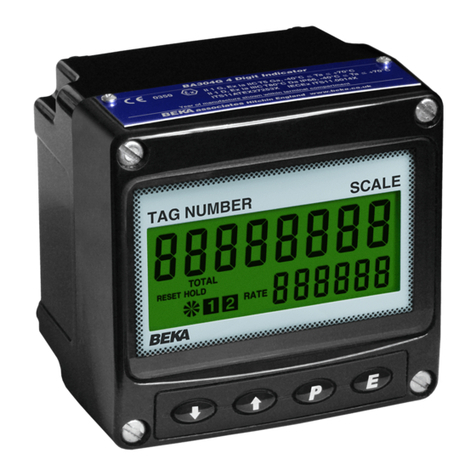
BEKA BA558C User manual

Issue: 3
1st October 2010
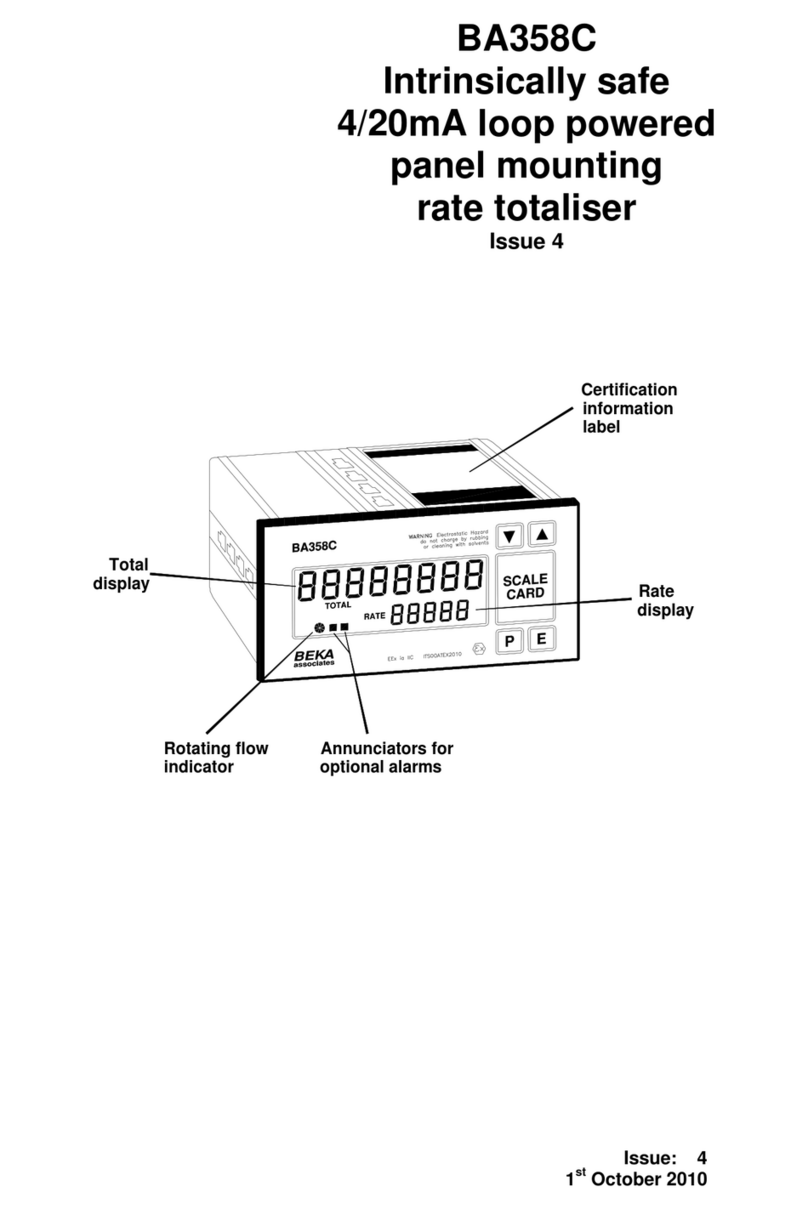
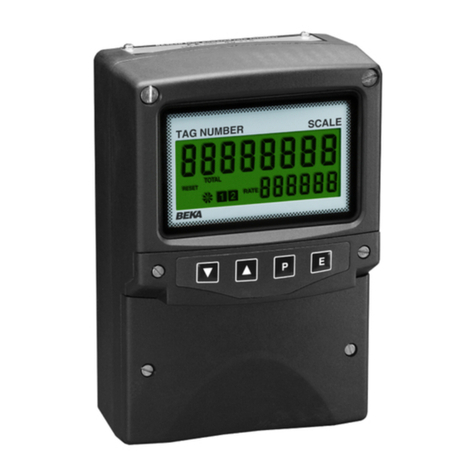
BA558C
4/20mA loop powered
panel mounting
rate totaliser
issue 3
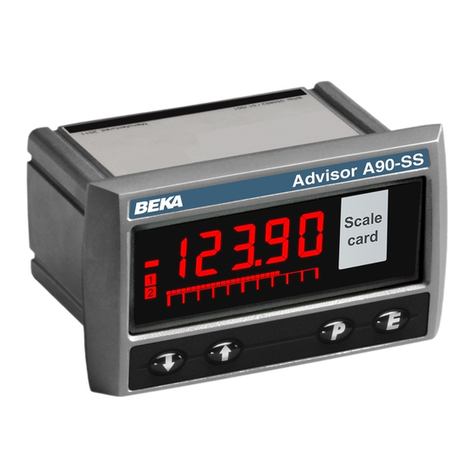
Label
Rate
display
Annunciators for
optional alarms
Rotating flow
indicator
Total
display

2
1. Description
2. Operation
2.1 Controls
2.2 Displays
3. System design
3.1 Flow transmitter loop
3.2 Remote indication
3.3 Reset terminals
4. Installation
4.1 Location
4.2 Installation procedure
4.3 EMC
5. Programming and Calibration
5.1 Calibration structure
5.2 Accessing programme functions
5.3 Summary of programmable
functions.
5.4 Root extractor
5.5 Resolution
5.6 Position of decimal points
5.7 Calibration of rate display
using an external current source.
5.8 Calibration of rate display
using internal references.
5.9 Conditioning sub-menu
5.9.1 AC rejection
5.9.2 Calibration of internal
references.
5.10 Resetting grand total
5.11 Timebase
5.12 Function of the Ppush-button
5.13 Total scale factor
5.14 Percentage clip-off
5.15 Local reset of total display
5.16 Security code
5.17 Over and under-range
6. Calibration Examples
6.1 Using an external current source
6.2 Using the internal references
7. Maintenance
7.1 Fault finding during commissioning
7.2 Fault finding after commissioning
7.3 Servicing
7.4 Routine maintenance
7.5 Guarantee
7.6 Customer comments
8. Accessories
8.1 Scale card
8.2 Tag number
8.3 Alarms
8.3.1 Solid state output
8.3.2 Programming and
adjustment
8.3.3 Alarm enable
8.3.4 Type of alarm
8.3.5 Setpoint adjustment
8.3.6 Alarm function
8.3.7 Alarm output status
8.3.8 Hysteresis
8.3.9 Alarm delay
8.3.10 Alarm silence time
8.3.11 Access setpoint
8.3.12 Adjusting alarm setpoints
from display mode.
8.4 Display backlight
8.5 Additional front panel protection
9. Index
CONTENTS
The BA558C is CE marked to show compliance with the
European EMC Directive 2004/108/EC

3
1. DESCRIPTION
The BA558C is a 4/20mA loop-powered rate
totaliser primarily intended for use with flowmeters.
The instrument simultaneously displays the rate of
flow and the total flow in engineering units on two
separate displays. The BA558C only introduces a
1.1V drop which allows it to be installed into almost
any 4/20mA flow loop. No additional power supply
or battery is required.
Housed in a robust 72 x 144 panel mounting DIN
enclosure, the BA558C has an IP65 front panel
and is supplied with a gasket to seal the joint
between the instrument and the panel.
2. OPERATION
Fig 1 shows a simplified block diagram of a
BA558C. The 4/20mA input current flows through
resistor R1 and forward biased diode D1. The
voltage developed across D1, which is relatively
constant, is multiplied by a switch mode power
supply and used to power the instrument. The
voltage developed across R1, which is proportional
to the 4/20mA input current, provides the input
signal for the analogue to digital converter.
Each time a 4/20mA current is applied to the
instrument, initialisation is performed. After a short
delay the following display sequence occurs:
All segments of the display are activated for
about 3 seconds.
Decimal points on large display are sequentially
activated for about 3 seconds.
Rate display and totaliser start to function using
calibration information stored in the instrument's
permanent memory.
If the 4/20mA current is disconnected during
operation the latest total and grand total are stored
in permanent memory.
Fig 1 Simplified block diagram of BA558C
2.1 Controls
The BA558C is controlled and calibrated via four
front panel push-button switches. In the display
mode i.e. when the instrument is displaying rate of
flow and total flow, these switches have the
following functions:
Summary of Switch Functions
PDisplays input current in mA or as a
percentage of span.
Down Shows rate display calibration at 4mA
input
Up Shows rate display calibration at
20mA input
E+Down Grand total –
displays least significant 8 digits
E+Up Grand total –
Displays most significant 8 digits.
Down Resets total display
+Up programmable function
Note: When optional alarms are fitted the push-
buttons may be programmed to have alternative
functions – see section 8.3

4
Full Description of Switch Functions
PWhile this button is pushed the rate
display will show the input current in mA,
or as a percentage of the instrument
span depending upon how the instrument
has been programmed. When the button
is released the normal display in
engineering units will return. The function
of this push-button may be modified
when alarms are fitted to the instrument.
Down While this button is pushed the
instrument will show the calibrated rate
display with 4mA input - usually zero for
flow applications. When the button is
released the flow rate will again be
displayed.
Up While this button is pushed the
instrument will show the calibrated rate
display with 20mA input. When the
button is released the flow rate will again
be displayed.
E+ While these two buttons are
Down pushed the total display will show the
least significant eight digits of the grand
total, and the grand total annunciator will
be activated.
E+ While these two buttons are
Up pushed the total display will show the
most significant eight digits of the grand
total and the grand total annunciator will
be activated.
Down+ Resets the total display to zero
Up when these two push-buttons are
operated simultaneously. Selectable
function from programme menu.
See section 6.15
2.2 Displays
The BA558C has two digital displays and
associated annunciators, plus a flow indicator as
shown on page 1.
Rate Shows the flow rate on the smaller
display five digit display.
Total Shows total flow since the
display instrument was last reset on the larger
eight digit display.
Flow Disc in the lower left hand corner
indicatorof the display 'rotates' when the input
current exceeds 4mA.
3. SYSTEM DESIGN
3.1 Flow transmitter loops
The BA558C rate totaliser may be connected in
series with any 4/20mA flow loop and calibrated to
display the rate of flow and total flow in
engineering units. Fig 2 illustrates a typical flow
loop application. The 4/20mA loop must be able to
tolerate the additional 1.1V required to operate the
indicator; increases to 1.2V at -20ºC.
Fig 2 BA558C in a flow loop
Considering the example shown in Fig 2, the sum
of the maximum voltage drop introduced by each
component in the loop must be less than the
minimum power supply voltage.
Min operating voltage of 2-wire flowmeter 10.0
Maximum voltage drop caused by controller 5.0
Maximum voltage drop caused by BA558C 1.2
Maximum voltage drop caused by cables 0.4
_____
16.6
At 20mA the power supply must therefore have an
output greater than 16.6V
3.2 Remote indication
The BA558C rate totaliser may be driven from any
4/20mA signal to provide a remote indication of
rate and flow. Fig 3 shows a typical application in
which the 4/20mA output from a flowmeter drives a
remote BA558C. Again it is necessary to ensure
that the 4/20mA loop is able to supply the 1.1V
required to operate the indicator; increases to 1.2V
at -20ºC.

5
Fig 3 Remote indication from a flowmeter
3.3 Reset terminals
The BA558C total display may be reset to zero by
connecting a switch between reset terminals RS1
and RS2 as shown in Fig 3. There is no practical
limit on the distance that the reset switch may be
from the rate totaliser.
Alternatively, the BA558C may be programmed so
that the total display is reset to zero when the Up
and Down push-buttons are operated
simultaneously for two seconds.
4. INSTALLATION
4.1 Location
The BA558C rate totaliser is housed in a robust
aluminium enclosure with a polyester membrane
front panel surrounded by a Noryl bezel. The front
of the instrument provides IP65 protection, and a
gasket seals the joint between the instrument
enclosure and the panel. The instrument may be
installed in any panel providing the environmental
limits shown in the specification are not exceeded.
Fig 4 shows the overall dimensions of the BA558C
and the panel cut-out. To achieve an IP65 seal
between the instrument enclosure and the panel
the smaller cut-out must be used and the
instrument secured with four panel mounting clips.
The BA558C liquid crystal display has maximum
contrast when viewed from directly ahead and
slightly below the centre line of the instrument. For
reflective displays there is little degradation of
contrast when viewed from above the centre line,
but slight degradation may be noticeable when the
instrument is fitted with a backlight.
Fig 4 BA558C dimensions

6
4.2 Installation Procedure
a. Insert the BA558C into the instrument panel
cut-out from the front of the panel.
b. Fix panel mounting clips to opposite sides of
the instrument and tighten until the
instrument is secure as shown in Fig 5.
Four clips are required to achieve an IP65
seal between the instrument enclosure and
the panel.
c. Connect the panel wiring to the rear
terminal block(s) as shown in Fig 5 To
simplify installation, the terminals are
removable so that panel wiring can be
completed before the instrument is installed.
Fig 5 Installation and terminal connections
4.3 EMC
The BA558C complies with the requirements of the
European EMC Directive 2001/108/EEC. For
specified immunity all wiring should be in earthed
screened twisted pairs.

7
5. PROGRAMMING & CALIBRATION
The BA558C is programmed and calibrated via
four front panel push-buttons. All the programming
functions are contained in an easy to use menu
which is shown diagrammatically in Figs 7A and
7B. Each function is summarised in section 5.3
which includes references to more detailed
information. Although this simple menu driven
system enables most adjustments to be made
without repeated reference to this manual, it is
recommended that at least the summary of the
programmable functions in section 5.3 is read
before attempting programming or recalibration.
When the instrument is fitted with alarms, the basic
menu is expanded to include the alarm functions
that are described in section 8.3 of this manual.
Note: While the instrument is being programmed
or calibrated totalisation is suspended, any flow
occurring during this time will not be recorded.
5.1 Calibration structure
Fig 6 shows the BA558C calibration structure. The
4/20mA input current, which in flow applications
represents flow rate, is displayed on the five digit
rate display. Using the instrument 'CAL' or 'SEt'
functions this display may be calibrated to show
the flow rate in engineering units. Both the zero
(display at 4mA) and the span (display at 20mA)
are adjustable, although for flow application the
display at 4mA is usually zero.
The position of the decimal point in the rate display
is defined by the d.p. function. To simplify
calibration the BA558C uses floating point
arithmetic, moving the rate display decimal point
position will therefore affect totalisation.
The BA558C total display is calculated from the
rate display using two serial factors: the timebase
't-bASE' and the total scaling factor 'SCALE-t'. To
calculate total flow the timebase divides the rate
display according to whether the rate display
represents flow per second, per minute or per
hour. The total scaling factor 'SCALE-t' is a wide
range programmable dividing factor allowing the
total display to be in different units from the rate
display.
For example, if a BA558C is displaying rate in litres
per minute, setting 'SCALE-t' to 4.5461 produces a
total display in UK gallons. Alternatively, setting
'SCALE-t' to 4546.1 will produce a total display in
thousands of UK gallons.
Fig 6 Calibration structure
The total is calculated and the display updated
once per second. When total alarms are used for
batching applications, this resolution may define
the accuracy of the system.

8
5.2 Accessing programming functions
Throughout this manual push-buttons are shown in
italics e.g. Por Up push-button, and legends
displayed by the instrument are shown within
inverted commas e.g. 'CAL' and ' ALr2'.
Access to the programme menu is obtained by
operating the Pand Epush-buttons
simultaneously. If the instrument is not protected
by a security code the first parameter 'root' will be
displayed. If a security code other than the default
code 0000 has already been entered, the
instrument will display 'COdE'. Press Pto clear
this prompt and enter the security code for the
instrument using the Up or Down push-button to
adjust each digit, and the Ppush-button to move
control to the next digit. If the correct code has
been entered pressing Ewill cause the first
parameter 'root' to be displayed. If an incorrect
code is entered, or a push-button is not operated,
the instrument will timeout after ten seconds and
automatically return to the display mode.
Apart from defining the position of the decimal
point in the rate display all programme functions
and prompts are shown on the large eight digit
display.
Once within the main programme menu the
required parameter can be reached by scrolling
through the menu using the Up and Down push-
buttons as shown by the programme structure in
Figs 7A and 7B. When returning to the operating
mode following recalibration or changes to any
parameters, the total display will show circulating
decimal points for a few seconds while the new
information is stored in permanent memory.
All new BA558C rate totalisers are supplied
calibrated as requested at the time of ordering. If
calibration information is not supplied, the BA558C
will be set to display a rate of 0.00 with 4mA input
and 100.00 with 20mA input. The total scale factor
will be set to 1.0000 with a timebase of flow per
second. The instrument can easily be
recalibrated on-site.
5.3 Summary of programmable functions
This section summarises all of the BA558C
programmable functions. When read with Figs 7A
and 7B it provides a quick aid for calibrating the
instrument. If more detail is required, each section
contains a reference to a full description of the
function.
SUMMARY
Display Description of function
'root' Square root extractor
Enables the square root extractor for
linearising the output from differential
flowmeters.
Percentage CLIP-OFF, below which
the instrument does not totalise, is
automatically set to 5% of rate when
the 'root' function is turned 'On'.
See section 5.4
'rESn' Display resolution
Selects the resolution of the least
significant digit of the rate display.
May be set to 1, 2, 5 or 10 digits.
See section 5.5
'd.P.' Decimal points
Defines the position of the decimal
point in both the rate and total displays.
See section 5.6
'CAL' Calibration of rate display
using external current source.
Enables the zero and span of the rate
display to be adjusted using an external
current source such as a calibrator.
Also enables a complete loop to be
calibrated from primary element to the
indicator display.
When used with an accurate traceable
current source this is the preferred
method of calibration.
See section 5.7
9
Display Description of function
'SEt' Calibration of rate display
using internal references.
Enables the zero and span of the rate
display to be adjusted without the need
for an accurate input current or
disconnection from the 4/20mA loop.
See section 5.8
'Cond' Indicator conditioning
This is a protected sub-menu which
contains the calibration routine for the
two internal references 'rEF', and the
mains (line) frequency selection
function 'FrE'.
See section 5.9
CAUTION
Please read sections 5.9 and 5.9.1
of this manual before changing
any of the parameters in this sub-
menu. Incorrect adjustment may
result in reading errors.
'CLr. Gtot' Clears grand total
This function resets the grand total to
zero when 'CLr YES' is selected, and
'SurE' is entered to confirm the
instruction.
Note: Once cleared, a grand total can
not be recovered.
See section 5.10
't-bASE' Timebase
Three selectable divisors which define
whether the rate display represents
flow per second, per minute or per
hour.
See section 5.11 & Fig 6.
'C - - P' Function of Ppush-button in
the display mode
The instrument may be programmed to
show on the rate display the input
current in milliamps, or the input as a
percentage when the Ppush-button is
operated in the display mode. Select
‘PC’ for % of span and ‘4-20’ to display
current.
See section 5.12
Display Description of function
'SCALE-t' Total Scale Factor
Defines the arithmetic relationship
between the rate and total displays.
May be adjusted between 0.0001 and
65535
SCALE-t = Units of rate display
Units of total display
To calculate SCALE-t the required units
of measurement for the total display
must be converted to the units of
measurement used for the rate display.
See section 5.13 and Fig 6.
'CLIP-OFF' Percentage Clip off
To prevent the totalisation of very low
flow rates, this function enables the
user to select a percentage rate below
which the rate display is forced to zero.
Adjustable between 0 and 10% of flow
for linear inputs, and 5 to 10% when
the root function is used to linearise a
square law input.
See section 5.14
'LOC.rSEt' Local reset of total display
When turned 'On' this function enables
the total display to be reset to zero by
simultaneously operating the Up and
Down push-buttons.
See section 5.15
'COdE' Security code
Defines a four digit numeric code which
must be entered to gain access to
programmable functions. Default code
0000 disables the security function and
allows unrestricted access to all
programmable functions.
See section 5.16

10
CLr.YES
t-bASE C--P
4-20 00000 00 OFF
LOC-rSET
0000
COdE
When fitted alarms
appear here
Clear
grand total
or
to select
CLr-YES
confirmed by
entering
WARNING
Cleared grand
total can not
be recovered
Timebase
or
between
4-20mA and
to toggle
or
Function of
P button
% of span to next digit.
Total scale
to adjust value
Press or
and to move
factor
Press +
to position
decimal point
% clip-off
to adjust value
Press or
between
0 and 10% or
and
pressing
Define Security
Enter by
Code
to move to
next digit
Local reset
or
Fig 7B. Programme Structure
CLr.Gtot
EEEEEEE
EPPEPE
PE PE PEPE
PP
To Cond
function on
Fig 7A
SurE
P E
SurE using
or
to adjust
display and
to move
to next digit
P
CLIP-OFF
SCALE-t
tb-1
to define rate
display timebase
select
tb-1 for flow/sec
tb-60 for flow/min
tb-3600 for flow/hour
to turn the local
reset function
On or OFF.
When On total
display is reset to
zero when
and
are operated
simultaneously

11
1, 2, 5 or 10 digit
rate display
resolution
Display DISPLAY
mode
P
P
P
P
E
P
E
P
E
E
EP
PP
E
E
EEP
E
P
E
P
E
P
E
P
EPEPEP EEEP
P
EEEEEEE
E
P
E
function on
Fig 7B
To GLr.tot
Fig 7A. Programme Structure
THESE REFERENCES
BEFORE ATTEMPTING TO ADJUST
READ INSTRUCTION MANUAL
WARNING
Calibration of internal references
internal references
Without need for accurate input
current set required display at
Calibration of rate display using
to move to next digit
4mA by pressing or and
Similarly set the required
full scale display
accurate 20mA input current
scale display using an
Similarly set the required full
to move to next digit
pressing or and
set required zero display by
With accurate 4mA input current
external current source
Calibration of rate display using
displays
toggle between
and to
decimal point
position of
to select
or
Decimal point
or
to select
Resolution
On and OFF
between
to toggle
or
extraction
Square root
Ent
.020A
Ent
.004A50
Cond
SurE
FrE rEF
SPAn
19999
SEt
ZErO
19999
SPAn
1999919999
ZErO
CAL
00000
d.P.
00000000
rESn
10
access
allows direct
Code 0000
next digit
to move to
and
pressing
Enter code by
Security Code
On
root
XXXX
COdE

12
5.4 Root extractor: root
This function is primarily intended for use with
differential flowmeters that have a square law
4/20mA output. The root extractor linearises the
flow signal and enables the BA558C to display flow
and total in linear units.
To activate the square root extractor select 'root'
from the menu and press Pwhich will reveal if the
function is 'On' or 'OFF'. If the function is set as
required, press E to return to the menu, or press
the Up or Down button to change the setting,
followed by the E button to return to the main
menu.
For reference, the following table shows the output
current from a non-linearised differential flowmeter.
% of full flow Current output mA
2.5 4.01
10.0 4.16
25.0 5.00
50.0 8.00
75.0 13.00
100.0 20.00
5.5 Resolution: rESn
This function defines the resolution of the least
significant rate display digit. Decreasing the
display resolution can improve the readability of a
noisy signal. Select 'rESn' from the menu and
press Pwhich will reveal the current display
resolution. To change the resolution press the Up
or Down button to select 1, 2, 5 or 10 digits,
followed by the Ebutton to return to the menu.
5.6 Position of the decimal points: d.P.
This function positions the decimal point in both
the rate and total displays.
The rate display can have up to five digits and the
decimal point may be positioned between any of
them, or omitted. The BA558C uses floating point
arithmetic so moving the position of the rate
display decimal point will affect totalisation.
Similarly the total display has eight digits and the
decimal point may be positioned between any of
them, or may be omitted.
To adjust the position of either decimal points
select 'd.P.' from the main menu and press Pwhich
will activate both displays with one digit and the
following decimal pointof the total display flashing.
If only the least significant digit is flashing, this
indicates that the decimal point is omitted.
The position of the decimal points can be moved
by pressing the Up or Down push-buttons.
Operating the Ppush-button will toggle control
between the two displays. When both decimal
points have been correctly positioned press Eto
return to the main menu.
If the application requires flow rate to be the
primary display i.e. shown on the large display,
the d.P. function enables the rate and total
displays to be interchanged. The rate display will
continue to have five digits but the total display will
be reduced from eight to six digits. The rate and
total annunciators will also be interchanged.
Pressing the Up and Down buttons simultaneously
will interchange the displays.
5.7 Calibration of the rate display using
an external current source: CAL
This function enables the zero and span of the rate
display to be adjusted using an external current
source such as a 4/20mA calibrator. When used
with an accurate traceable current source this is
the preferred method of calibration.
To calibrate the instrument select 'CAL' from the
main menu and press P. The indicator will display
'ZErO' which is a request for a 4mA input current.
Adjust the external current calibrator to 4.000mA
and again press Pwhich will reveal the current
instrument zero display. For flow applications this
will usually be zero. Each digit of the rate display
can be changed by pressing the Up or Down
buttons. When the first digit is correct pressing P
will transfer control to the next digit. When all the
digits have been adjusted, press Eto enter the
new zero. The indicator will display 'Ent' for a few
seconds while the information is being stored in
memory, and will then return to the 'ZErO' prompt .
To adjust the rate display at 20mA, press the Up
button which will cause the instrument to display
'SPAn'. Adjust the external current calibrator to
20.000mA and again press Pwhich will reveal the
existing full scale display. Each digit of the rate
display can be changed by pressing the Up or
Down buttons. When the first digit is correct
pressing Pwill transfer control to the next digit.
The most significant digit, which can be 1 or 2, is
set by rolling over the previous digit. When all the
digits have been adjusted press Eto enter the new
span. The instrument will display 'Ent' for a few
seconds while the information is being stored in
memory, and will then return to the 'SPAn' prompt.
Finally press Eagain to return to the main menu.
This function may also be used when calibrating a
complete loop including the flow meter.

13
5.8 Calibration of the rate display using
internal references: SEt
This function enables the zero and span of the rate
display to be adjusted without the need for an
accurate external current source, or for
disconnection from the 4/20mA loop. The
accuracy of this method depends upon the
accuracy of the internal references which should
be regularly calibrated as described in section
5.9.2
To calibrate the rate display select 'SEt' from the
main menu and press P. The instrument will
display 'ZErO', pressing Pagain will reveal the
current display at 4mA. For flow applications this
will usually be zero. Each digit of the rate display
can be changed by pressing the Up or Down
buttons. When the first digit is correct pressing P
will transfer control to the next digit. When the
least significant digit has been adjusted, press E to
return to the 'ZErO' prompt which completes the
adjustment.
To adjust the rate display at 20mA, press the Up
button which will cause the instrument to display
'SPAn'. Pressing P again will reveal the existing
full scale rate display. Each digit can be changed
by pressing the Up or Down buttons. When the first
digit is correct, pressing Pwill transfer control to
the next digit. The most significant digit can only be
adjusted by rolling-over the previous digit. When all
the digits have been adjusted press Eto return to
the 'SPAn' prompt, followed by Eto return to the
main menu.
5.9 Conditioning sub-menu: Cond
This sub-menu allows the mains (line) frequency at
which the instrument has maximum ac rejection to
be selected and the two internal references to be
calibrated. To minimise the possibility of accidental
adjustment these functions are contained in a
protected sub-menu. To gain access to this sub-
menu select 'Cond' from the main menu and press
Pwhich will cause the instrument to display '0000'.
Using the Up, and Down buttons and the Pbutton
to move to the next digit, enter the password
'SurE'. 'S' is entered as '5'. Pressing Ewill then
give access to the sub-menu.
5.9.1 AC rejection: FrE
WARNING
If the mains filter frequency is changed, the
rate display and the internal references (if
used) must be recalibrated.
To provide maximum low frequency rejection the
internal digital filter may be set to operate at 50 or
60Hz to correspond with the local mains (line)
frequency. To change the frequency select 'FrE'
from the 'Cond' sub-menu and press Pwhich will
reveal the current setting. The setting can be
changed by pressing the Up or Down buttons
followed by the Ebutton to return to the sub-menu.
5.9.2 Calibration of internal references:
rEF
The BA558C contains two references representing
4 and 20mA. These are used in the 'SEt' function
that enables the rate display to be calibrated
without an external current calibrator. They are
also used in the 'C--P' function when the Ppush-
button is programmed to display the input current
in the display mode. If either of these two
functions are used, the internal references should
be routinely calibrated against an external 4/20mA
calibrator connected to the input terminals of the
instrument. See section 7.4
To calibrate the internal references select 'rEF'
from the sub-menu and press Pwhich will result in
a '.004A' prompt being displayed. Adjust the
external current calibrator to 4.000mA and again
press P. The instrument will display 'Ent' while the
4mA reference is being updated and will then
return to the '.004A' prompt.
To re-calibrate the 20mA internal reference, press
the Up button which will cause the instrument to
display '.020A'. Adjust the external current
calibrator to 20.000mA and again press P. The
BA385C will display 'Ent' while the 20mA reference
is being updated and will then return to the '.020A'
prompt. This completes calibration of the internal
references, two operations of the Ebutton will
return the instrument to the 'Cond' prompt in the
main menu.
5.10 Resetting grand total: CLr. Gtot
The grand total is a separate sixteen digit counter
which duplicates the total display, but is not zeroed
when the total display is reset to zero. The grand
total may be viewed in the display mode in two
eight digit sections as described in section 2.1 of
this manual.

14
The grand total counter can only be reset to zero
from the 'CLr.Gtot' function within the main
programme menu. To zero the grand total
counter select 'CLr. Gtot' and press Pwhich will
cause the instrument to display 'Clr. no' with 'no'
flashing. Press the Up or Down button until 'CLr.
YES' is displayed followed by Pwhich will result in
a '0000' prompt. Using the Up and Down buttons
and the Pbutton to move to the next digit, confirm
the request by entering the password 'SurE'. Note
'S' is entered as '5'. Pressing Ewill then reset the
grand total counter to zero and return the
instrument to the 'CLr. Gtot' prompt in the main
menu.
WARNING
After resetting the grand total counter to
zero the old grand total can not be
recovered.
5.11 Timebase: t-bASE
Together with the total scale factor 'SCALE-t', this
function defines the arithmetic relationship
between the rate and total displays. The
timebase divides the rate display by 1, 60 or 3,600
depending upon whether the BA558C rate display
represents flow per second, per minute or per
hour. See Fig 6.
To check or change the timebase select 't-
bASE' from the main menu and press Pwhich will
reveal the current setting. Pressing the Up or
Down buttons will index though the following three
options.
BA558C
Rate
display
represents
flow
Select
In
t-base
menu
Total display
= rate
divided by
Per second tb – 1 1
Per minute tb – 60 60
Per hour tb – 3600 3600
Select the required divisor and press Eto return to
the main menu.
5.12 Function of the Ppush-button:
C - - P
This parameter defines the function of the Ppush-
button when the BA558C is in the display mode.
Either the input current in milliamps or the input as
a percentage of span may be shown.
To check or change this parameter select 'C - -P'
from the main menu and press Pto reveal the
current setting. Pressing the Up or Down button
will toggle the instrument between the two options.
Select '4-20' if the input current in milliamps is
required, or 'PC' if the input as a percentage of
span is required. When the required option is
displayed press Eto store the selection and return
to the main menu.
Accuracy of both these options depends upon the
accuracy of the internal references which should
be periodically calibrated - see section 5.9.2
5.13 Total scale factor: SCALE-t
Together with the timebase 't-bASE', this is a
dividing factor which defines the arithmetic
relationship between the rate and total displays.
The total scale factor may be set to any value
between 0.0001 and 65535* allowing the total flow
and rate of flow to be displayed in different
engineering units.
SCALE-t = Units of rate display
Units of total display
When calculating SCALE-t the required units of
measurement for the total display must be
converted to those used for the rate display as
shown in following example:
The BA558C rate display represents litres per
second but the total flow display is required in UK
gallons. There are 4.5461 litres in a UK gallon.
SCALE-t = Units of rate display
Units of total display
= 1 litre = 1 litre
1 gallon 1/(4.5461) litres
SCALE-t = 4.5461

15
Alternatively if the total display is required in
thousand of UK gallons
= 1 litre = 1 litre
1 gallon 1/(4546.1) litres
SCALE-t = 4546.1
The total scale factor SCALE-t is not dependent on
the rate display units of time. i.e. flow units per
second, minute or per hour. The timebase t-bASE
accounts for these differences.
To check or change the total scale factor select
'SCALE-t' from the main menu and press Pto
reveal the existing setting, one digit will be
flashing. The value of the flashing digit can be
changed by pressing the Up or Down buttons.
When this digit is correct pressing Pwill transfer
control to the next digit.
To position the decimal point, move the flashing
digit to the left hand side of the required decimal
point position and simultaneously press the Up and
Down buttons.
When the required total scale factor has been
entered, press E to store the number and return to
the main menu.
*Note: The maximum numerical value of SCALE-t
is 65535 irrespective of the decimal point position.
i.e. 6.5535; 65.535; 655.35; 6553.5 and 65535.
5.14 Percentage clip-off: CLIP-OFF
To prevent errors resulting from the totalisation of
very low flow rates over long periods, the BA558C
rate display can be forced to zero when the flow
rate falls below a specified value. This threshold
may be adjusted between 0 and 10% of flow for
linear inputs, and between 5 and 10% of flow for
square law inputs linearised by the root extractor.
To check or change the cut-off point select 'CLIP-
OFF' from the main menu and press Pto reveal
the current setting. This clip-off threshold is shown
as a percentage of total flow and may be adjusted
in one percent increments using the Up or Down
buttons. When set as required, press the E button
to enter the revised figure and return to the main
programme menu.
5.15 Local reset of total display:
LOC. rSET
When turned on this function enables the operator
to reset the BA558C total display to zero by
operating the Up and Down push-buttons
simultaneously. To check the status of the
function select 'LOC. rSET'' from the menu and
press P. If required press the Up or Down button
to change the setting, followed by the Ebutton to
return to the main menu.
5.16 Security code: COdE
The calibration and conditioning of the instrument
may be protected by a four digit security code
which must be entered before access to the
programme menu is granted. New instruments
are programmed with the default security code
0000 which allows unrestricted access to all
programming functions.
To enter a new security code select 'COdE' from
the menu and press P. The current security code
will be displayed which may be changed using the
Up and Down push-buttons, and the Pbutton to
move to the next digit. When the required code
has been entered press Eto return to the main
menu. The revised security code will be activated
when the indicator is returned to the display mode.
If the security code is lost, access to the
programmable functions can be obtained by
moving the internal security link to the override
position. The original security code can then be
viewed by selecting 'CodE' from the main menu
and pressing P.

16
Fig 8 Location of security code override link
To gain access to the security code link, remove
the instrument terminal block(s) by gently pulling.
Remove the six screws securing the rear panel,
and lift off the panel which will reveal the link - see
Fig 8.
5.17 Over and under-range
If the rate display range is exceeded, the four least
significant digits will be blanked. Under-range is
indicated by a flashing '-1' and over-range by a
flashing '1'. Under and over-range are also
indicated if the input current falls below
approximately 3.6mA or rises above approximately
21mA.
If the input current falls below approximately 3mA,
the instrument initialisation sequence is performed
as described in section 2.
When the total display exceeds 99999999 it will
automatically roll-over to zero and continue
counting. The most significant eight digits of the
grand total counter can count the number of times
the total display rolls-over. If it is anticipated that
in normal operation the total display will exceed
99999999, the grand total should be reset to zero
during commissioning. Up to 108roll-overs can be
counted.
6. CALIBRATION EXAMPLES
This section includes two examples illustrating how
a BA558C rate totaliser may be programmed and
calibrated to display the rate of flow and total flow
measured by a flowmeter with a 4/20mA output.
Section 7.1 describes the preferred method of
calibration using an external traceable 4/20mA
calibrator. Section 7.2 contains an example of
calibration using the BA558C internal 4 and 20mA
references, which although not traceable, are
adequate for many industrial applications.
6.1 Calibration example
Using an external current source
In this example the BA558C rate totaliser is
connected to a flowmeter having an output of
20mA at a flow of 1100 litres / minute. The
BA558C is required to display flow in litres per
minute and total flow in cubic metres with a
resolution of 0.1 cubic metres. Totalisation is to
occur for flow rates between 1 and 100% of
maximum flow. The frequency of the mains supply
is 50Hz and a security code of 1209 is required.
In the display mode the BA558C is required to
display the input current as a percentage of span
when the P push-button is operated.
Step 1 Connect instrument to calibrator
Connect the BA558C to an accurate
current source such as a calibrator.
Terminal 1 positive and terminal 3
negative. The instrument will perform the
initialisation routine described in section 2,
and then display the input current on the
rate display using the existing calibration
information.
Step 2 Enter the programming mode
With an input current between 4 and 20mA
put the instrument in the programming
mode by simultaneously pressing Pand E.
Assuming a security code has not already
been entered the instrument will respond
by displaying 'root' which is the first
function in the main menu. See Figs 7A
and 7B.

17
Step 3 Turn square root extractor off
With 'root' displayed, press P which will
reveal the root extractor status. The root
extractor can be turned on or off by
operating the Up or Down buttons. Select
'OFF', and press Eto return to the 'root'
prompt in the main menu.
Step 4 Select frequency of maximum mains
(line) rejection
Scroll though the main menu until 'Cond' is
displayed; press Pwhich will result in the
instrument displaying '0000' with the most
significant digit flashing. To prevent
accidental adjustment the Cond sub-menu
is protected by the code word 'SurE'' which
must be entered character by character
using the Up and Down buttons plus Pto
move control to the next digit. Note: S is
entered as 5. When 'SurE' has been
entered pressing E will result in the 'FrE'
prompt. Press Pto enter the function and
using the Up or Down buttons select '50'.
Finally, press Etwice to return to the
'Cond' prompt in the main menu.
Step 5 Define function of Ppush-button Select
'C--P' from the main menu and press Pto
reveal the function of the Ppush-button in
the operating mode. Select percentage
'PC' and return to the main menu by
pressing E.
Step 6 Define rate display resolution
Select 'rESn' from the main menu and
press Pto reveal the current resolution of
the rate display. Using the Up and Down
push-buttons select a resolution of '1' and
return to the 'rESn' prompt in the main
menu by pressing E.
Step 7 Position rate & total decimal points
Select 'd.P.' from the main menu and press
P. The rate and total displays will be
activated with one digit of the total display
flashing. Press the Up or Down push-
button until the second least significant
digit and following decimal point of the total
display flash. This gives the required total
display resolution of 0.1
Press Pto move control to the rate display.
Using the Up or Down push-button move
the flashing digit to the least significant
position (right hand side) which will result
in no decimal point in the rate display.
Finally press Eto return to the 'd.P’.
prompt in the main menu.
Step 8 Calibrate the rate display
Scroll through the main menu until 'CAL' is
displayed. Press P and the instrument will
request a 4mA input by displaying 'ZErO'.
Set the input current to 4.0000mA and
press Pagain which will reveal the existing
rate display. Using the Up, Down and P
push-buttons enter the required zero
display of 0000 Press Eto enter this
calibration figure. The instrument will
display ‘Ent’ for a few seconds before
returning to the 'ZErO' prompt.
Press the Up push-button and the
instrument will request a 20mA input by
displaying 'SPAn'. Set the input current to
20.0000mA and again press Pwhich will
reveal the existing rate display at 20mA.
Using the Up, Down and Ppush-buttons
enter the required display of 1100 Press
Eto enter this calibration figure. The
instrument will display ‘Ent’ for a few
seconds before returning to the 'SPAn'
prompt.
Finally press Eagain to return to the 'CAL'
prompt in the main menu.
Step 9 Define the timebase
In this example the rate display represents
flow per minute so it is necessary to set the
instrument timebase to 60. This will divide
the rate display by 60 to provide the
correct total display.
Select ‘t-bASE’ from the main menu and
press Pto reveal the current setting.
Using the Up or Down button select ‘tb –
60’ and press Eto return to the main
menu.

18
Step 10 Define the total scale factor
In this example the rate display is in litres
per minute but the total display is
required in cubic metres:
SCALE-t = Units of rate display
Units of total display
There are 1,000 litres in a cubic metre
thus:
= litres
cubic metres
= 1 litre
1/(1000) litres
SCALE-t = 1000
From the main menu select 'SCALE-t'
and press Pto reveal the current five
digit dividing factor. Using the Up and
Down buttons to adjust the flashing digit,
and the P button to transfer control
between digits, set 'SCALE-t' to 1000.0
The position of the decimal point is
defined by moving the flashing digit to the
second least significant position and
operating the Up and Down buttons
simultaneously.
When 'SCALE-t' has been set to 1000.0
press Eto return to the main menu.
Step11 Define percentage cut-off
Totalisation is to be inhibited at flow rates
below 1% of maximum flow. To define
the clip-off point select ‘CLIP-OFF' from
the main menu and press Pwhich will
reveal the current setting. Using the Up
and Down buttons select 1 and return to
the main menu by pressing E.
Step 12 Reset the grand total to zero
To reset the grand total to zero select
'CLr.Gtot' from the main menu and press
Pwhich will cause the instrument to
display 'Clr. no'. Toggle this to 'CLr.
YES' using the Up or Down push-buttons
and press Pwhich will result in a '0000'
prompt. Using the Up, and Down buttons
and the P button to move to the next
digit, enter the password 'SurE' which
protects this function. Pressing Ewill
then reset the grand total counter to zero
and return the instrument to the 'CLr.
Gtot' prompt in the main menu.
Step 13 Set the security code
Defining a security code prevents
unauthorised access to the programme
functions. Select 'COdE' from the main
menu and press Pwhich will reveal the
existing security code. Using the Up and
Down buttons enter the new code 1209
digit by digit. The Pbutton will transfer
control between digits. When the new
code has been entered, press Eto return
to the main programme menu.
Step 14 Return to the display mode
Following completion of programming
and calibration, return the instrument to
the display mode by pressing E. All the
BA558C programming functions will now
be stored in permanent memory and
protected from accidental adjustment by
the security code.

19
6.2 Calibration example
Using the internal references
In this example the internal references within the
BA558C are used to calibrate the rate display.
Except for steps 1, 2 and 8 the procedure is
identical to that in the previous example in section
6.1 The advantages of using the internal
references are that the instrument does not have
to be disconnected from the measurement loop
and no calibration equipment is required.
Steps Enter the programming mode
1 & 2 The BA558C may be recalibrated
without disconnection from the 4/20mA
measurement loop. With any input
current between 4 and 20mA put the
instrument in the programming mode by
simultaneously pressing Pand E.
Assuming a security code has not
already been entered the instrument will
respond by displaying 'root' which is the
first function in the main menu.
Steps Perform as described in the
3 to 7 previous calibration example
see section 6.1
Step 8 Calibrate the rate display
Scroll through the main menu until 'SEt'
is displayed. Press Pand the instrument
will display 'ZErO', pressing Pwill reveal
the existing rate display at 4mA. Using
the Up, Down and Ppush-buttons enter
the required zero display of 0.0 Press E
to enter this calibration figure. The
instrument will display ‘Ent’ for a few
seconds before returning to the 'ZErO'
prompt.
Press the Up push-button and the
instrument will display 'SPAn'. Pressing
Pagain will reveal the existing display at
20mA. Using the Up, Down and Ppush-
buttons enter the required display of
1100 Press Eto enter this calibration
figure. The instrument will display ‘Ent’
for a few seconds before returning to the
'SPAn' prompt.
Steps Perform as described in the
9 to 14 previous calibration example see section
6.1

20
7. MAINTENANCE
7.1 Fault finding during commissioning
If a BA558C fails to function during commissioning
the following procedure should be followed:
Symptom Cause Check
No display Incorrect
wiring There should be
1.1V between
terminals 1 & 3
with terminal 1
positive
No display
and no
voltage
between
terminals 1 &
3
Incorrect
wiring or no
power supply.
Check wiring and
confirm that a
4/20mA current is
flowing in the loop.
Rate displays
flashing 1 Positive over-
range The rate display
has been
incorrectly
calibrated & is
trying to display a
number greater
than 20500.
Rate displays
flashing –1 Negative over-
range Input current is
less than
approximately
3.4mA.
Unstable rate
display 4/20mA
current is
noisy or the
flow signal is
unstable
Eliminate source of
electrical noise .
Reduce resolution
of the rate display
to mask flow noise
Unable to
enter
programme
mode
Incorrect
security code Enter the correct
security code or fit
security link in
override position.
See Fig 8
7.2 Fault finding after commissioning
ENSURE PLANT SAFETY BEFORE
STARTING MAINTENANCE
If a BA558C fails after it has been functioning
correctly, the following table may help to identify
the cause of the failure.
Symptom Cause Check
No display
and no
voltage
between
terminals 1 &
3
No power
supply. Confirm that a
4/20mA current is
flowing in the loop.
Unstable rate
display 4/20mA
current is
noisy or the
flow signal is
unstable
Eliminate source of
electrical noise .
Reduce resolution
of the rate display
to mask flow noise
Incorrect
calibration Digital filter
‘FrE’ has been
changed after
indicator was
calibrated
Recalibrate
indicator with
digital filter FrE set
to required
frequency
Unable to
enter
programme
mode
Incorrect
security code Enter the correct
security code or fit
security link in
override position.
See Fig 8
If this procedure does not reveal the cause of the
fault, it is recommended that the instrument is
replaced. This can be achieved without
disconnecting the panel wiring by unplugging the
terminals on the suspect instrument, and plugging
them into a replacement rate totaliser.
7.3 Servicing
We recommend that all faulty BA558C rate
totalisers are returned to BEKA associates or to
our local agent for repair.
7.4 Routine maintenance
The mechanical condition of the instrument and
electrical calibration should be regularly checked.
The interval between inspections depends upon
environmental conditions. We recommend that
initially instrument calibration should be checked
annually.
7.5 Guarantee
Instruments which fail within the guarantee period
should be returned to BEKA associates or our local
agent. It is helpful if a brief description of the fault
symptoms is provided.
7.6 Customer comments
BEKA associates is always pleased to receive
comments from customers about our products and
services. All communications are acknowledged
and whenever possible are implemented.
Table of contents
Other BEKA Measuring Instrument manuals

BEKA
BEKA BA324D User manual

BEKA
BEKA BA314NG User manual

BEKA
BEKA BA537E User manual

BEKA
BEKA BA504E User manual

BEKA
BEKA PROFIBUS PA BA444DF-P User manual

BEKA
BEKA BA304C User manual

BEKA
BEKA BA648CF-F User manual

BEKA
BEKA BA304NG User manual

BEKA
BEKA FOUNDATION BA444NDF-F User manual

BEKA
BEKA BA558E User manual